
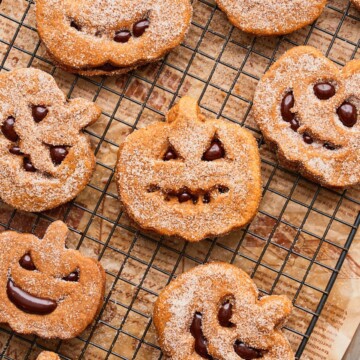
Transform your Halloween baking into something truly magical with these Spooky Halloween Pumpkin Cookies! These super soft and spiced brown butter pumpkin cookies have chocolate ganache nestled between them, to create adorable jack-o-lantern faces when it's time to serve! These cookies combine the cozy flavors of fall with a delightfully spooky presentation that's perfect for parties, trick-or-treaters, or just a fun autumn baking project!

Save This Recipe! 💌
Whether you're looking for the perfect Halloween party treat, a fun baking activity with kids, or just want to embrace pumpkin spice season, these sandwich cookies are sure to impress.
Made with brown butter for an extra layer of nutty flavor, lots of pumpkin puree, spices, and maple syrup, these cookies are soft, flavorful, and perfect for Instagram! 🎃
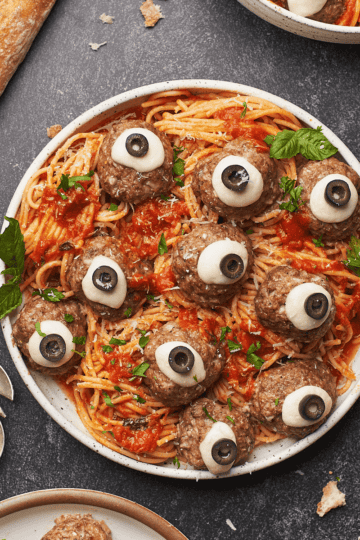
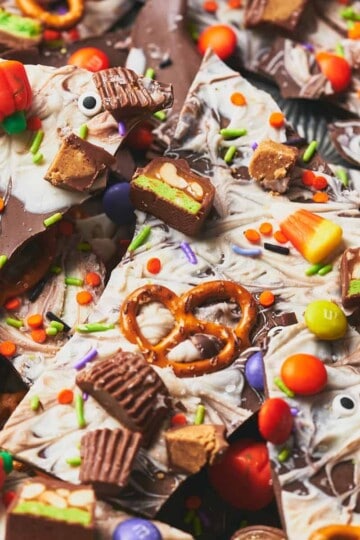
Looking for more Halloween treats to try? Try our Halloween snack mix, this Halloween bark, these black velvet cupcakes, and this black velvet cake!
Jump to:
❤️Why We Love This Recipe
- Festive presentation. The jack-o'-lantern design with chocolate ganache peeking through the cut-outs creates a super fun effect that's perfect for Halloween.
- Rich flavor profile. Brown butter, pure pumpkin puree, brown sugar, and maple syrup combine with warm spices to create a cookie that tastes like autumn in every bite.
- Make-ahead friendly. The dough can be made ahead and chilled, making these perfect for planning ahead for parties.
- Customizable faces. Each cookie can have its own unique jack-o'-lantern expression, making this a fun creative project to express yourself.
🎃Ingredients
Here are the ingredients we used for this recipe. You can find more information for substitutions below.

- Chocolate. We'd recommend melting wafers or a chocolate bar that melts easily! We used bittersweet chocolate for this application, but you can use any chocolate you'd like.
- Heavy cream. To make the ganache, we'll need to heat heavy cream, not milk or half and half, but make sure it's heavy cream!
- Butter. Unsalted butter is what you want for this recipe, so we can control the salt level.
- Pumpkin puree. Make sure it's pure pumpkin puree with no additives like spices and sugar!
- Baking soda. We use a really small amount of baking soda for an ever-so-slight rise and to help promote browning. We don't want to use much, however, since we don't want the cookies to spread!
- Egg yolks. We're only using the egg yolks in this recipe for richness. Use large eggs, and if possible, use high quality eggs with amber yolks which will help enhance the orange color of the dough! Save the extra egg whites for an omelet, scramble, or something else. 🙂
Visit the recipe card for the full quantities and nutritional information.
✨Substitutions & Variations
Here are a few suggestions on additional flavors to try, or simple variations to this recipe.
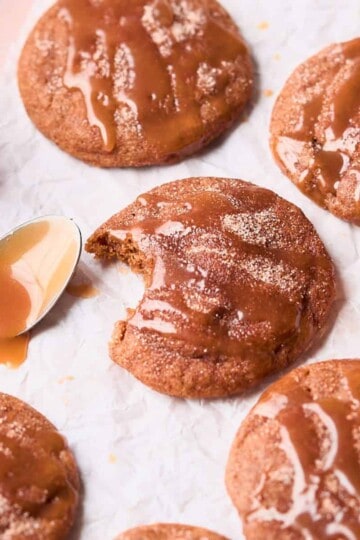
- Swap the filling! Feel free to add a mix of fillings to these yummy treats, some ideas are marshmallow fluff or salted caramel sauce!
- No pumpkin spice. You can use whatever blend of spices you like, including cinnamon, nutmeg, ginger, allspice, and cardamom. We'll include our pumpkin spice recipe in the post.
- Dairy-free. Swap the butter for dairy-free butter, and use coconut cream to make a dairy-free chocolate ganache.
- Gluten-free. To make this recipe gluten-free (it should work well!!) swap the all-purpose flour for your favorite gluten-free flour, like this Bob's Red Mill 1:1 flour!
This recipe hasn't been tested with any other substitutions or variations, so we can't guarantee any results. If you make a change, let us know how it goes in the comments below!
🔪Prep Work
- Allow the eggs to sit out at room temperature for about an hour.
- Line baking sheets with parchment paper.
- Chop chocolate bars into small pieces (if using bars).
- Measure out the rest of the ingredients using a food scale.
📋Instructions
Prep the ingredients
Start by browning the butter. Here is our step-by-step guide on how to brown butter. Set it aside to cool in the fridge while you prep the other ingredients. (Image 1)
Meanwhile, place the pumpkin puree in a cheesecloth or paper towel in a metal sieve, and over a bowl to catch the excess liquid. You may need to use a few paper towels. (Image 2) Wring out ALL of the excess liquid!
Lastly, in a small bowl, whisk together the all-purpose flour, kosher salt, cinnamon, pumpkin spice, and baking soda. (Image 3) Set aside.


Cream the butter, sugar, and wet ingredients
In a large bowl, combine the cooled brown butter, vanilla extract, brown sugar, maple syrup, and drained pumpkin puree. (Image 4)
Mix together until smooth and creamy with a hand mixer (or stand mixer with a paddle attachment) for about 5 minutes. The mixture should become pale and fluffy. (Image 5)
Add in egg yolks and mix again. (Image 6)


⭑Pro tip: Don't skip creaming the butter, sugar, and liquid ingredients together. This will really help the texture of the cookies and prevent them from spreading too much when baking!
Add the dry ingredients & finish the dough
Add the dry ingredients to the wet, and mix to combine. (Image 7)
Put onto a floured work surface, then divide the dough in half. Flatten each piece of dough between parchment paper. Roll the dough to be about ¼ to ⅓-inch thick. (Image 8) Quick note - the thicker the dough, the longer the cookies will take to bake!
Then wrap the dough halves in plastic wrap. (Image 9) Chill in the fridge or freezer for about an hour so the dough can rest.


⭑Pro tip: This is quite a wet dough, and chilling the dough is crucial to make it easier to work with! Do NOT skip this step!
Make the cutouts
After the dough has chilled, working in batches (keeping half of the dough in the freezer while you work on one half) transfer the dough to a floured work surface. Flour your cookie cutters between each use, and make the pumpkin shapes. (Image 10)
In half of the pumpkins, cut out jack-o-lantern faces. (Image 11)
Place the cookies on a parchment-lined baking sheet and place them in the freezer to chill. (Image 12)
Meanwhile, re-roll the scraps and make more cutouts until you run out of dough! If the dough gets too sticky, place it back in the freezer for a few minutes to firm up.


Note: This recipe makes about 13-14 jack-o-lantern sandwich cookies, or roughly 26-28 cookies if you use the cookie cutters we did. You can make more or less easily depending on the size of your cookie cutters! Just be aware that this may impact the bake time.
Bake the cookies
When it's time to bake, preheat the oven to 350°F, and add trays of cookies and bake for 11-14 minutes until set. (Image 13) These cookies are VERY soft, and sometimes spread a little. If the mouth and eye shapes spread, use a tooth pick or knife to make more room in the cut outs of the eyes.
Cool the cookies on the cookie tray until they have firmed up for about 5-7 minutes, then transfer to a wire cooling rack to cool completely.

⭑Pro tip: Don't try to move the cookies too soon! They are soft and if they are moved too soon, they will fall apart!
Roll in spiced sugar
In a separate bowl or on a plate, combine white sugar and pumpkin spice or cinnamon. (Image 14)
Place the cookies in the sugar mixture and toss to coat. (Image 15)


Chocolate ganache & assemble
To make the chocolate ganache, heat the heavy cream until it's very hot but NOT boiling, and pour it over top of the chocolate. Let it sit for about 3 minutes, then stir until the mixture is smooth. (Image 16)
Allow the ganache to cool off and set for a few minutes, just so it doesn't run right off the cookies.
On a solid half of a pumpkin (with no faces cut out), place a dollop of chocolate ganache in the center. (Image 17)


Place a jack-o-lantern cut out cookie over top of a cookie with chocolate ganache, and watch the chocolate press through to make an adorable spooky face!
Serve warm, and enjoy!

✨Top Tips
- Use a kitchen scale for best results. This is probably our top tip, every time! Using a kitchen scale makes all the difference for accurate measurements, that way, you don't end up with too much flour in the dough!
- Make sure to get all the excess water out of the pumpkin puree. We recommend using a heavy-duty paper towel or cheesecloth to wring out all of the excess moisture. We don't want to add extra moisture to the cookie dough, since this dough is already on the wet side!
- Let the brown butter cool. Make sure you give the butter time to chill, or else it will combine with the sugar and turn into a greasy mess. Place it in the fridge or freezer for a few moments to cool off completely before using.
- Cream the wet ingredients well. This will really help the texture of your cookies and help prevent spreading.
- Chill the dough, and keep your kitchen cold! You'll also want to work in batches to keep the dough cold while cutting out the shapes. This dough is more wet than a regular cut-out cookie (which makes them so soft and flavorful!) but it can be a little hard to work with when the dough gets warm! If the dough becomes too sticky, add a little flour, or return it to the freezer to get it to firm up again.
- Use flour on the cookie cutter to help get cleaner cutout shapes. Between each use, we recommend using a floured cookie cutter to help the cuts be a little cleaner!
- After you've cut out shapes, place the cutouts in the freezer while you preheat the oven. The longer the cutouts can freeze before baking, the better they will keep their shape.
- If the cutout eyes and mouths spread while baking, use a toothpick or knife to reshape the jack-o-lantern shape while they are still warm.
- Use an oven thermometer. Some ovens run hotter or cooler than the temperature dial states. We always recommend monitoring your oven's actual temperature by using an oven thermometer.
- Cool completely. Since these cookies are so soft, they do need to cool completely before handling or you risk them falling apart. Let them cool for about 10 minutes on the baking sheet before transferring them to a cooling rack to finish cooling down completely.
- Let the ganache cool slightly before assembling the cookie sandwiches to prevent running.
Need supplies? Shop our Amazon store! Stock your pantry, and find all of our favorite kitchen tools! A Full Living LLC earns a small commission through purchases on our storefront to help support this site.
💭Frequently Asked Questions
Store assembled cookies in an airtight container in the refrigerator for up to a week.
Yes! Freeze unfilled cookies for up to 3 months. Thaw and fill with ganache before serving.
Pumpkin pie spice is easy to make at home with just a few ingredients. The best part about making your own is that you can adjust the spices to taste.
Combine:
4 tablespoons of ground cinnamon
1 tablespoon ground ginger
1 tablespoon ground nutmeg
2 teaspoons ground allspice
2 teaspoons ground cloves
& about ½ teaspoon ground cardamom (if you want, we love cardamom!)
This makes a large batch, just under 8 tablespoons worth. Store in an airtight container in a cool, dry place and use in other recipes!
The dough for these cookies is more wet than a regular cutout cookie dough, so it needs to be handled with care. Make sure to use flour on your work surface, and keep the cookie dough as cold as possible when working with it. Keep the kitchen cold, work in batches, and chill the cookies before baking for the best results!
👻More Halloween Recipes To Consider


Did you try this recipe? Make sure to leave a 5-star review below! 🌟 This helps other readers find our recipes and encourages them to try them. Also, be sure to leave a comment with your experience. Follow along, and tag @AFullLiving on Instagram with your photos!
📖 Recipe
Halloween Pumpkin Cookies
Ingredients
Soft pumpkin cut-out cookies
- ¾ cup unsalted butter
- 1 cup pumpkin puree 244 grams
- 2 ½ cups all purpose flour plus more for the working surface and to flour the cookie cutters 340 grams
- 1 tablespoon pumpkin pie spice
- 1 teaspoon kosher salt
- 1 teaspoon cinnamon
- ½ teaspoon baking soda
- 1 ½ cups brown sugar 300 grams
- 2 tablespoons maple syrup 30 ml
- 1 tablespoon vanilla extract
- 2 large egg yolks room temperature
Spiced sugar for rolling the cookies
- ¼ cup white sugar 50 grams
- 1 teaspoon pumpkin spice
Chocolate ganache
- 4 ounces chocolate wafers or chopped chocolate bars semi-sweet, dark chocolate, or milk chocolate, whatever you like
- 4 ounces heavy cream
Instructions
Prep the ingredients
- Start by browning the butter. Here is our step-by-step guide on how to brown butter. Set it aside to cool in the fridge while you prep the other ingredients.¾ cup unsalted butter
- Meanwhile, place the pumpkin puree in a cheesecloth or paper towel in a metal sieve, and over a bowl to catch the excess liquid. You may need to use a few paper towels. Wring out ALL of the excess liquid!1 cup pumpkin puree
Make the cookie dough
- In a small bowl, whisk together the all-purpose flour, pumpkin spice, kosher salt, cinnamon, and baking soda. Set aside.2 ½ cups all purpose flour, 1 teaspoon kosher salt, ½ teaspoon baking soda, 1 tablespoon pumpkin pie spice, 1 teaspoon cinnamon
- In a large bowl, combine the cooled brown butter, vanilla extract, brown sugar, maple syrup, and drained pumpkin puree. Mix together until smooth and creamy with a hand mixer (or stand mixer with a paddle attachment) for about 5 minutes. The mixture should become pale and fluffy. Add in egg yolks and mix again until totally combined.1 ½ cups brown sugar , 2 tablespoons maple syrup , 1 tablespoon vanilla extract, 2 large egg yolks
- Add the dry ingredients to the wet, and mix to combine. Put onto a floured work surface, then divide the dough in half. Flatten each piece of dough between parchment paper. Roll the dough to be about ¼ to ⅓-inch thick. Quick note - the thicker the dough, the longer the cookies will take to bake! Then wrap the dough halves in plastic wrap. Chill in the fridge or freezer for about an hour so the dough can rest.
Make the cutouts
- After the dough has chilled, working in batches (keeping half of the dough in the freezer while you work on one half) transfer the dough to a floured work surface. Flour your cookie cutters between each use, and make the pumpkin shapes. In half of the pumpkins, cut out jack-o-lantern faces. Place the cookies on a parchment-lined baking sheet and place them in the freezer to chill.
- Meanwhile, re-roll the scraps and make more cutouts until you run out of dough! If the dough gets too sticky, place it back in the freezer for a few minutes to firm up. This recipe makes about 13-14 jack-o-lantern sandwich cookies, or roughly 26-28 cookies if you use the cookie cutters we did. You can make more or less easily depending on the size of your cookie cutters! Just be aware that this may impact the bake time.
Bake the cookies
- When it's time to bake, preheat the oven to 350°F, add trays of cookies, and bake for 11-14 minutes until set. These cookies are VERY soft, and sometimes spread a little. If the mouth and eye shapes spread, use a toothpick or knife to make more room in the cutouts of the eyes.
- Cool the cookies on the cookie tray until they have firmed up for about 5-7 minutes, then transfer to a wire cooling rack to cool completely.
Roll in spiced sugar
- In a separate bowl or on a plate, combine white sugar and pumpkin spice or cinnamon. Place the cookies in the sugar mixture and toss to coat.¼ cup white sugar , 1 teaspoon pumpkin spice
Make the chocolate ganache & assemble the cookies
- To make the chocolate ganache, heat the heavy cream until it's very hot but NOT boiling, and pour it over top of the chocolate. Let it sit for about 3 minutes, then stir until the mixture is smooth. Allow the ganache to cool off and set for a few minutes, just so it doesn't run right off the cookies.4 ounces chocolate wafers or chopped chocolate bars, 4 ounces heavy cream
- On a solid half of a pumpkin (with no faces cut out), place a dollop of chocolate ganache in the center.
- Place a jack-o-lantern cut out cookie over top of a cookie with chocolate ganache, and watch the chocolate press through to make an adorable spooky face!
- Store assembled cookies in an airtight container in the refrigerator for up to a week.Yes! Freeze unfilled cookies for up to 3 months. Thaw and fill with ganache before serving.
Save This Recipe! 💌
Notes
- Use a kitchen scale for best results. This is probably our top tip, every time! Using a kitchen scale makes all the difference for accurate measurements, that way, you don't end up with too much flour in the dough!
- Make sure to get all the excess water out of the pumpkin puree. We recommend using a heavy-duty paper towel or cheesecloth to wring out all of the excess moisture. We don't want to add extra moisture to the cookie dough, since this dough is already on the wet side!
- Let the brown butter cool. Make sure you give the butter time to chill, or else it will combine with the sugar and turn into a greasy mess. Place it in the fridge or freezer for a few moments to cool off completely before using.
- Cream the wet ingredients well. This will really help the texture of your cookies and help prevent spreading.
- Chill the dough, and keep your kitchen cold! You'll also want to work in batches to keep the dough cold while cutting out the shapes. This dough is more wet than a regular cut-out cookie (which makes them so soft and flavorful!) but it can be a little hard to work with when the dough gets warm! If the dough becomes too sticky, add a little flour, or return it to the freezer to get it to firm up again.
- Use flour on the cookie cutter to help get cleaner cutout shapes. Between each use, we recommend using a floured cookie cutter to help the cuts be a little cleaner!
- After you've cut out shapes, place the cutouts in the freezer while you preheat the oven. The longer the cutouts can freeze before baking, the better they will keep their shape.
- If the cutout eyes and mouths spread while baking, use a toothpick or knife to reshape the jack-o-lantern shape while they are still warm.
- Use an oven thermometer. Some ovens run hotter or cooler than the temperature dial states. We always recommend monitoring your oven's actual temperature by using an oven thermometer.
- Cool completely. Since these cookies are so soft, they do need to cool completely before handling or you risk them falling apart. Let them cool for about 10 minutes on the baking sheet before transferring them to a cooling rack to finish cooling down completely.
- Let the ganache cool slightly before assembling the cookie sandwiches to prevent running.


Melinda says
This recipe is THE BEST pumpkin flavored cookie you will ever make. I followed the pumpkin cutout cookie recipe exactly, but I made mine with a maple buttercream. My family is already begging me to make these cookies again so I will definitely have to find some Thanksgiving themed cookie cutters and make them again. Honestly they’d be delicious even without the ganache (or frosting in my case). They’re just that flavorful!!!
Briana says
Melinda you're seriously awesome, we can't tell you how much your comment brightened our day!!! Seriously we're blushing! Also... your maple buttercream idea sounds delicious and I think I like it better than my chocolate ganache idea!!! 😂😂😂😂
Briana says
If you're looking for a delicious, fun, and showstopping Halloween dessert, this is IT! I don't tend to go for regular cutout cookies as often, but these are SO soft. Delicious!