
If you're craving a soft and fluffy dinner roll with the earthiness of rye, you'll love these delicious Rye Dinner Rolls! They have a rich and sweet flavor from molasses, and they go perfectly with a bowl of soup, as an open-face sandwich with high-quality butter, and so much more!

Save This Recipe! 💌
These delicious rye rolls pair perfectly with many things. They are inspired by Nordic flavors, and in particular, we love enjoying them with good butter and pickled herring, a big bowl of our Norwegian fish soup, or this Finnish salmon soup!
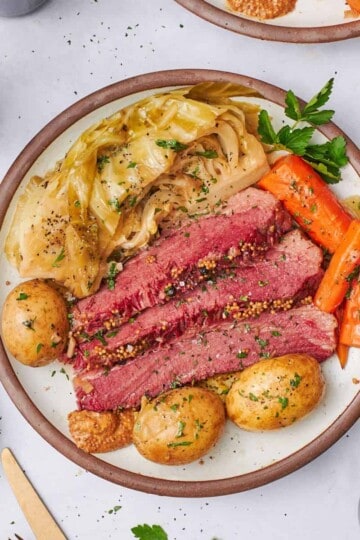
These rolls would also taste great with this Dutch oven corned beef!
Looking for more delicious Nordic and Scandinavian recipes? Our recipe list is growing, since I'm learning more about my cultural foods after spending time in Norway as an exchange student in highschool! Try our Norwegian meatballs or this Swedish shrimp toast.
Another must-try Nordic bread recipe are these Swedish cardamom buns - but they're a sweet treat rather than a savory one!
Rye Rolls (Soft Dinner Rolls)
🥚Ingredients
Here are the ingredients we used for this recipe. You can find more information for substitutions below.

- All-purpose flour. As a note, we use Bob's Red Mill all-purpose flour in all of our baking recipes that call for flour. Keep this in mind, as cup measurements can vary for different brands.
- Dark rye flour. This gives the rolls their signature earthy and hearty flavor. This product is pretty finely ground, but you can sift it again if you prefer less texture in the roll.
- Kosher salt. We love using this fine ground kosher salt for baking, and we do always use Diamond Crystal Salt in our kitchen unless otherwise noted. If using another type of salt, use less, because Diamond Crystal salt is less salty than other types!
- Yeast. We used instant yeast for this recipe, as we find it the eaisest to work with. You can use other types of yeast, just be sure check out this helpful guide to help you make adjustments if using something other than instant (or rapid rise) yeast. Whatever type of yeast you're using, make sure it's fresh!
- Molasses. Adds a sweetness to the rolls and gives them a nice warm flavor. The molasses also makes the rolls a deeper brown color.
- Butter. We recommend using unsalted butter if possible. This allows you to control the salt level in the rolls. If using salted butter, scale back on the added salt.
- Eggs. We use two egg yolks plus a whole egg for the rolls. The yolks give the dough richness, and the whole egg helps with the structure. Don't throw away the egg whites though! We will use one egg white to whisk with milk and brush over the top of the buns to give them a shiny, glossy top when baking. Save the other one for a breakfast scramble!
- Milk. We recommend using whole milk for the most flavor.
Visit the recipe card for the full quantities and nutritional information.
✨Substitutions & Variations
- Dairy free. Swap the milk for the water, and use a dairy-free butter, or even oil in place of butter if you prefer.
- Brown butter. For extra depth of flavor, brown the butter for the rolls.
- Swap the molasses. You can use any sweetener of choice here. Honey, brown, or white sugar all work great in place of molasses. Molasses does give them a more "signature" flavor, and a darker color.
- Add some seasonings. Toasted caraway seeds added to the dough could make for a really delicious and more "traditional" flavor when you think of rye bread from a deli. Poppyseeds and even onion powder would all be great additions to these rolls as well.
This recipe hasn't been tested with any other substitutions or variations, so we can't guarantee any results. If you make a change, let us know how it goes in the comments below!
🔪Prep Work
- Bring eggs to sit out at room temperature for about an hour to reach room temperature.
- Measure out the rest of the ingredients using a kitchen scale.
- When time to bake, separate two egg yolks from their whites, saving the whites.
- Heat butter, then set it aside to cool briefly.
- Grease a 9x13-inch baking pan. Set aside.
Pro Tip
- To quickly bring eggs to room temperature, place the eggs in a bowl of warm (not hot) water for 10-15 minutes.
Instructions
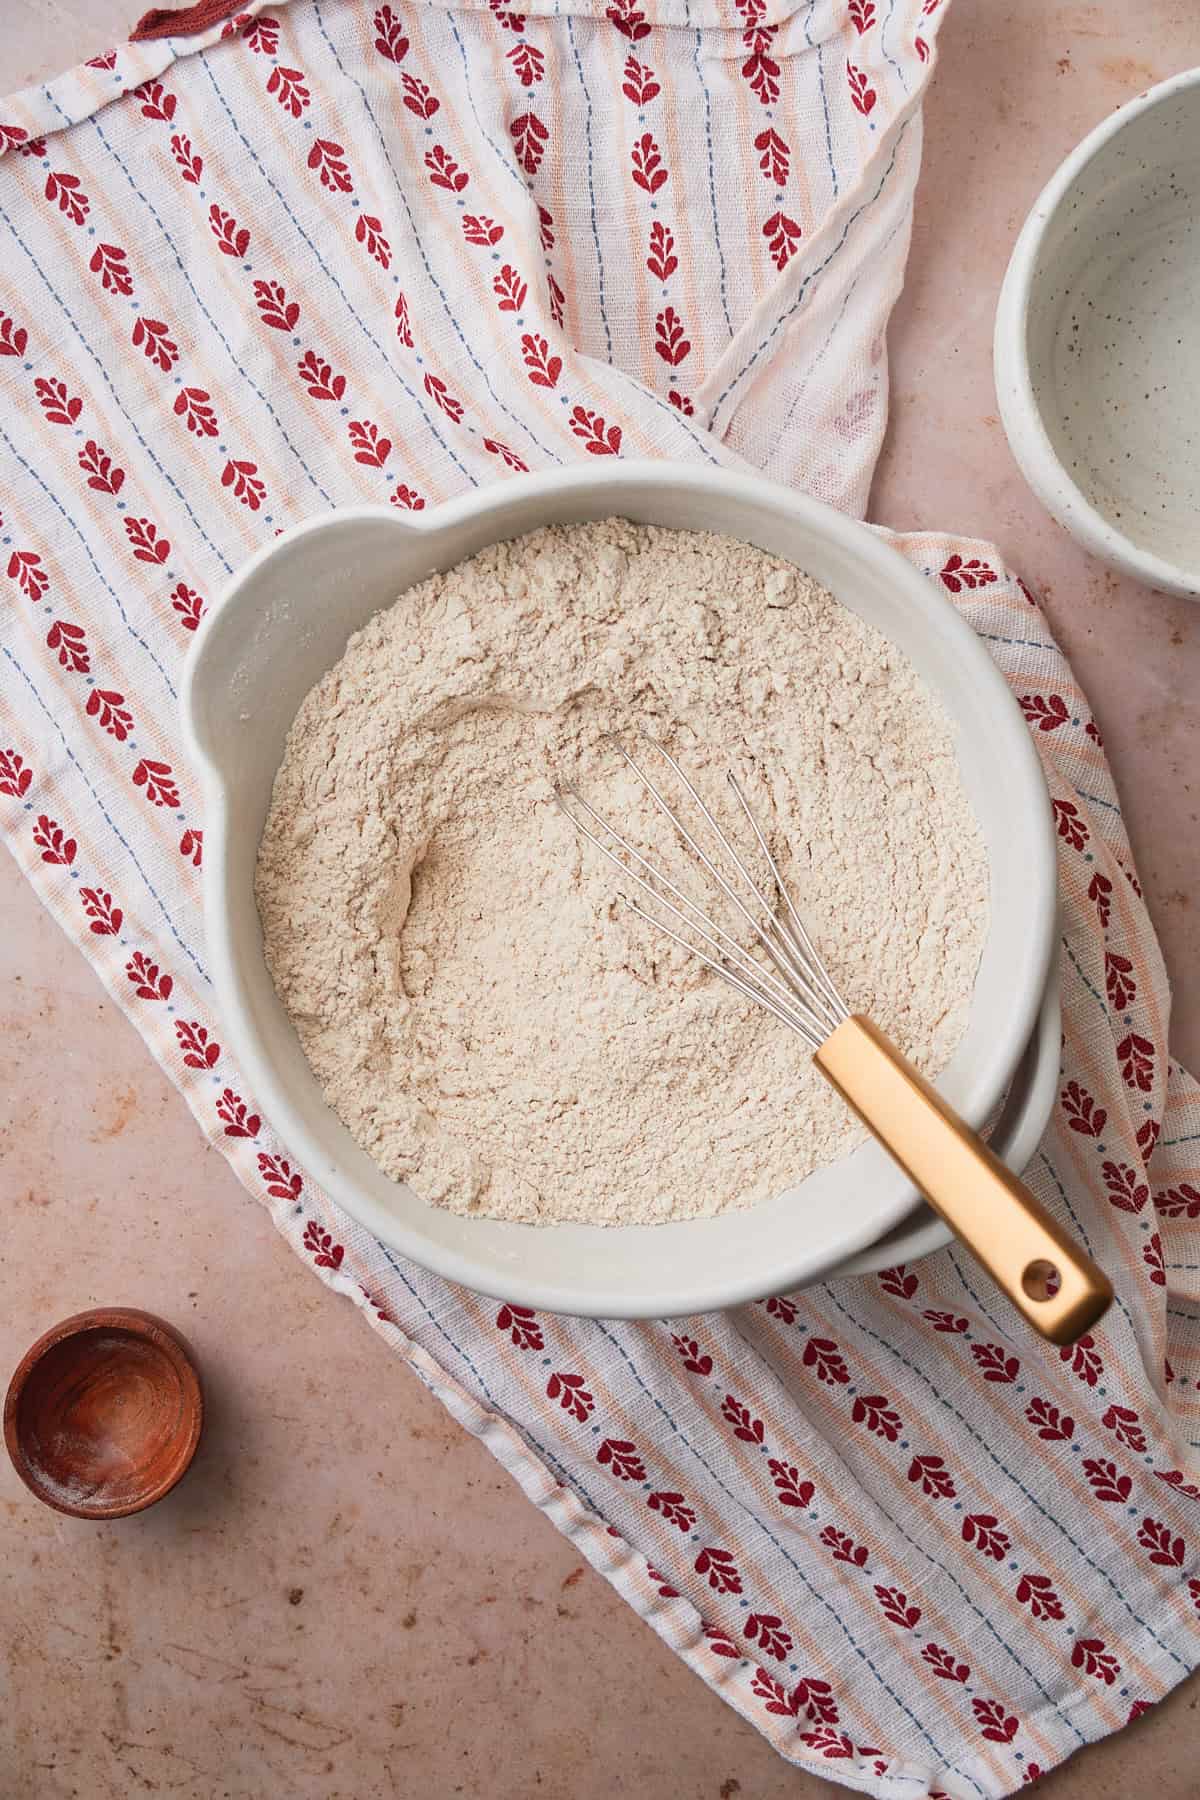
Whisk dry ingredients
In a bowl, combine all purpose flour, rye flour, and kosher salt. Whisk well and set aside.
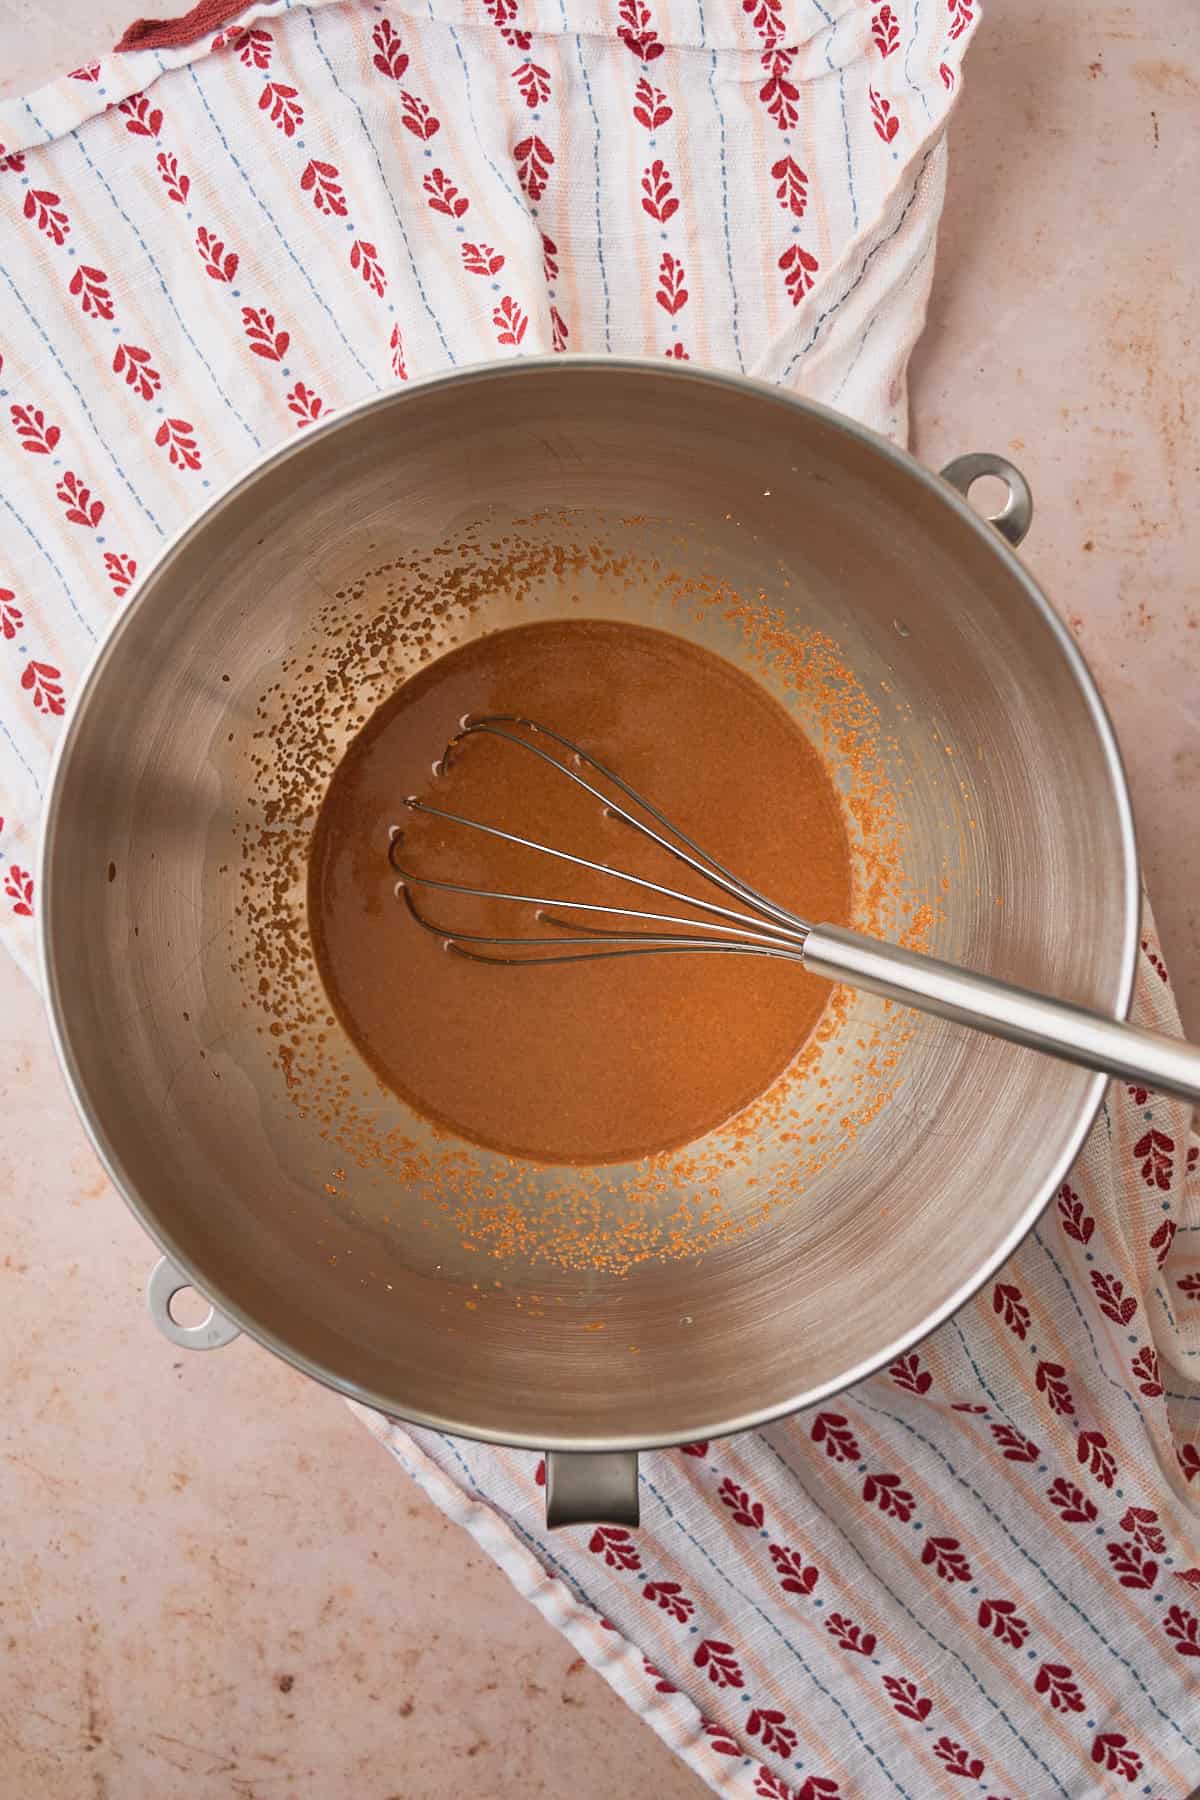
Activate yeast
Add warm milk(110-115°F), molasses, and yeast to a mixing bowl. Whisk and let it sit for about 10 minutes.
Pro Tip
Checking the yeast is an extra step when using instant yeast (like we are here), but we often recommend doing it to ensure your yeast is fresh if you're not sure.
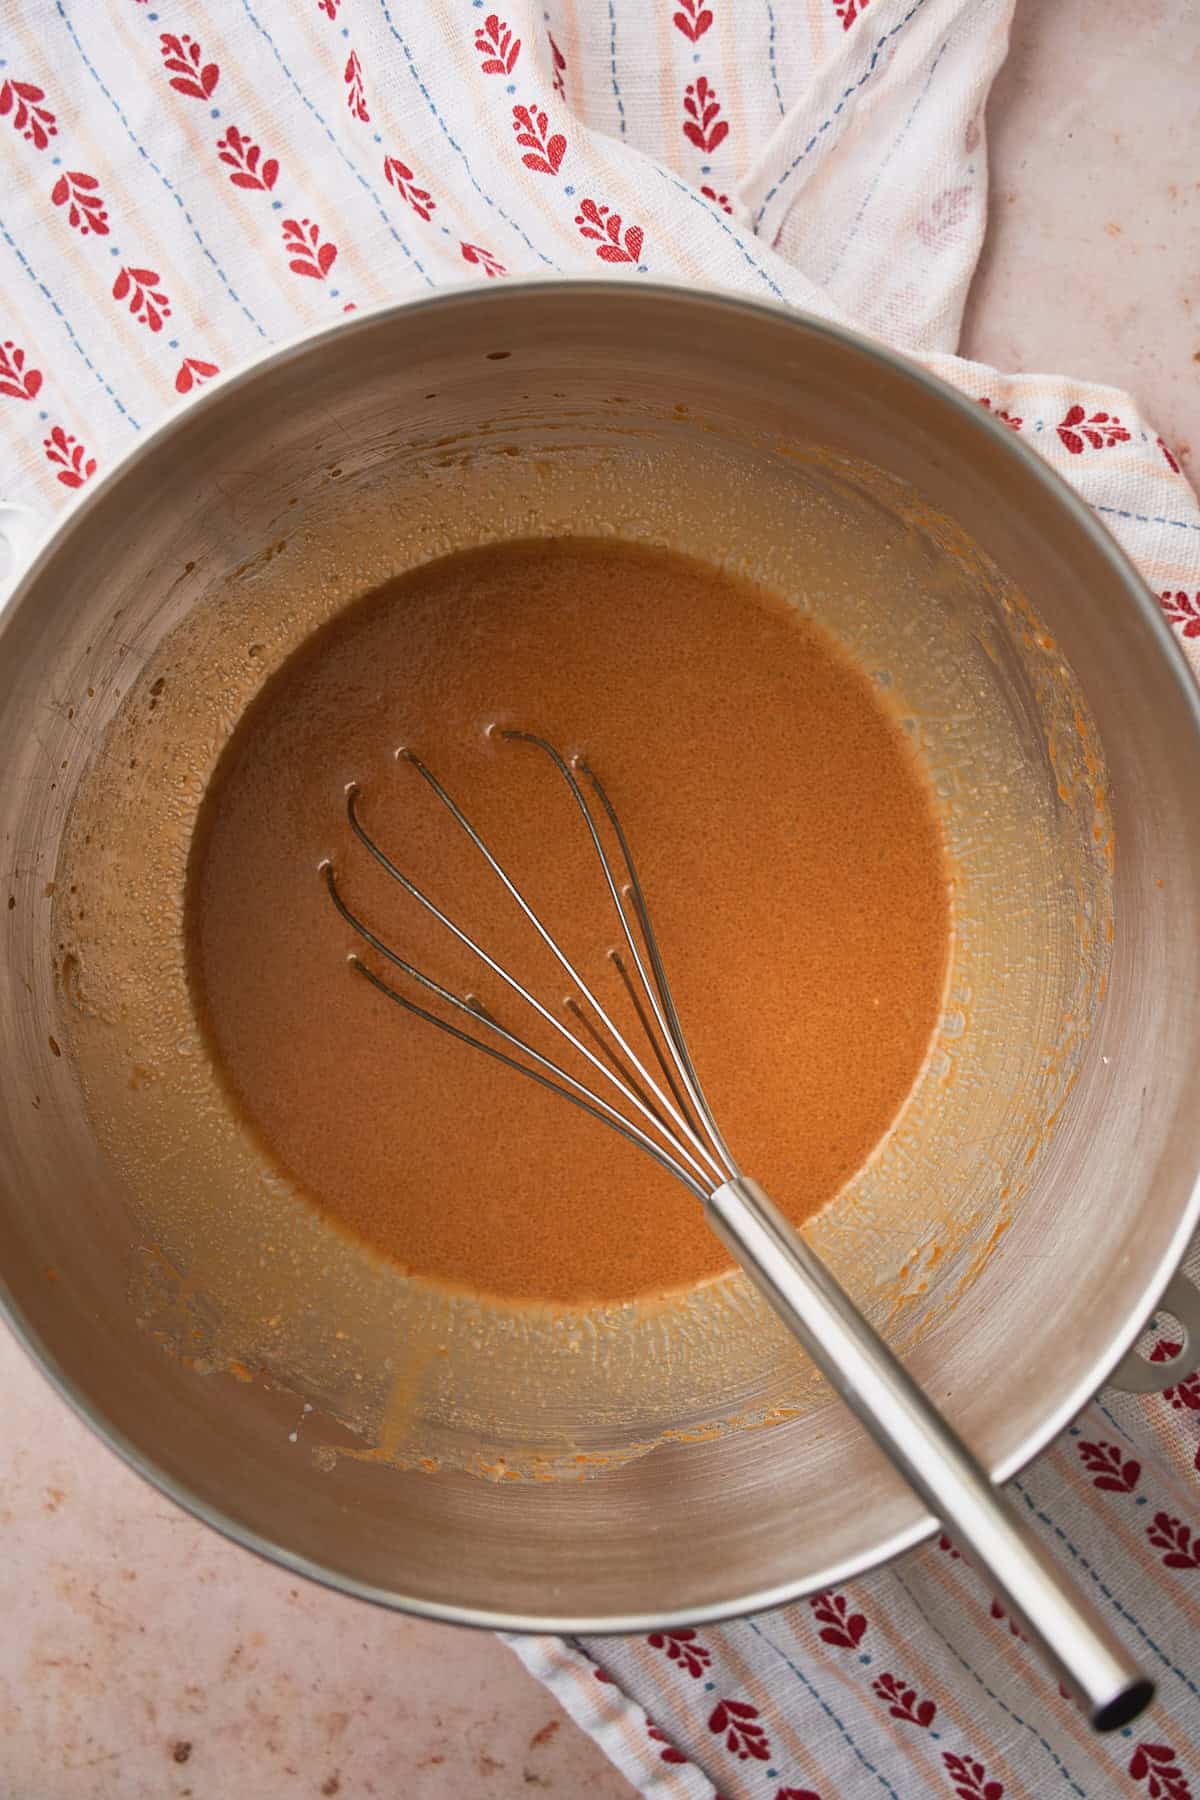
Add eggs and butter
After 10 minutes, the mixture should be foamy. Then, you can add melted and cooled butter, along with the egg and egg yolks.
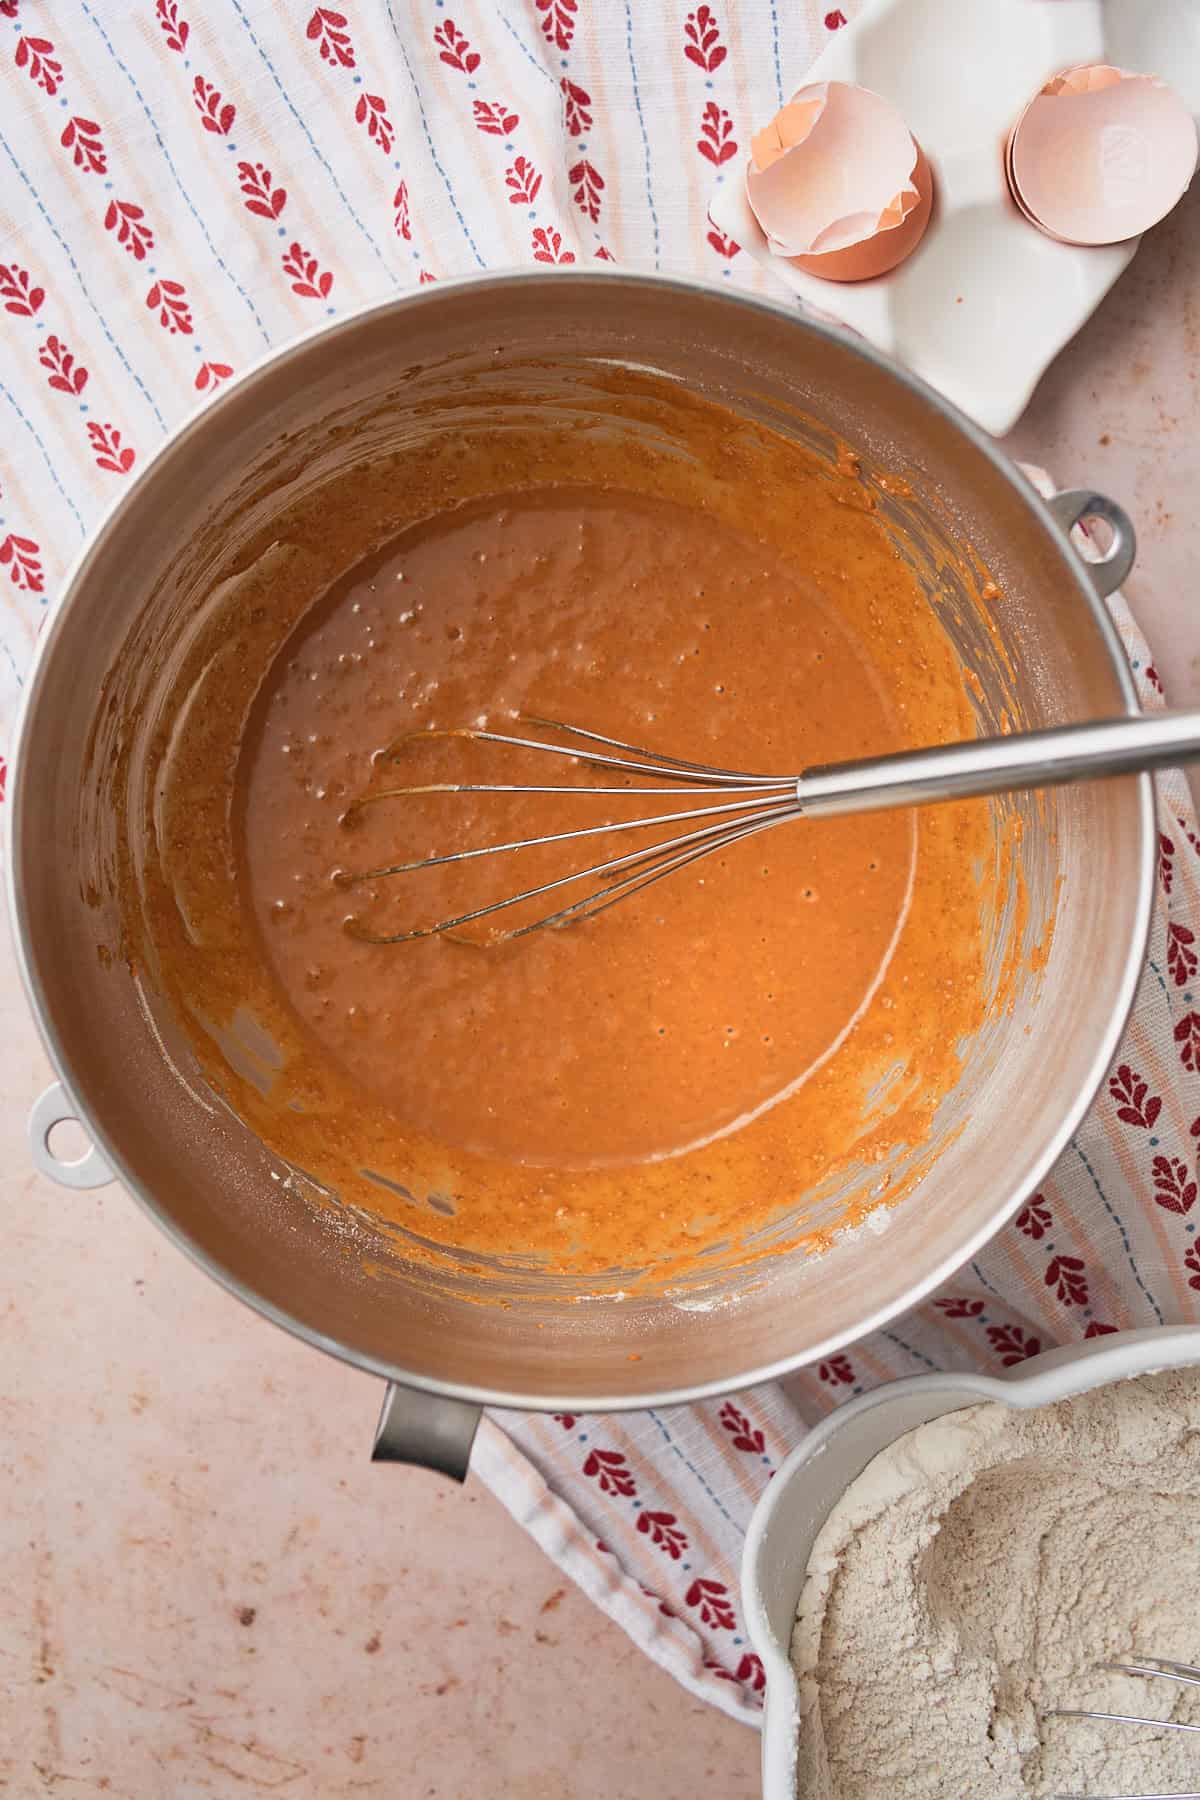
Add some of the dry ingredients
Add about ⅓ of the flour mixture. And then whisk it well until it's completely incorporated.
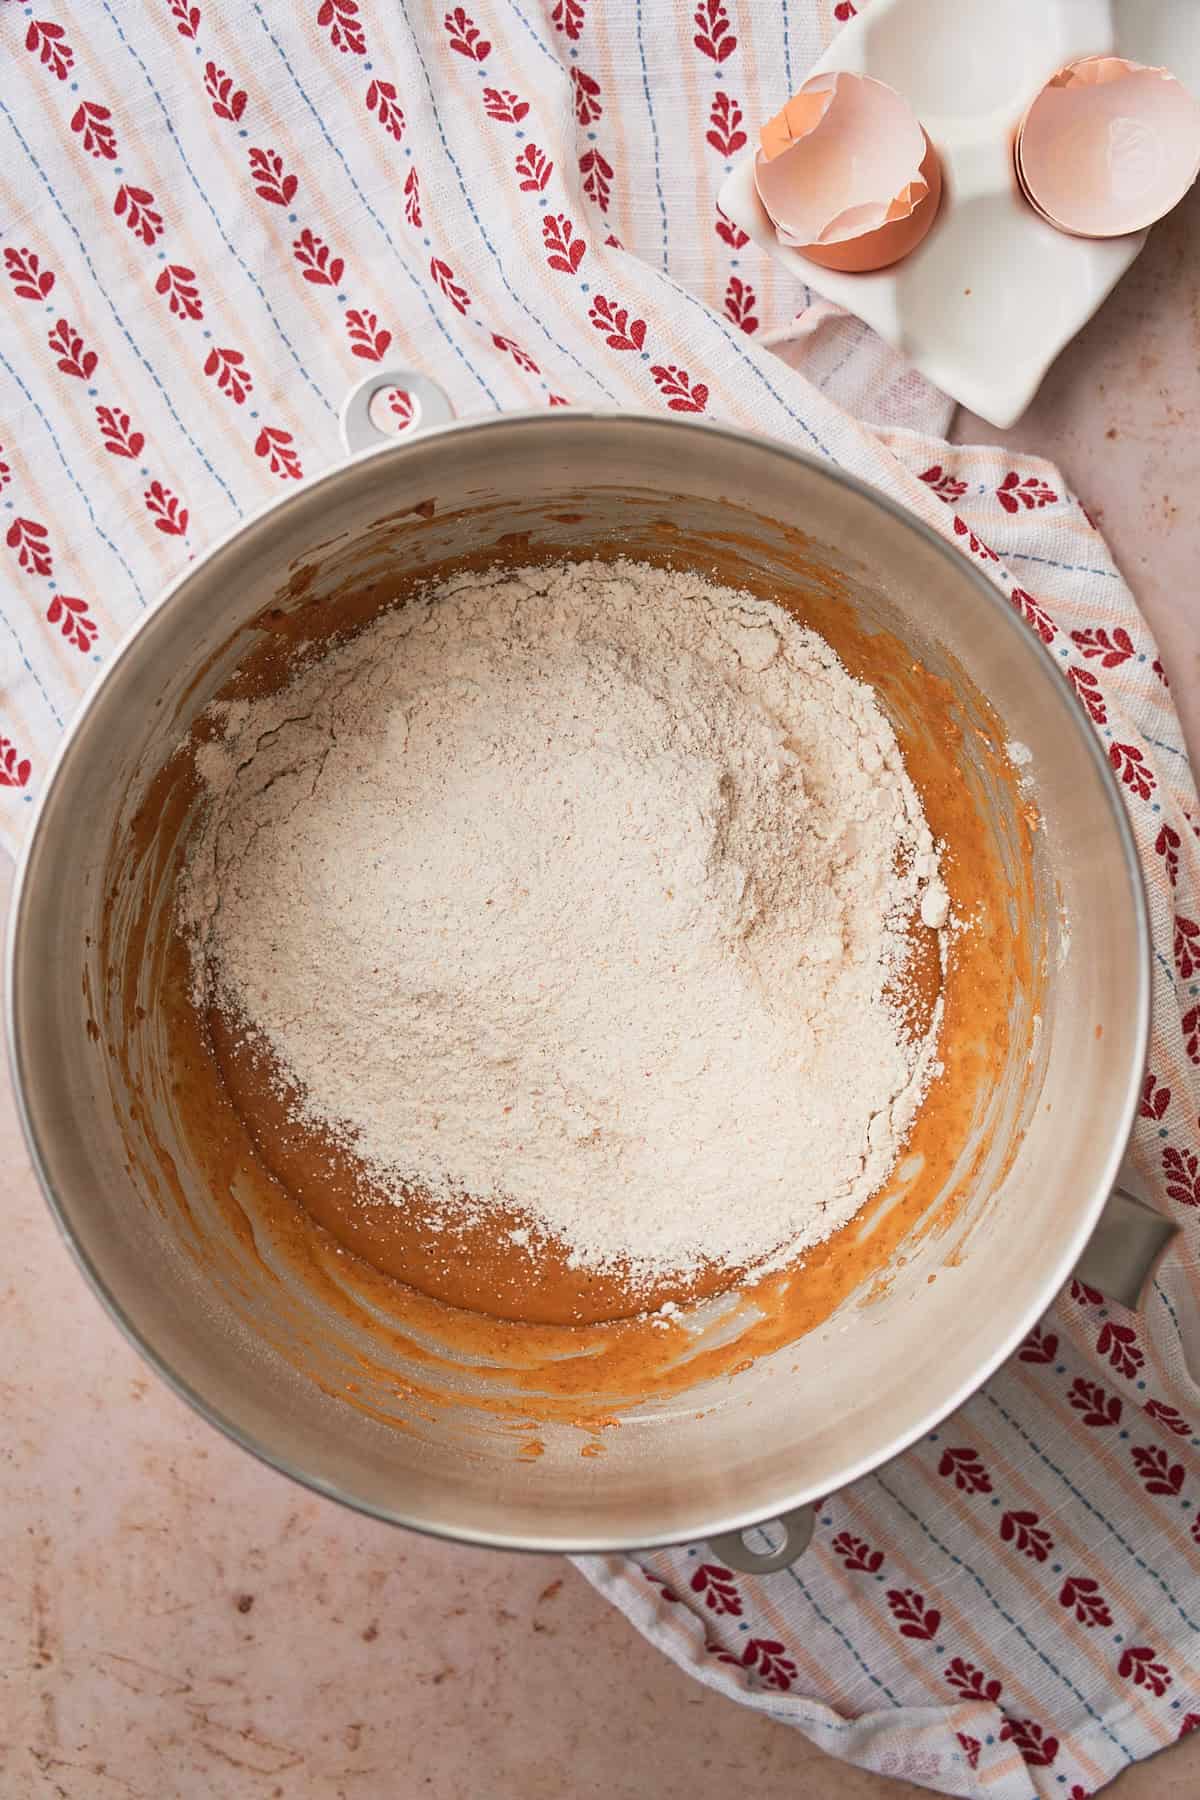
Add remaining dry ingredients
Add the rest of the dry ingredients to the wet ingredients.
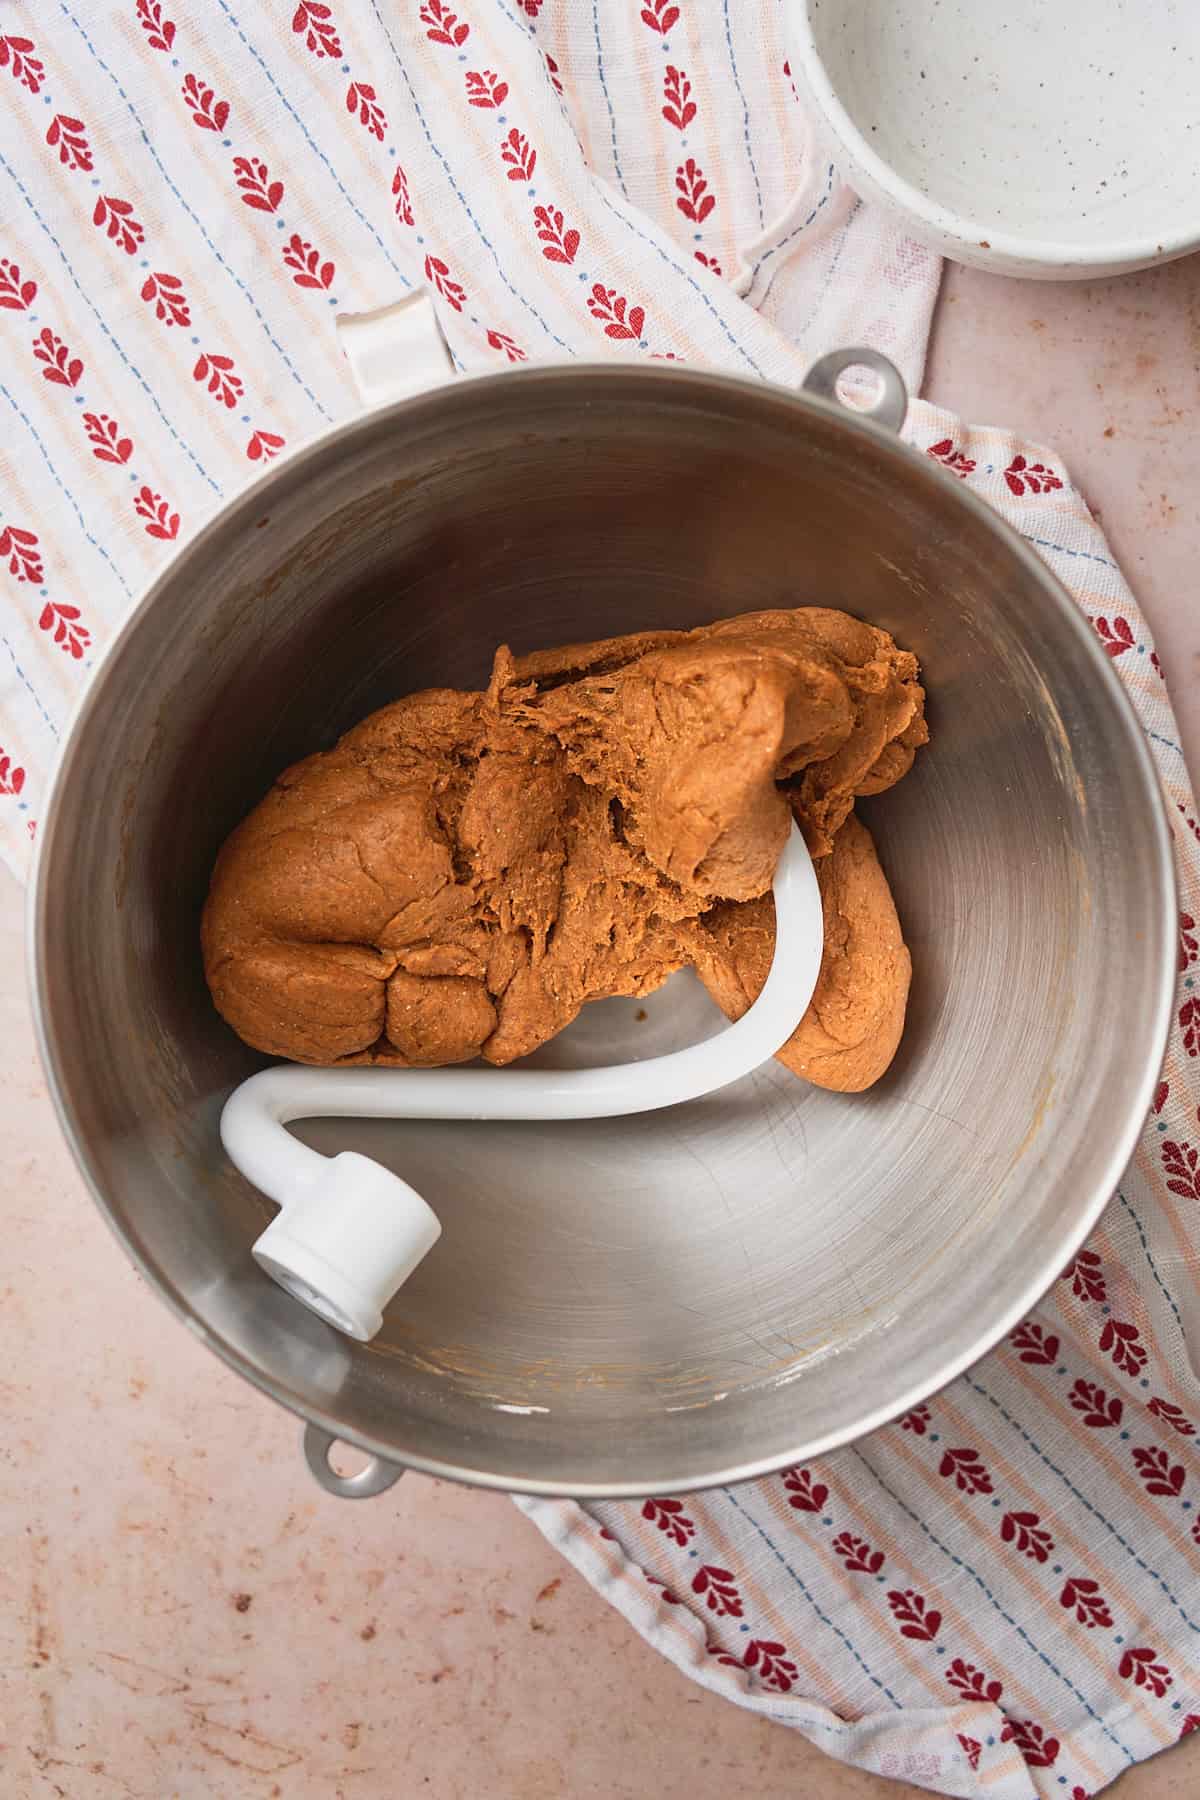
Knead the dough
With a dough hook in a stand mixer, knead on low speed for 8-10 minutes until the dough is smooth, and elastic, and pulls away from the sides of the bowl.
Pro Tip
Resist the urge to add more flour if the dough is a bit sticky early on. More kneading should do the trick. The windowpane test is a good way to know when the dough is ready.
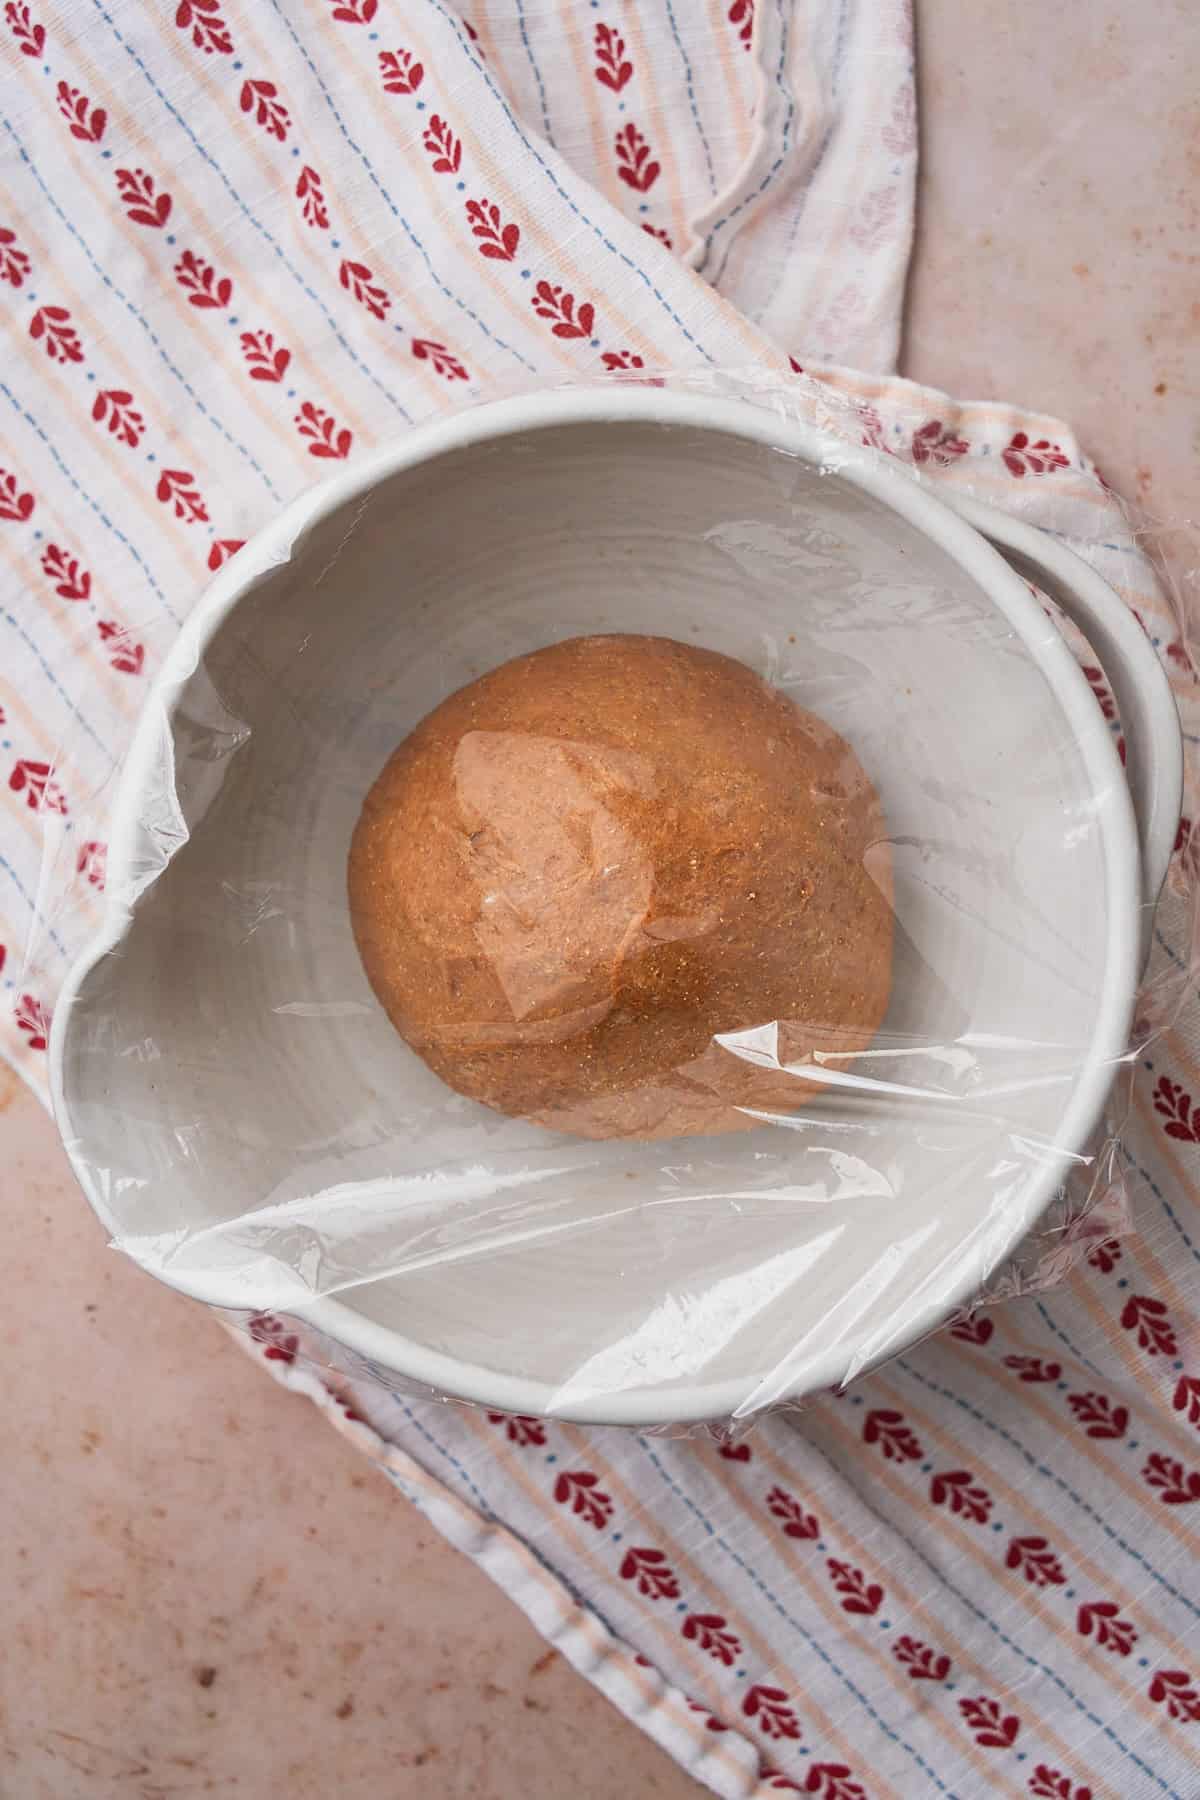
Rest the dough
Grease a clean bowl with some oil, then transfer the dough to the bowl and cover it with a clean kitchen towel or plastic wrap. Place it in a warm place to allow it to rise.
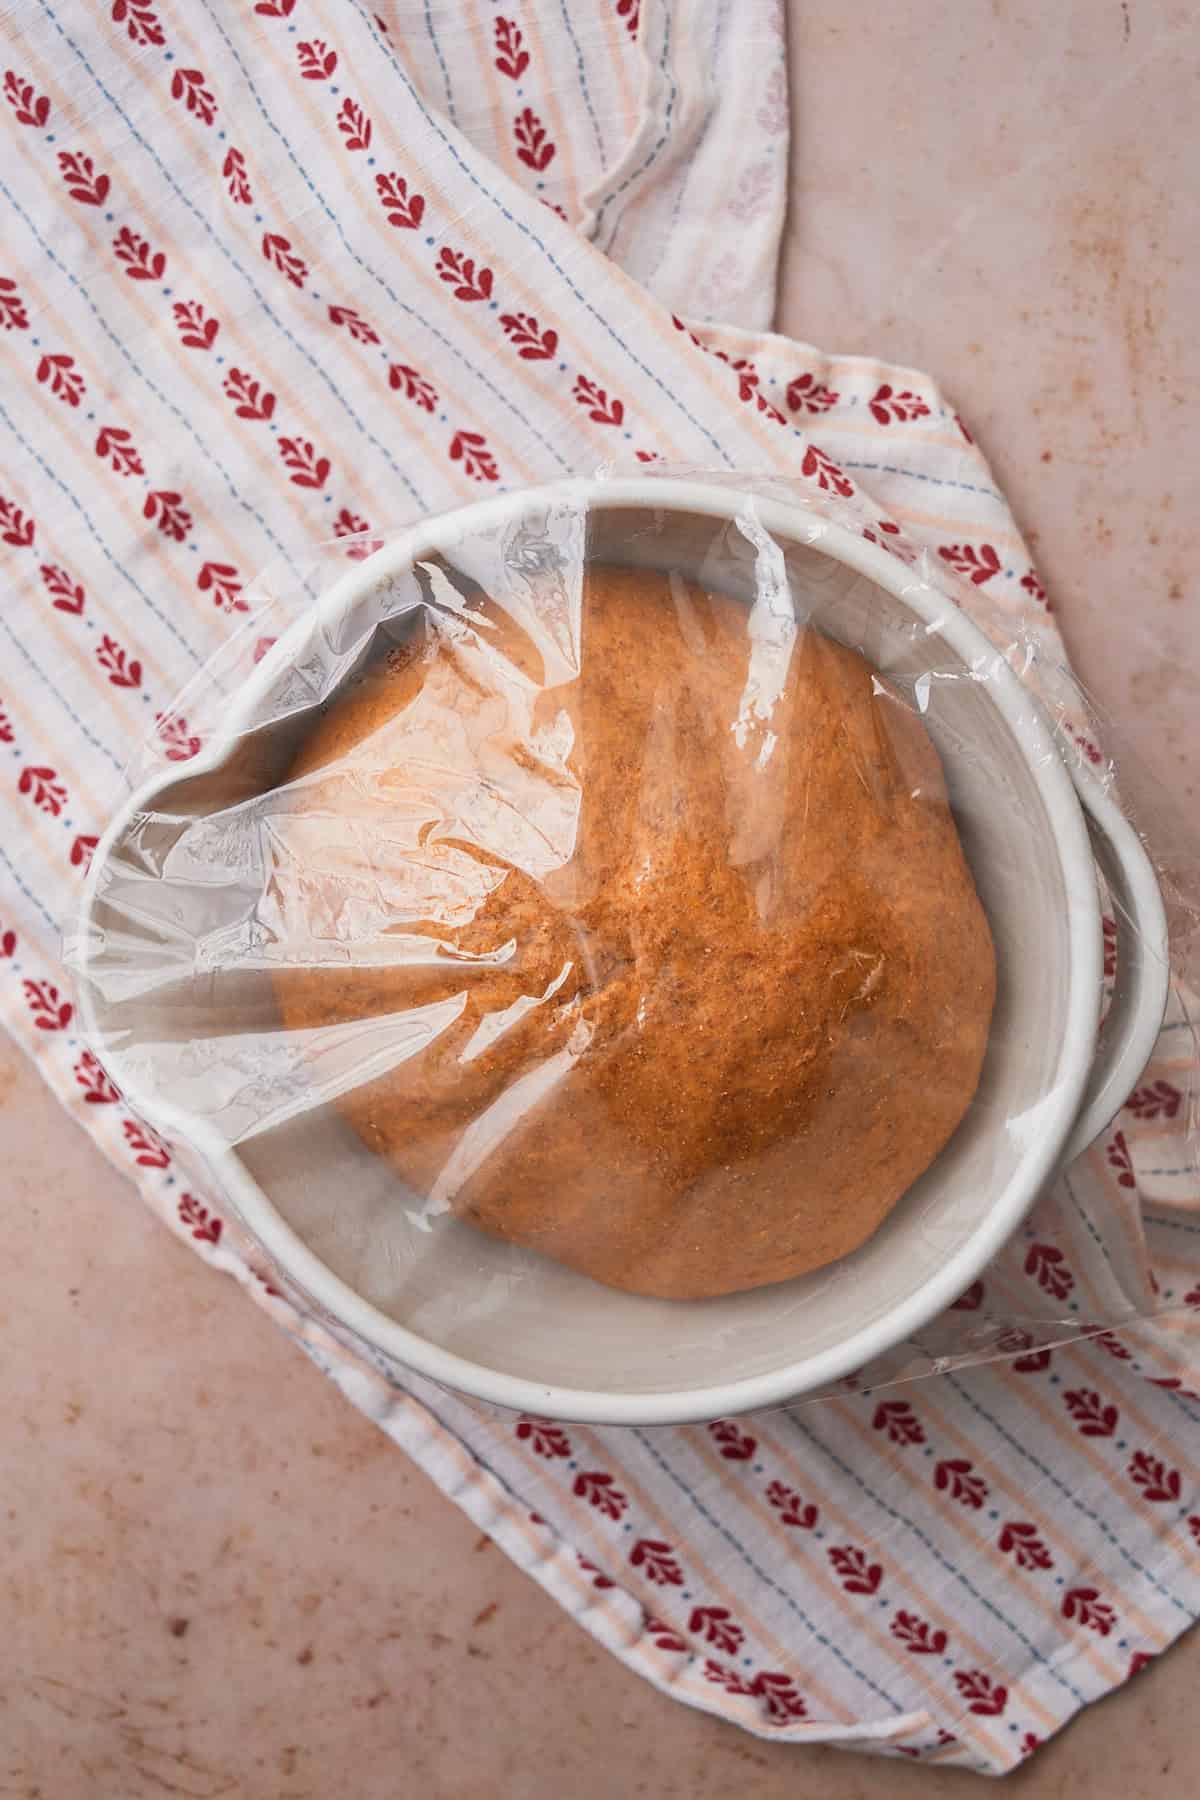
First rise
Allow the dough to rise until it's about twice its size. This should take about 1 - 1 ½ hours. When touched, the dough should not spring back right away and it should instead leave an imprint where your finger was.
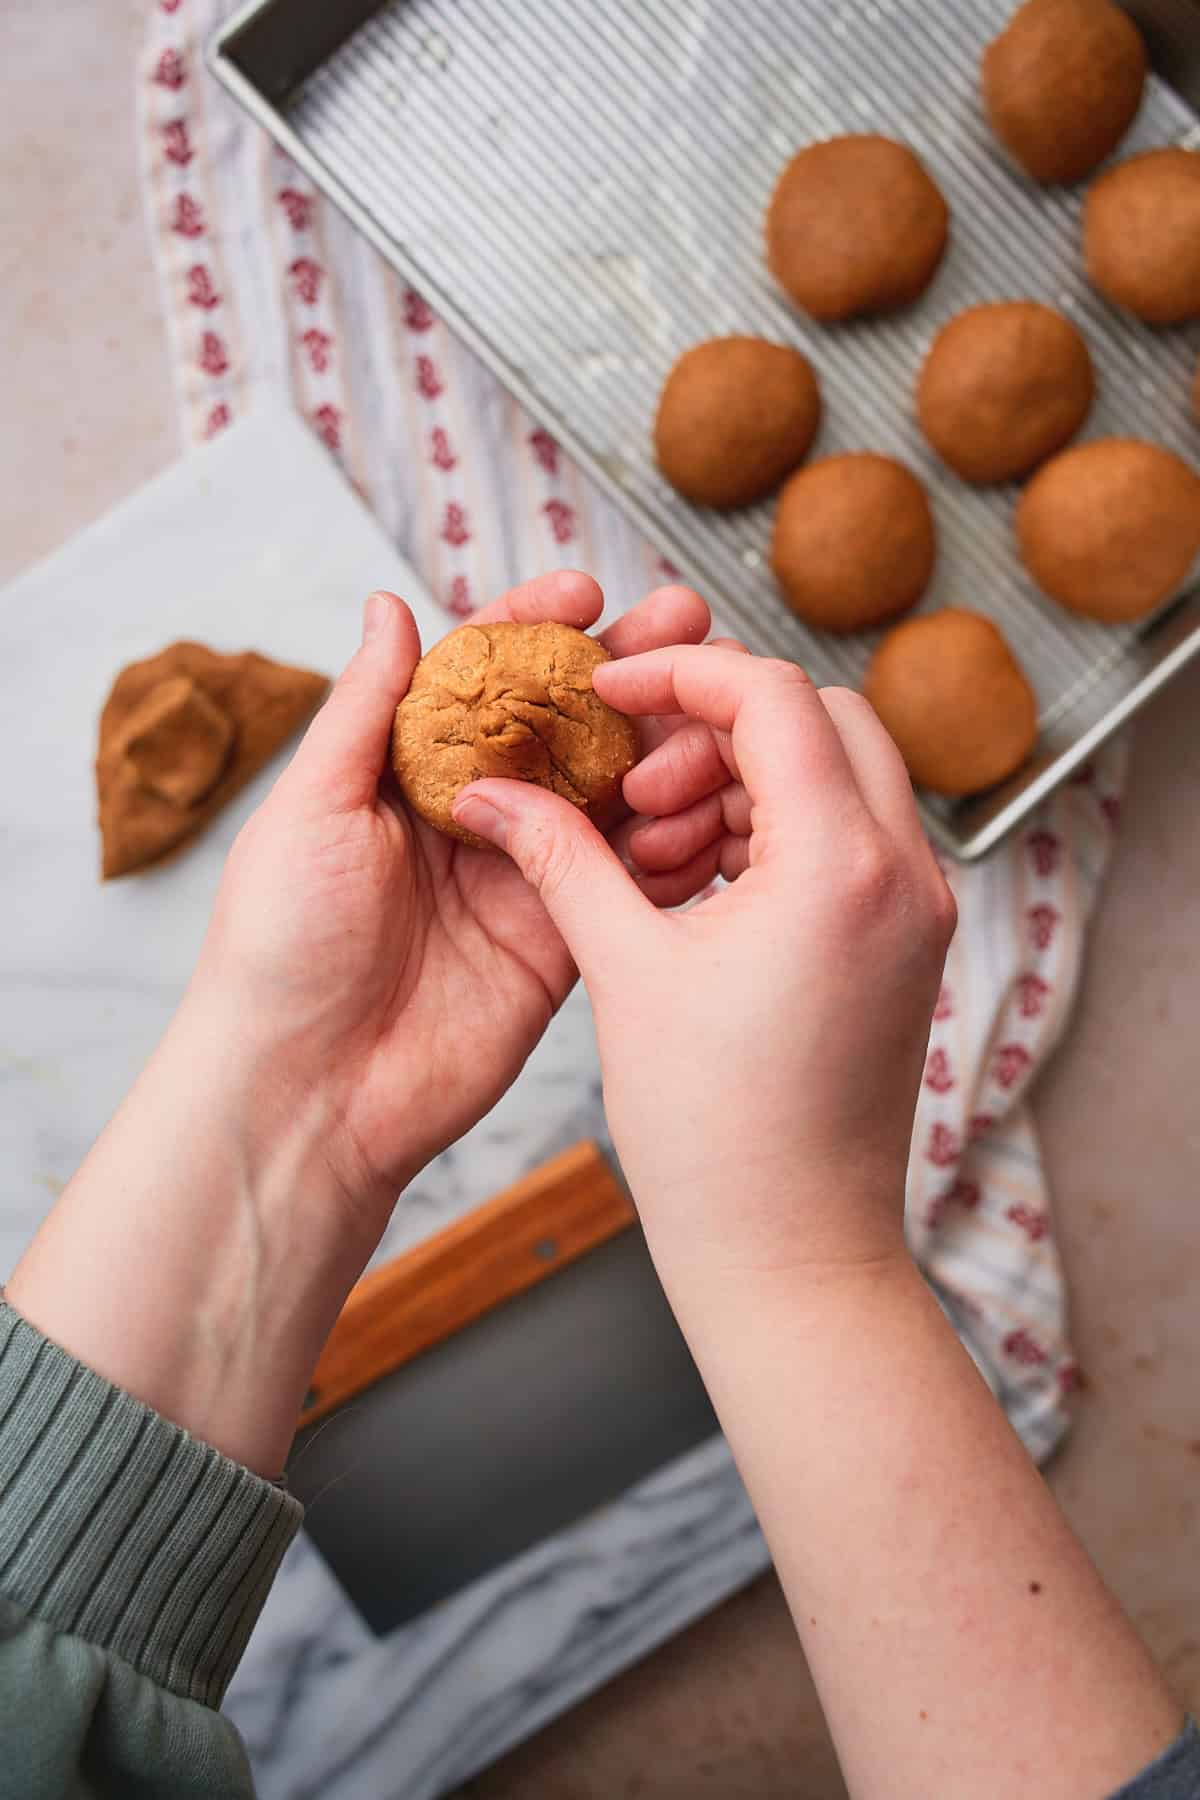
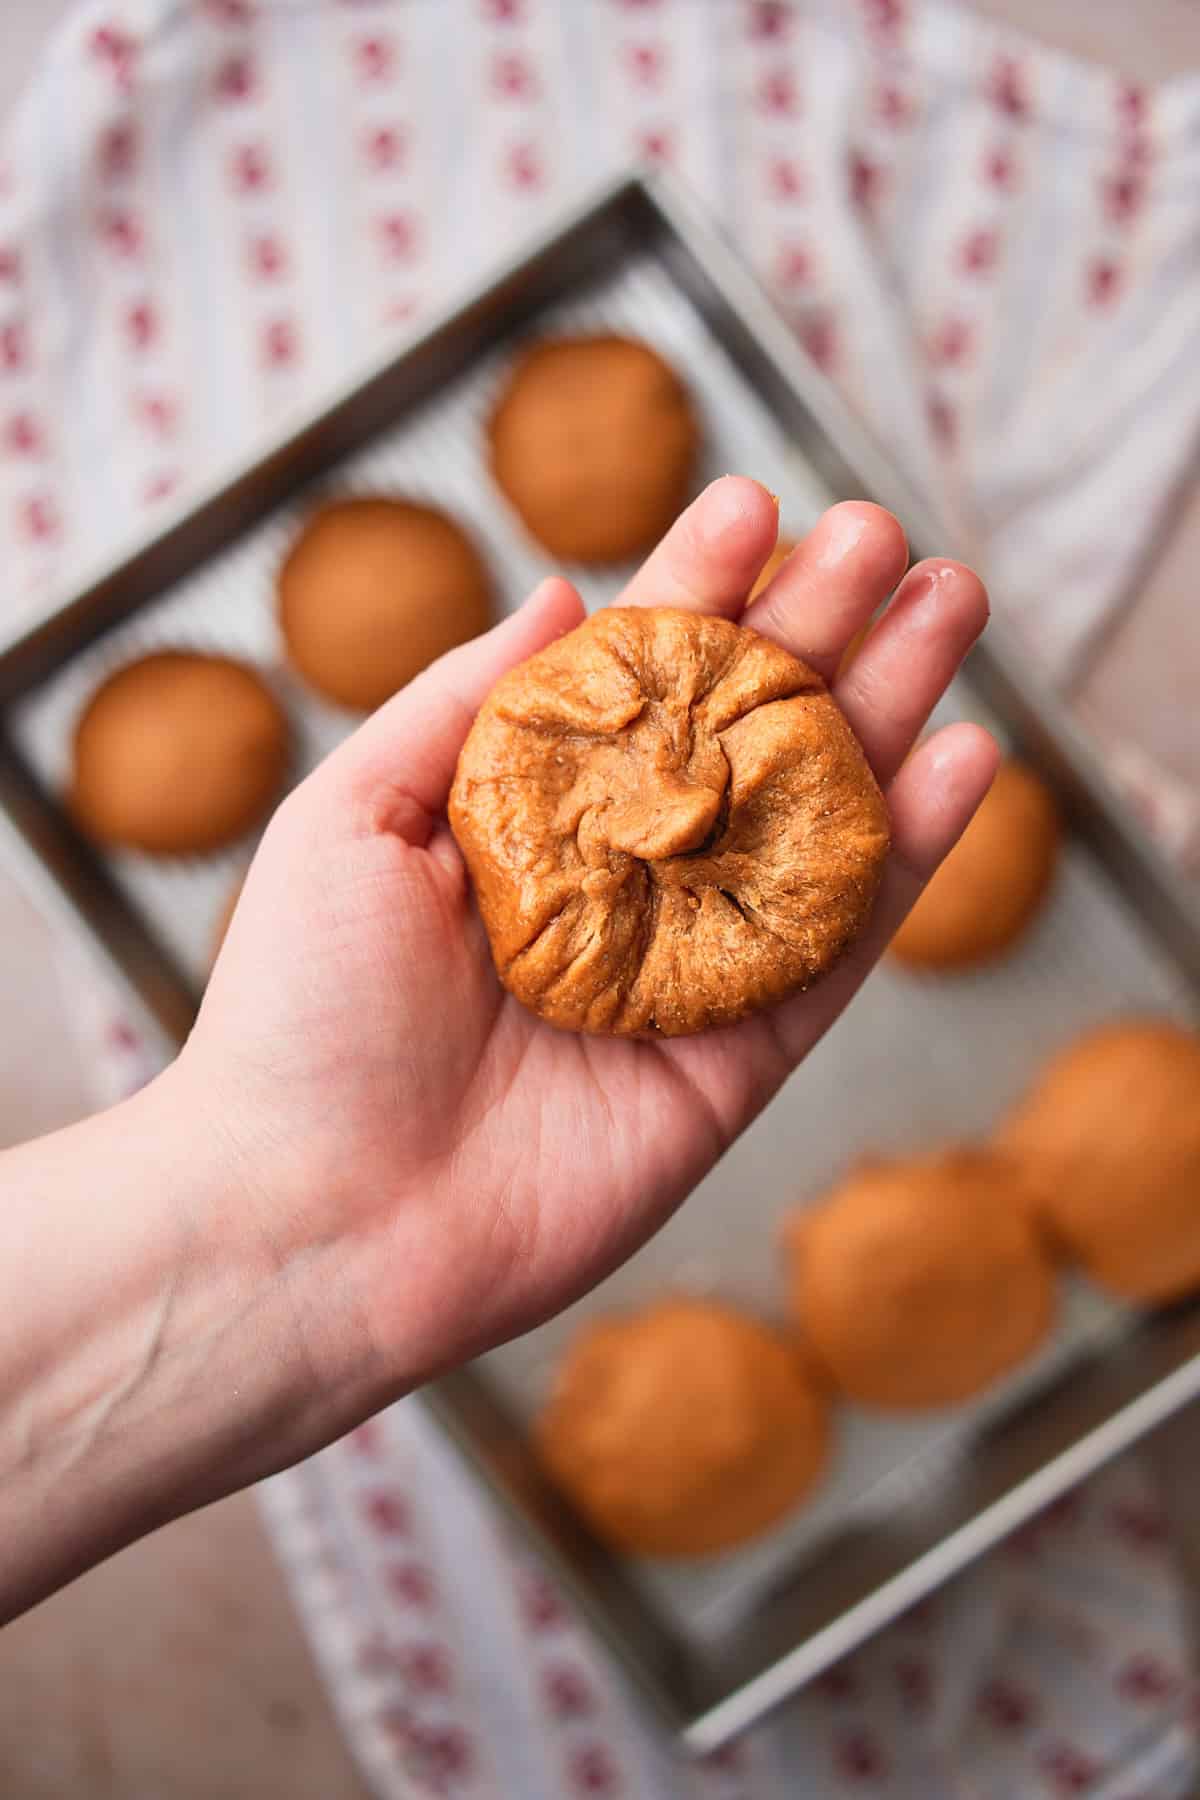
Cut and pinch
Now, shape the buns into 12 roughly equal sized pieces. You can use a food scale to weigh them out if you'd like. There's no need to flour your work surface, this dough is pliable, not sticky.
On the underside of each piece of dough (working with one piece at a time) create a round ball shape, and pinch the dough where it comes together near the back.
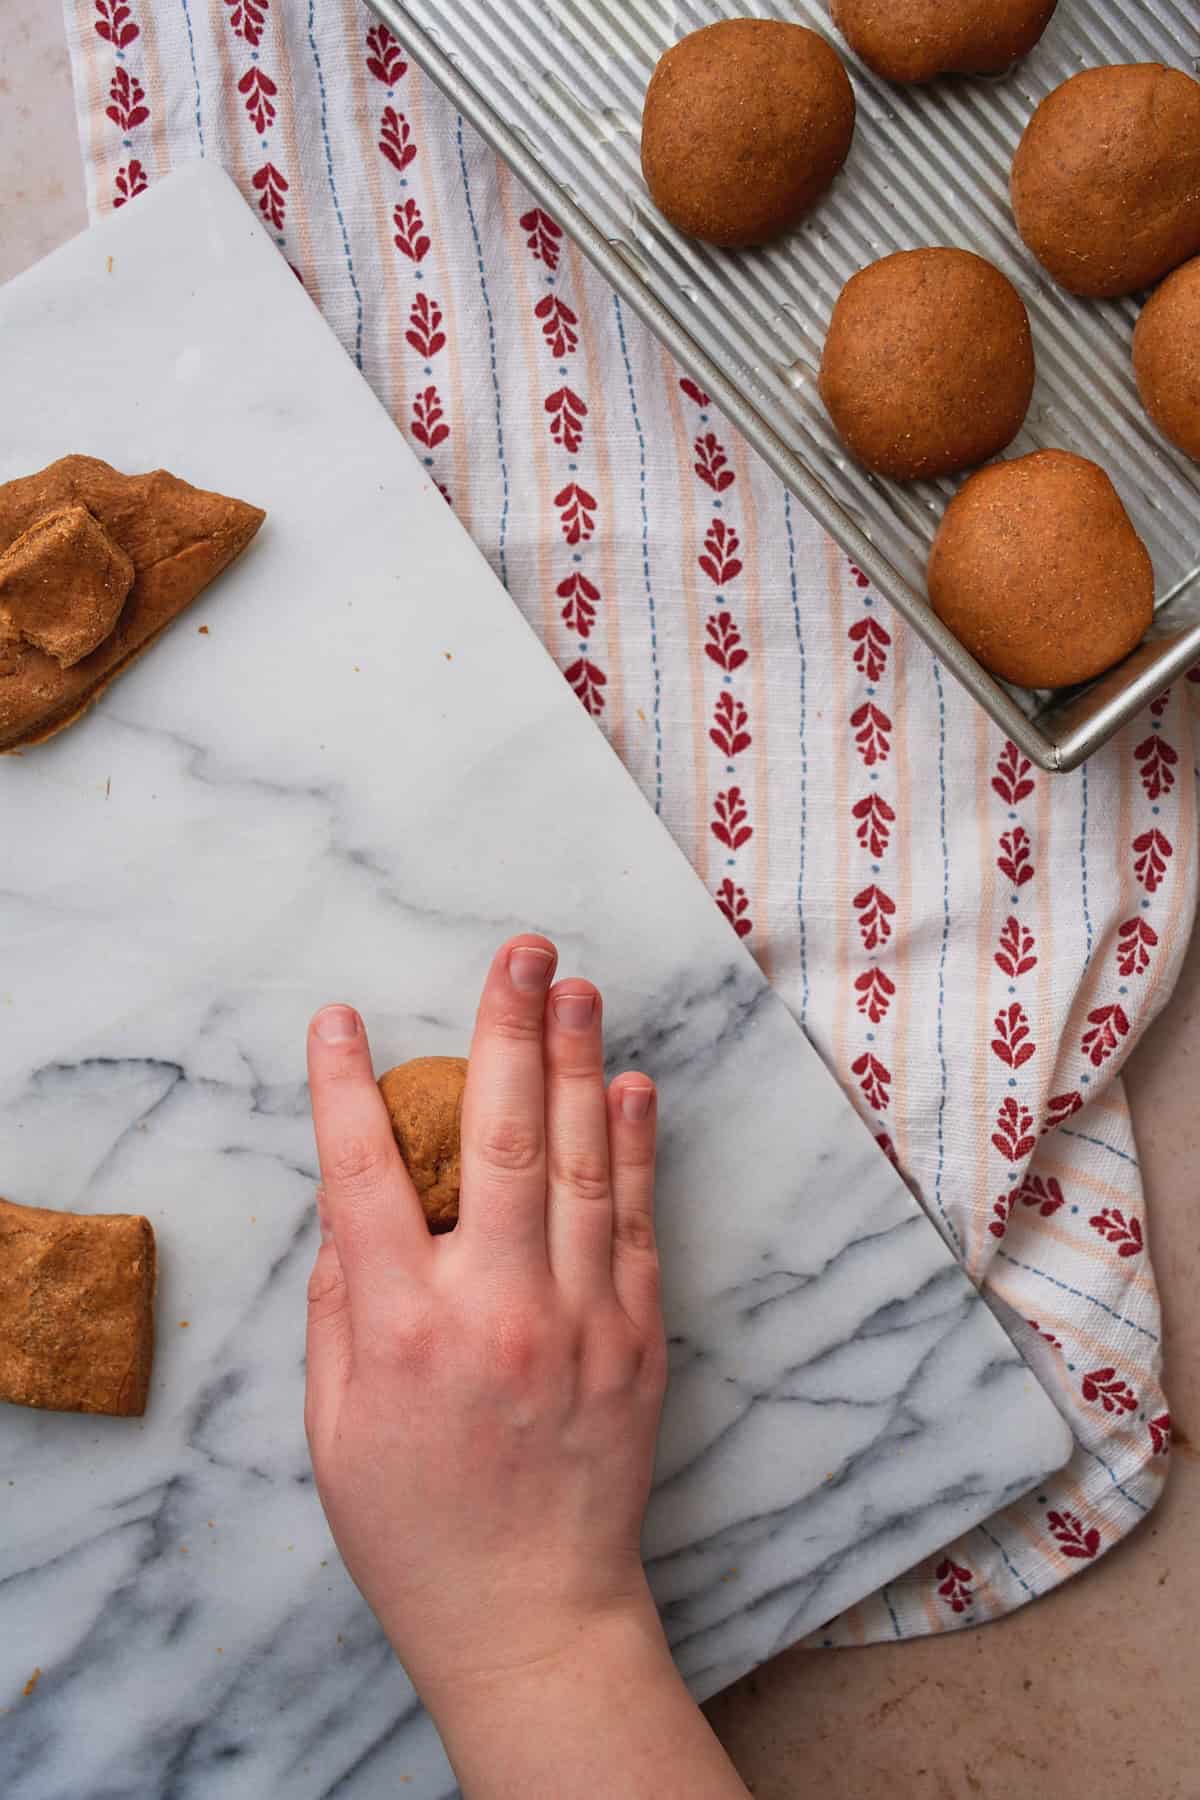
Roll
Place the dough ball with the pinched side down onto a work surface. Use your palm to lightly roll the dough ball into a round shape, applying gentle pressure.
Shape
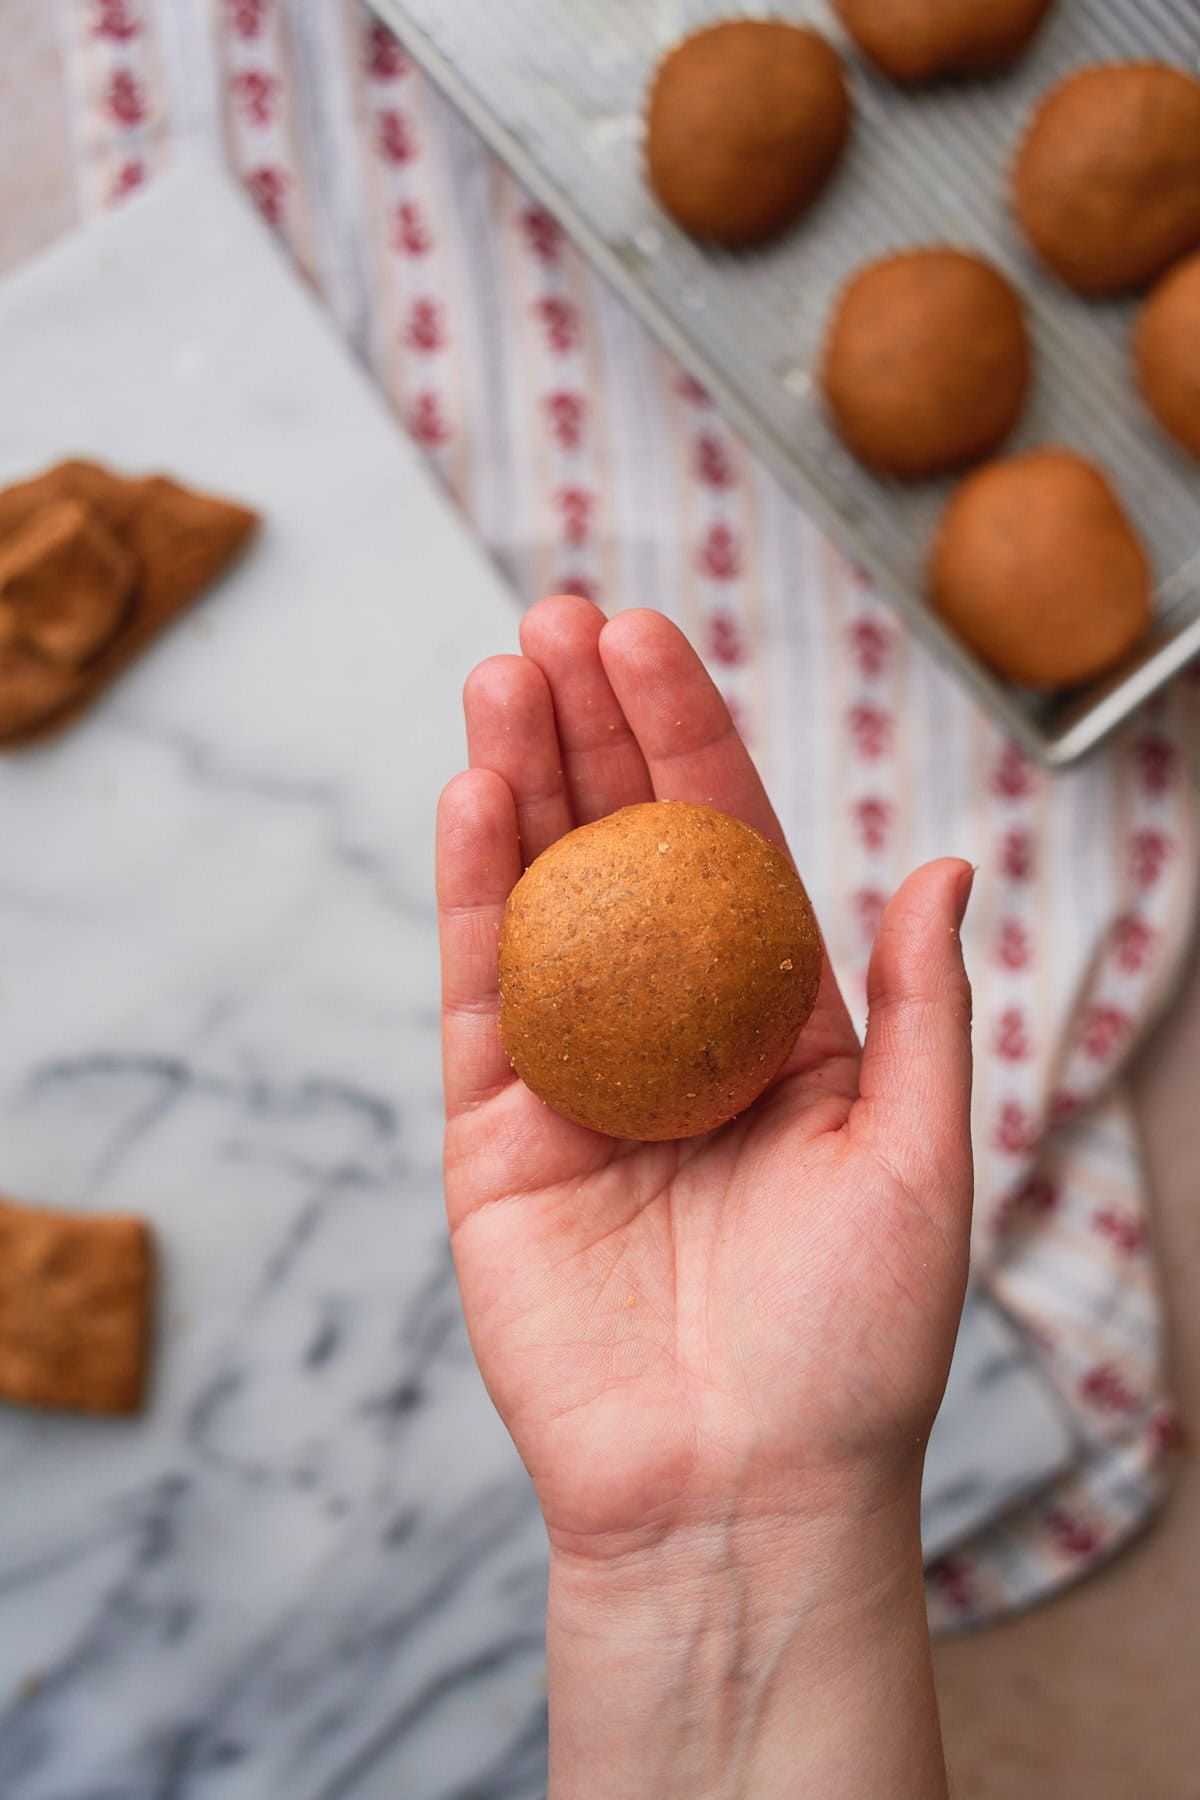
Roll until the bread forms a tight dough ball.
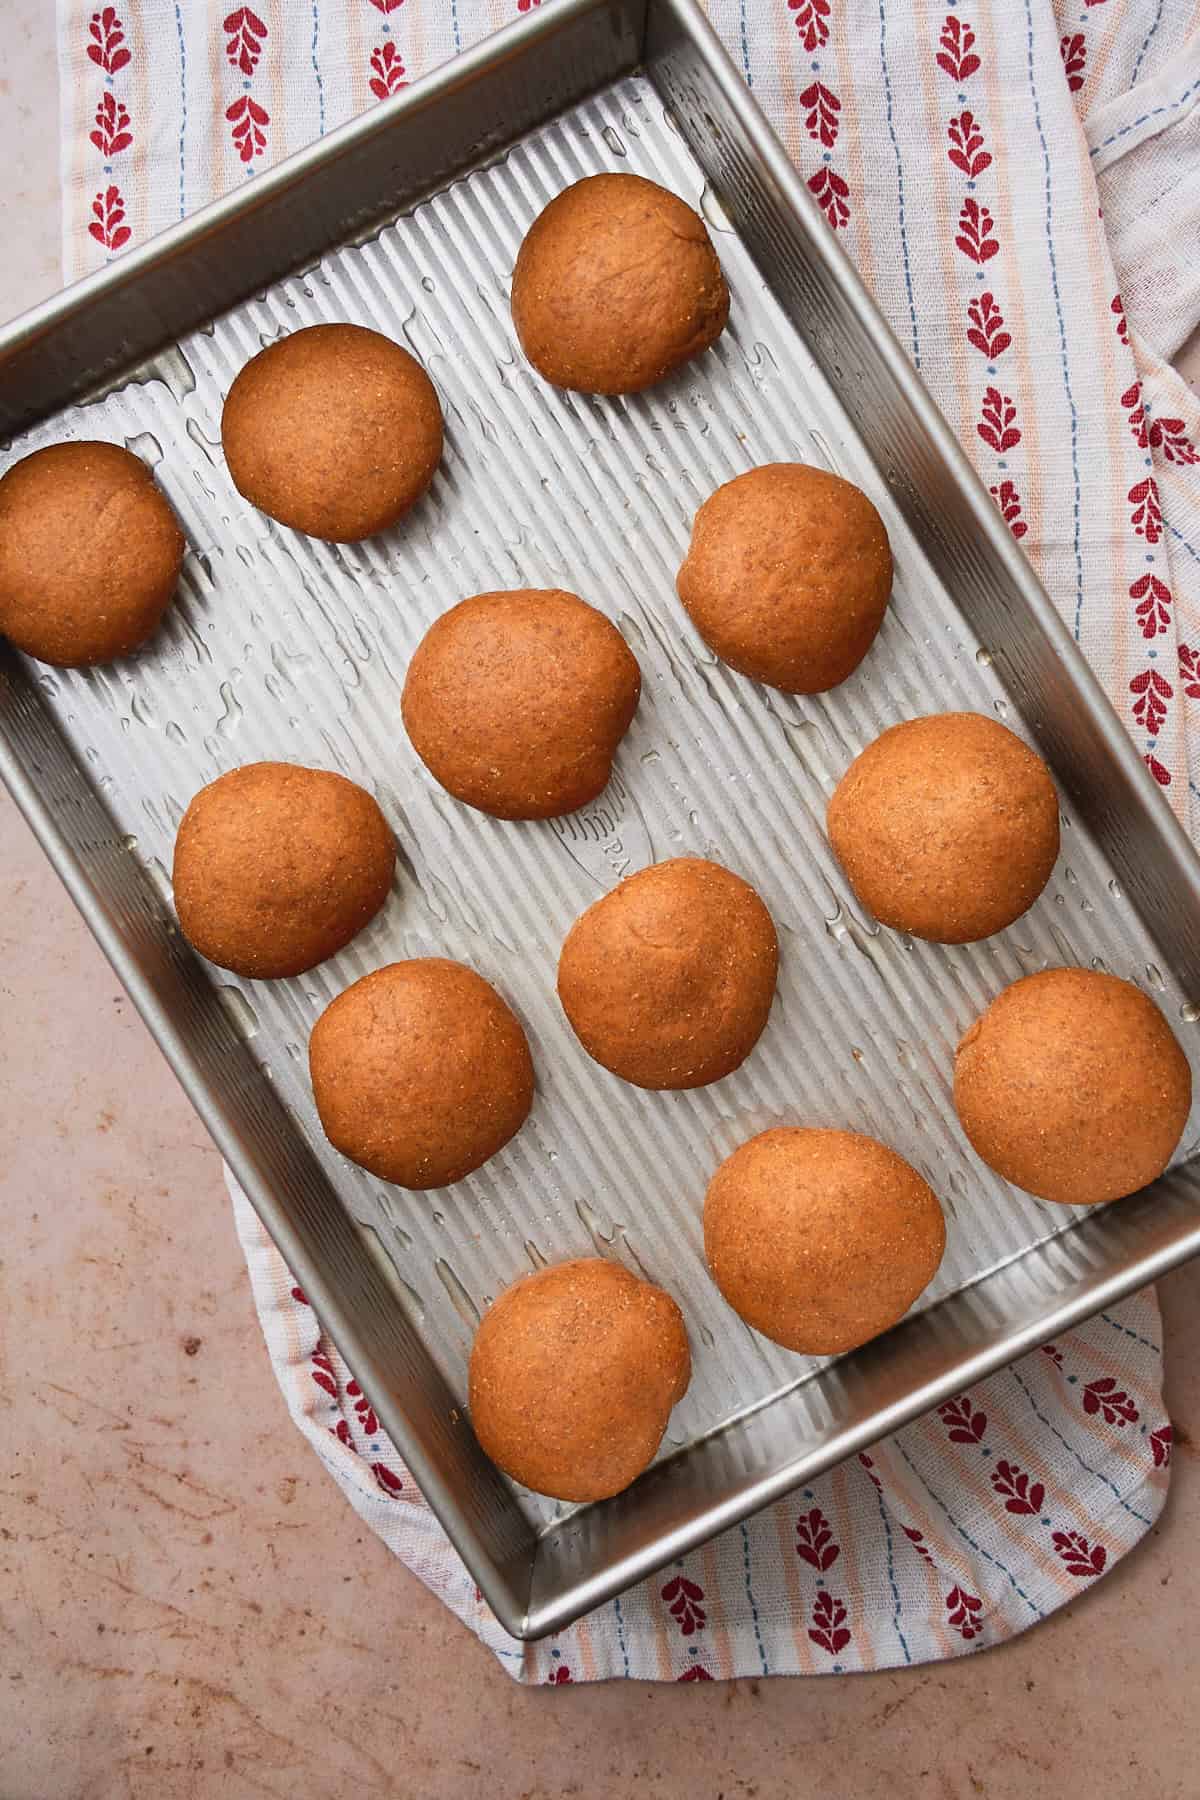
Rest again
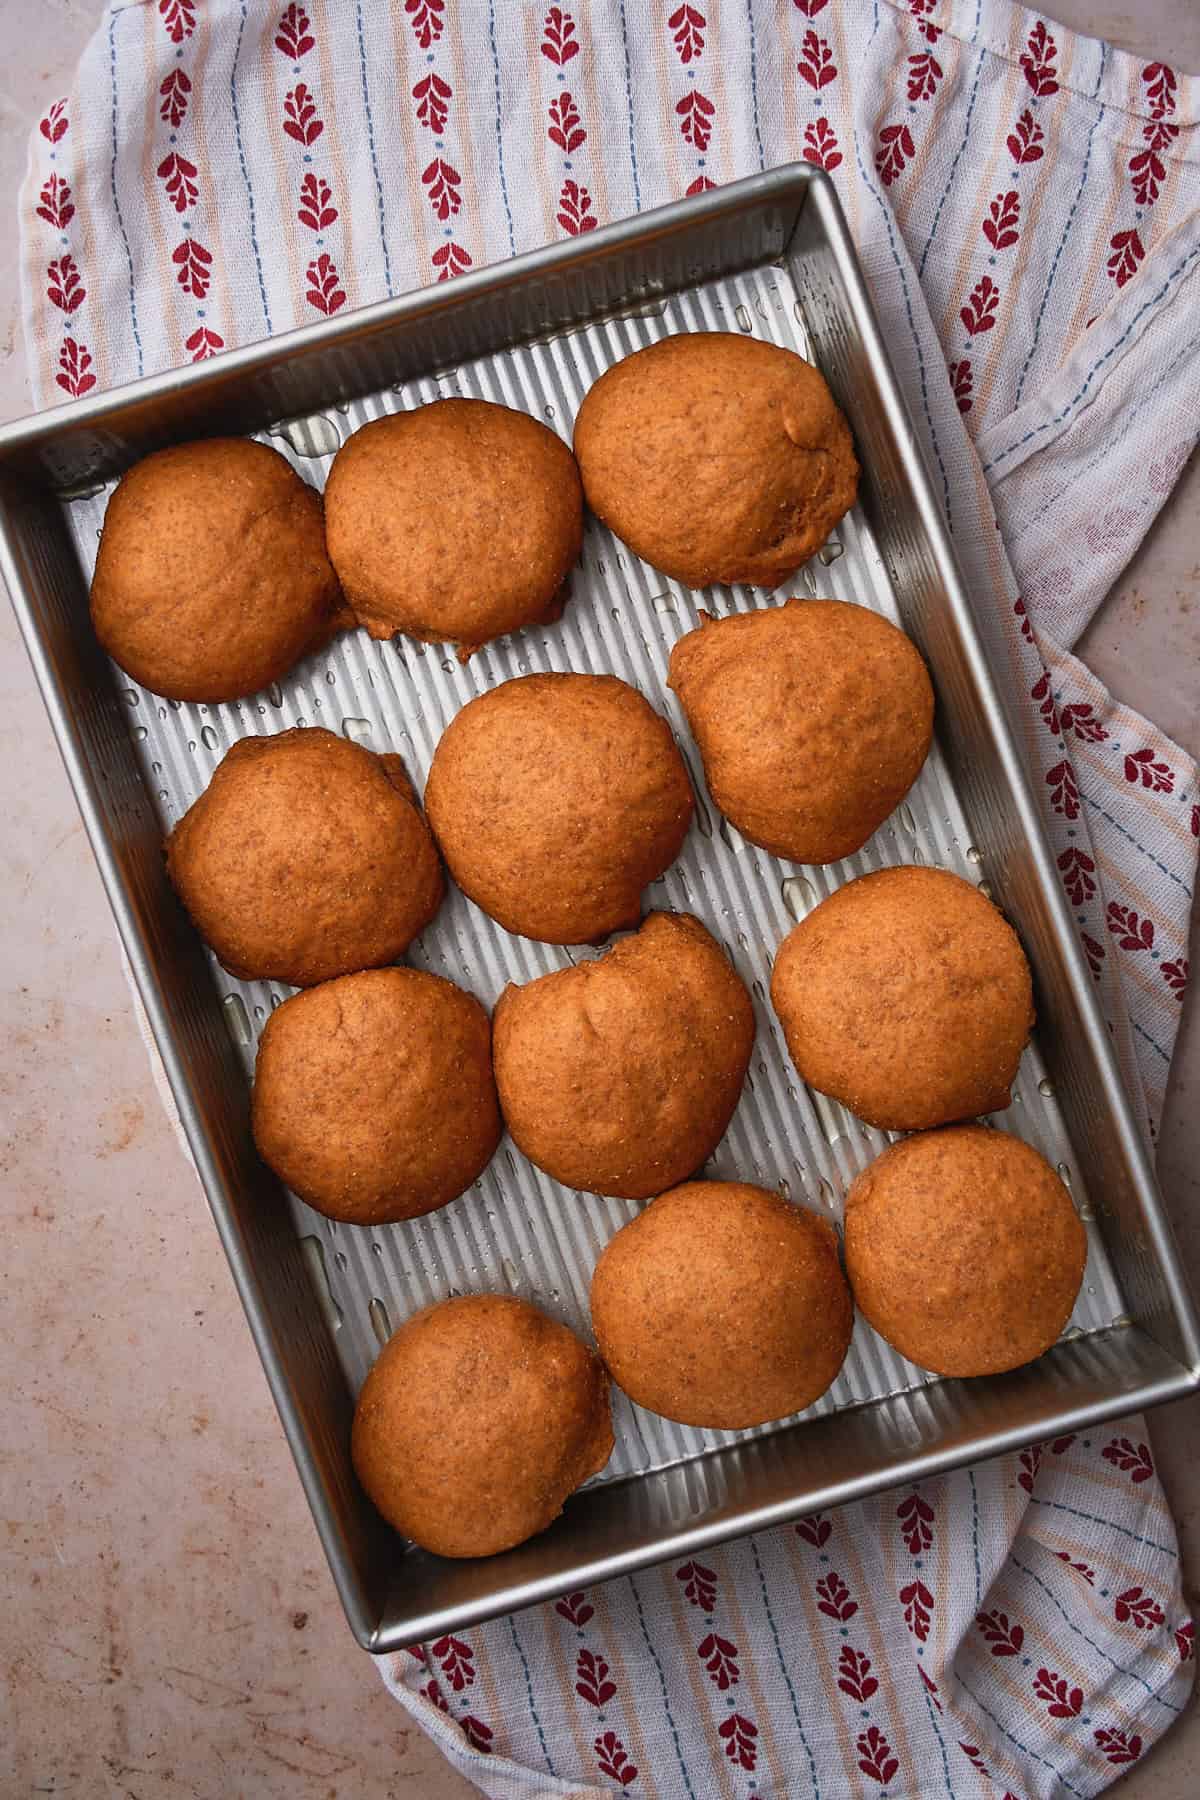
Place the rolls, seam side down into your greased baking sheet. Cover, and let rise again for about 45 minutes to an hour.
Meanwhile
While the dough is rising for the second time, preheat the oven to 375°F.
Second rise
The rolls are done rising when they are touching, soft, and fluffy. Again, if you touch one with your finger, an indent should remain and the dough should not spring back on you.
Fix any untucked seams
If the seams come untucked during the second rise, simply re-pinch them and place them flat-side down in the baking pan again.
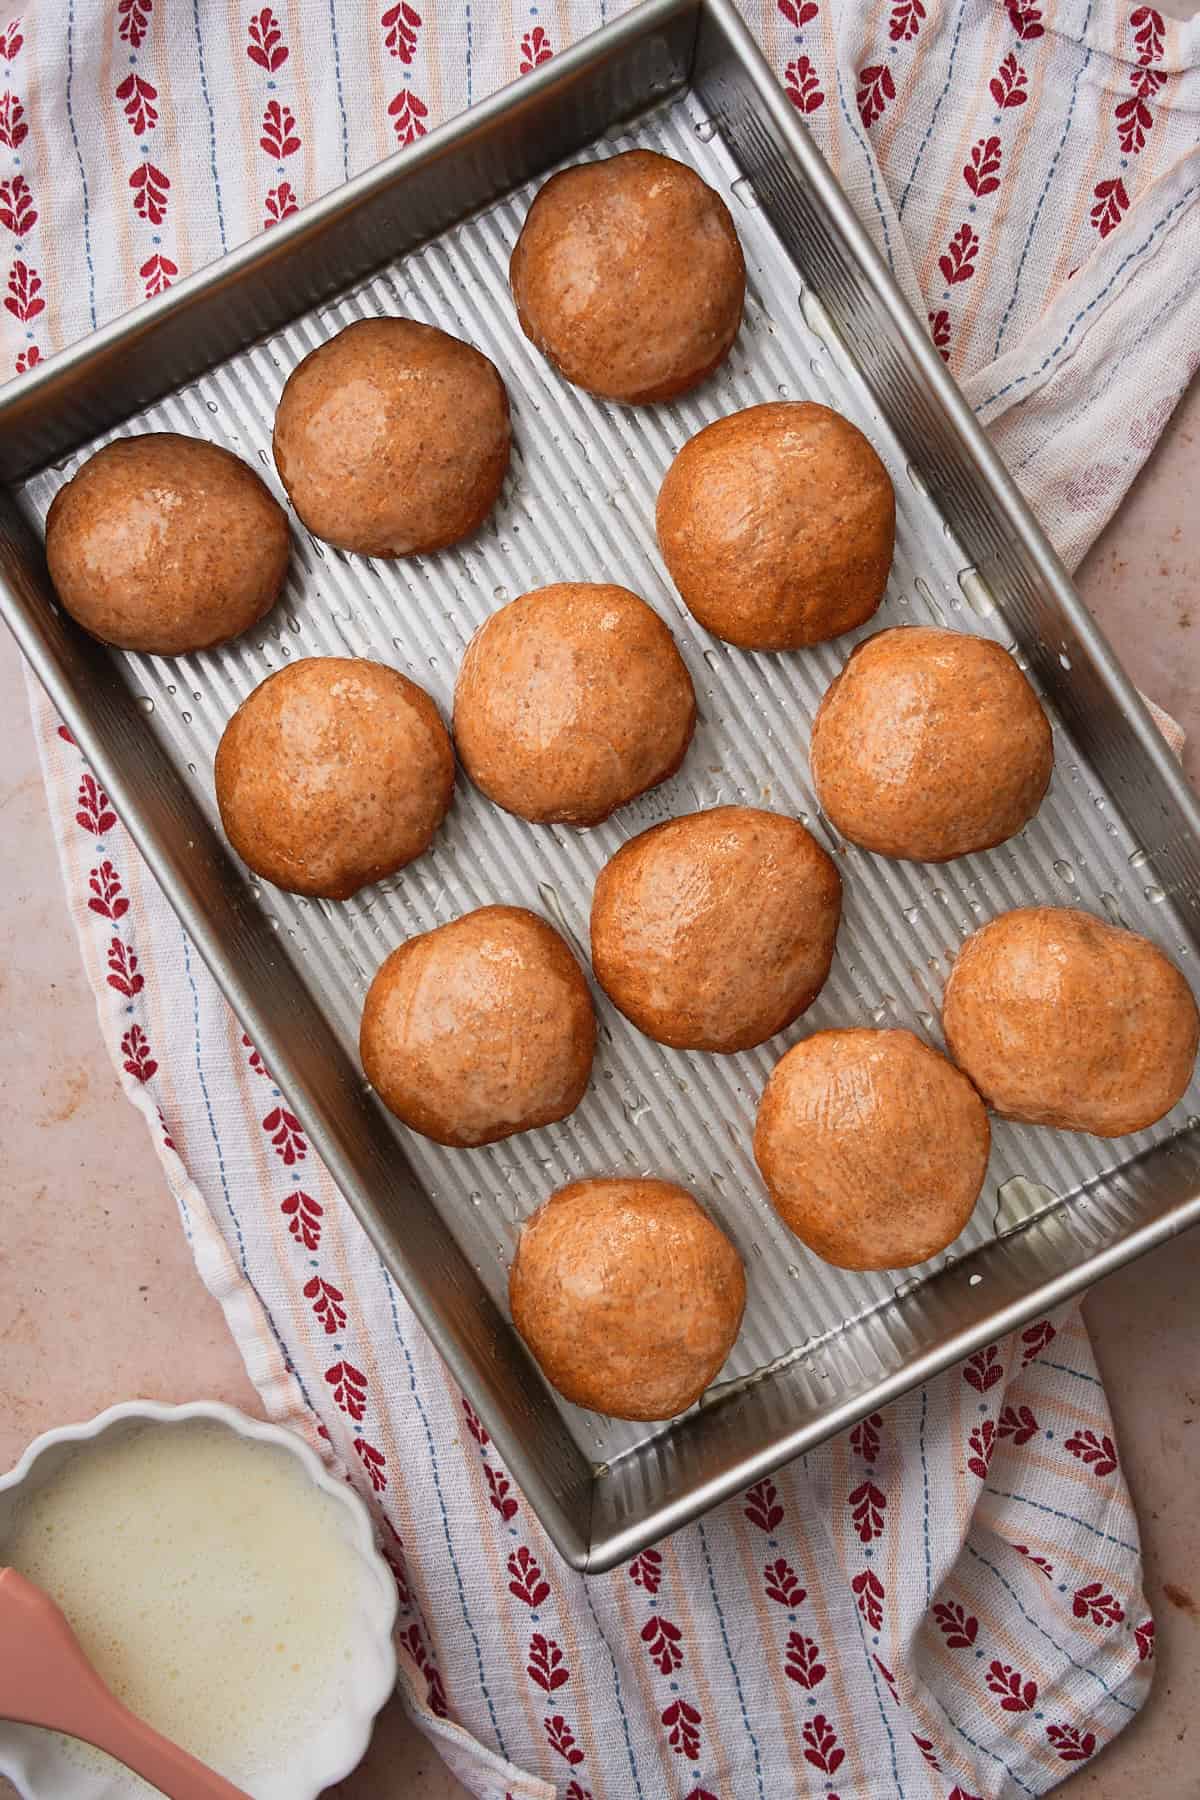
Brush with egg white wash
Whisk together 1 tablespoon of milk with 1 reserved egg white and brush the tops of the buns. This will give them a glossy finish.
Bake
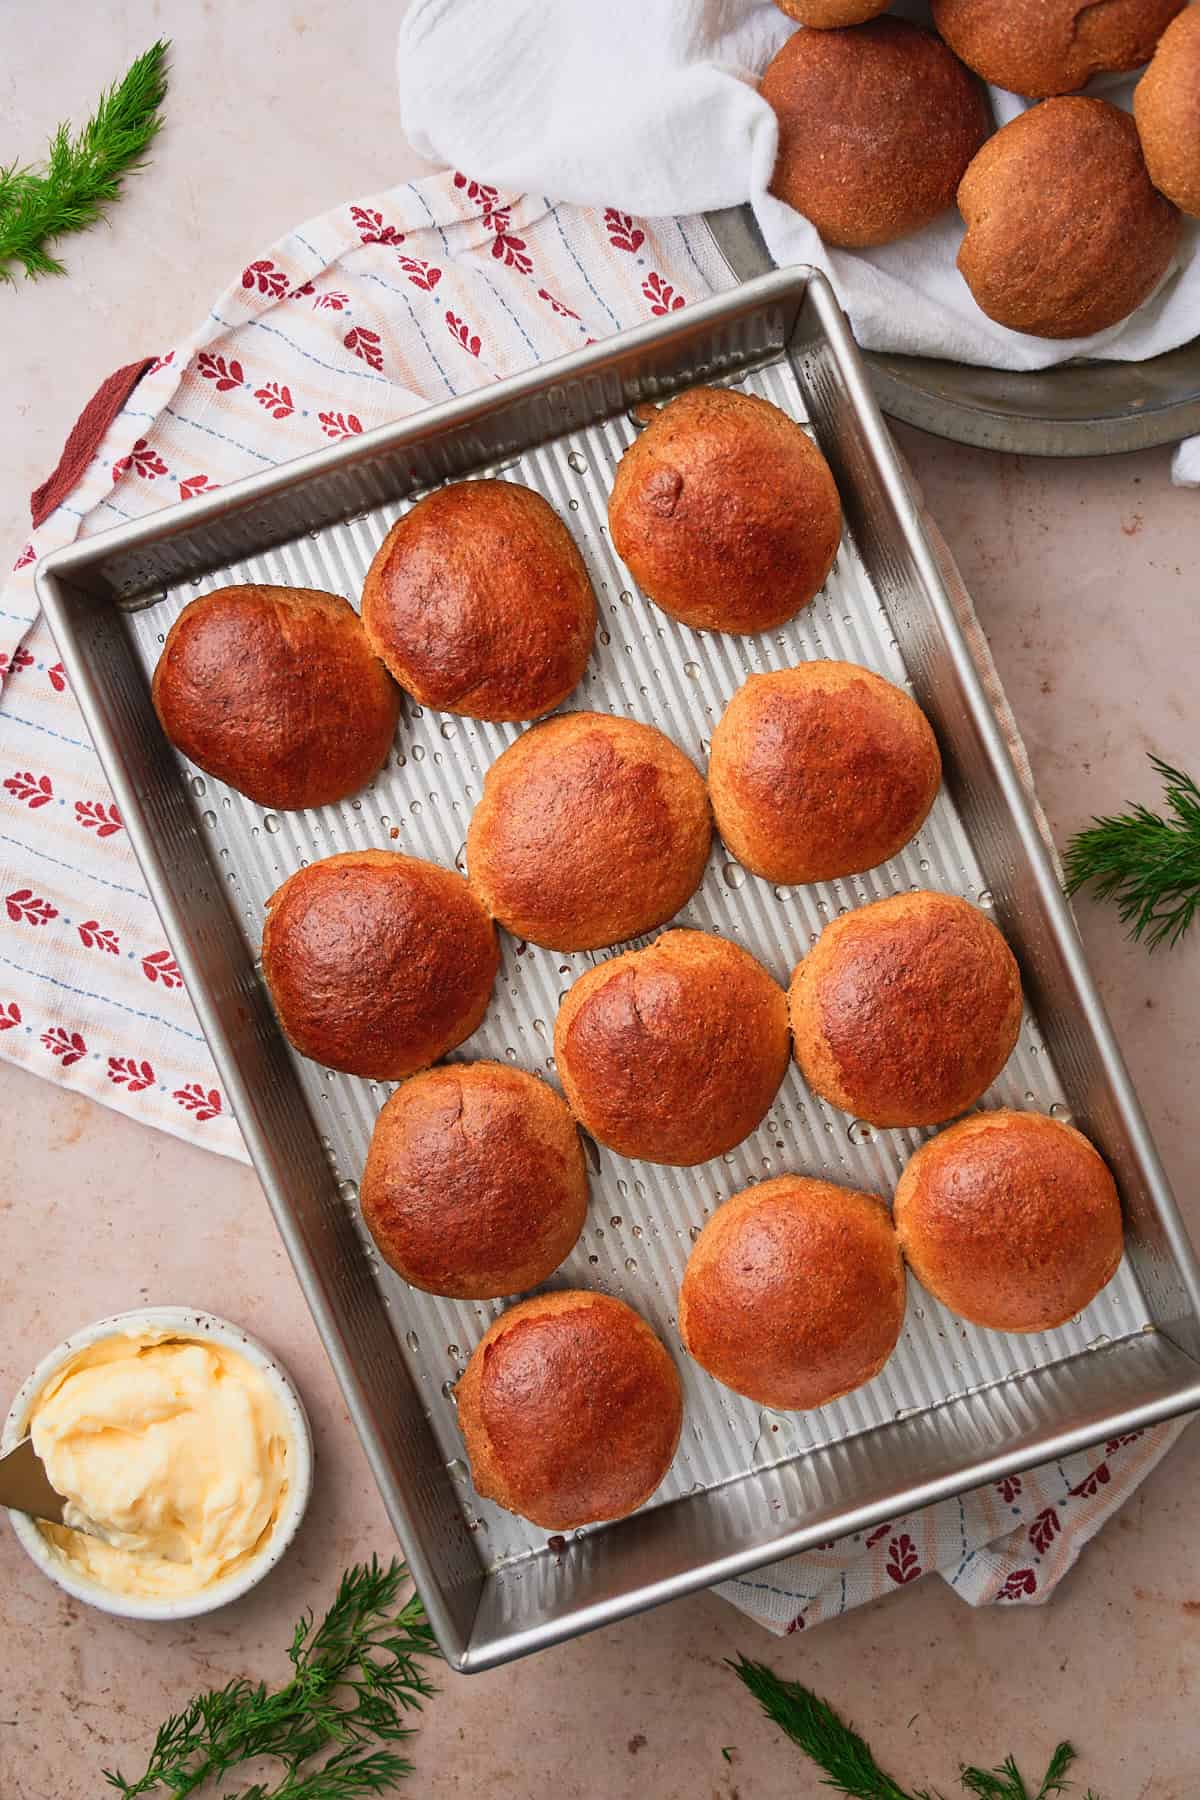
Now, just bake the buns at 375°F for 20-25 until the buns are golden brown. When they come out of the oven, you can rub them with butter for an even yummier finish.

Serve and enjoy!
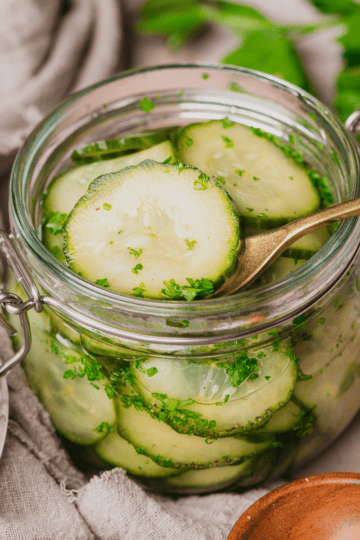
We love to serve this with butter, pickled herring, and fresh dill! It's also great with smoked fish like smoked salmon. We hope to have a pickled herring recipe for you this year, so stay tuned! 🙂
Equipment
- A digital food scale saves us a lot of dishes, makes more accurate and better tasting baked goods (with better texture!) and is all around an amazing tool to have in the kitchen.
- We like using an instant-read thermomter so we can easily monitor the temperature of the milk when blooming the yeast. Too cold, and it won't activate. Too hot, and it will kill the yeast.
- You can always knead dough by hand, but using a stand mixer makes your life a lot easier!
- We suggest getting an oven thermometer to monitor the temperature of the oven. Some ovens run hot, and some run cold. We also suggest never trusting the *beep* sound on the oven. It usually goes off way too early!
- We prefer baking in metal pans for the most consistent results. They also conduct heat more evenly than glass or ceramic. Here's our favorite rectangular 9x13-inch pan.
Storage
Room temperature
Store leftovers in an airtight container at room temperature for up to 4-5 days.
Freezing
Allow the rolls to cool down completely before wrapping tightly and storing in an airtight, freezer safe container for up to 3 months. You can wrap them in foil and warm them gently in the oven before enjoying again.
Make Ahead Tips
If you'd like to make the rolls in advance, follow all of the steps up through shaping the rolls. Then, cover, and place them in the fridge for 8-12 hours to allow them to rise slowly. Bake and continue as usual!

Expert Tips
- Check for yeast freshness. It's an extra step, but it will save you a headache in the long run if your yeast is old. We like making sure our yeast is ready to go by activating it with warm milk before beginning. If it's old, toss it. Then at least you don't go through all of that trouble only to find out your yeast is dead!
- Weigh ingredients with a kitchen scale. Not only does this mean fewer dishes for you, but it it will also ensure a proper texture of the rolls.
- Make sure you don't skip kneading the dough. This step is crucial to ensure the texture is soft and fluffy, rather than dense and hard. Resist the urge to add more flour, and instead, keep kneading to make sure your rolls end up soft.
💬Common Questions
This happens if the dough is too warm when shaped or if the seam on the bun wasn't pressed tightly enough. You can try chilling the rolls briefly before re-shaping them after the second rise to make them a bit easier to work with. Use a decent amount of pressure, but don't go overboard when shaping.
🍴Pairing
In addition to pickled herring, try serving this recipe with a few of these favorites!


These rolls would also taste great with scrambled eggs or these smashed eggs, and some smoked salmon! Try with a bowl of our creamy smoked whitefish chowder!
🌟Leave a Review!
If you make this recipe, we'd love to hear from you! Leave a comment below with your rating for the recipe. Share with us by tagging us on Instagram! We love seeing your creations! 📸
📖 Recipe

Rye Rolls
Ingredients
Buns
- 2 cups all purpose flour 272 grams
- 1 ½ cups + 2 tablespoons dark rye flour 195 grams
- 1.5 teaspoons kosher salt
- 2 ¼ teaspoons instant yeast 7g
- ¾ cup whole milk warmed to 110-115°F
- 3 tablespoons molasses 45g
- 6 tablespoons unsalted butter melted and cooled
- 1 large large egg room temperature
- 2 large egg yolks room temperature
Egg wash
- 1 large egg white reserved from above
- 1 tablespoon whole milk
For serving
- butter for brushing the tops of the buns
Instructions
- In a bowl, combine all purpose flour, rye flour, and kosher salt. Whisk well and set aside.2 cups all purpose flour, 1 ½ cups + 2 tablespoons dark rye flour, 1.5 teaspoons kosher salt
- *Extra step if using instant yeast! Add warm milk (110-115°F), molasses, and yeast to a mixing bowl. Whisk and let it sit for about 10 minutes.2 ¼ teaspoons instant yeast, ¾ cup whole milk, 3 tablespoons molasses
- After 10 minutes, the mixture should be foamy. Then, you can add melted and cooled butter, along with the egg and egg yolks.6 tablespoons unsalted butter, 1 large large egg, 2 large egg yolks
- Add about ⅓ of the flour mixture, and then whisk it well until it's completely incorporated. Add the rest of the dry ingredients to the wet ingredients. With a dough hook in a stand mixer, knead on low speed for 8-10 minutes until the dough is smooth, elastic, and pulls away from the sides of the bowl.
- Grease a clean bowl with some oil, then transfer the dough to the bowl and cover with a clean kitchen towel or plastic wrap. Place it in a warm place to allow it to rise.
- Allow the dough to rise until it's about twice it's size. This should take about 1 - 1 ½ hours. When touched, the dough should not spring back right away and it should instead leave an imprint where your finger was.
- Now, shape the buns into 12 roughly equal-sized pieces. You can use a food scale to weigh them out if you'd like. There's no need to flour your work surface, this dough is pliable and not sticky. On the underside of each piece of dough (working with one piece at a time) create a round ball shape, and pinch the dough where it comes together near the back.
- Place the dough ball with the pinched side down onto a work surface. Use your palm to lightly roll the dough ball into a round shape, applying gentle pressure, and roll until the bread forms a tight dough ball.
- Place the rolls, seam-side down into your greased baking sheet. Cover, and let rise again for about 45 minutes to an hour. While the dough is rising for the second time, preheat the oven to 375°F.
- The rolls are done rising when they are touching, soft, and uffy. Again, if you tough one with your finger, an indent should remain and the dough should not spring back on you.
- If the seams come untucked during the second rise, simply re-pinch them and place them flat side down in the baking pan again.
- Whisk together milk and an egg white and brush the tops of the buns. This will give them a glossy finish.1 large egg white, 1 tablespoon whole milk
- Now, just bake the buns at 375°F for 20-25 until the buns are golden brown. When they come out of the oven, you can rub them with butter for an even yummier finish.
Save This Recipe! 💌
Notes
-
- Check for yeast freshness. Although it's not necessary to bloom instant yeast, if you're not sure if it's still fresh, we recommend doing so to avoid a headache later on!
-
- Weigh ingredients with a kitchen scale. This helps ensure precise, accurate measurements that lead to better-tasting rolls with a better texture. It also means fewer dishes. (YAY!)
-
- Make sure you don't skip kneading the dough. Instead of adding extra flour to the dough, try kneading it a little longer. Sometimes, this is all you need if the dough is a little sticky! Extra kneading helps ensure the rolls stay soft, instead of making them dry from excess flour.
- Storage: Store leftovers in an airtight container at room temperature for up to 4-5 days.
- Freezing: Allow the rolls to cool down completely before wrapping tightly and storing in an airtight, freezer safe container for up to 3 months. You can wrap them in foil and warm them gently in the oven before enjoying again.
- Make-ahead: If you'd like to make the rolls in advance, follow all of the steps up through shaping the rolls. Then, cover, and place them in the fridge for 8-12 hours to allow them to rise slowly. Bake and continue as usual!


Briana says
This one is so versatile and delicious! They stay soft for days if stored properly and they're great for breakfast, lunch, dinner, or a snack!