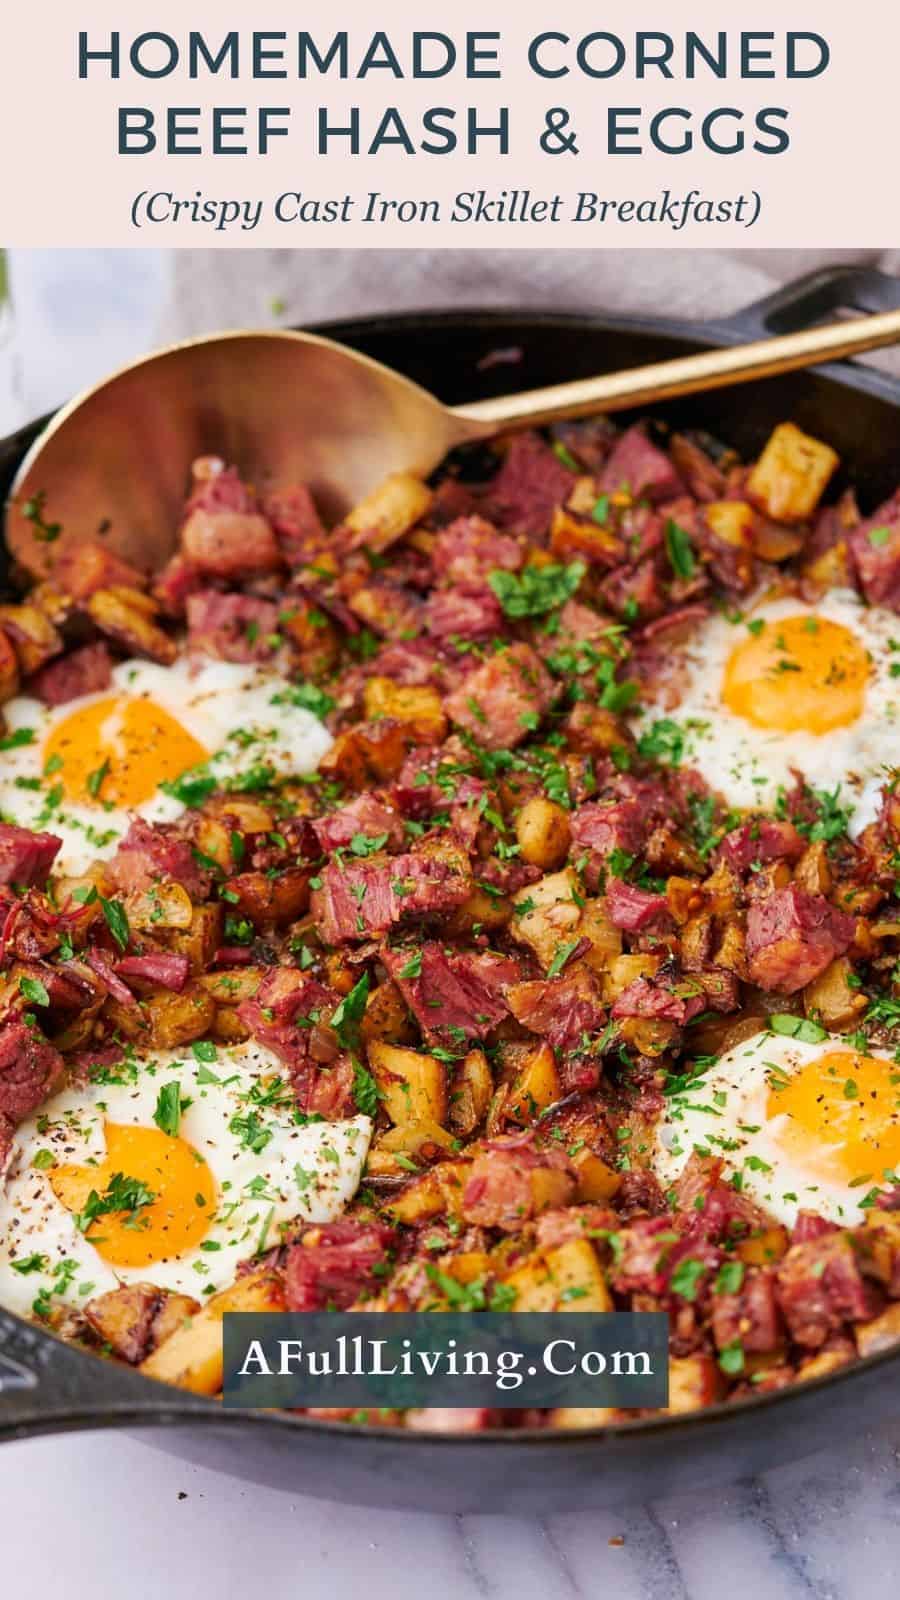
This Homemade Corned Beef Hash and Eggs is the real reason we always cook an extra-large corned beef brisket - because the leftovers the next morning might actually be better than the dinner. Crispy golden potatoes seared in a cast iron skillet, tender corned beef with caramelized, salty edges, and perfectly runny eggs, all in one pan. It's everything the canned version wishes it could be, and it comes together in under an hour.
Save This Recipe! 💌
The Best Way to Use Leftover Corned Beef: Crispy Hash with Eggs 🍳
If you made our Dutch oven corned beef and cabbage or Instant Pot corned beef and found yourself staring at a pile of leftover meat the next morning, may we present this delicious one-skillet breakfast! Corned beef hash might be the single best reason to cook an extra-large brisket. The leftovers might be better than the dinner itself. 🤤
Canned corned beef hash was one of my favorite foods we'd have once in a while at daycare (listen, I was five, and it was delicious). Nowadays, we make it from scratch with real leftover corned beef, and it's truly a game-changer. The crispy, caramelized edges on the potatoes and meat, the Worcestershire and smoked paprika, the runny egg pulling everything together. There's no comparison. And Chamere, who has zero memory of canned hash, has very strong opinions about this version. As in, he asks for it every time we have leftover corned beef. Every. Time. 😂
This is one of our favorite things to make the morning after St. Patrick's Day, but honestly, we make it anytime we have leftover corned beef. It feeds a crowd right out of the skillet, cleanup is minimal, and it pairs perfectly with warm rye rolls and coffee. 🤤
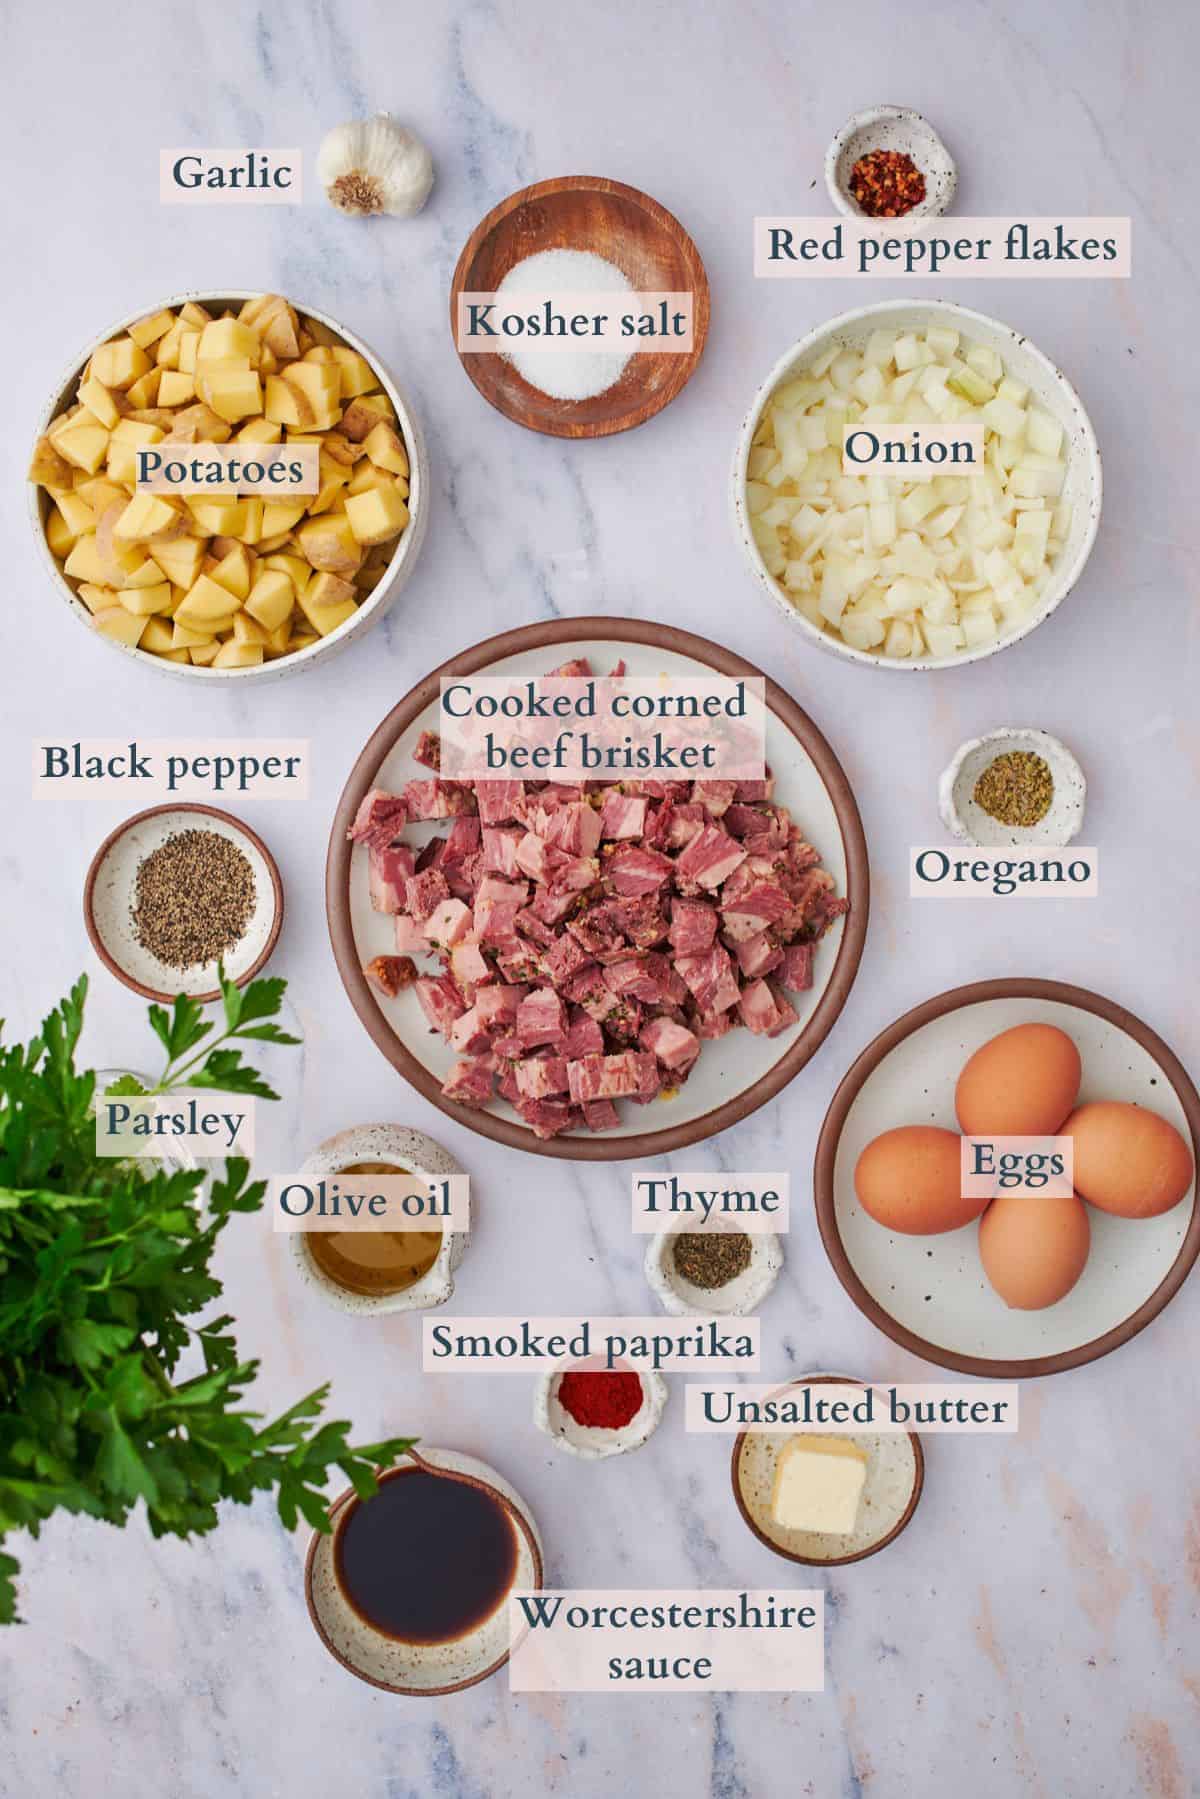
🍳 Ingredients for Homemade Corned Beef Hash with Eggs
This recipe keeps things simple - you probably already have everything you need if you cooked corned beef the day before!
How to Make Crispy Corned Beef Hash and Eggs in a Skillet ✨
Once you get the potatoes started, this whole thing comes together fast. The key is letting everything crisp up without touching it too much.
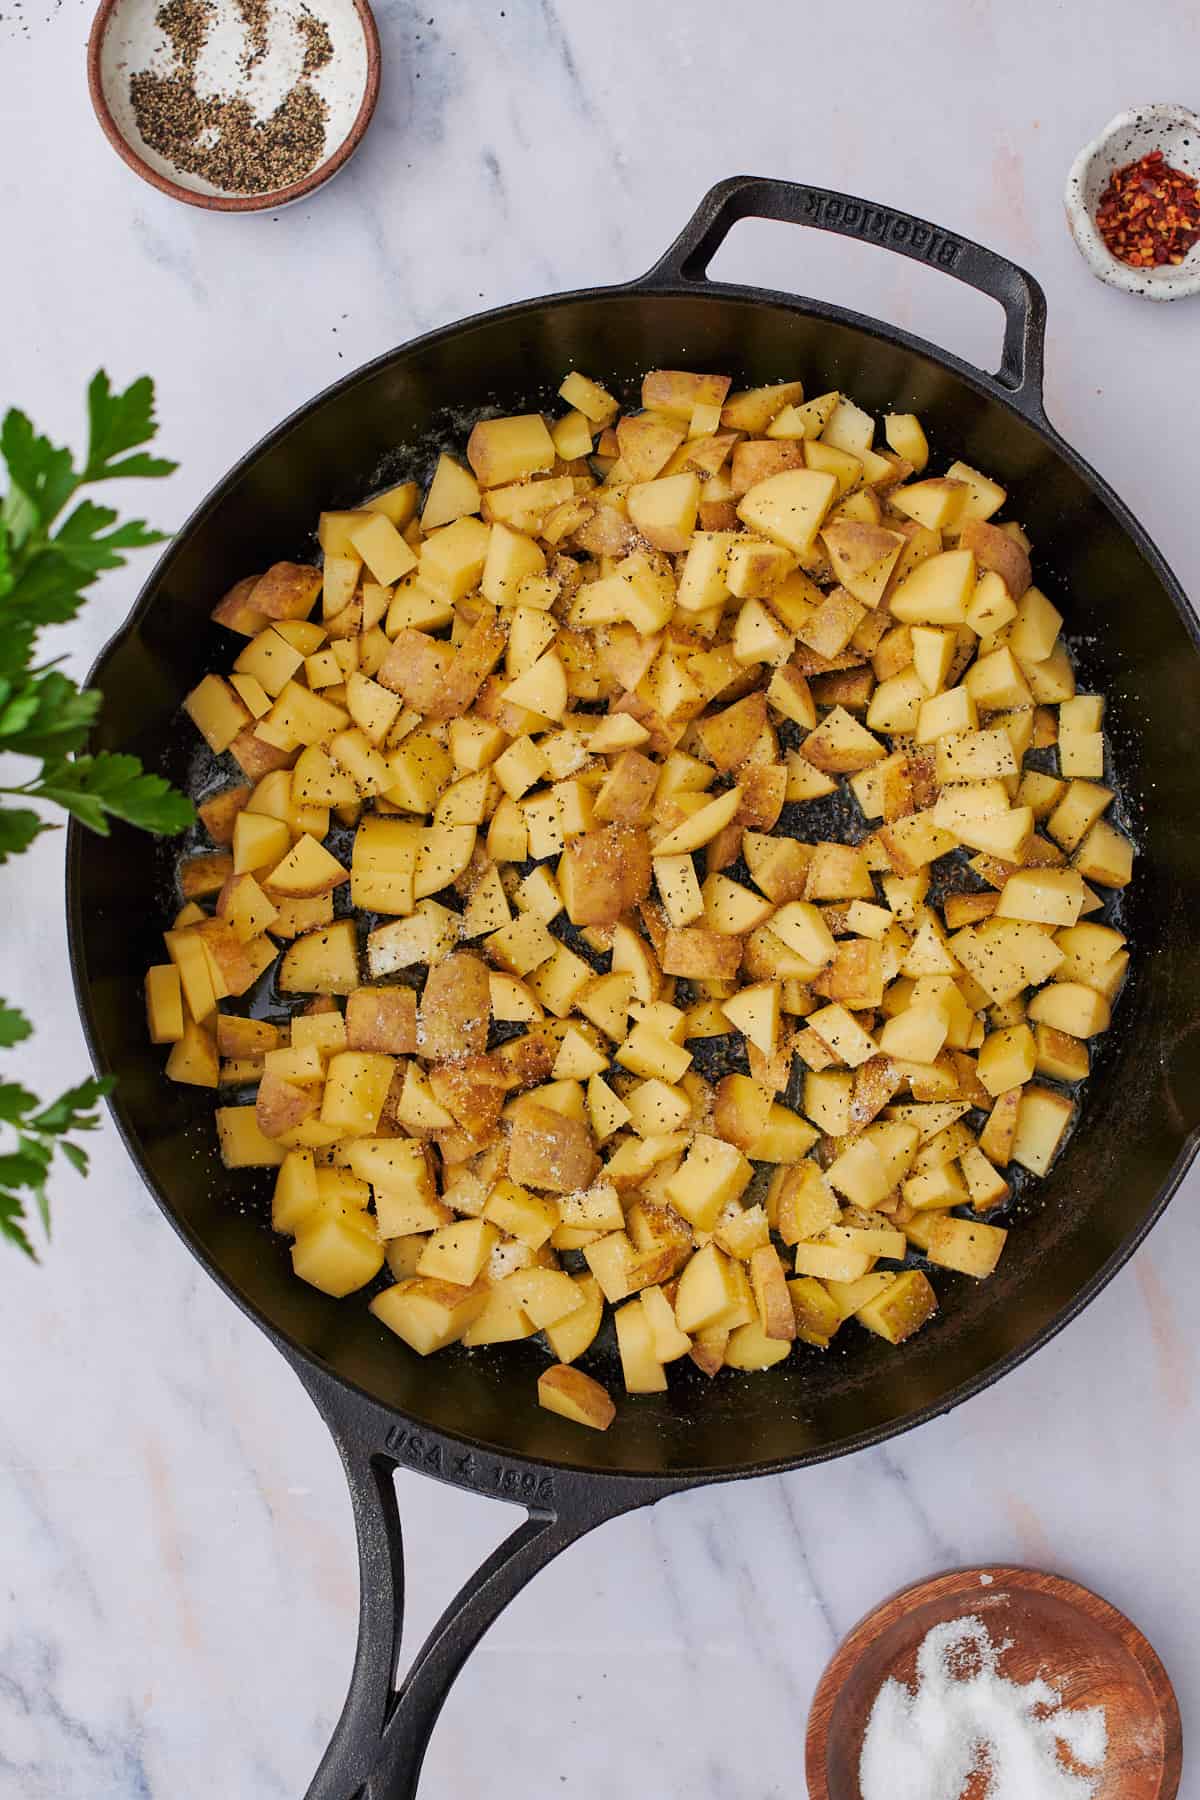
- Step 1: Heat oil in a large cast-iron skillet over medium heat. Add the diced potatoes and season well with salt and pepper. Let them cook without stirring to build a golden crust on the bottom.
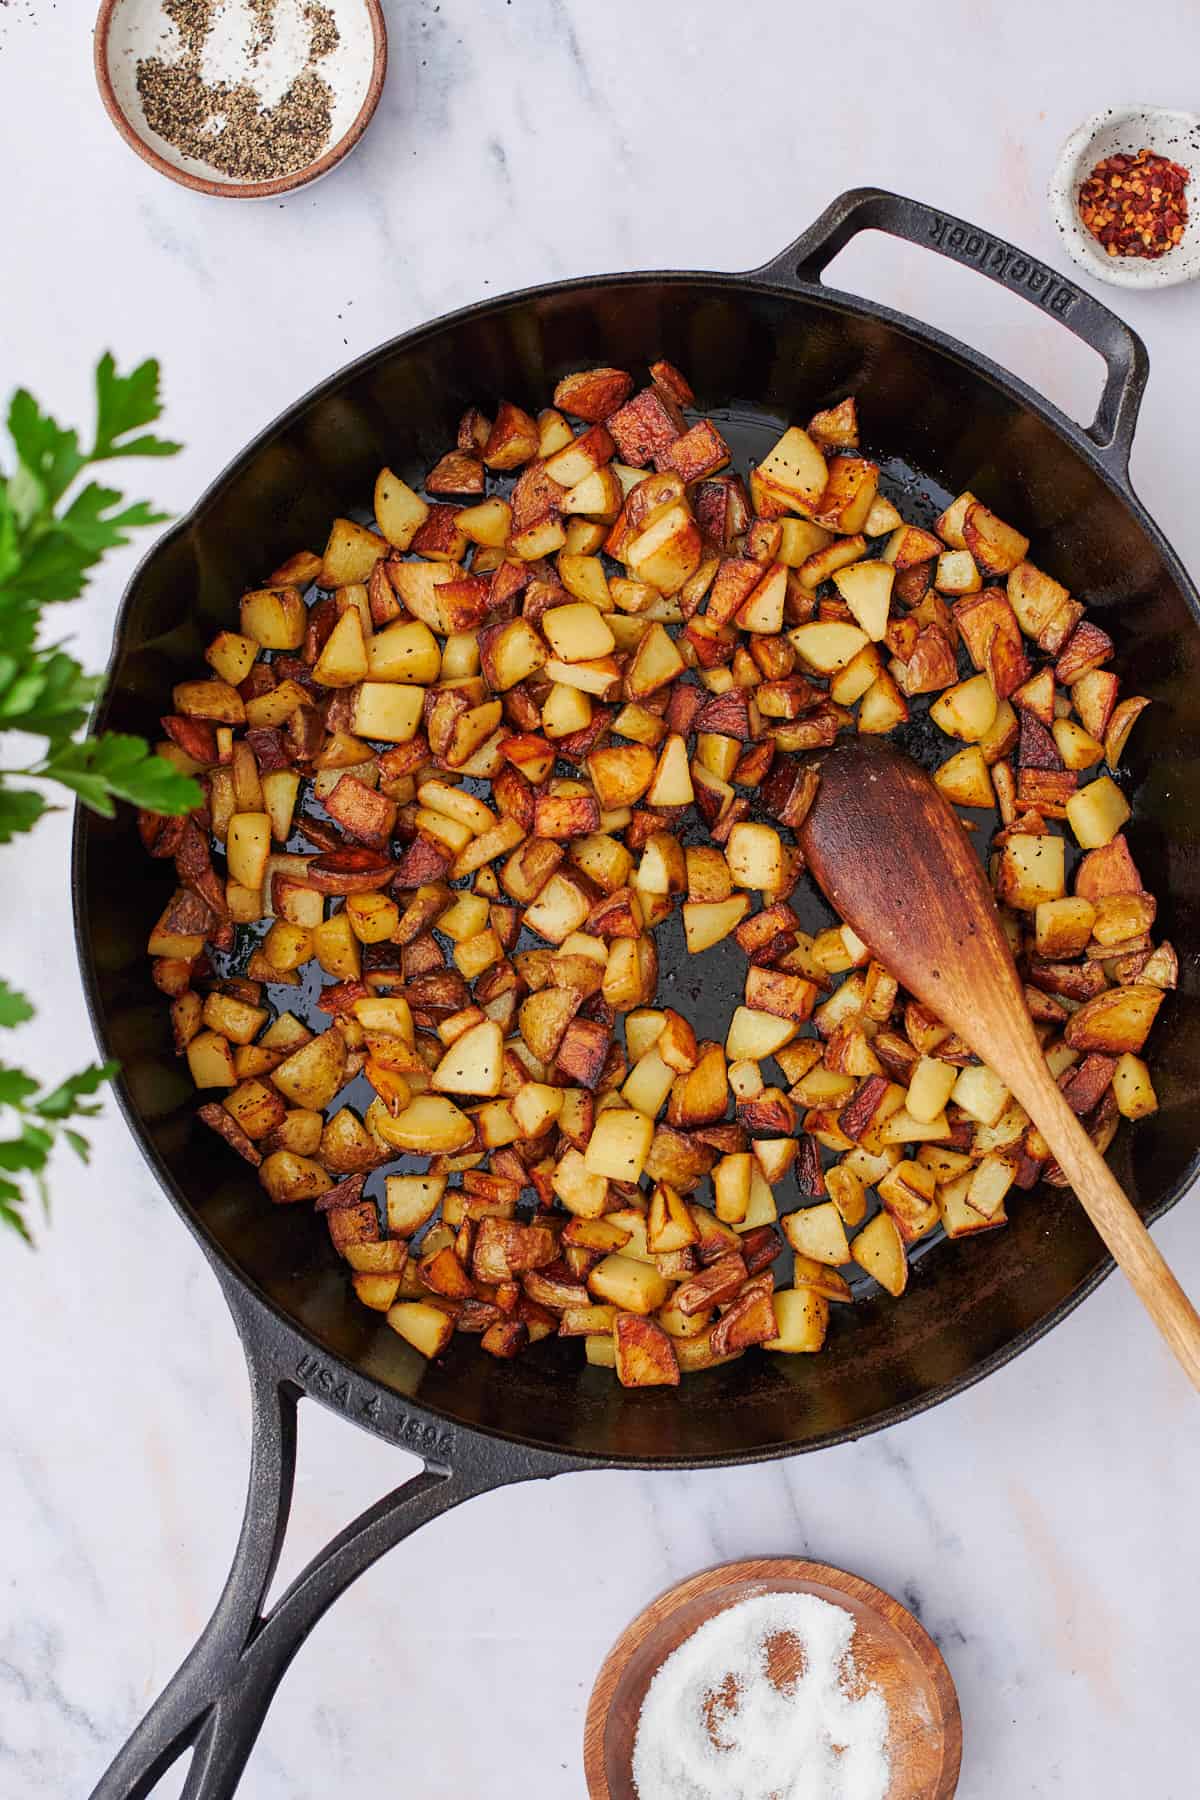
- Step 2: After the potatoes have developed a nice crust on one side, toss them and let them sit again. Repeat once more - you want golden brown on multiple sides. This takes some patience, but it's worth it.
🔪 A cast-iron skillet makes all the difference here. It holds heat like nothing else, which is how you get those crispy, golden edges on both the potatoes and the corned beef.
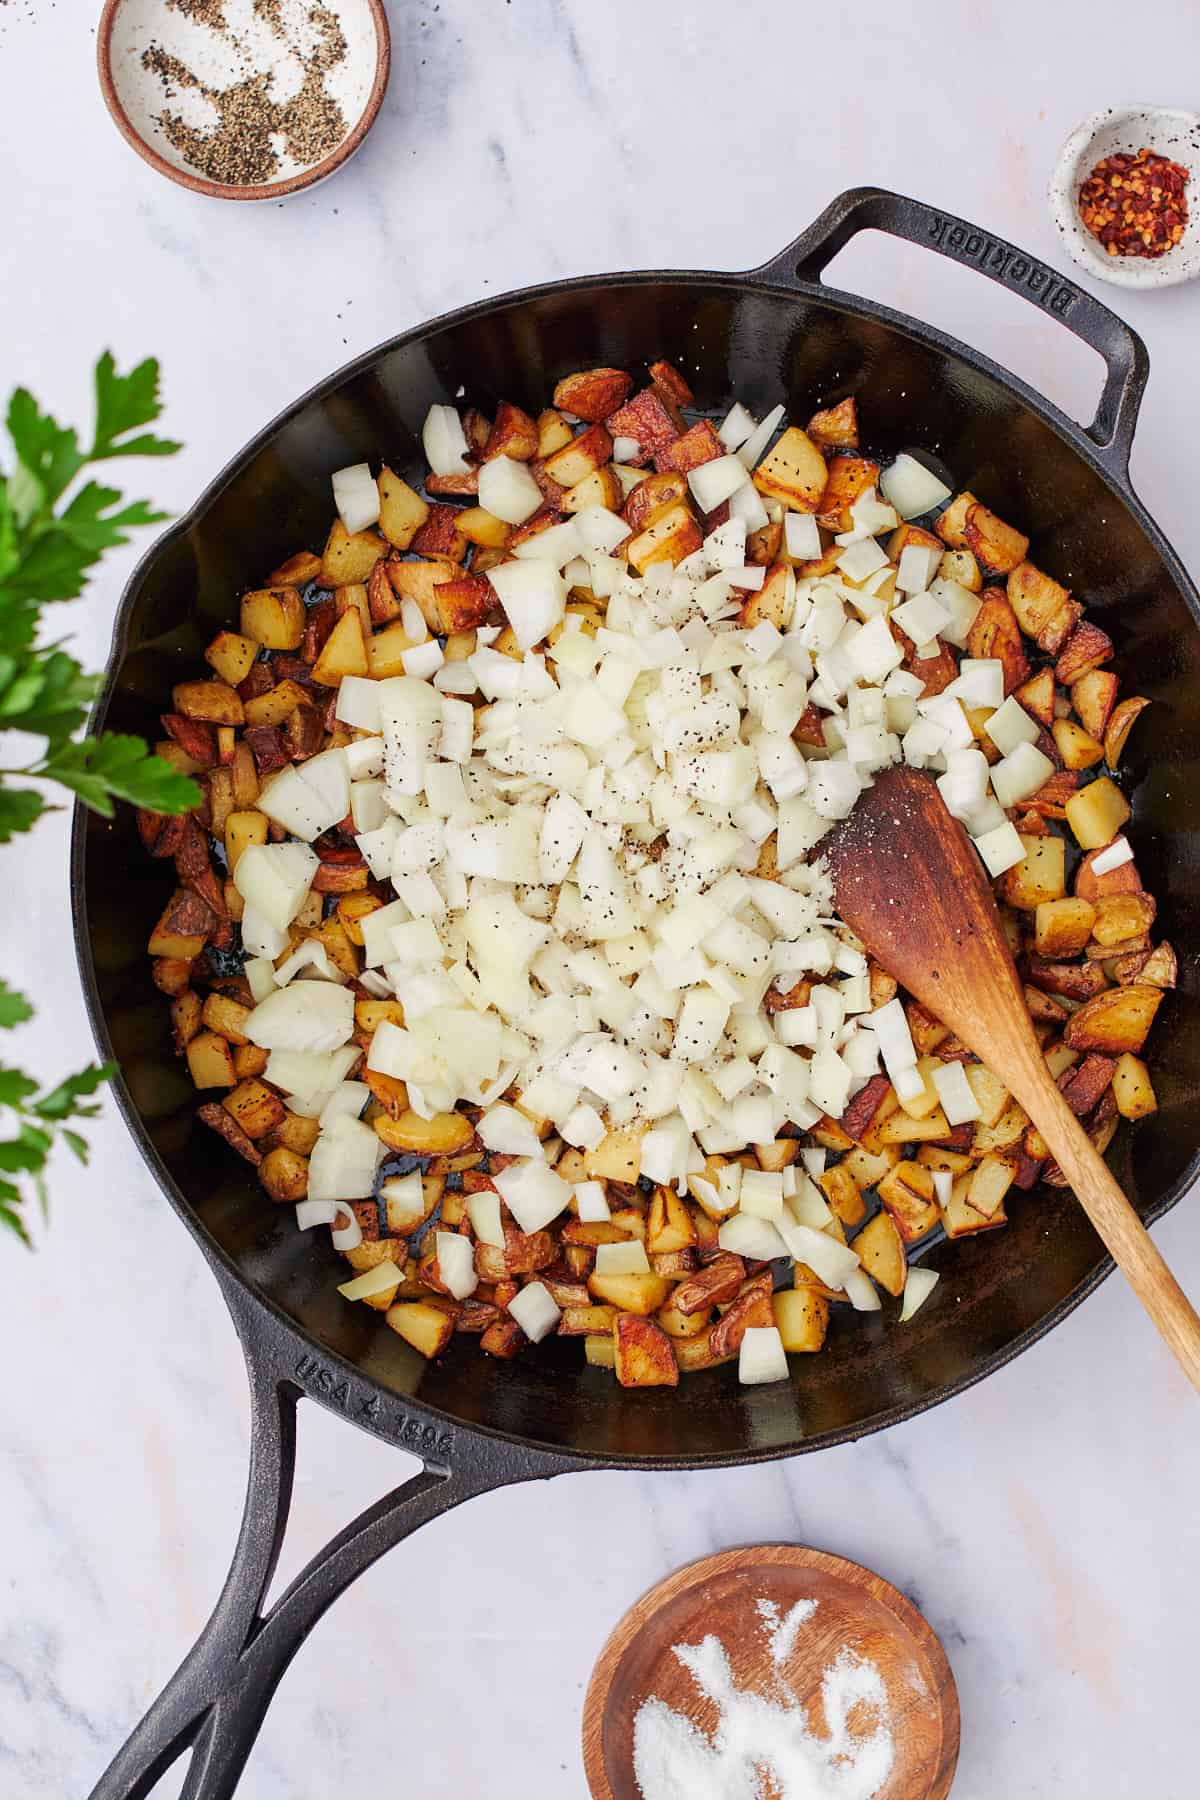
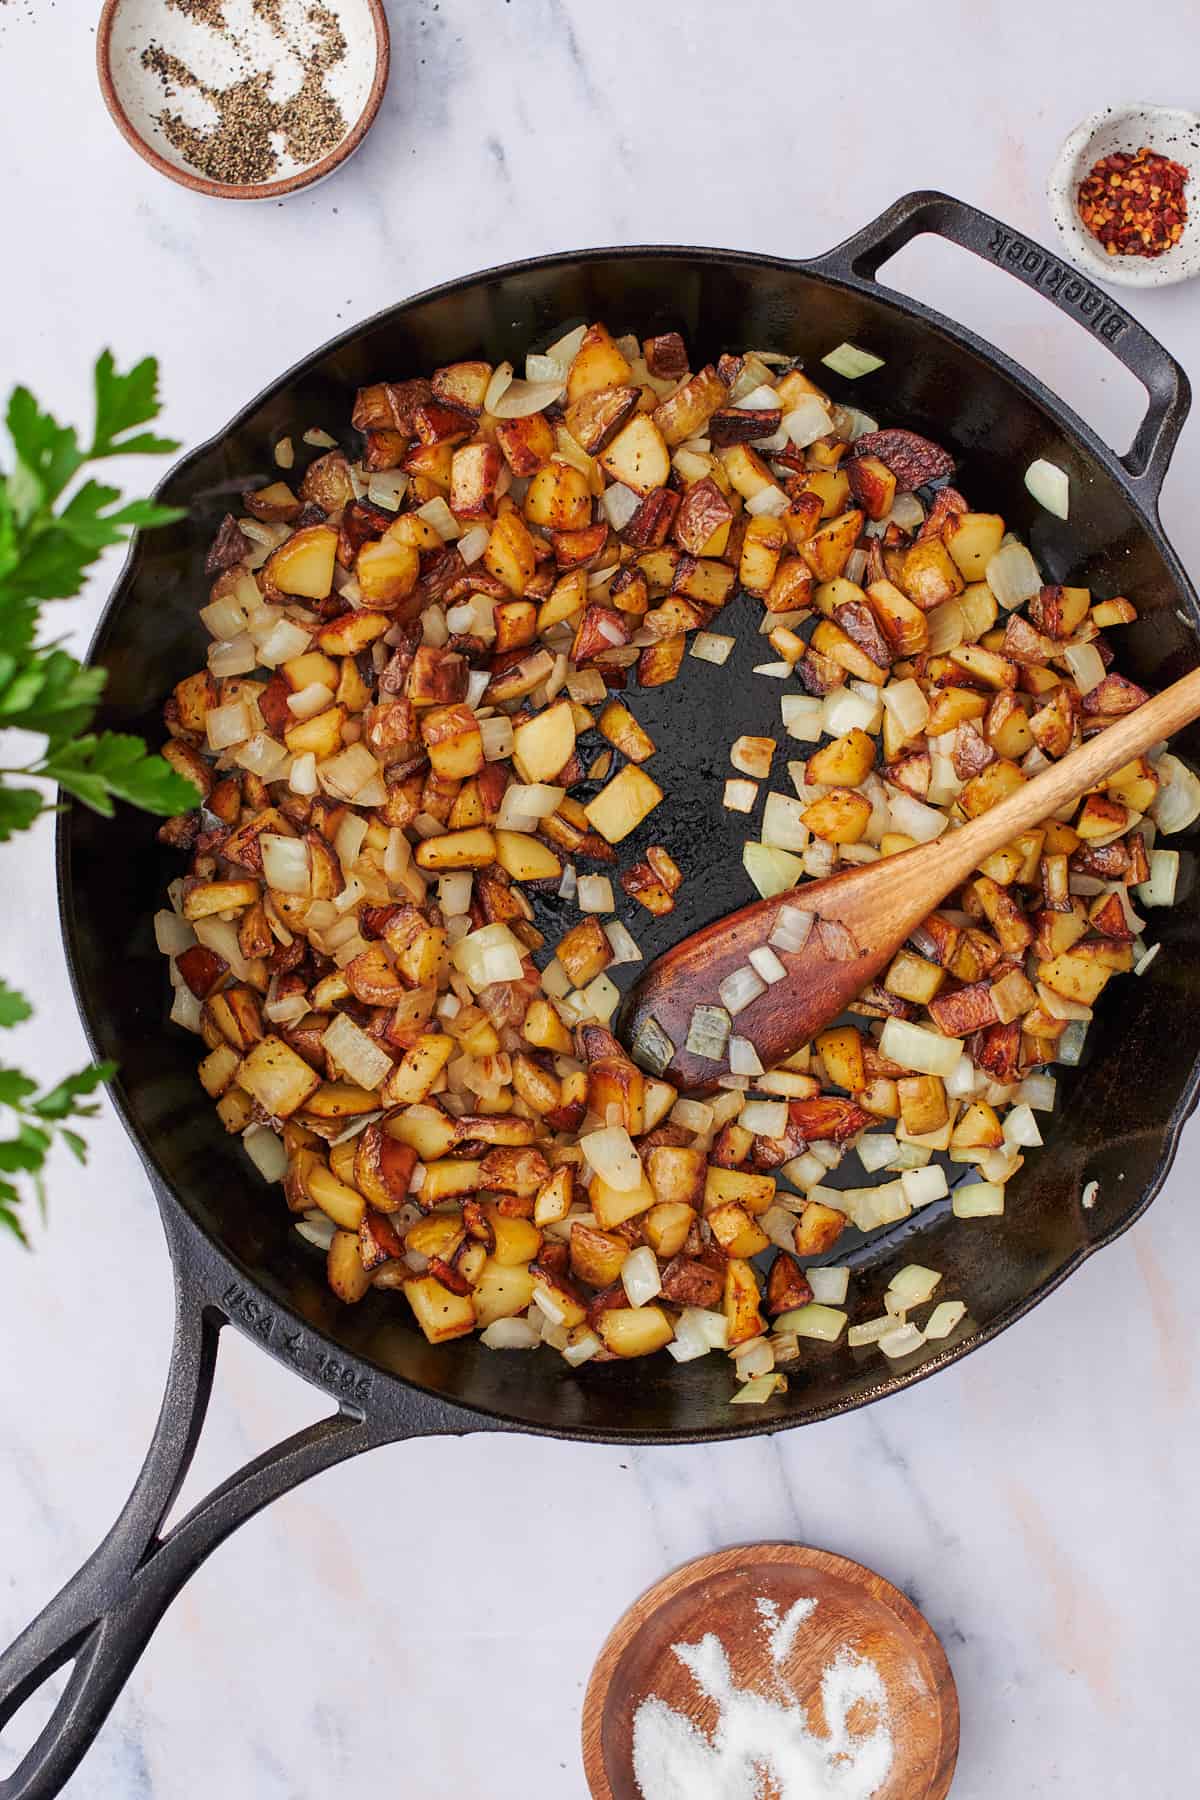
- Step 3: Melt butter in the skillet, then add the diced onion with a pinch of salt. Cook until softened and starting to turn golden. Add the garlic along with the thyme, oregano, smoked paprika, and red pepper flakes. Stir for about a minute until everything is fragrant.
After the potatoes have developed a nice crust on one side, toss them and let them sit again. Repeat once more - you want golden brown on multiple sides. This takes some patience, but it's worth it.
🧂 Go easy on the salt at first. Corned beef is already quite salty, and the potatoes need seasoning too - but you can always add more. Season in stages and taste as you go.
- Step 3: Melt butter in the skillet, then add the diced onion with a pinch of salt. Cook until softened and starting to turn golden.
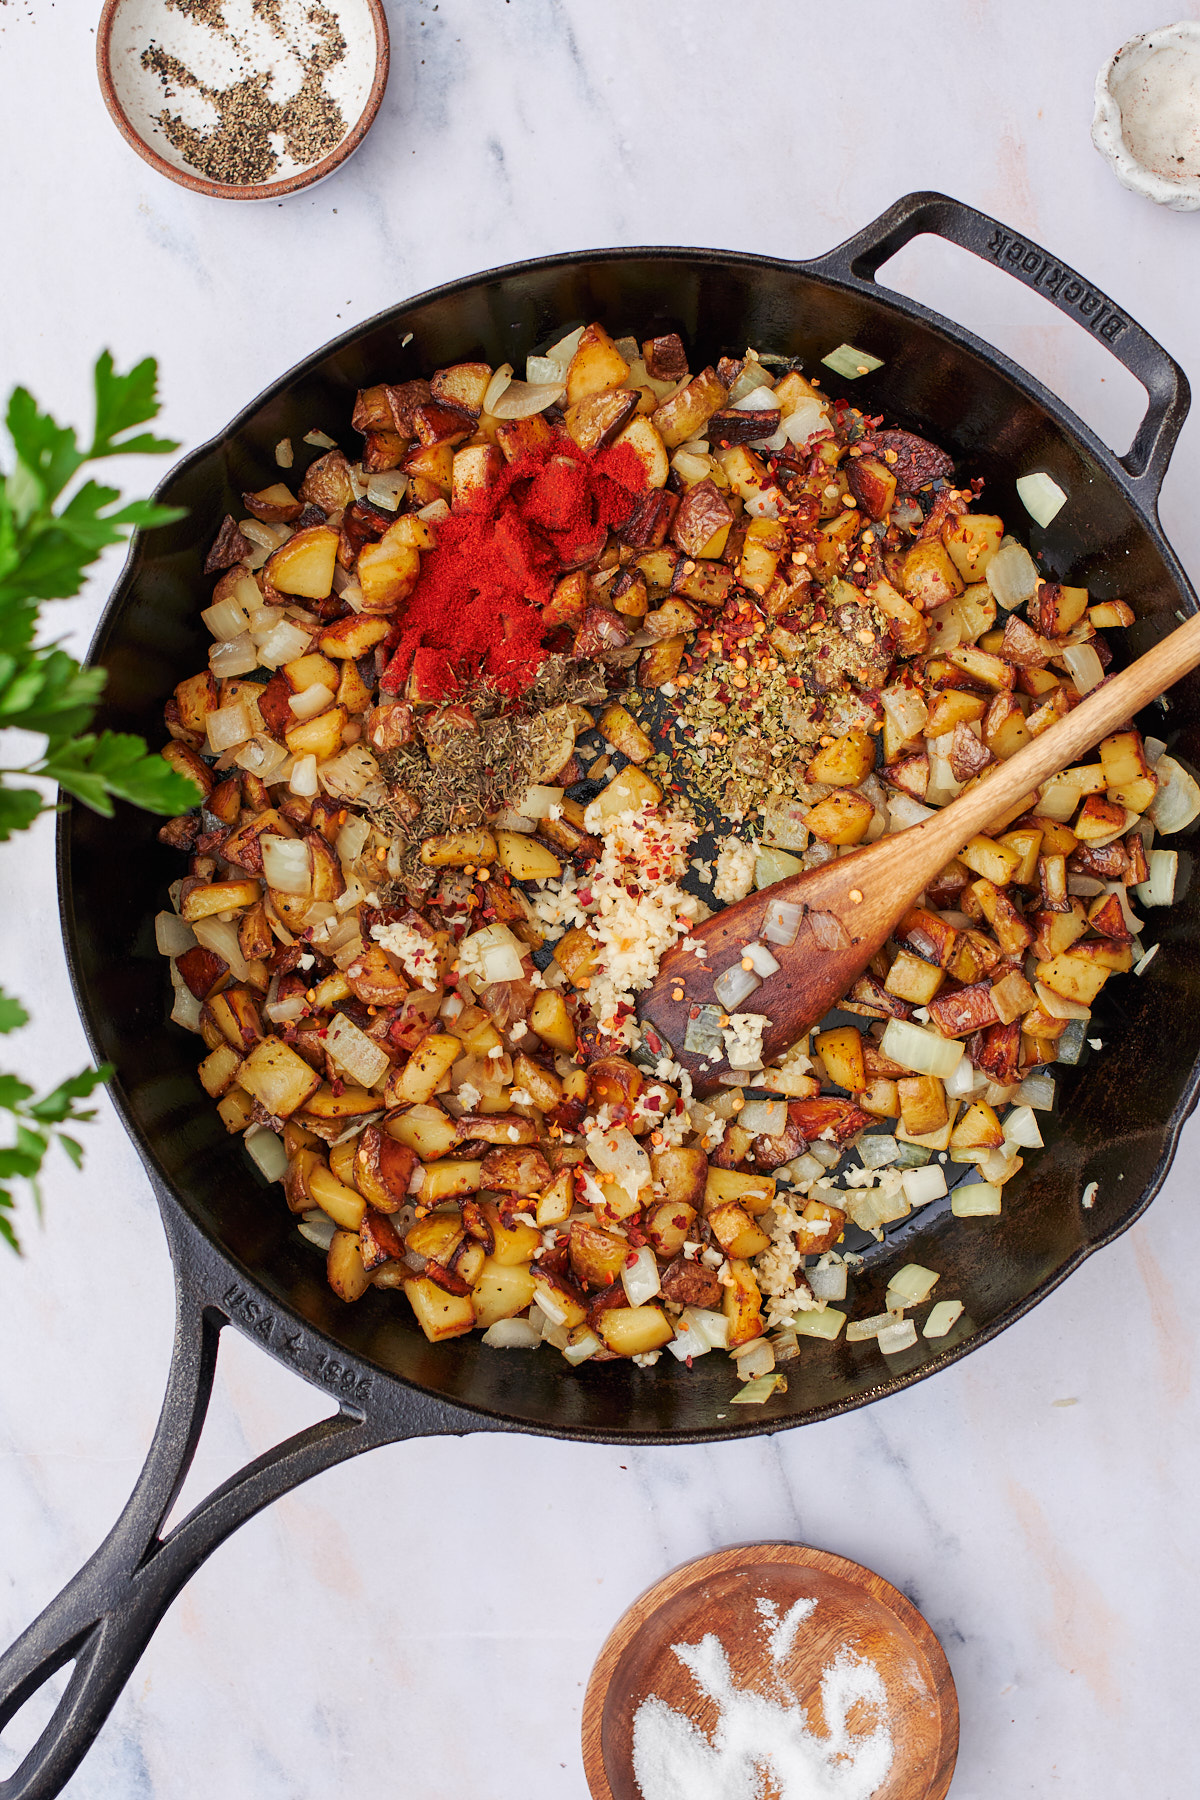
Add the garlic along with the thyme, oregano, smoked paprika, and red pepper flakes. Stir for about a minute until everything is fragrant.
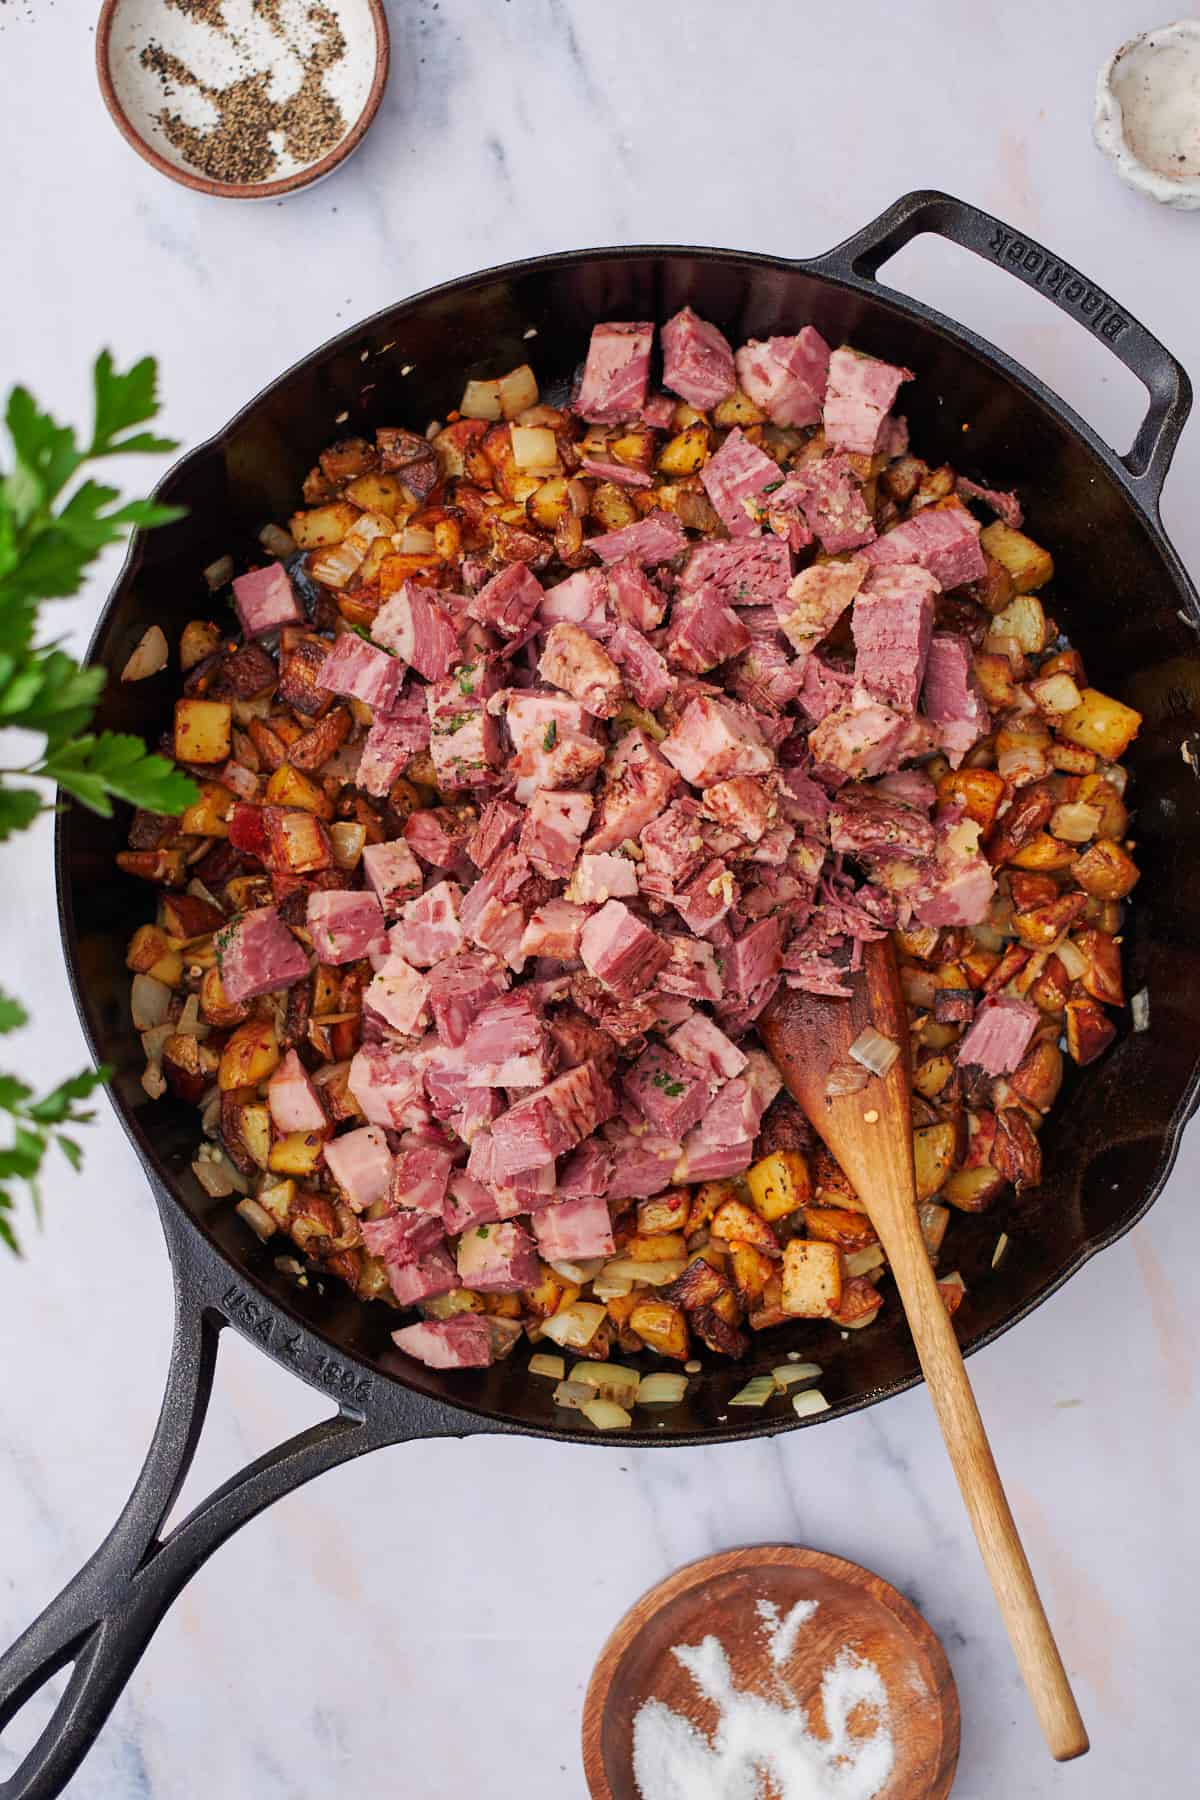
- Step 4: Increase the heat to medium-high and add the chopped corned beef and a splash of Worcestershire sauce.
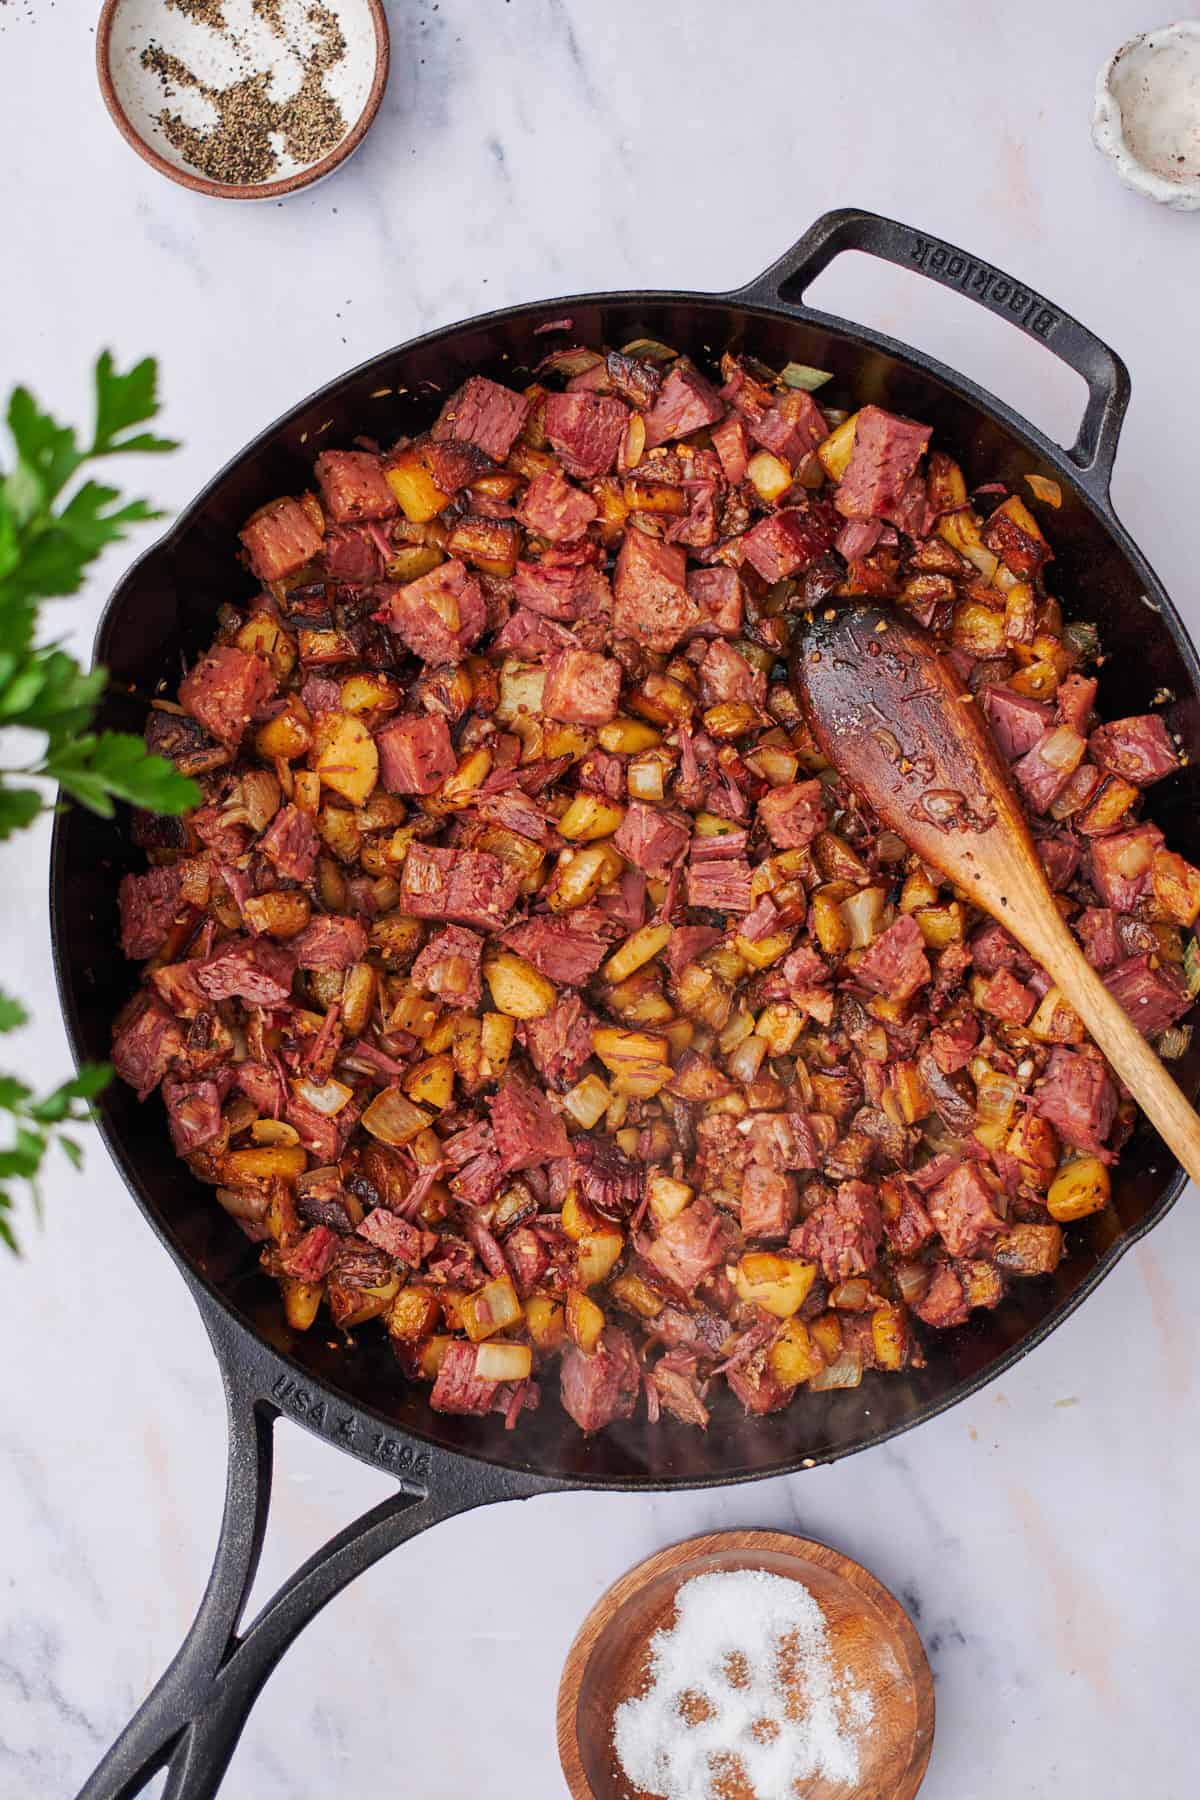
Toss everything together and then leave it alone. Let the corned beef render out some fat and develop crispy, caramelized edges.
💡 Resist the urge to stir. This is the most common mistake with hash. Every time you stir, you're preventing that crispy crust from forming. Let it sit, let it sizzle, and only toss it once or twice during this step.
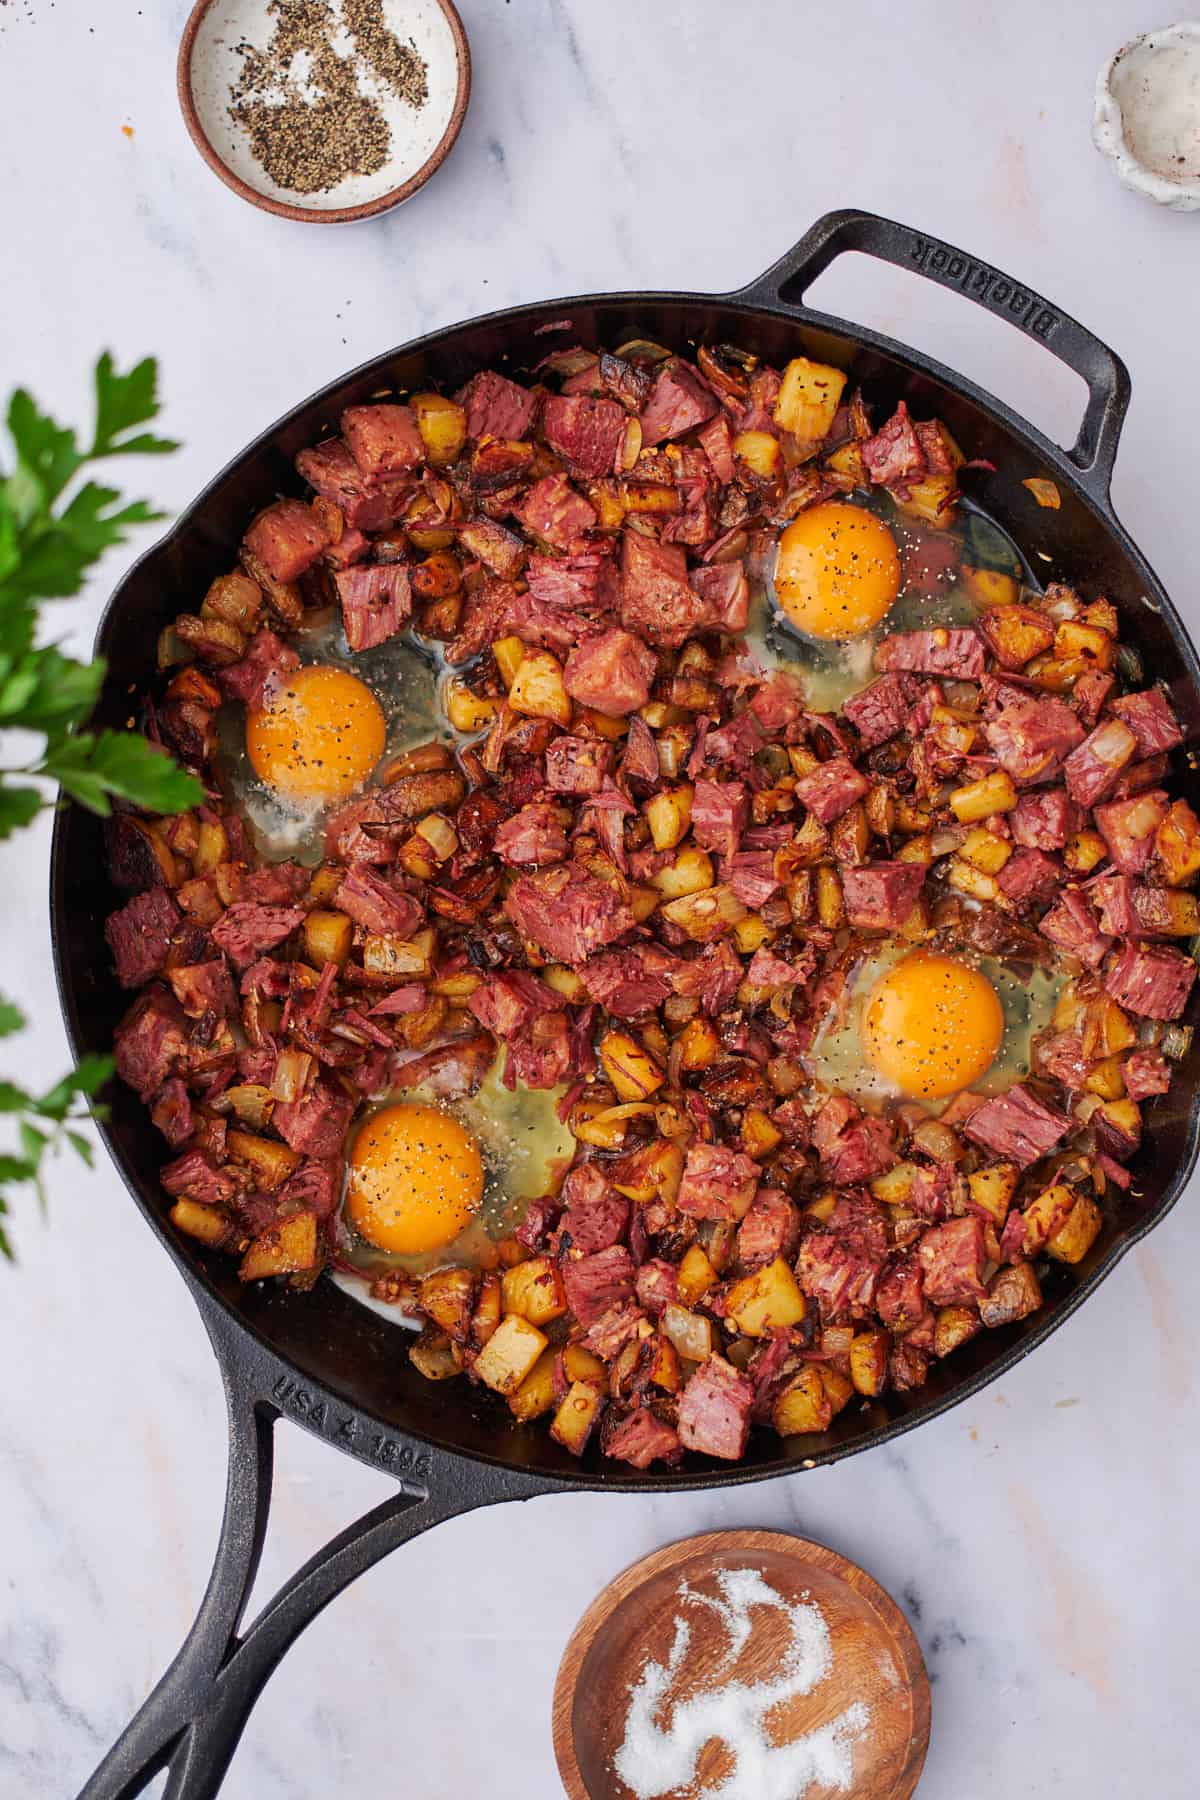
- Step 5: Make small wells in the hash and add a little oil or butter to each one. Crack the eggs into the wells, season with salt and pepper, then reduce the heat to medium-low and cover the skillet.
🍳 Don't skip the oil in the wells. A little fat before the egg goes in keeps them from sticking to the cast iron and makes serving much easier.
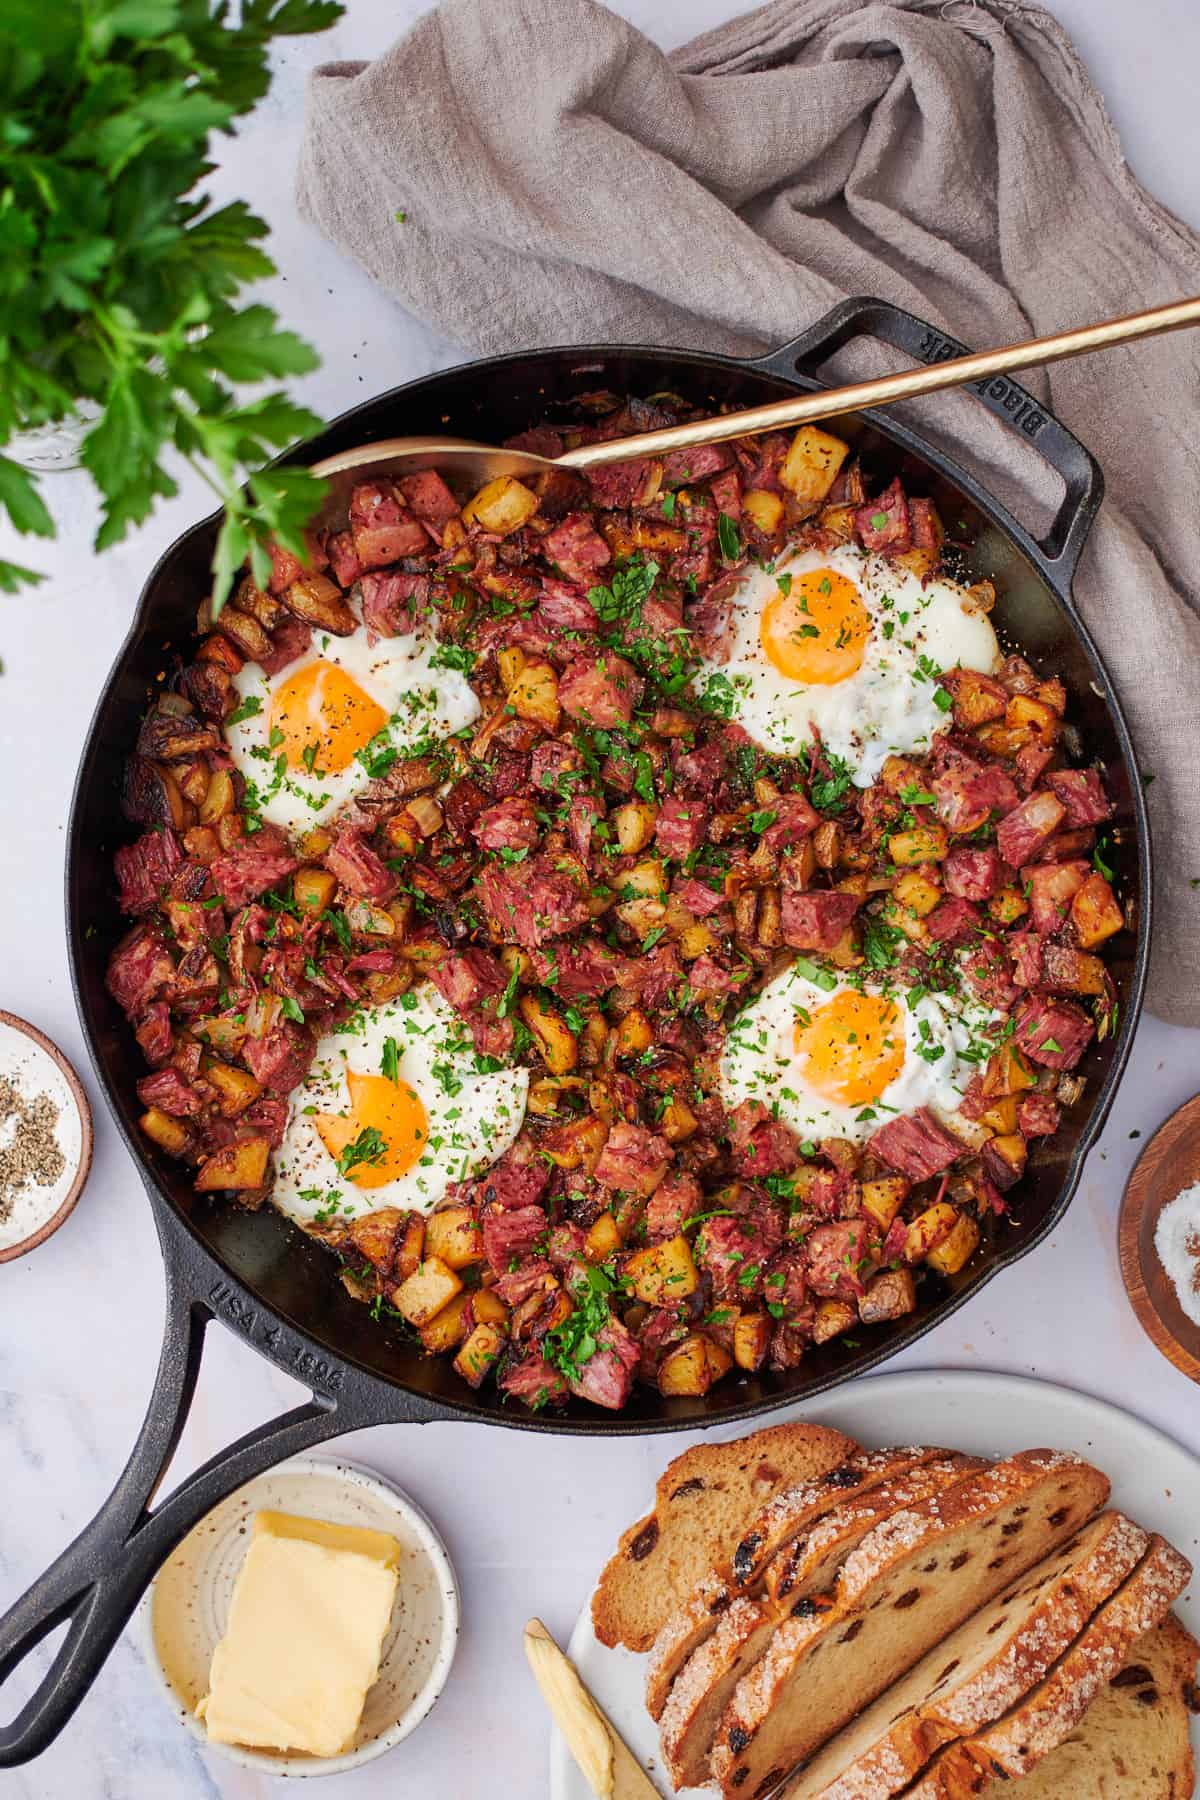
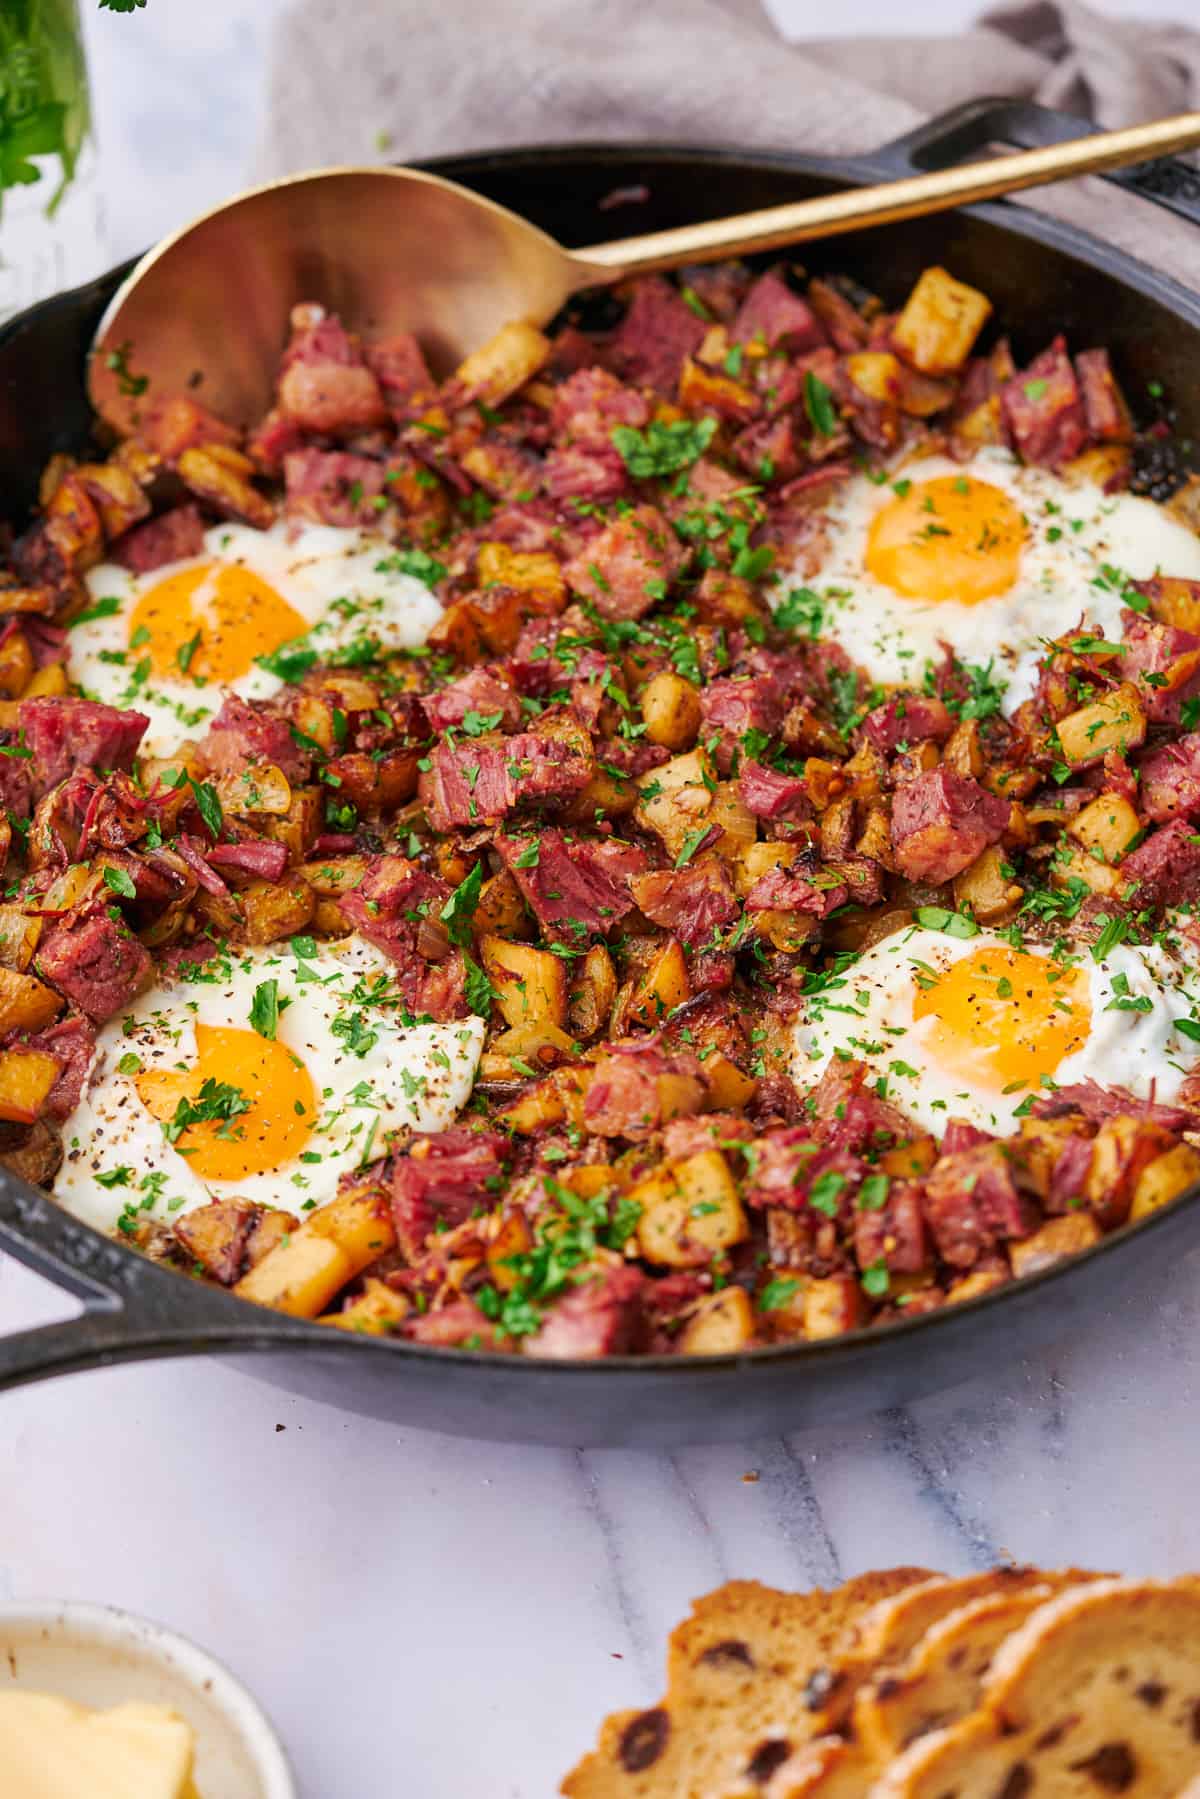
- Step 6: Cook covered until the egg whites are set, but the yolks are still runny - about 4 to 5 minutes. Keep an eye on them, because they go from perfect to overcooked quickly. Garnish with fresh parsley and a crack of black pepper. Serve straight from the skillet or plate it up!
Serve with a few soft rye rolls or crusty bread on the side and a cup of coffee. Or if it's St. Patrick's Day brunch, go all in with a Baileys coffee. 🤤
🌟Leave a Review!
If you make this Crispy Skillet Corned Beef Hash with Eggs, we'd love to hear from you! Leave a comment below with your rating for the recipe. Share with us by tagging us on Instagram! We love seeing your creations! 📸
📖 Recipe

Homemade Corned Beef Hash and Eggs (Crispy Skillet Recipe!)
Equipment
Ingredients
For the Hash
- 2 tablespoons oil
- 1½ pounds Yukon Gold or baby red potatoes diced (no need to peel)
- 1 to 3 teaspoons kosher salt divided (add in stages - corned beef is already salty, see notes)
- 1 teaspoon black pepper divided
- 2 tablespoons unsalted butter
- 1 large large yellow onion diced
- 6 cloves garlic minced
- 1 pound cooked corned beef brisket chopped into bite-sized pieces (see our Dutch oven corned beef and cabbage or Instant Pot corned beef)
- 1 teaspoon dried oregano
- ½ teaspoon dried thyme
- ½ teaspoon smoked paprika
- ¼ teaspoon red pepper flakes optional, to taste
- 1 tablespoon Worcestershire sauce
For the Eggs
- 4 large eggs
- 1 tablespoon oil for the wells
- Salt and pepper to taste
- 2 tablespoons fresh parsley chopped (for garnish)
Instructions
- Preheat a large cast iron skillet over medium heat. Add oil, followed by the diced potatoes. Season with salt and pepper. Cook without stirring for 7 to 10 minutes to build a golden crust on the bottom. Toss, then cook undisturbed for another 5 to 7 minutes. Toss once more and cook an additional 4 to 5 minutes until golden brown on multiple sides.2 tablespoons oil, 1½ pounds Yukon Gold or baby red potatoes, 1 to 3 teaspoons kosher salt, 1 teaspoon black pepper
- Melt butter in the skillet. Add the diced onion with a pinch of salt and cook until softened, about 4 to 5 minutes.2 tablespoons unsalted butter, 1 large large yellow onion
- Add the minced garlic, thyme, oregano, smoked paprika, and red pepper flakes. Stir often and cook until fragrant, about 1 minute.6 cloves garlic, 1 teaspoon dried oregano, ½ teaspoon dried thyme, ½ teaspoon smoked paprika, ¼ teaspoon red pepper flakes
- Increase heat to medium-high. Add the chopped corned beef and Worcestershire sauce, tossing to combine. Cook for 5 to 7 minutes, stirring only once or twice, to render out the fat and crisp up the corned beef.1 pound cooked corned beef brisket, 1 tablespoon Worcestershire sauce
- Create 4 small wells in the hash. Add a small drizzle of the remaining olive oil into each well. Crack the eggs into the wells and season with salt and pepper. Reduce heat to medium-low and cover the skillet. Cook for 4 to 5 minutes for runny yolks, or up to 8 minutes for fully set yolks. Make sure the egg whites are completely set before removing from heat.4 large eggs, 1 tablespoon oil, Salt and pepper
- Garnish with fresh parsley, flaky salt, and cracked black pepper. Serve immediately straight from the skillet.2 tablespoons fresh parsley
Save This Recipe! 💌
Notes
- Storage: Store leftover hash (without eggs) in an airtight container in the fridge for up to 5 days. Reheat in a hot skillet, in the oven at 400°F, or in an air fryer until crispy and heated through. Cook fresh eggs when you're ready to eat - reheated eggs get rubbery.
- Freezing: The potato and corned beef hash freezes well without the eggs. Cool completely, spread in a single layer on a parchment-lined baking sheet, and freeze until solid (about 2 hours). Transfer to a freezer-safe bag and store for up to 3 months.
- The corned beef: We cook ours in advance and just cut up the leftovers. You can also use store-bought deli corned beef in a pinch - just dice it up and skip the rendering step since deli meat won't crisp the same way.
- Canned corned beef: Yes, you can use canned corned beef. Season more lightly since canned versions are saltier. The texture won't be quite the same, but it works for a quick breakfast.
- Cast iron skillet: Highly recommended for the crispiest results. The heavy bottom holds heat evenly and gives you that golden crust on both the potatoes and the corned beef.
- Salt management: We use Diamond Crystal kosher salt. If using Morton's or table salt, use roughly half the amount, because they're significantly saltier by volume. Add salt in stages and taste as you go. Corned beef is already quite salty, and the amount varies depending on how you cooked it. Start with less than you think you need. You can always add more at the end!
- Serve with soft rye dinner rolls and Baileys coffee for a St. Patrick's Day brunch spread!


Kim Ott says
Yhis recipe is absolutely delicious! Yhis eggs pair up with the corned beef & potatoes makes this recipe over the top.
Briana says
Hi Kim, we're so happy to hear this! Thank you so much for taking the time to leave a review! 🙂
Andy flack says
Such an easy recipe to make and tastes lovely
Briana says
So glad to hear this, Andy! Thanks for giving it a try!