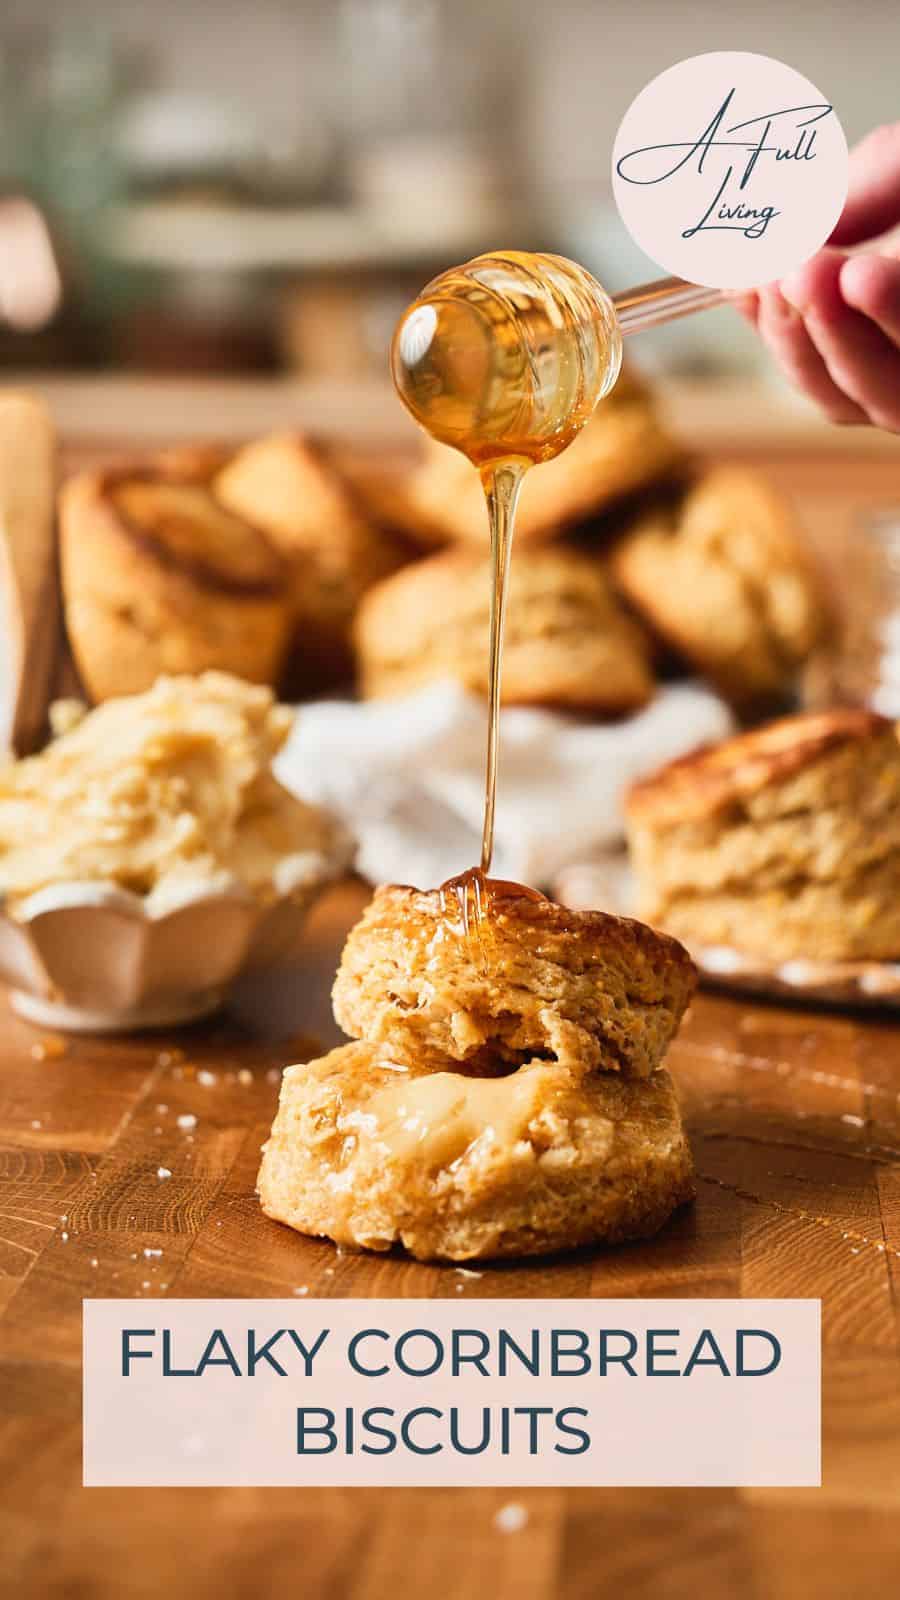
Never choose between buttermilk biscuits and cornbread again - these Cornbread Biscuits are the best of both worlds! These biscuits are made with some cornmeal to give them a nutty, cornbread flavor while still remaining soft and fluffy with tons of tall, flaky layers. Made with just 8 pantry staple ingredients and 20 minutes of prep time, they're a delicious addition to any meal, from summer cookouts to holiday feasts!
Save This Recipe! 💌
These Buttermilk Cornbread Biscuits Are Flaky, Not Crumbly 🌽
Somewhere between a tender buttermilk biscuit and a skillet of good cornbread, there's this. We stopped choosing and started making both at once. (Best idea we've had in a while, to be honest! 😂)
The cornmeal gives these a heartier texture and that sweet, nutty corn flavor, without turning them dry or sandy. These have the crumb of a biscuit, with the soul of cornbread.
They're sky-high and buttery with the flaky layers you expect from a great biscuit, and they're easier than you think! Our step-by-step instructions will help you nail them every time.
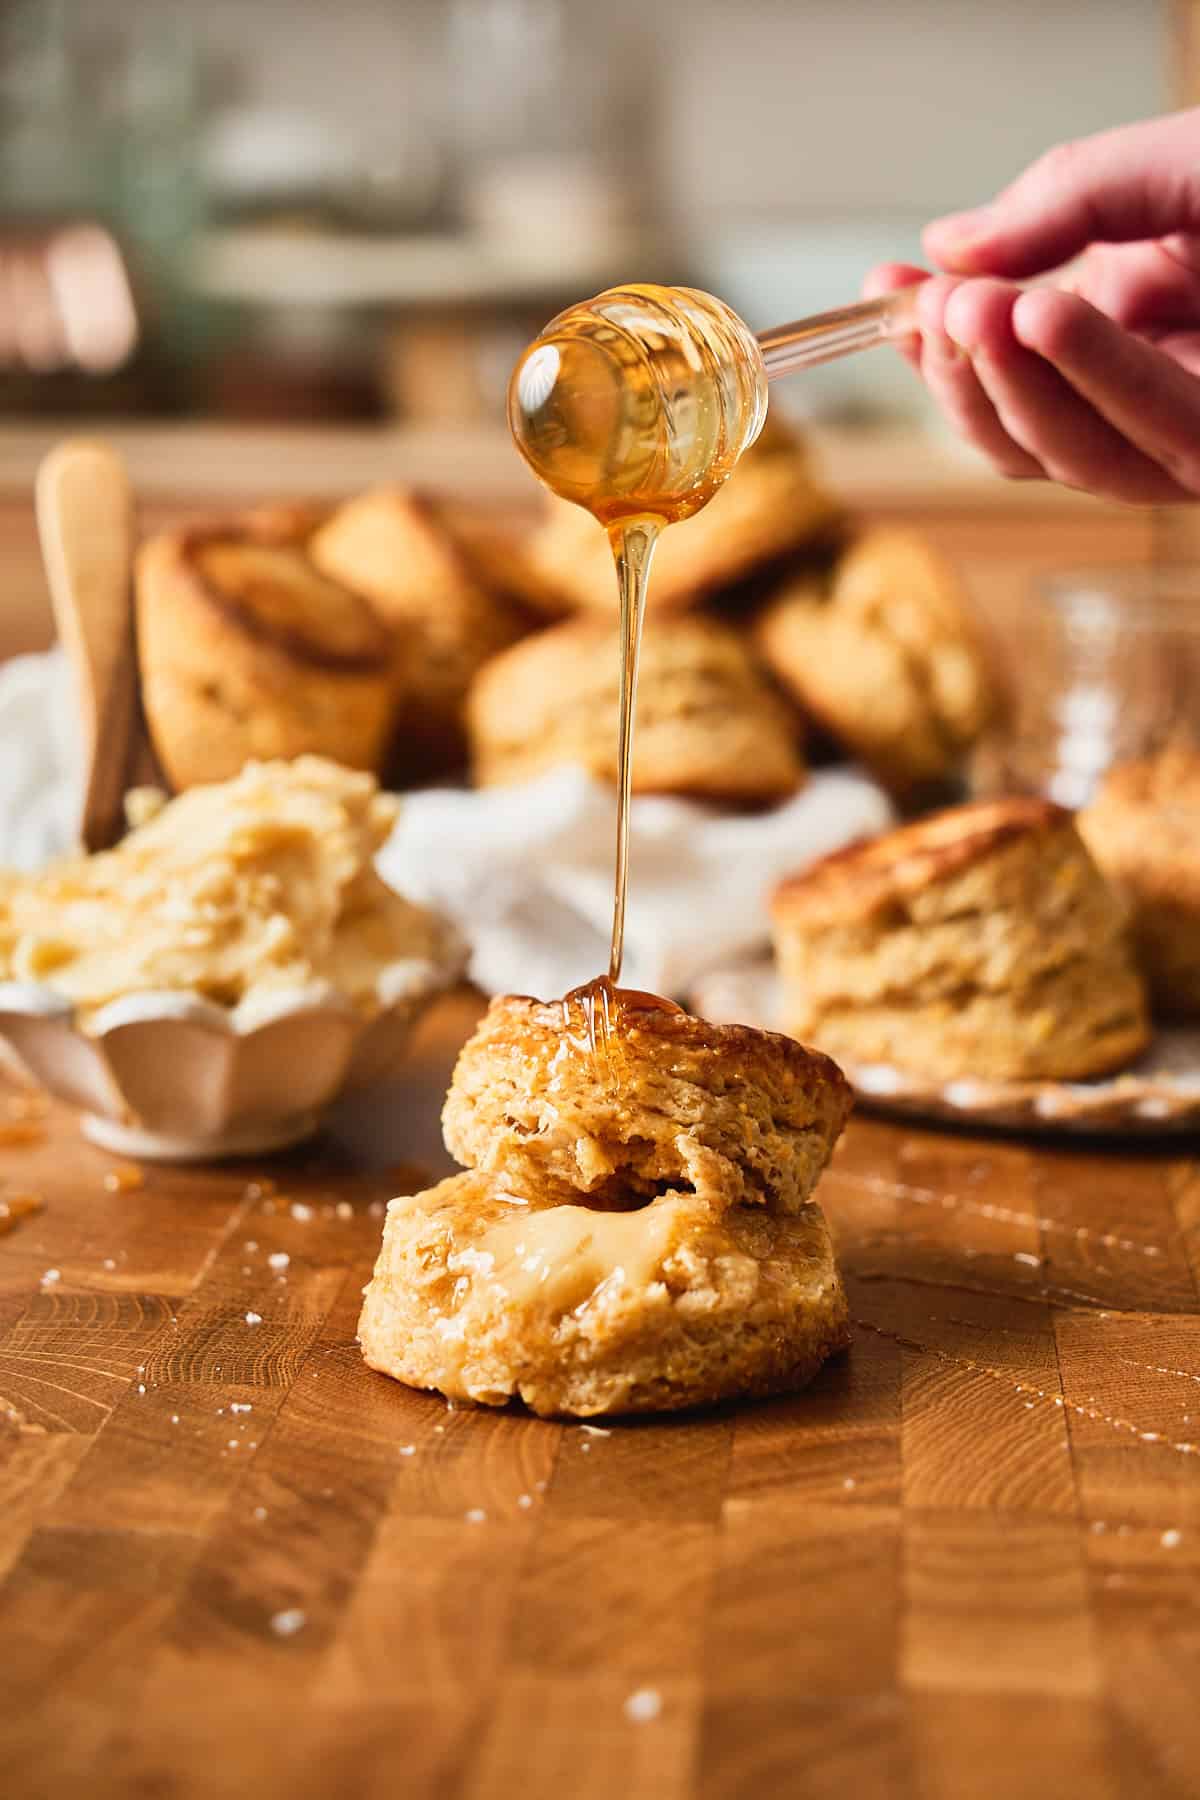
Serve them warm from the oven with plenty of whipped honey butter, or split alongside a bowl of chuck roast chili. They're just as good in July with barbecue as they are in November at Thanksgiving!
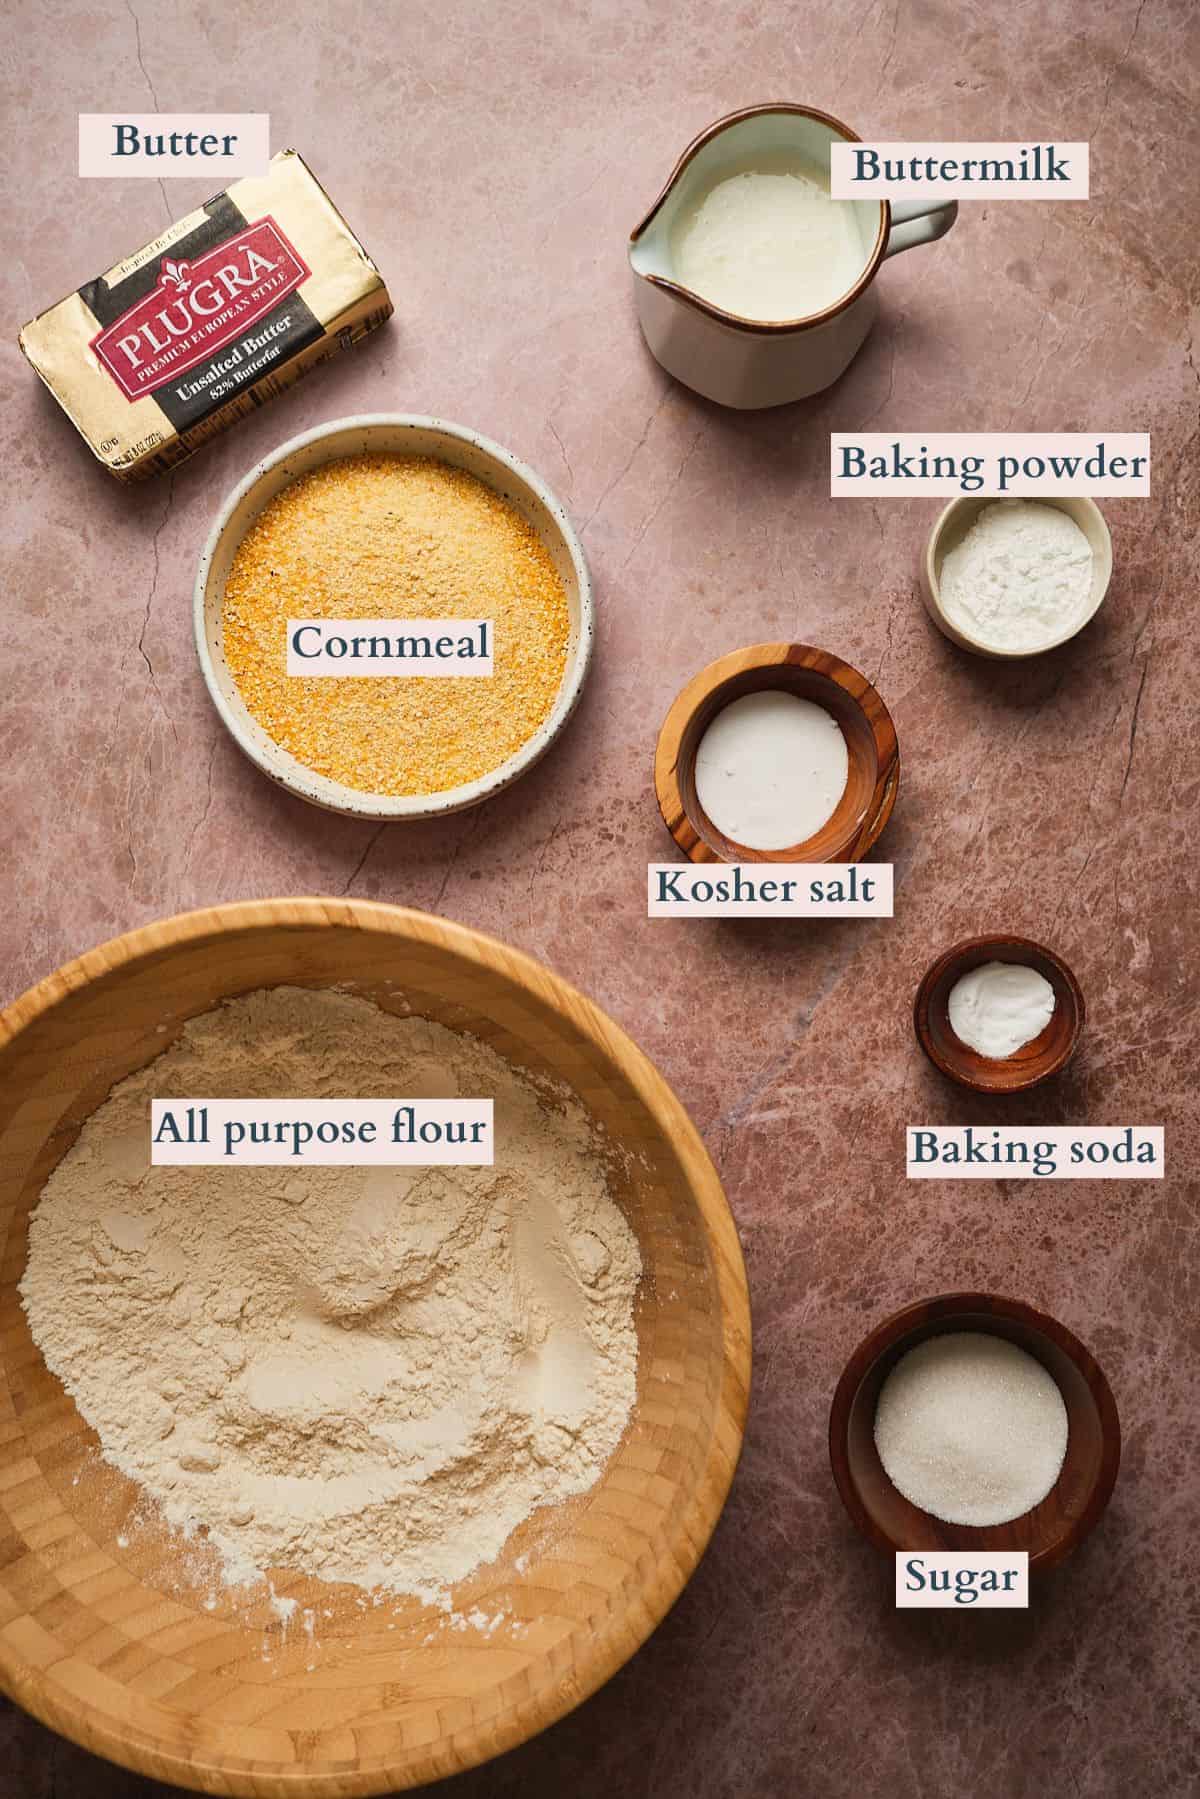
🌽 Ingredients for Cornbread Biscuits
The beauty of this cornbread biscuit recipe is that it leans on baking essentials. You probably keep most of the ingredients on hand!
How to Make Cornmeal Biscuits
Making buttermilk biscuits always involves some technique; there's no doubt about that. With a little practice, you'll be making tender cornbread biscuits with beautiful layers in no time!
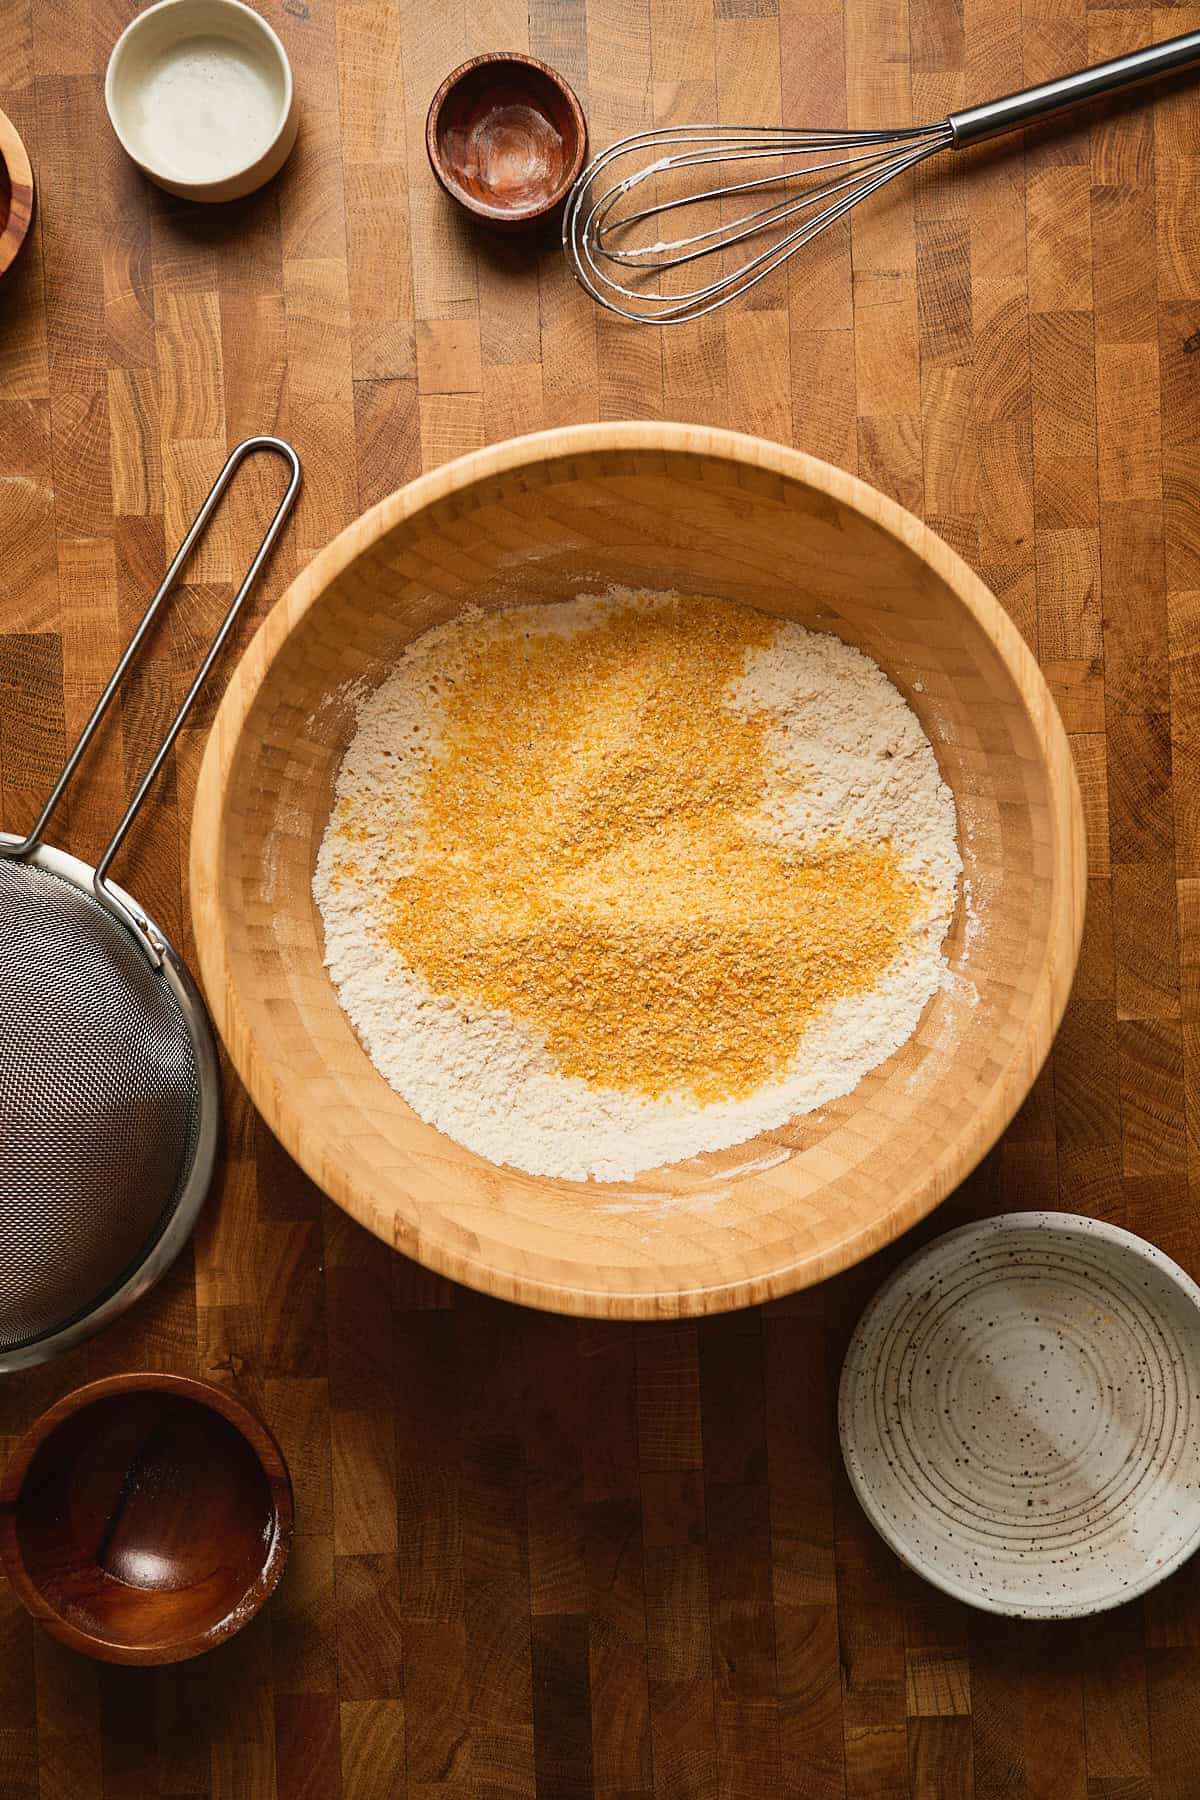
- Step 1: In a large mixing bowl, sift in flour, sugar, baking powder, baking soda, and salt. Add in the cornmeal.
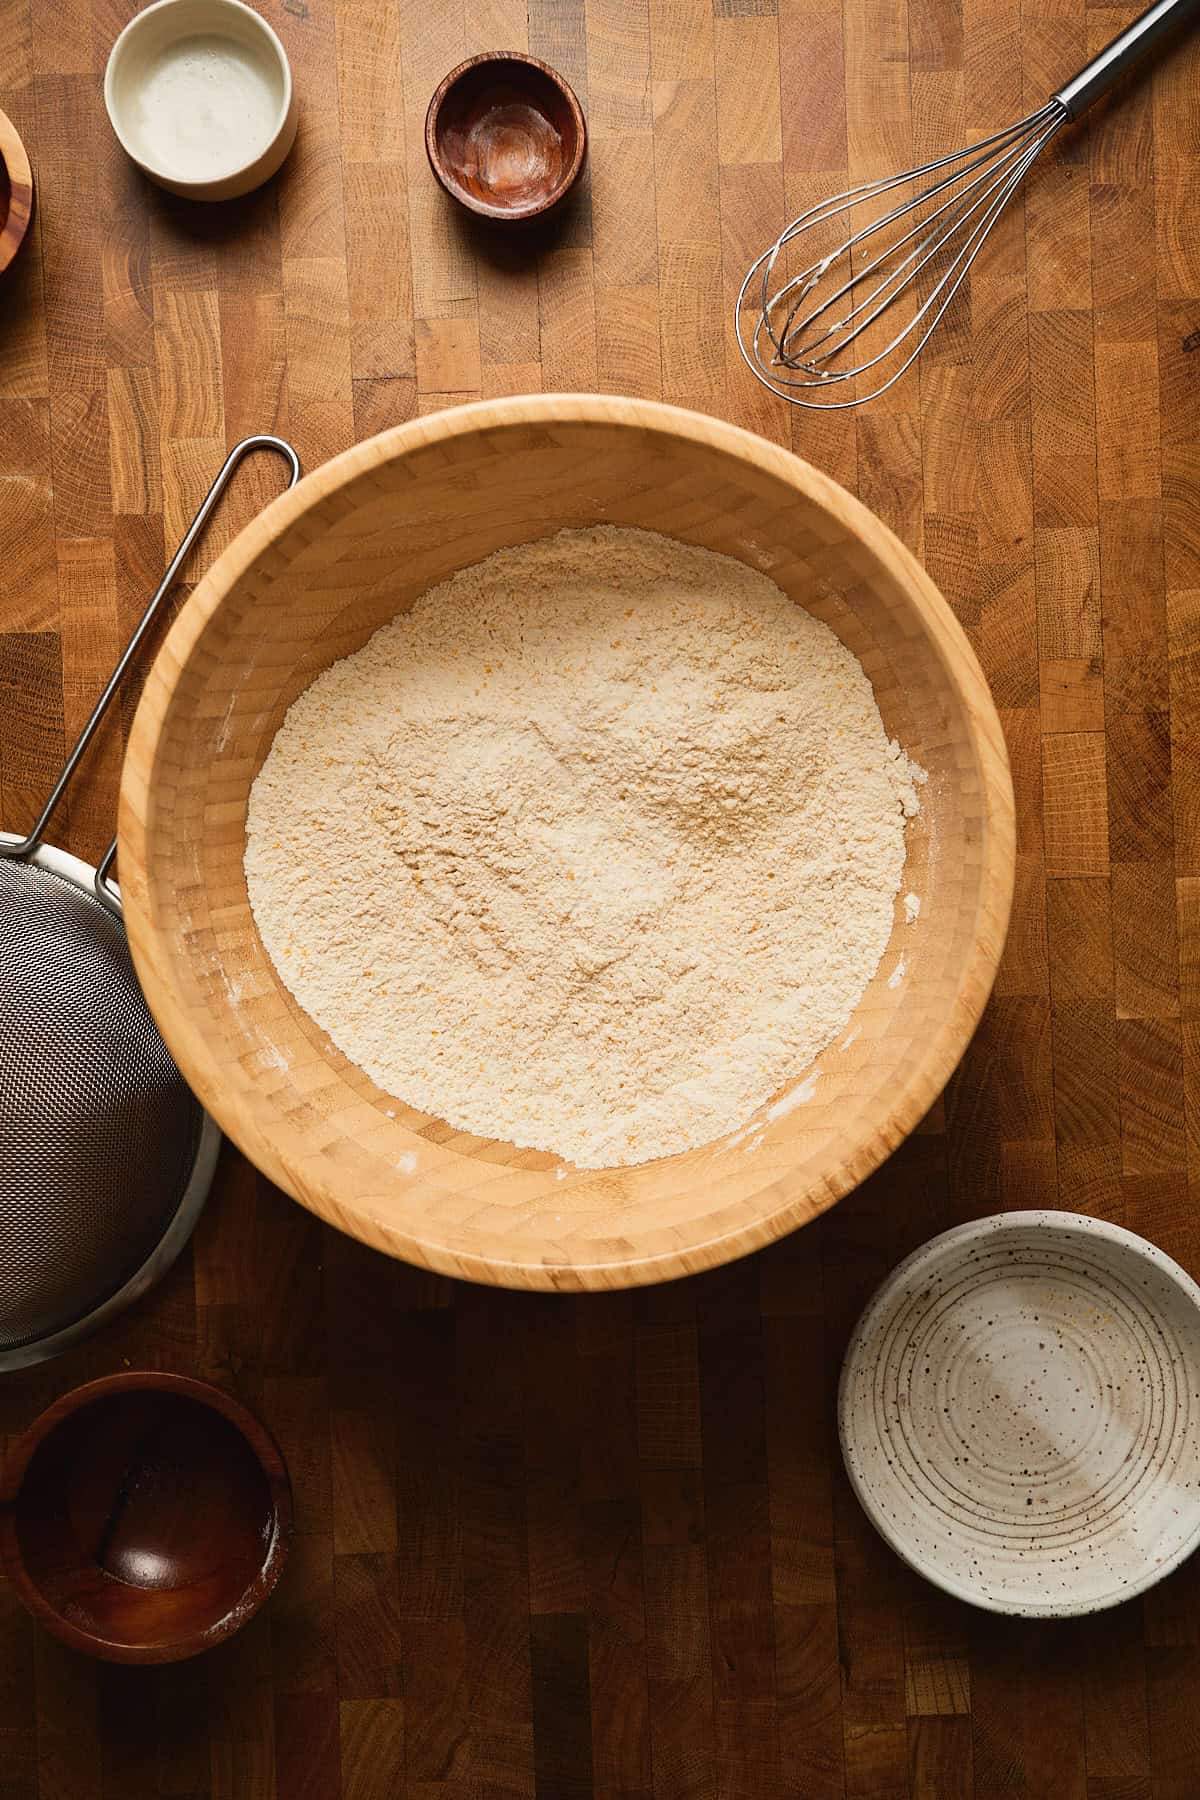
Whisk until well combined.
🌽 Which cornmeal? We used a medium-grain cornmeal for a denser, crunchy texture. Fine-grain also works really well, and yellow or white both work; it doesn't matter! We don't recommend coarse-grain cornmeal for these.
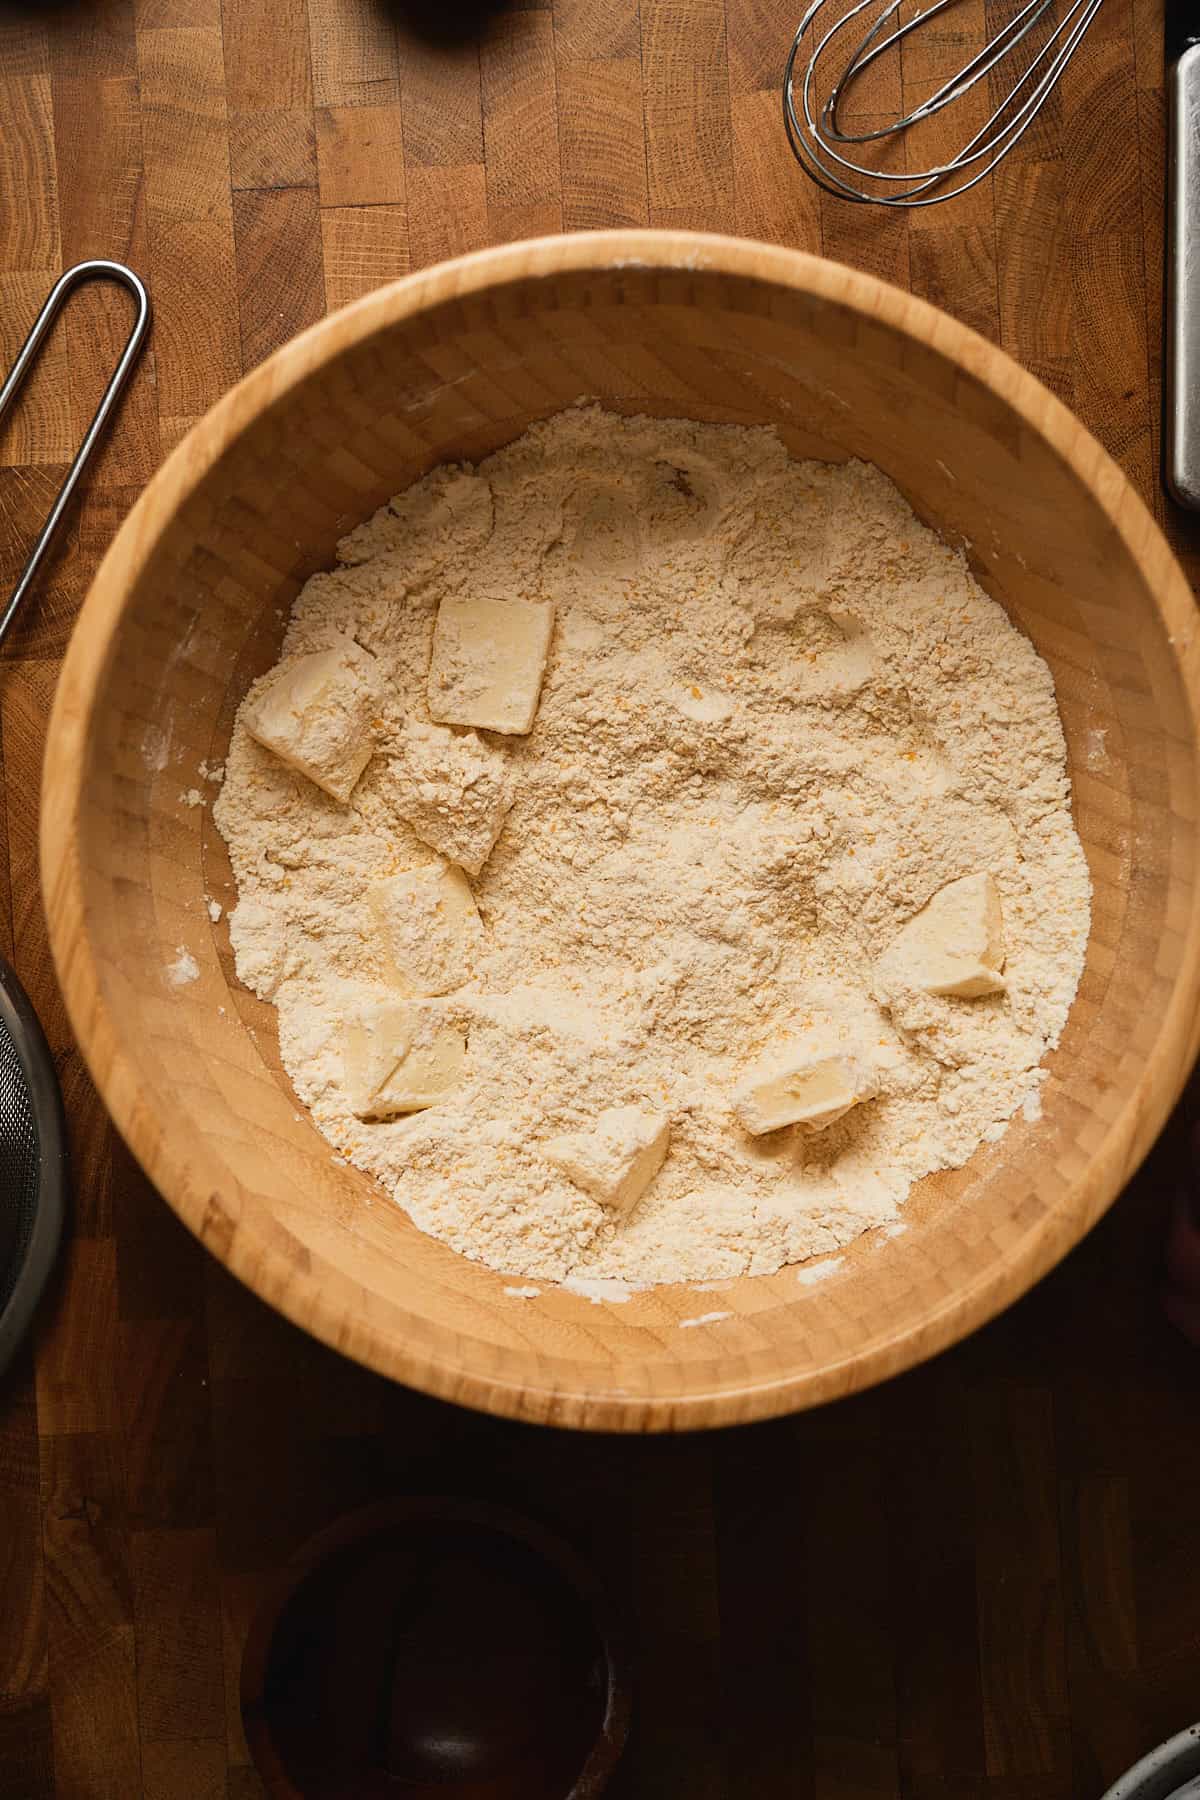
- Step 2: Add in large chunks of cold butter. Toss to ensure the butter chunks are coated in flour. This will prevent them from sticking together.
🧈 Use cold butter & cut big! Cut the butter into roughly tablespoon-sized chunks. Don't cut them too small! Those bigger pieces flatten out as you work the dough and create the tall, flaky layers we're after.
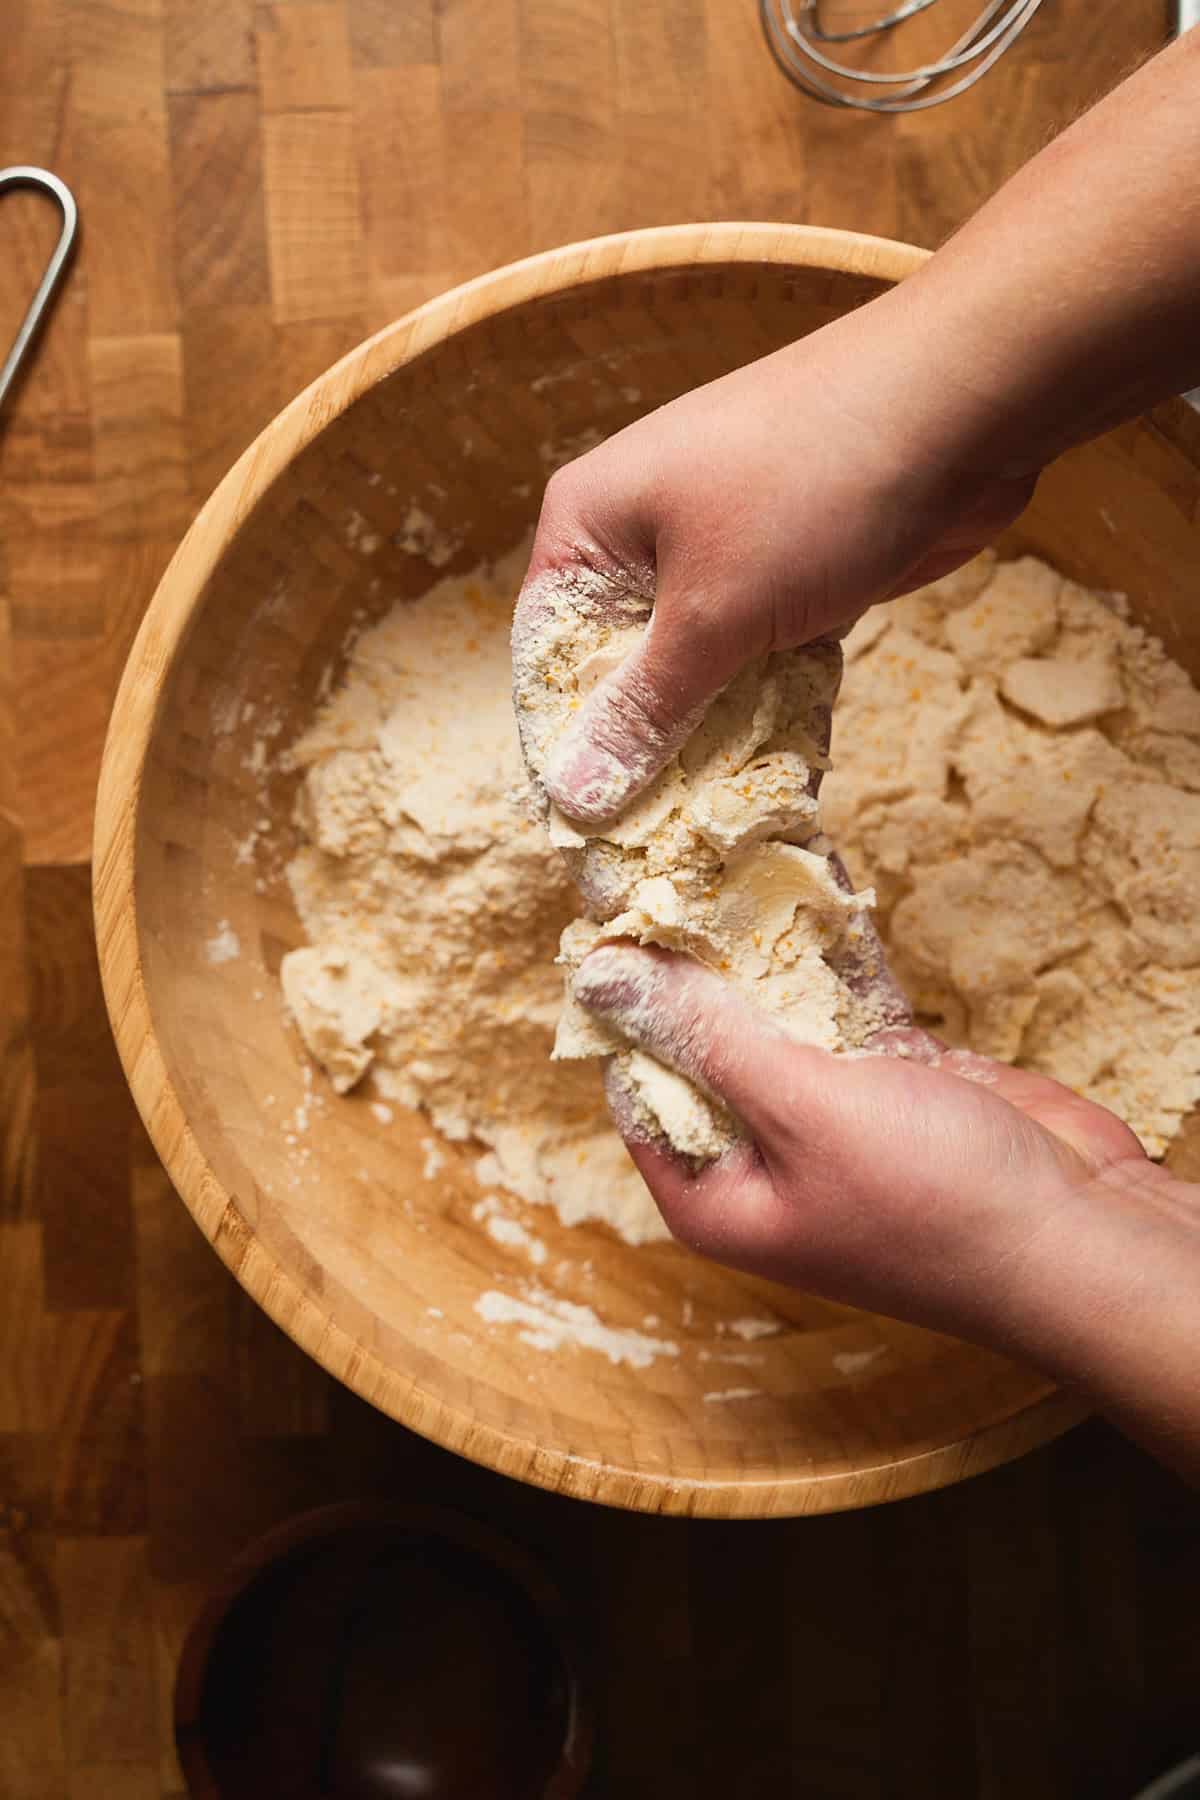
- Step 3: Press the butter between your fingers to flatten it, tossing in flour to ensure nothing sticks.

These thin sheets of butter are the perfect size, and those flat sheets will help us create amazing flaky layers in the biscuits as steam escapes in the oven.
🧈Speaking of butter... A high-quality, European-style butter makes a real difference in texture and flavor. Our favorite (and the sponsor of the recipe video on Instagram!) is Plugrà butter, which is 82% butterfat and slow-churned. American butters are typically 80% butterfat, and that extra 2% really shows up here.
Alternative methods for cutting in butter. If cutting in the butter by hand is too difficult, or you have hot hands, you have options!
- Grating or using a pastry blender. You can grate frozen butter directly into the flour using a box grater or pastry blender, as we did with these honey butter chicken biscuits!
- Food processor. Pulse the cold butter and dry ingredients together in a food processor until the mixture resembles coarse crumbs.
Though working the butter in by hand is now our preferred method, these other methods also work well - just be sure to work quickly to keep everything cold.
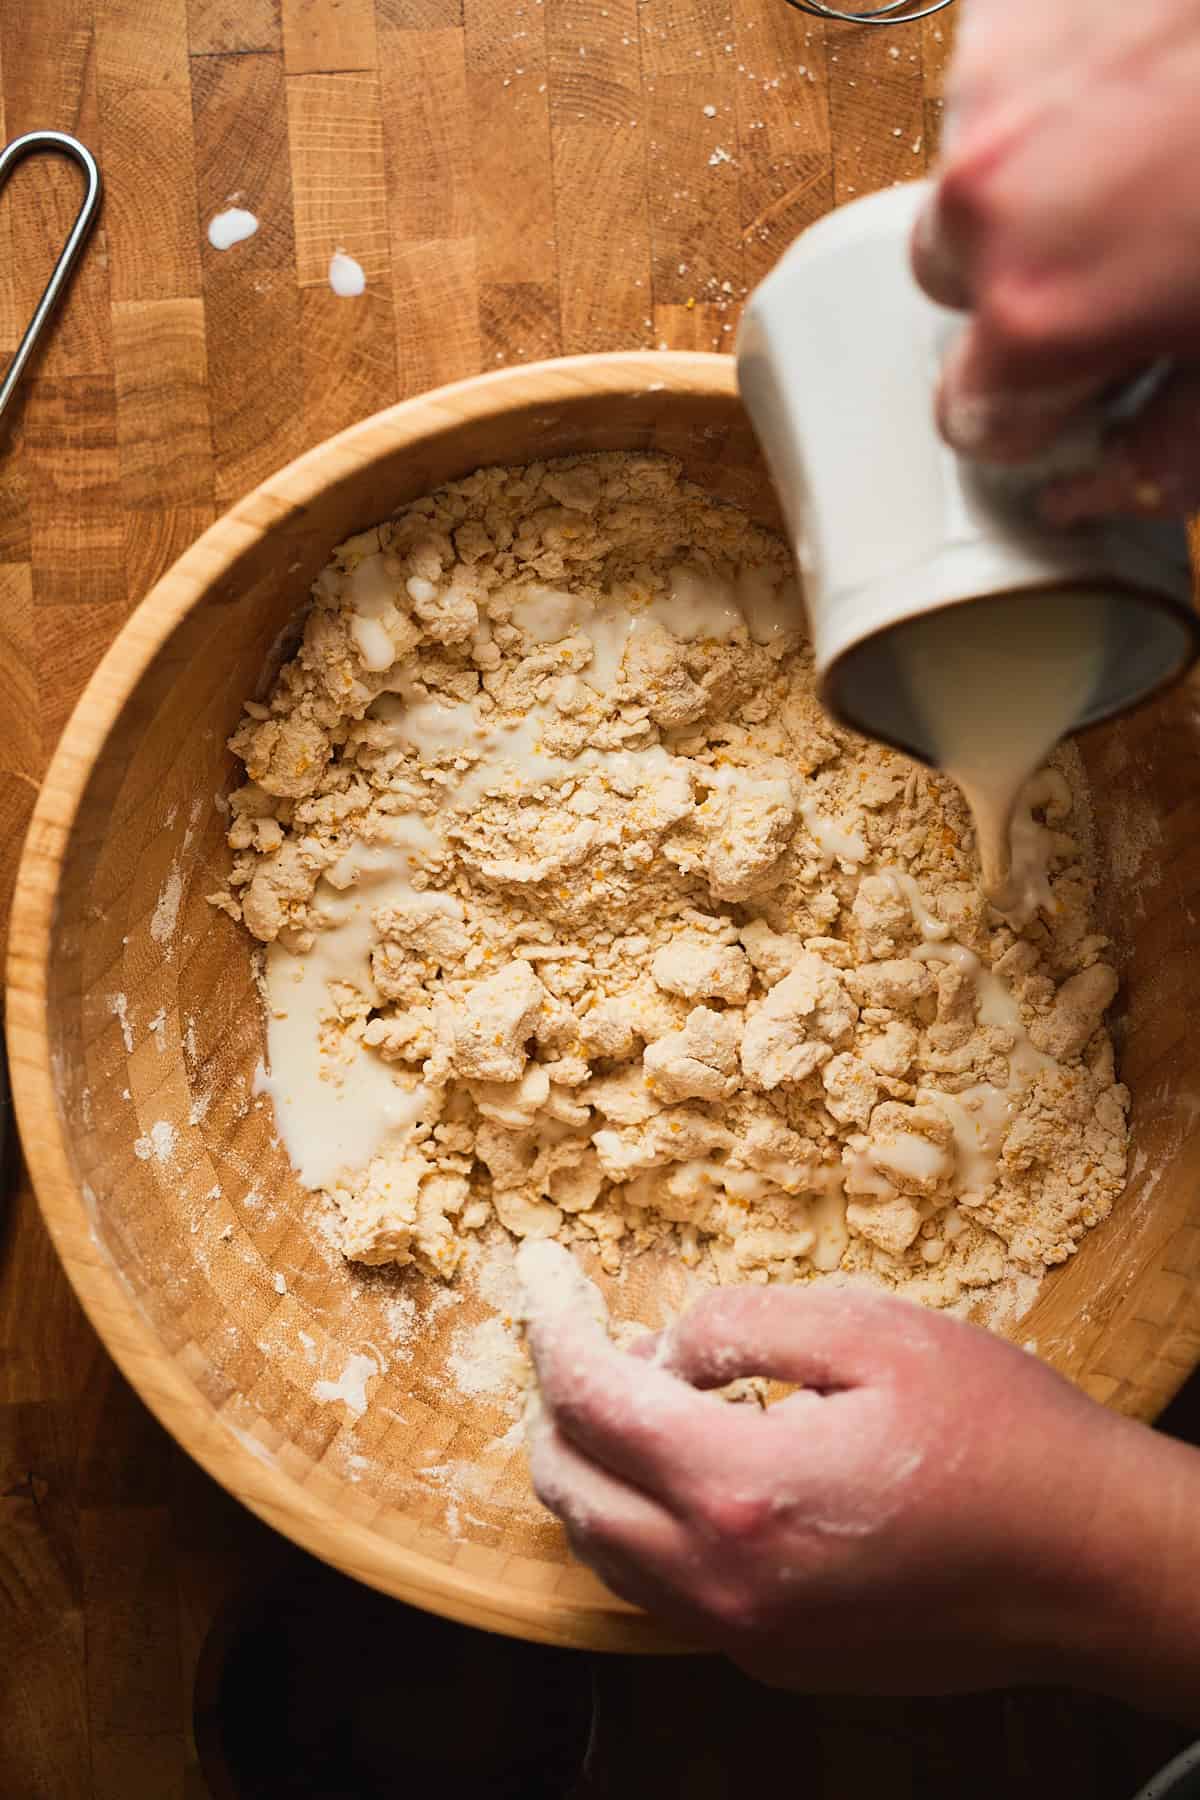
- Step 4: When all of the butter pieces have been flattened, drizzle the buttermilk over the mixture. Use your hands in a "claw" shape to gently fold the ingredients together until a loose, sticky, and shaggy dough forms.
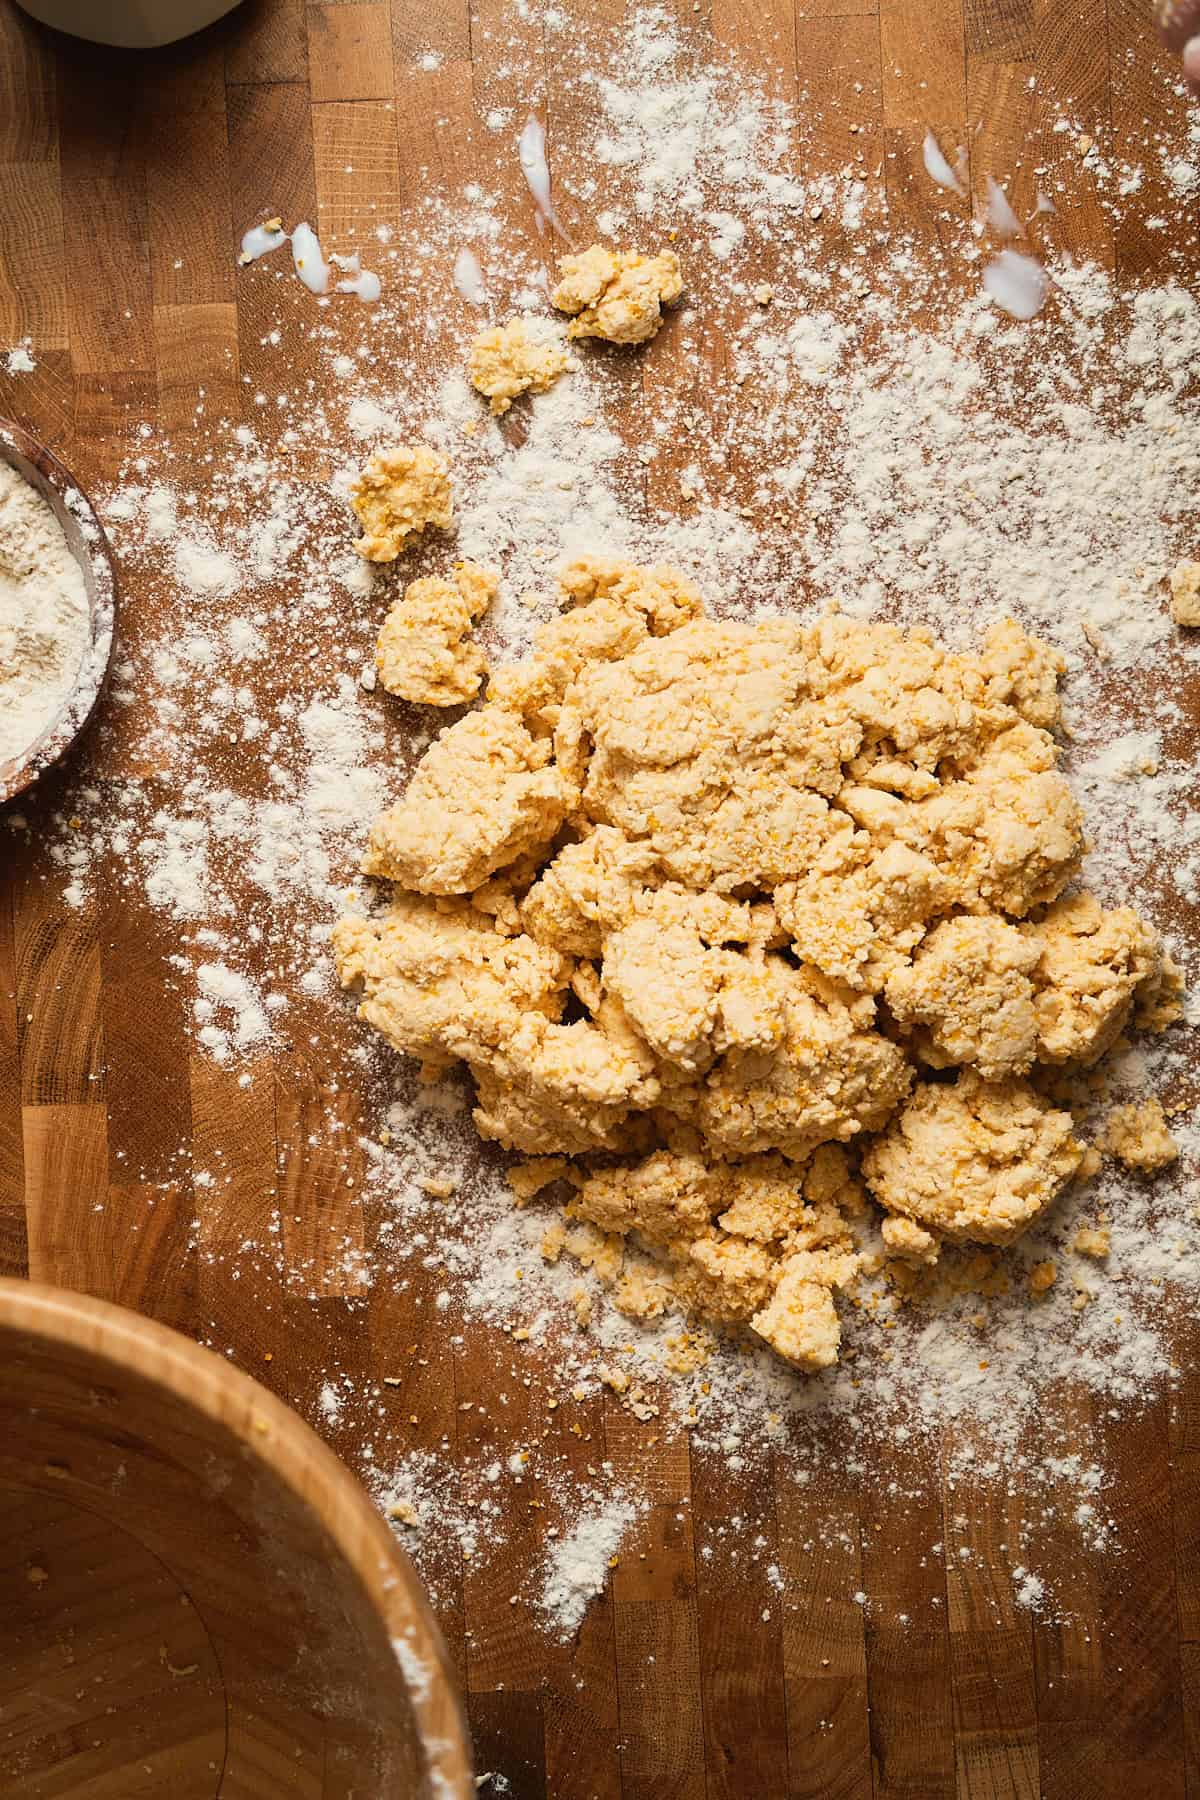
The dough should begin to hold together at this point, but it will still be very shaggy and loose. Turn the dough out onto a floured work surface.
No buttermilk? If you don't have any buttermilk on hand, add 1 tablespoon of vinegar or fresh lemon juice to one cup of whole milk. Let it sit for about 5 minutes to curdle, stir, and that's it! Homemade buttermilk. 😉
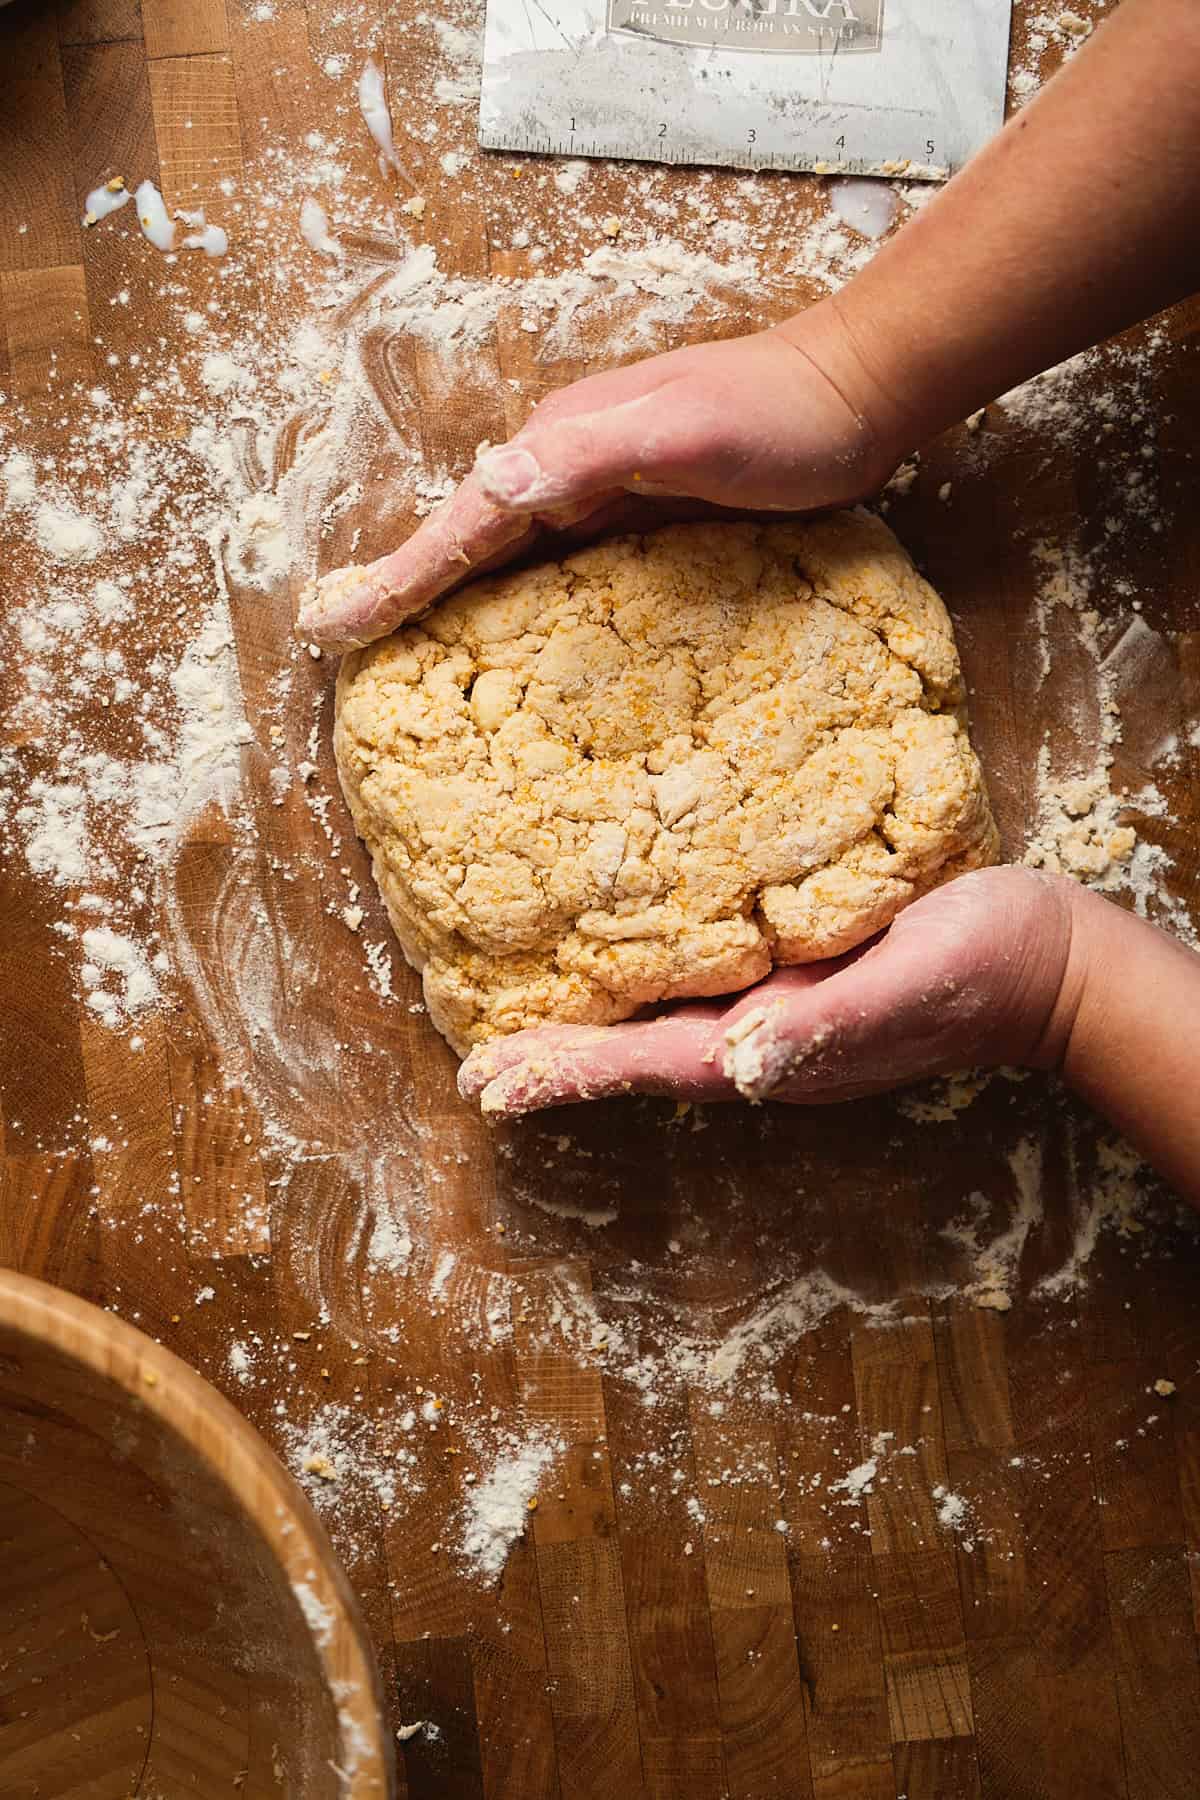
- Step 5: Pat the dough together.
Gently push it together until it's a rough rectangle shape, about 1 inch thick.
⚠️Be careful not to overwork the dough. Trust the process; it will come together!
To ensure the biscuits are extra flaky, you'll go through a process of folding the biscuit dough, similar to the classic French pastry technique of lamination, but not nearly as difficult. This step is crucial for creating the flaky layers we're after. Once you get the hang of it, it's fun!
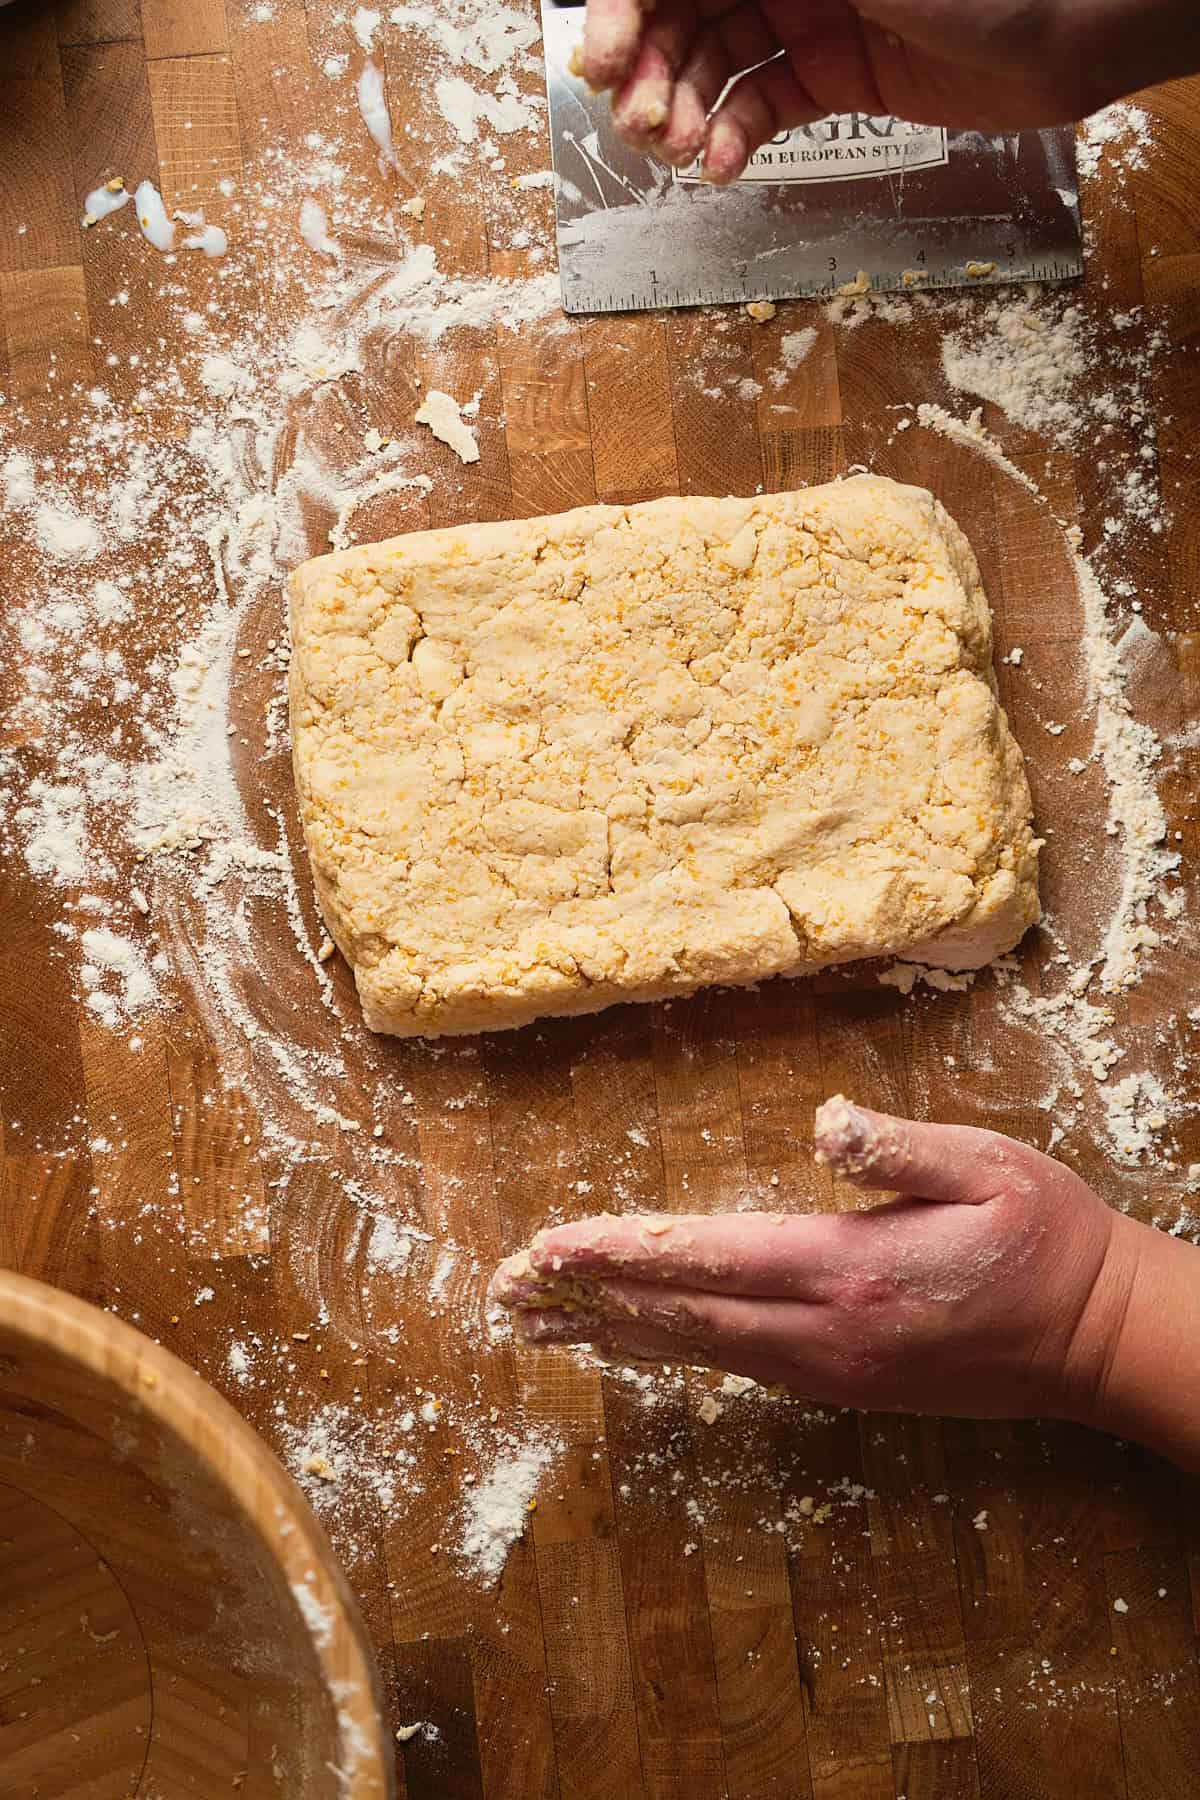
- Step 6: Use your hands or a bench scraper to fold the dough in half, stacked on top of itself.
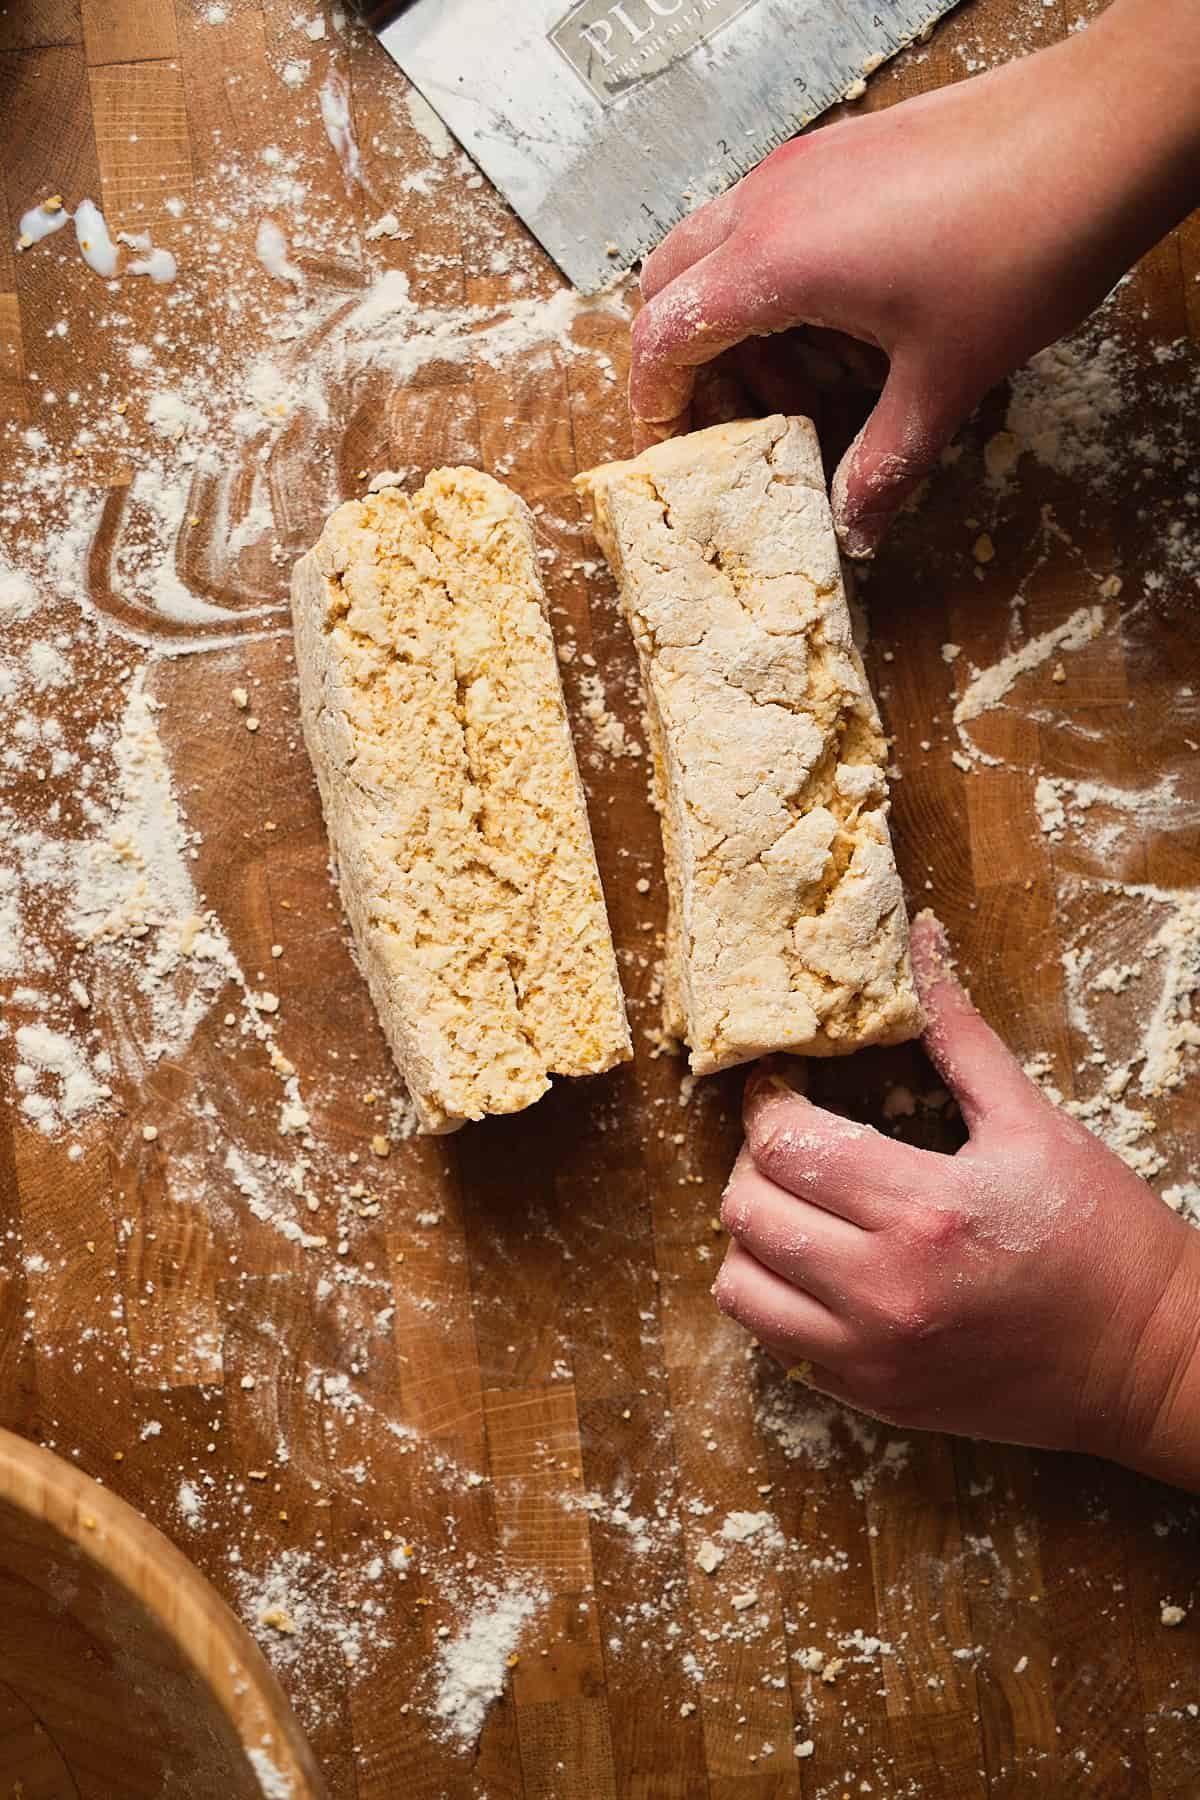
Use your bench scraper to cut the dough in half lengthwise.
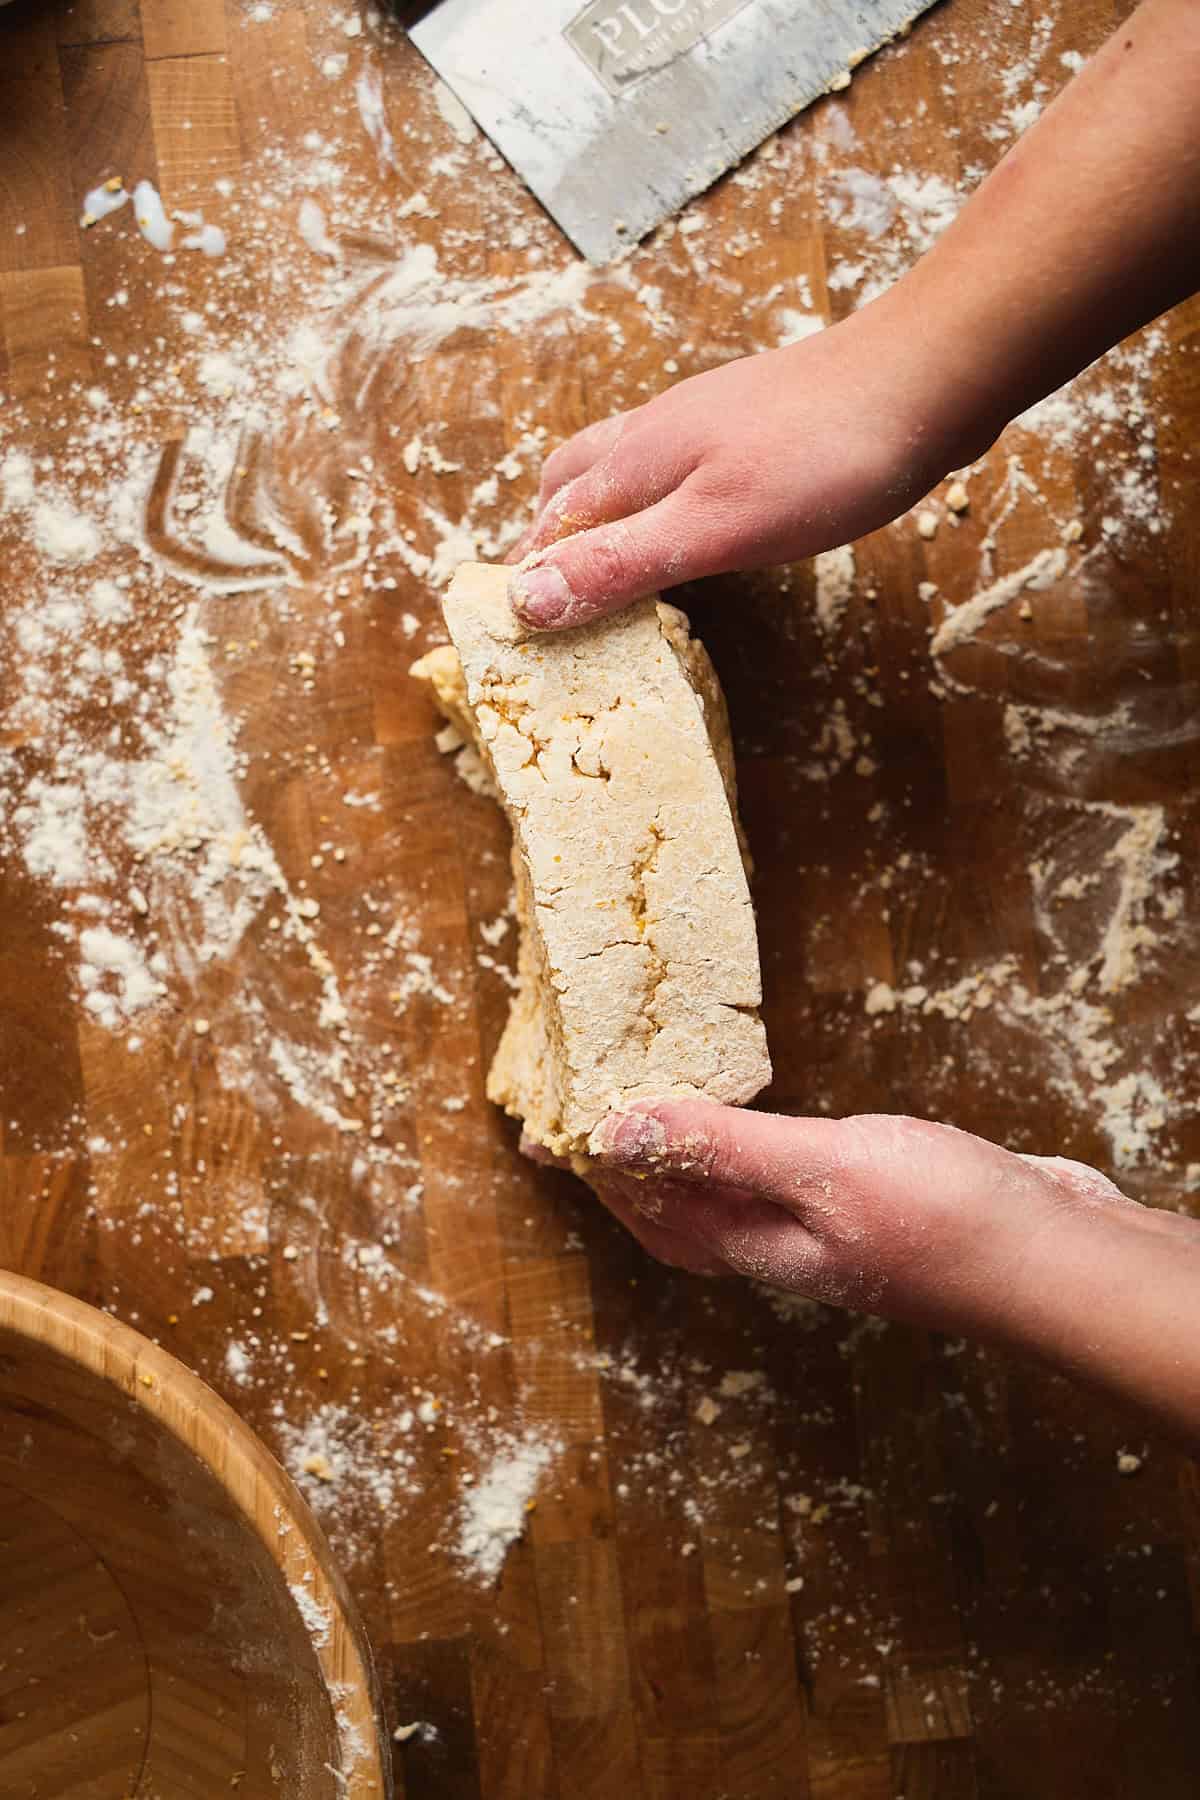
- Step 7: Stack the cut dough.
Press down to form another rectangle.
⚠️If the dough starts to feel warm or greasy (you'll smell that buttery aroma), or you can see butter melting, let the dough rest and even place it back in the fridge or freezer for a few minutes to firm it back up. Keep the dough moving, and add flour if needed to prevent the dough from sticking to your work surface.
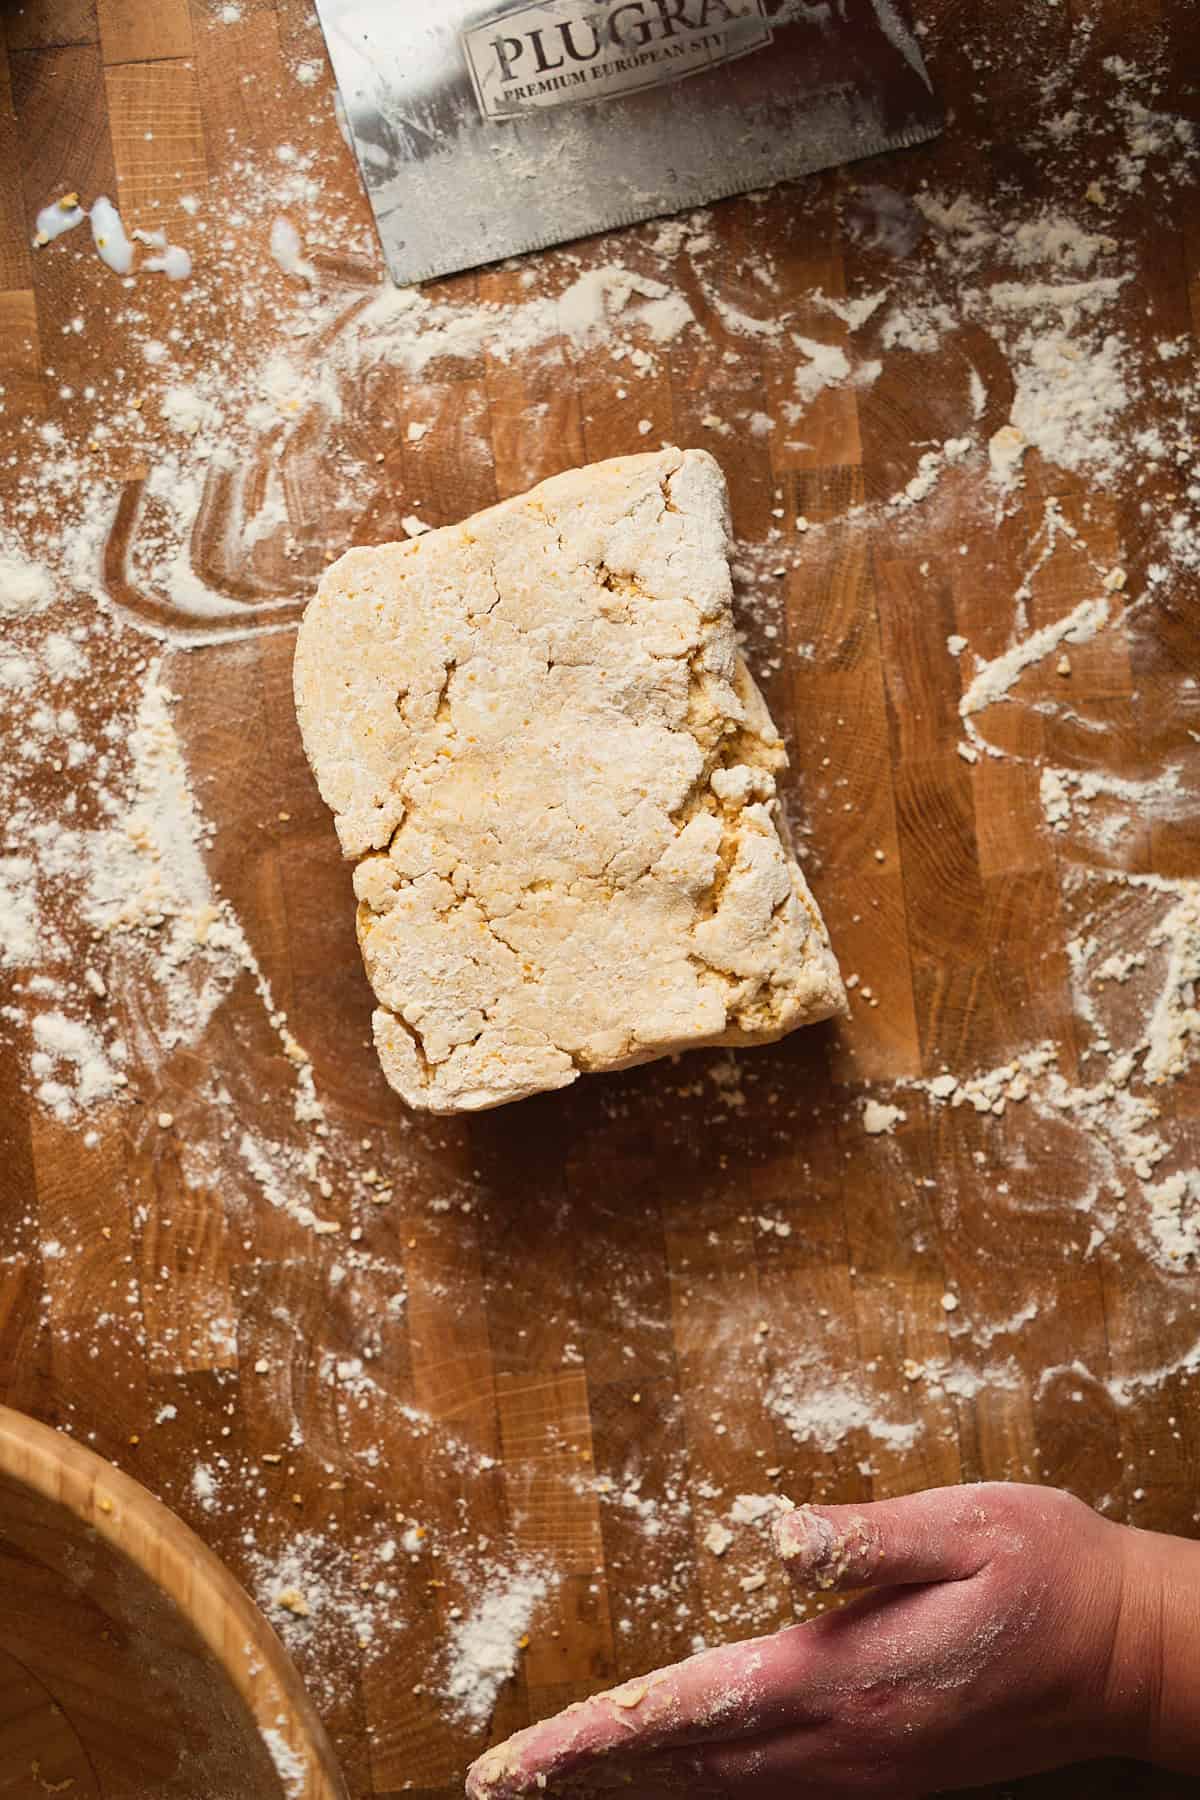
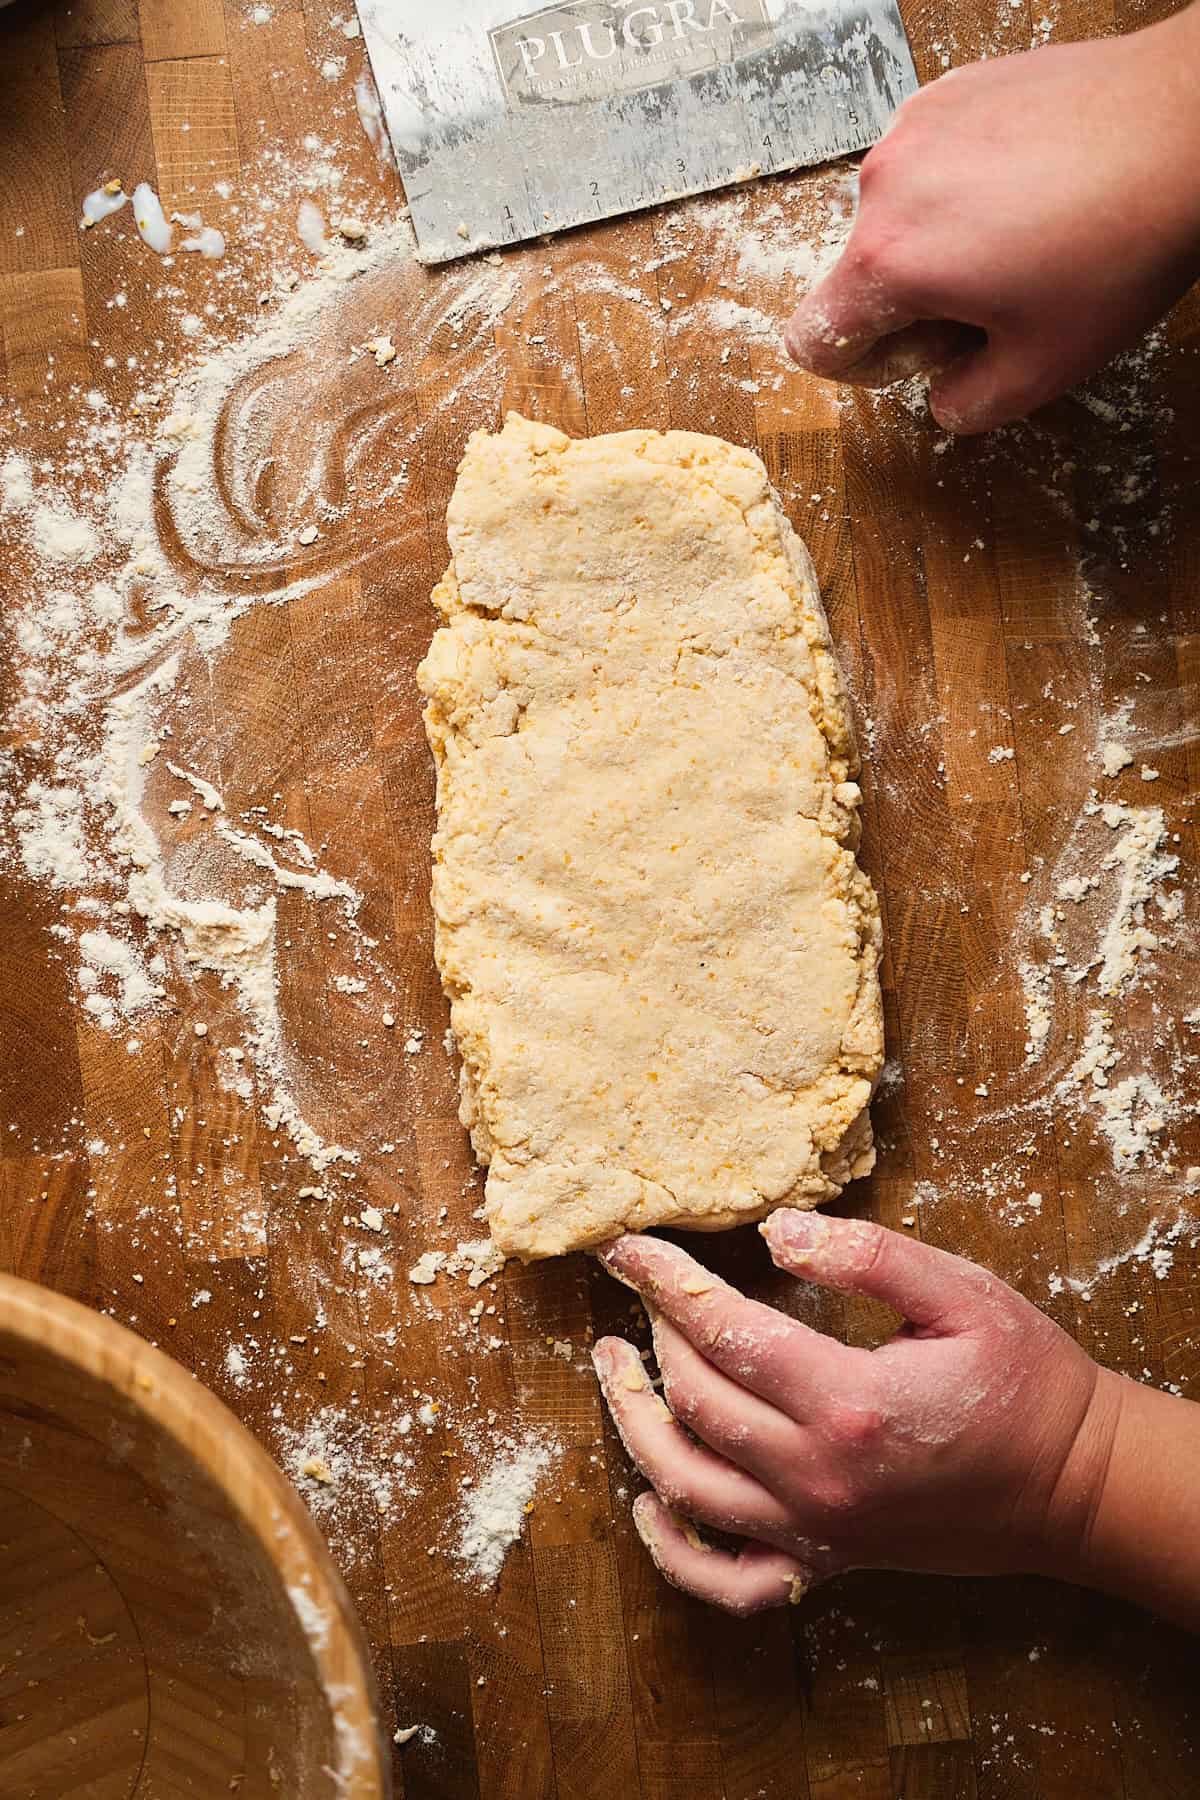
- Step 8: Turn the dough 90 degrees and press it into a rectangle shape again. Repeat this fold-cut-stack-turn process 2-3 more times (for a total of 3-4 times).
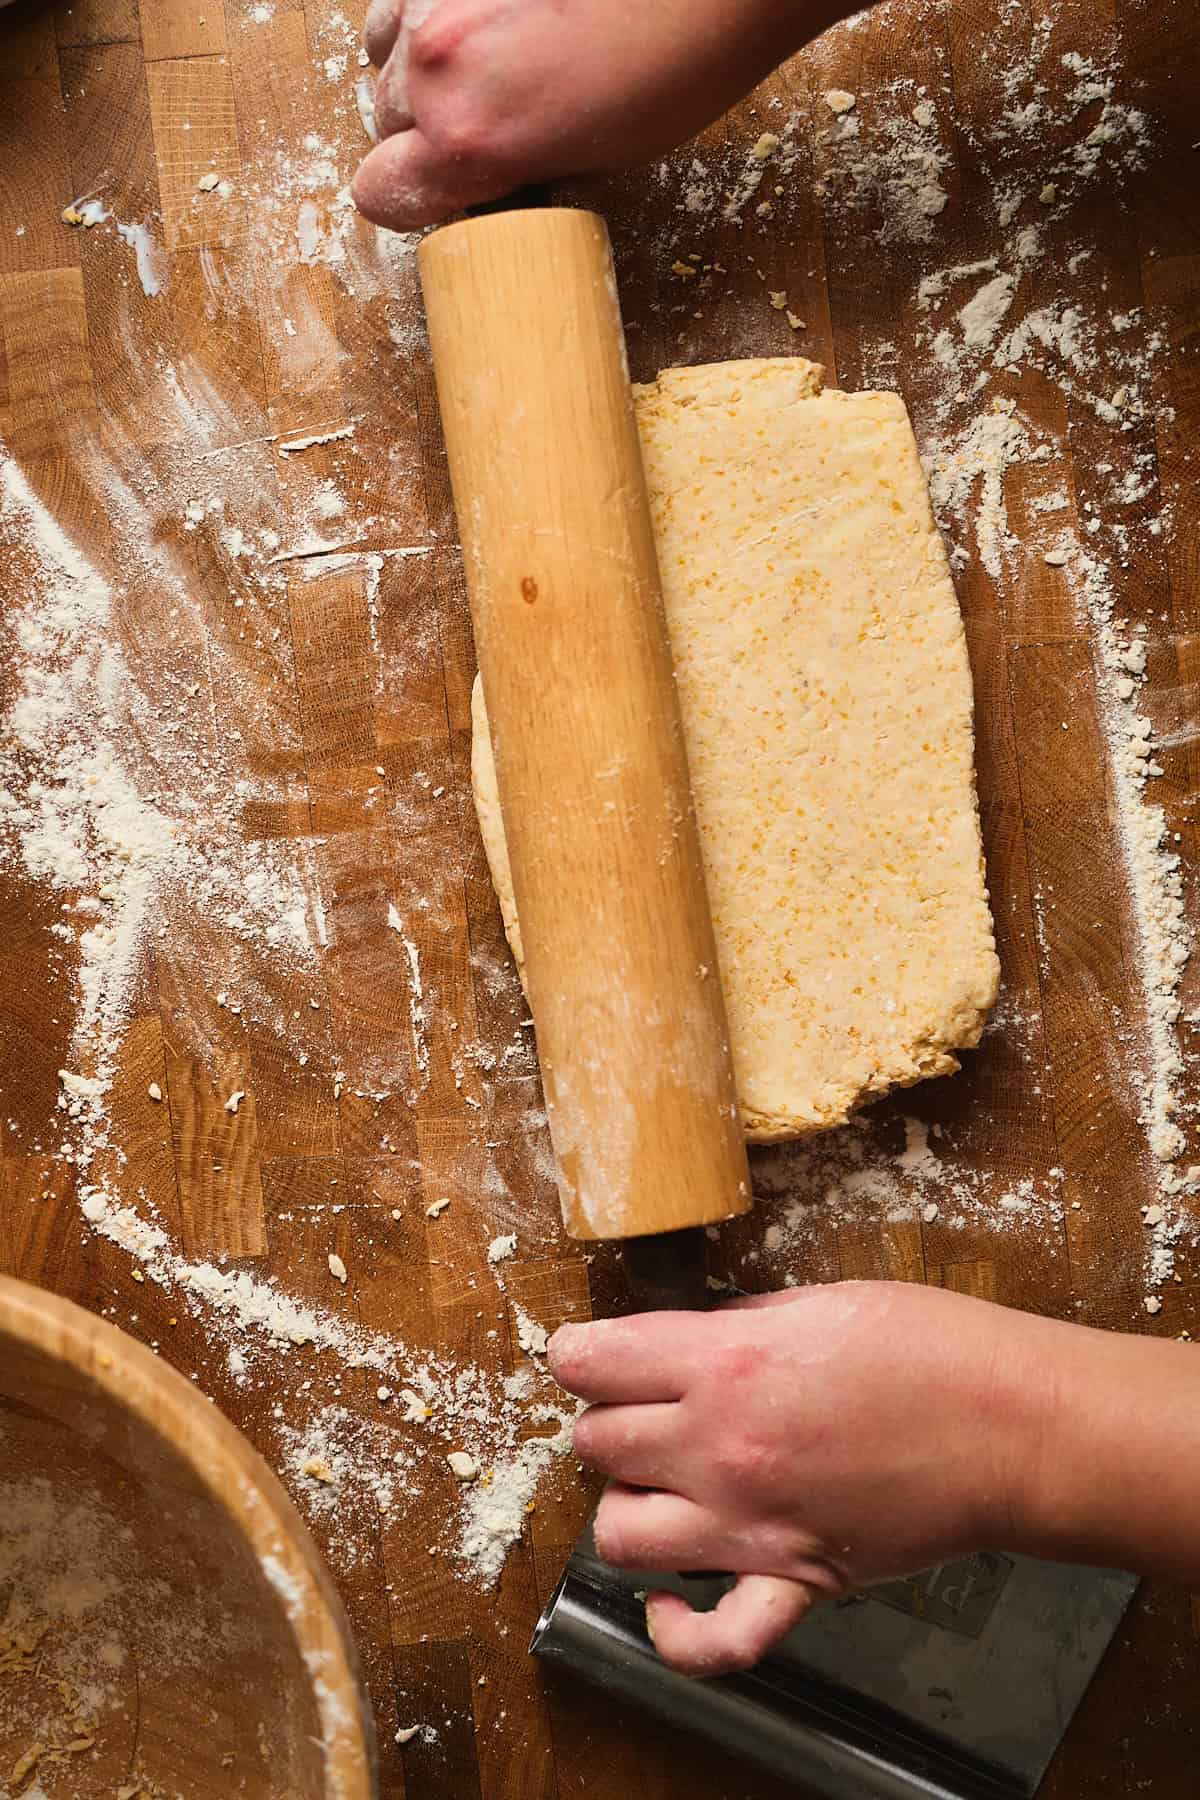
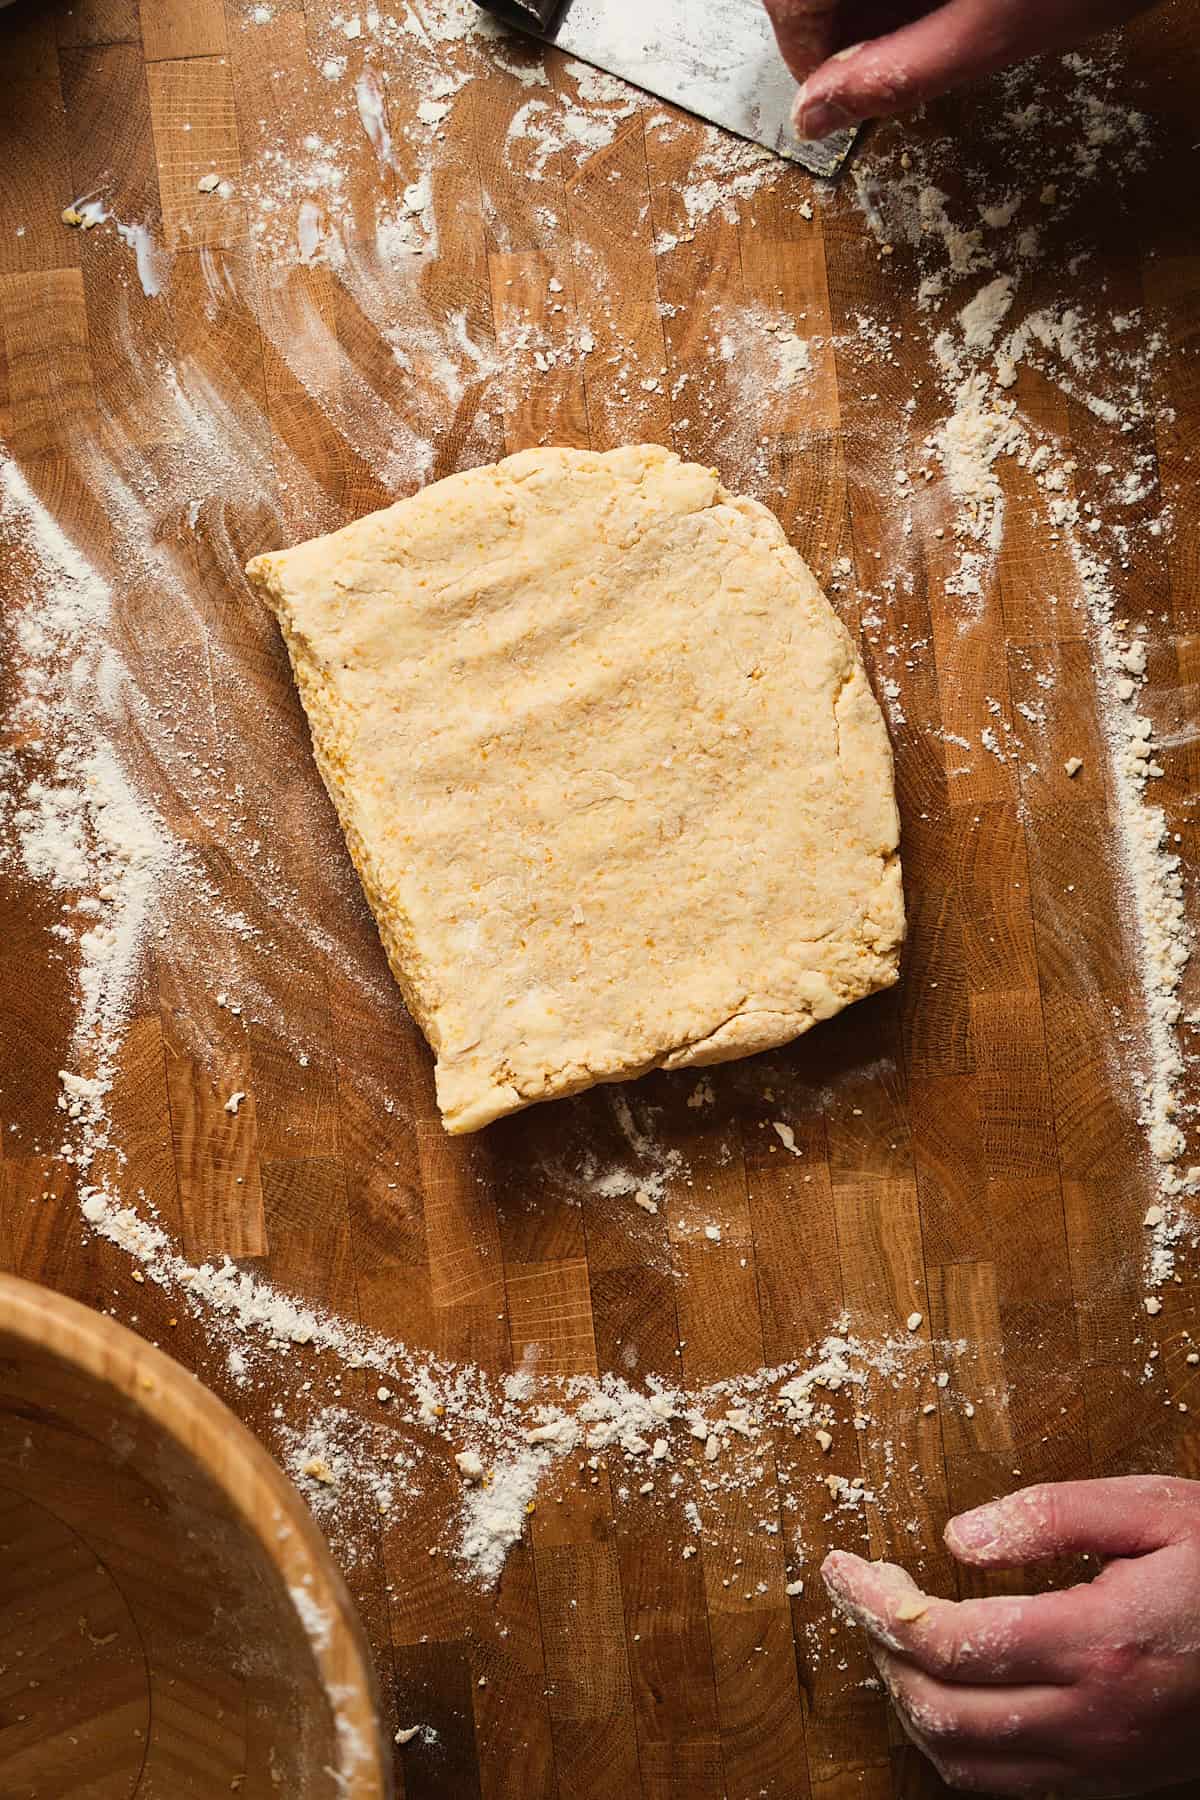
After the dough has been cut, stacked, and reshaped at least 3 (preferably 4!) times, you can use a floured rolling pin to gently roll the dough into a rectangle with roughly ¾-1 inch in thickness.
Do not exceed 1 inch in thickness, or your biscuits will topple over in the oven!
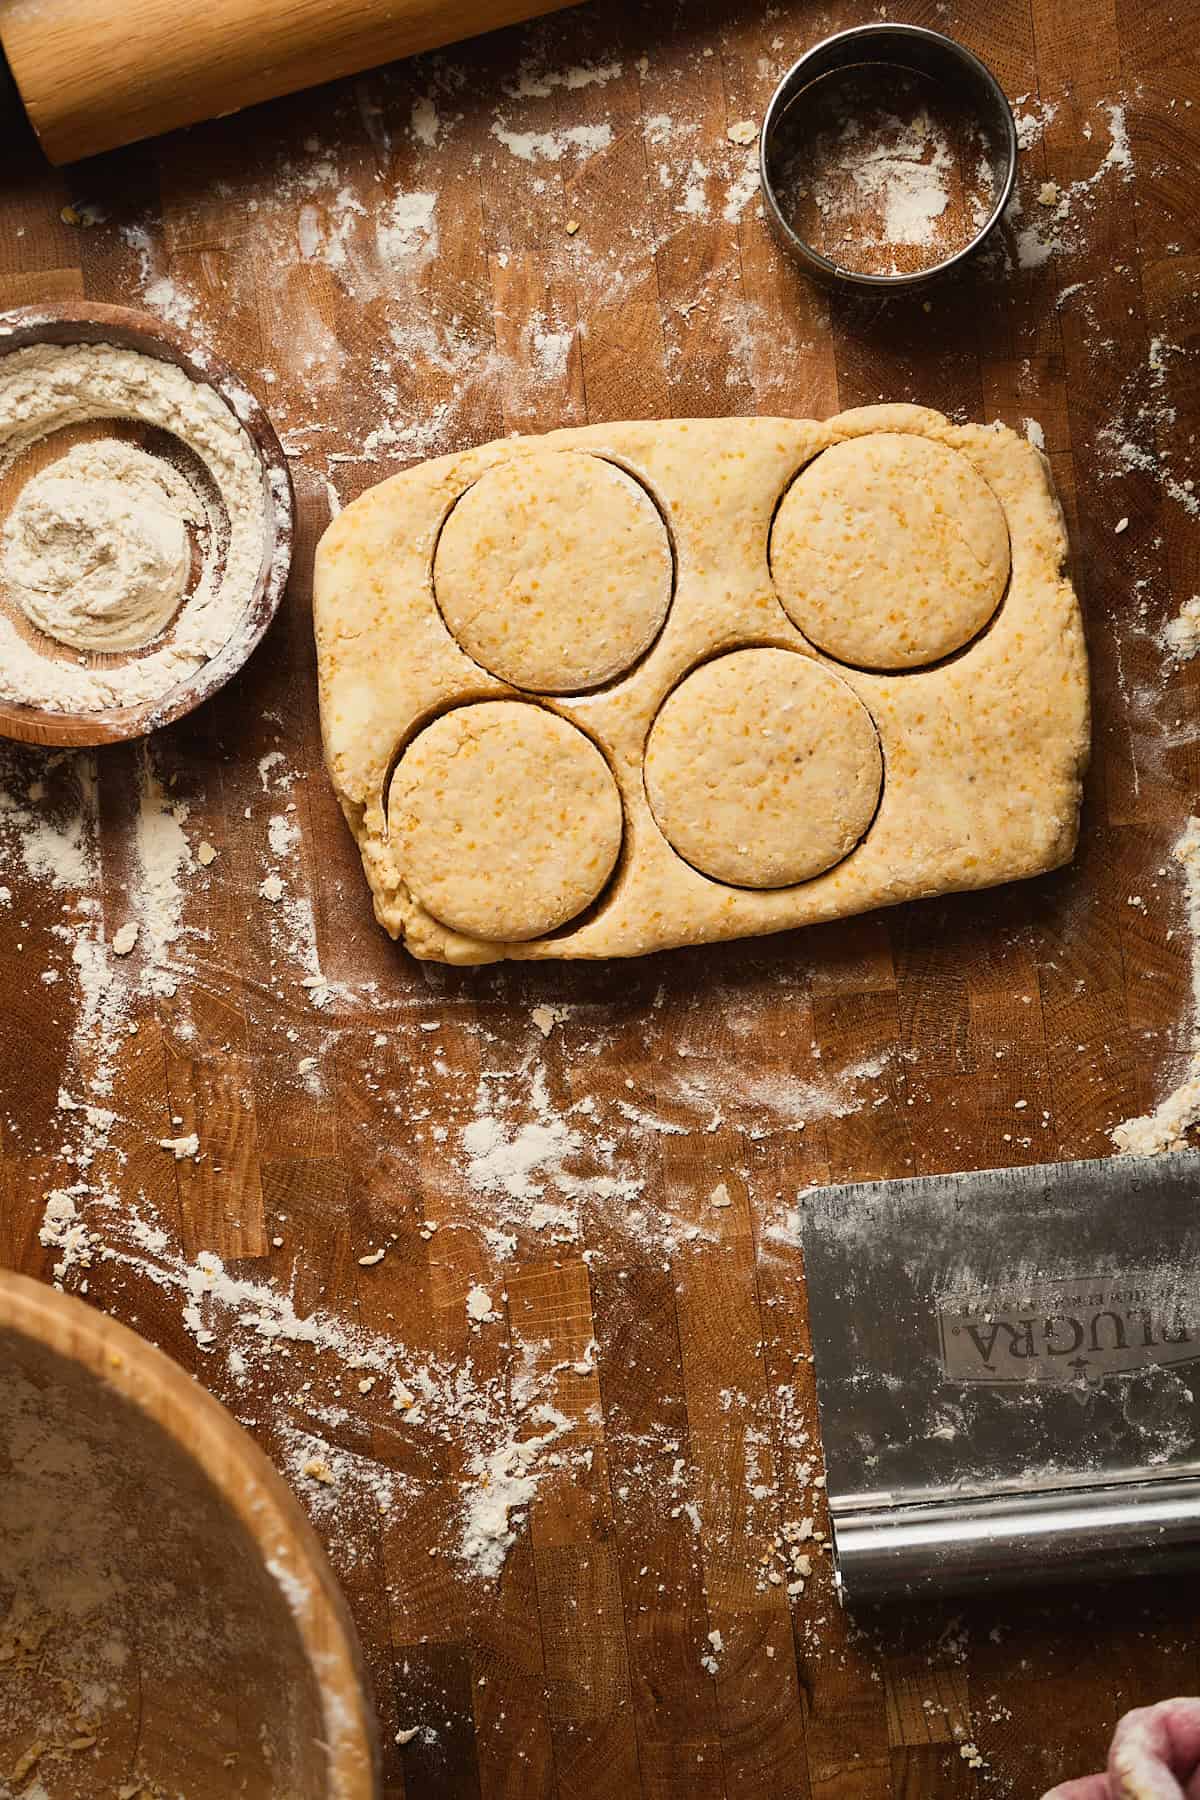
- Step 9: Using a 2-½ inch biscuit cutter (or standard mason jar lid), push the cutter straight down through the dough and lift it right back up. Do not turn or twist your biscuit cutter!
To prevent sticking, between stamping out each biscuit, dip the biscuit cutter in flour. This will help it make cleaner cuts that don't stick.
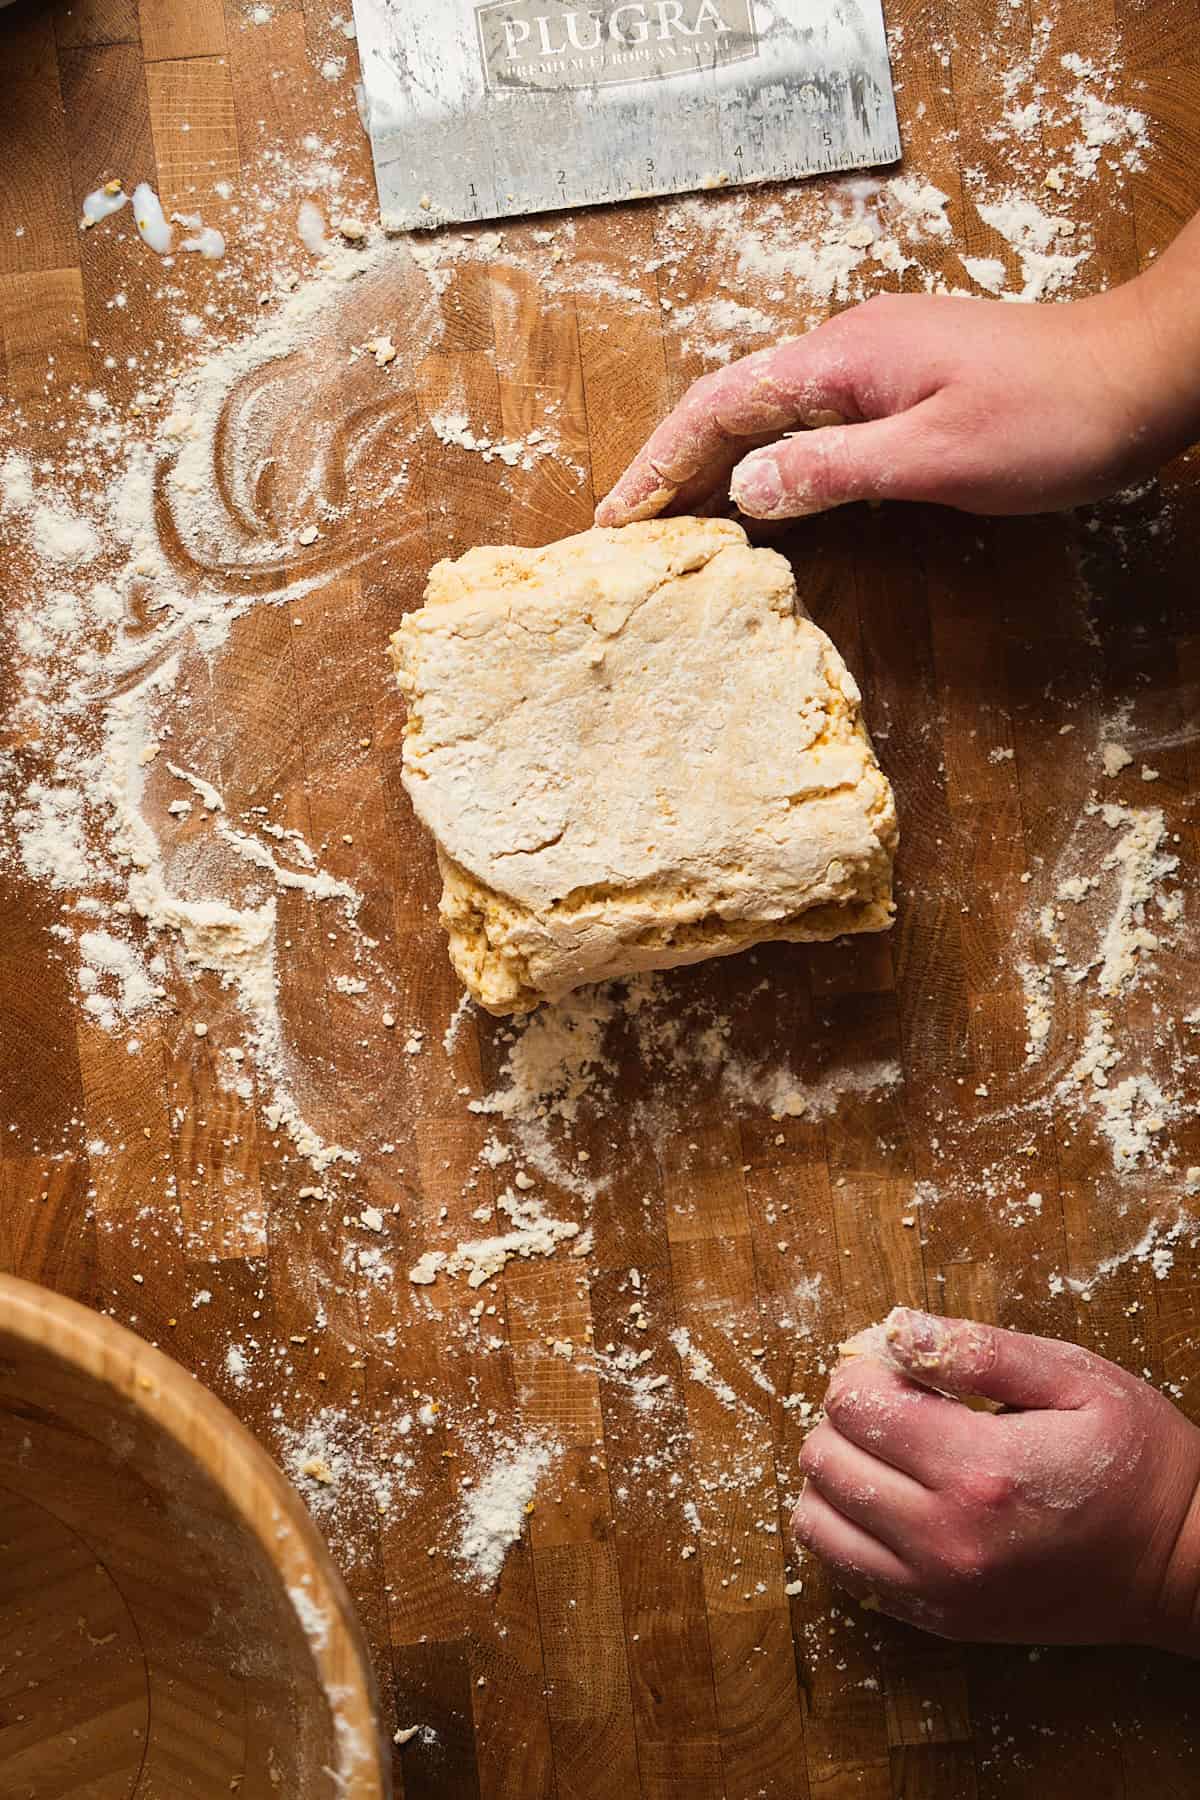
- Step 10: Press the biscuit scraps together to re-roll them and cut out more biscuits.
Shape the dough back into a square or rectangle shape that is between ¾-1-inch in thickness.
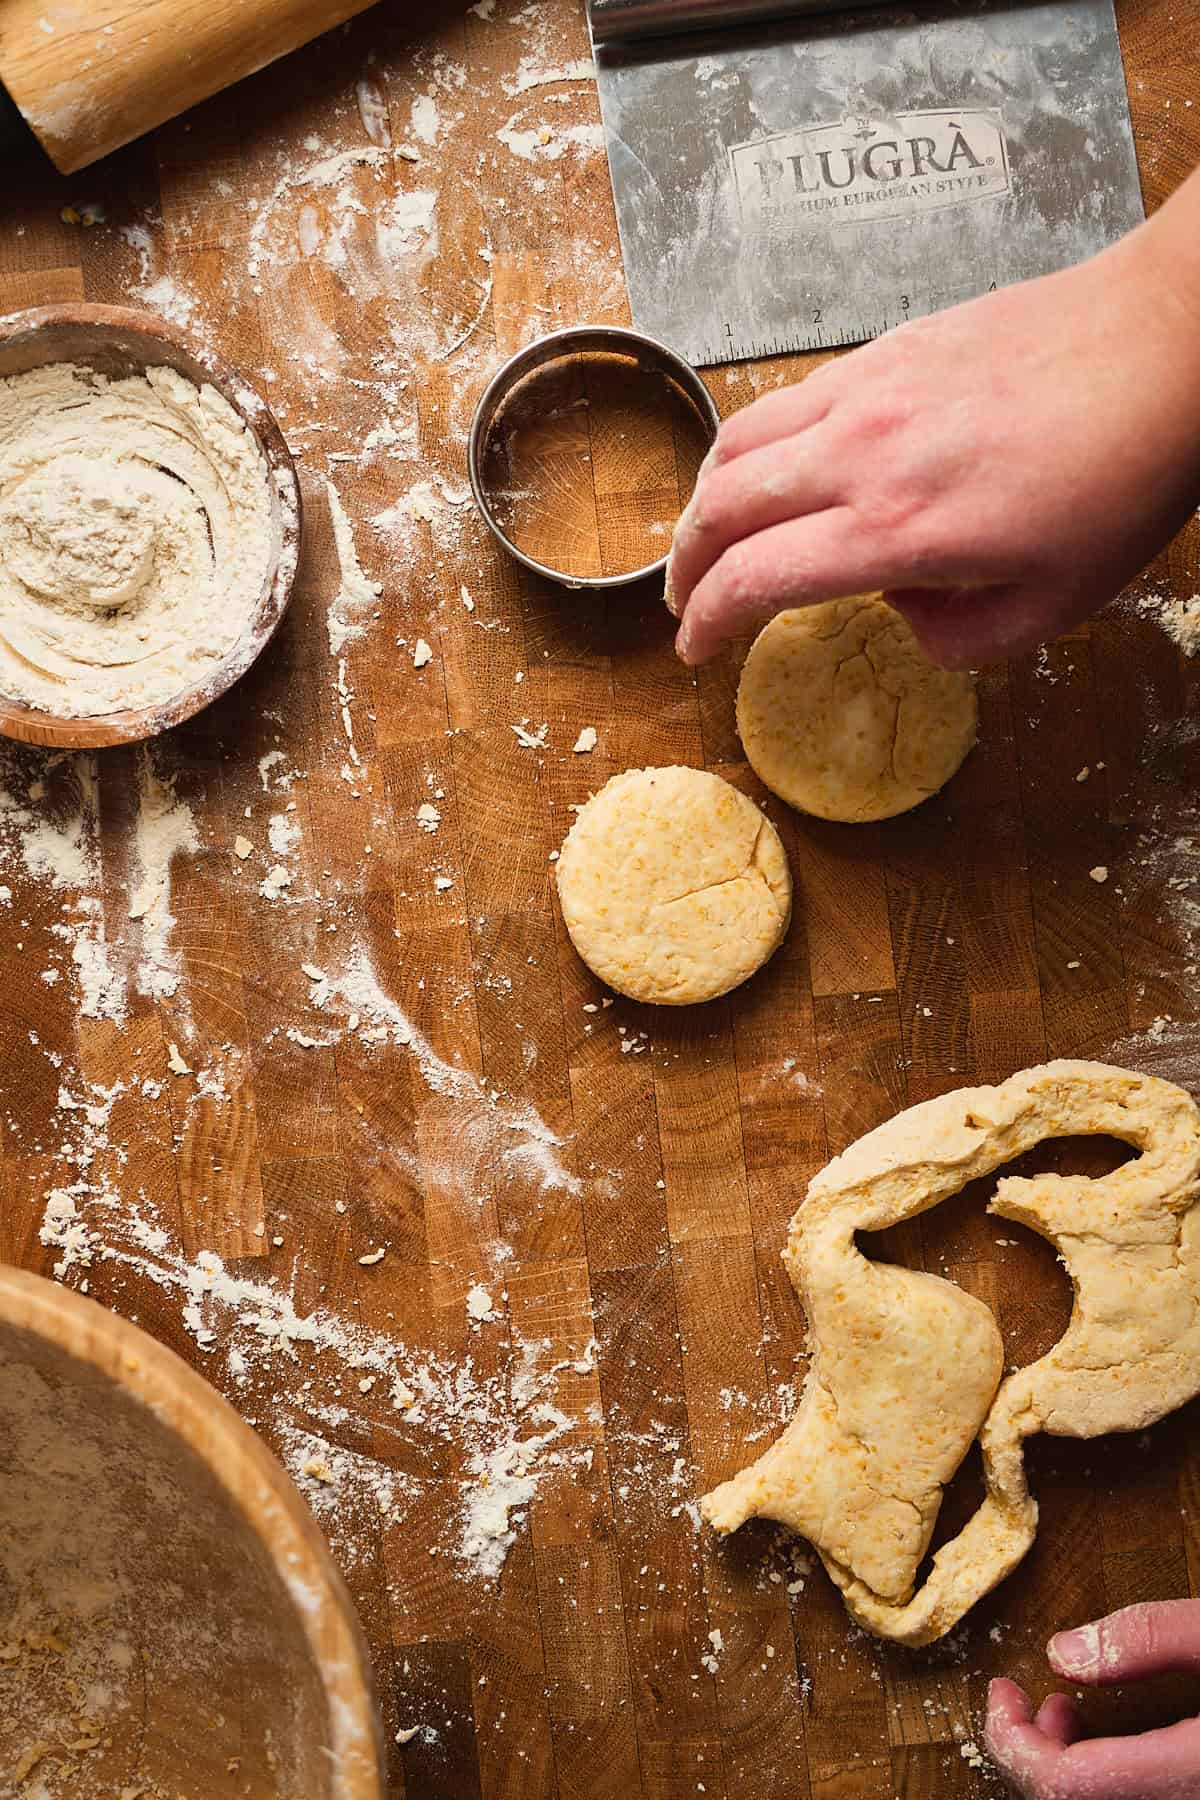
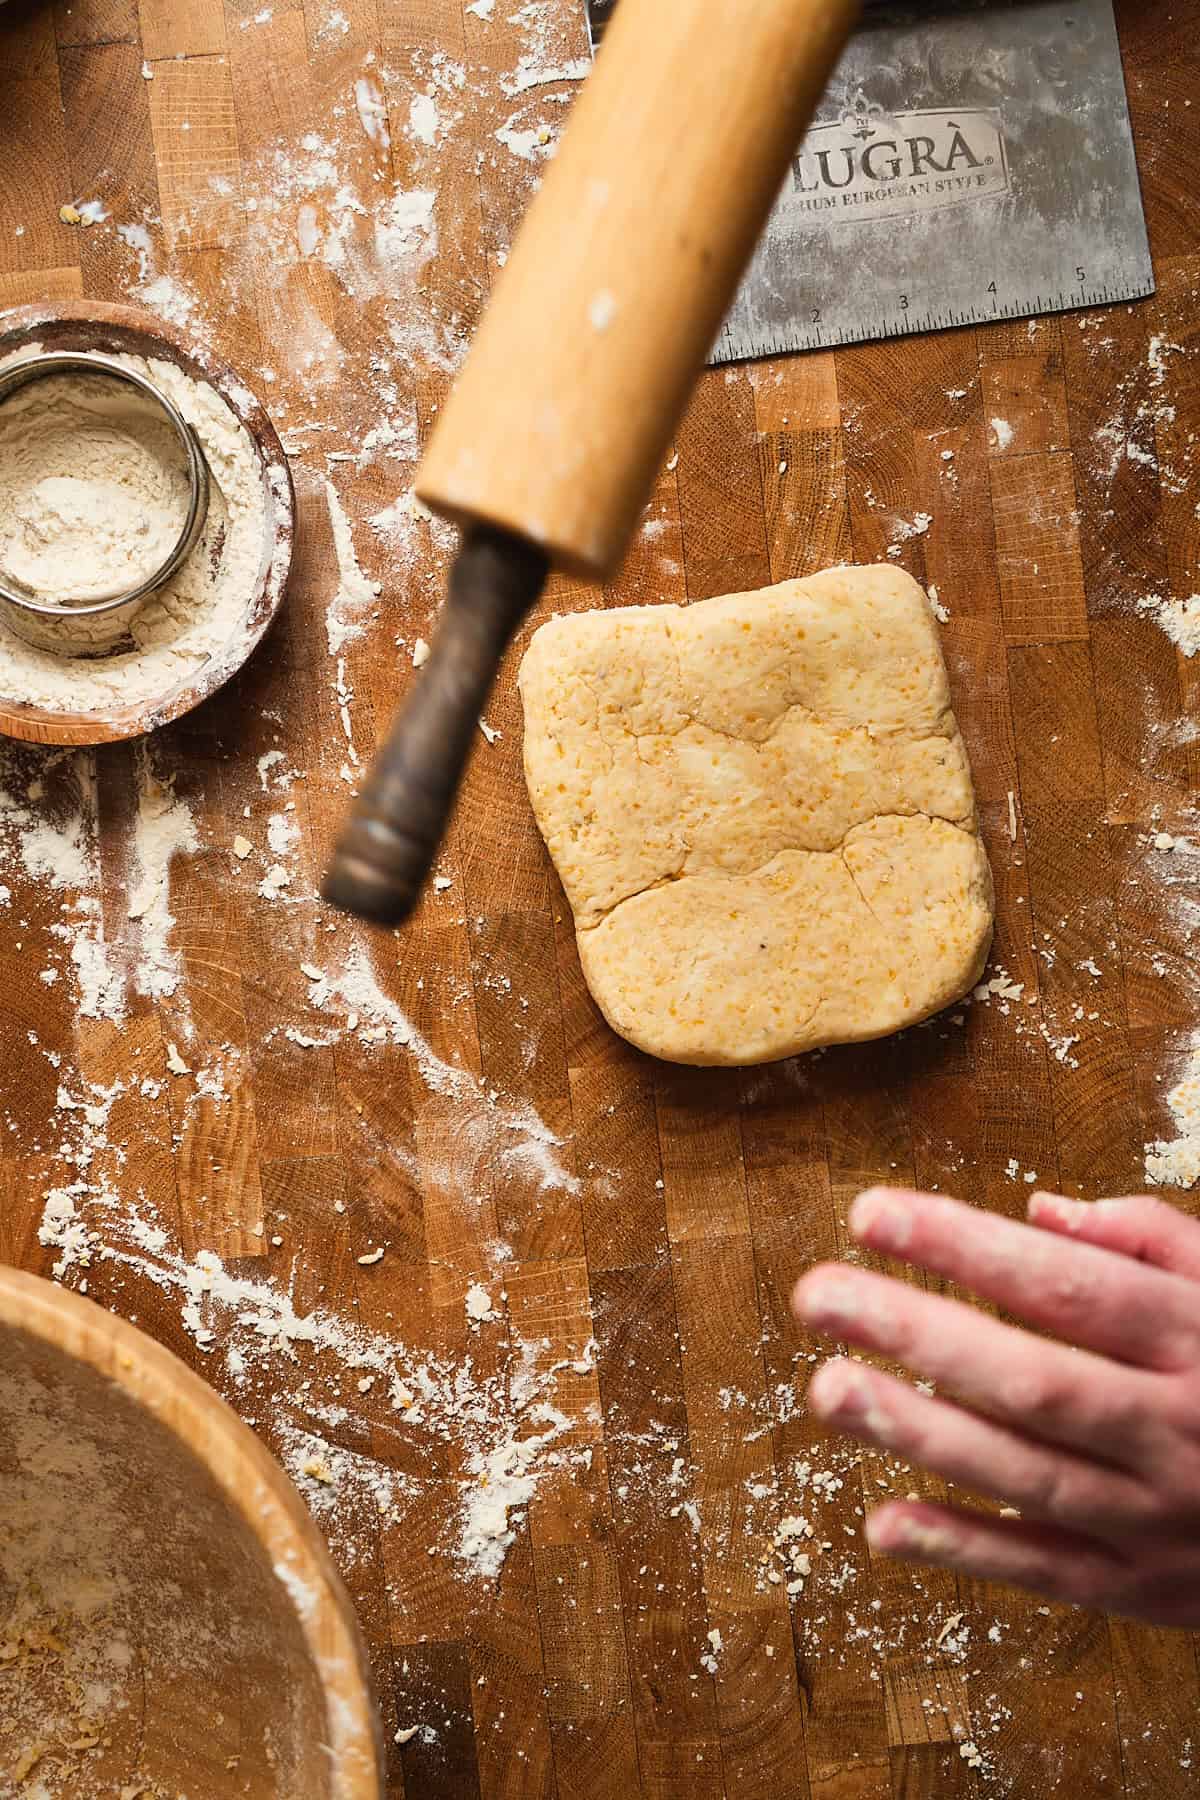
- Step 11: Once you've rolled and cut your first round of biscuits, gently press the scraps back together and re-roll to cut the rest. You'll get 12 biscuits from this dough. Try not to overwork the scraps - those last biscuits from the re-rolled dough won't rise quite as tall, but they'll still be tender and delicious.
Work the dough as little as possible when re-rolling the scraps! The re-rolled scraps will definitely not be quite as pretty as the initial batch and may become a little tougher, but they will still be very delicious!
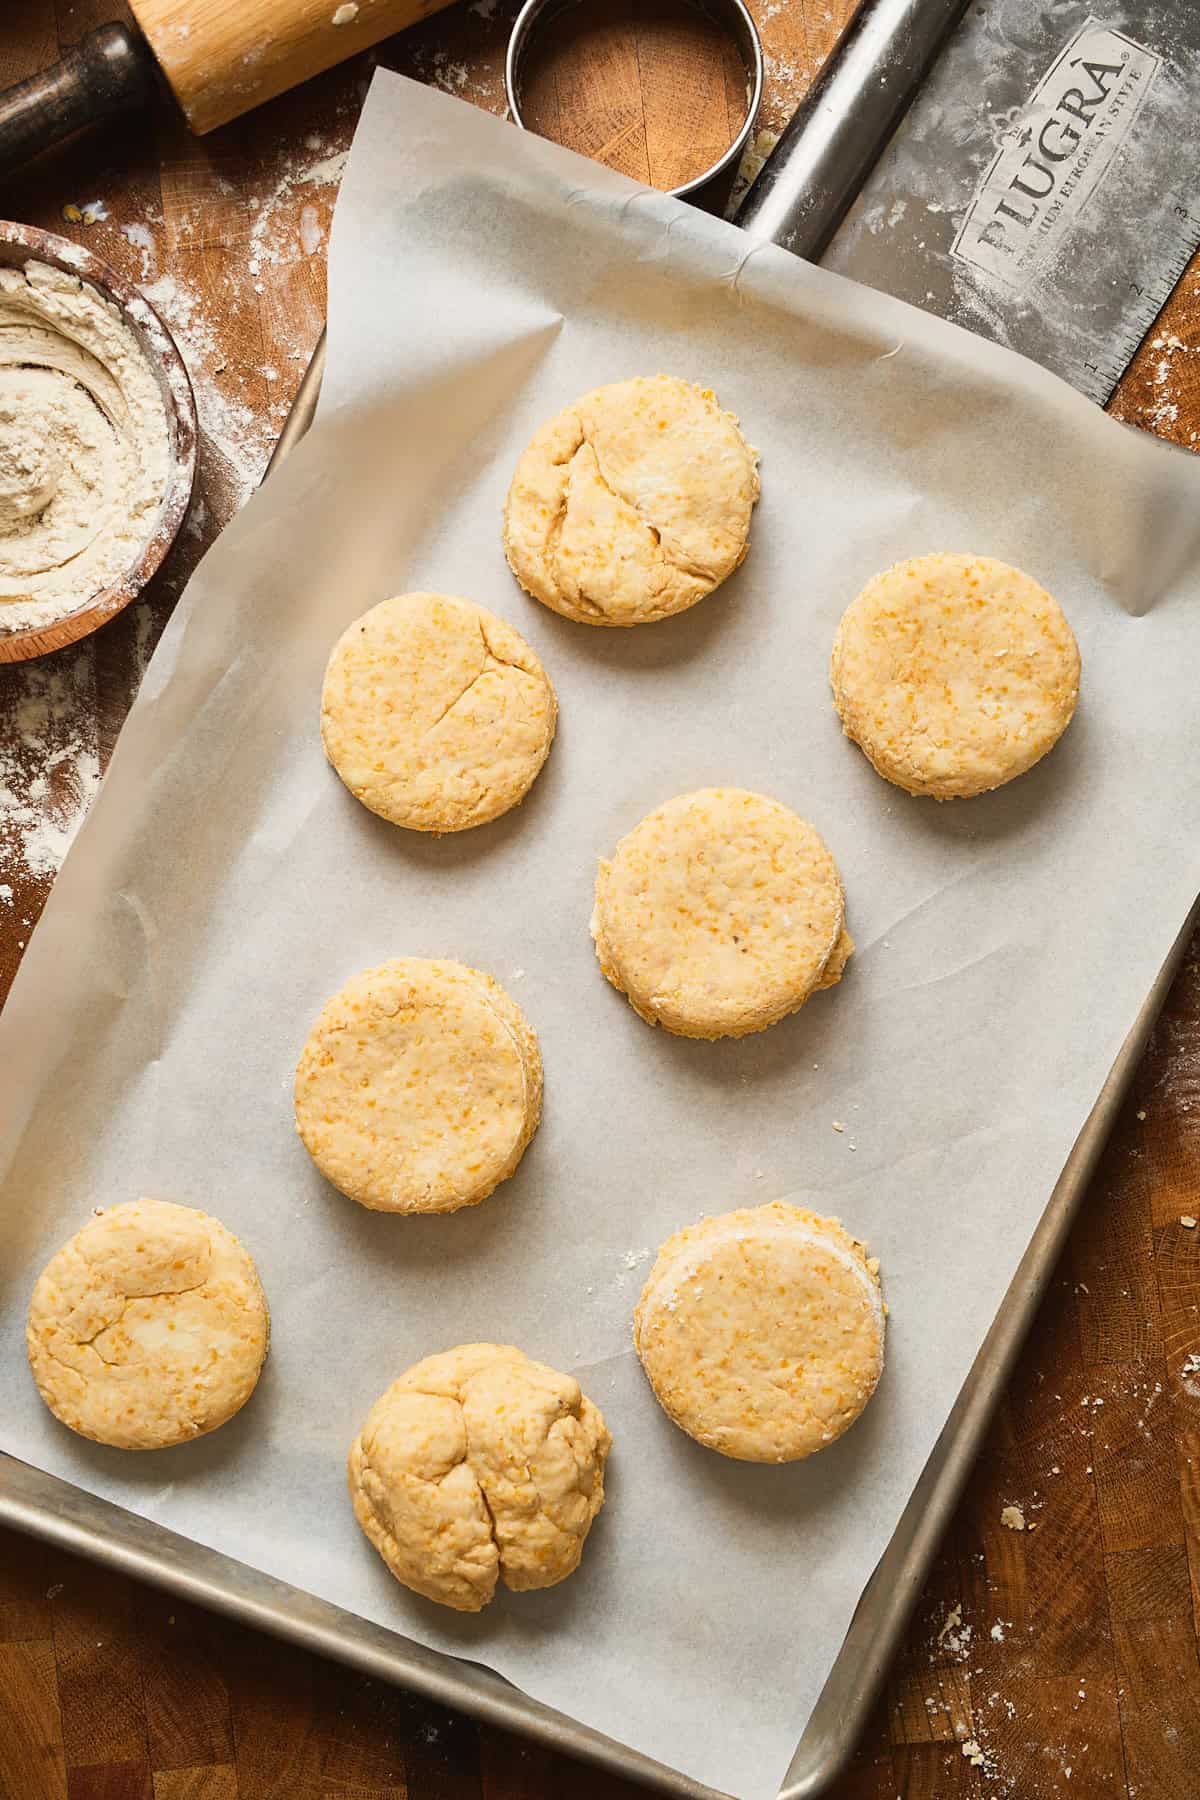
- Step 12: Place the biscuits on a parchment-lined baking sheet, then transfer to the freezer for at least 15 minutes to chill.
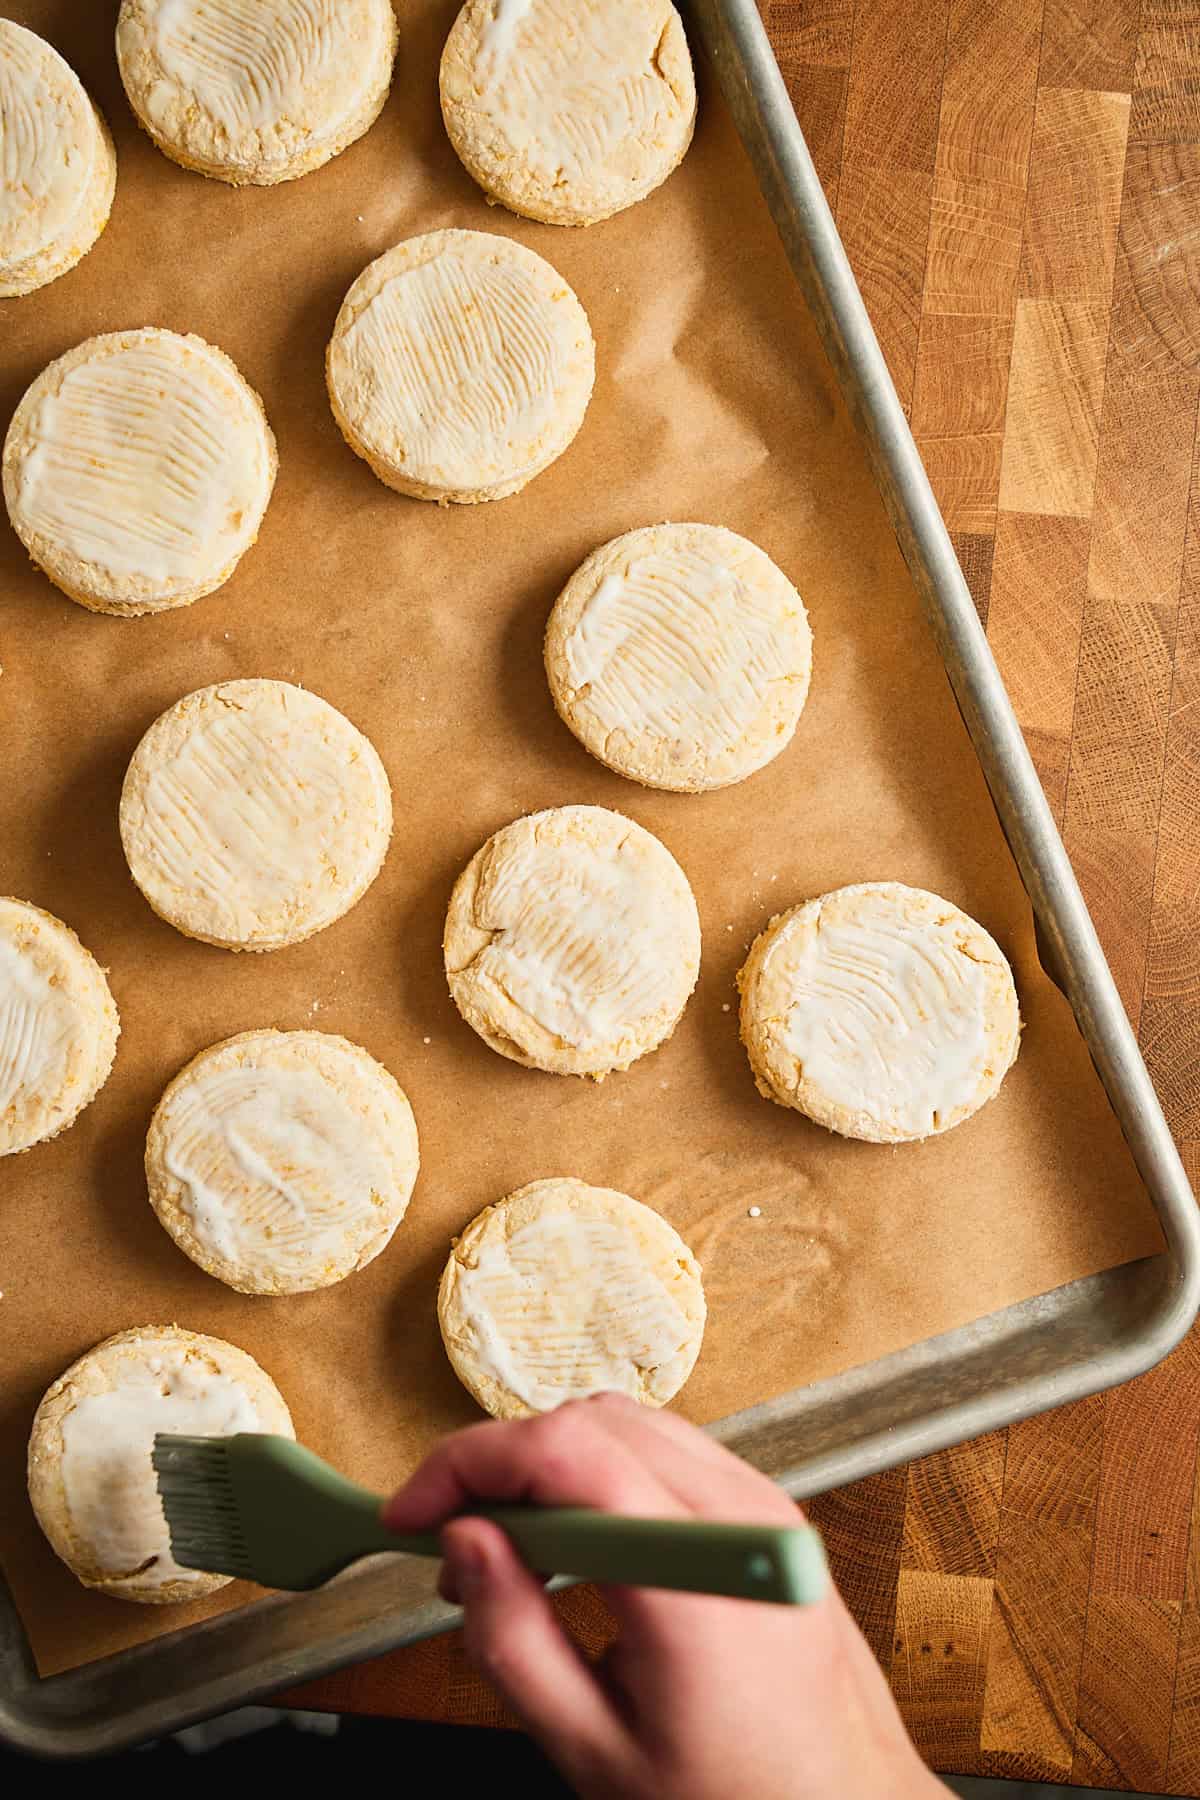
Preheat the oven to 425°F, and brush the tops of the biscuits with buttermilk or egg wash for a golden finish.
💡Make-ahead tip: You can save time by prepping your biscuits in advance and storing them in the freezer. These will keep in the freezer, tightly wrapped, for up to 3 months.
❄️If baking the biscuits from frozen, you may need to add 2-3 minutes extra to the bake time.
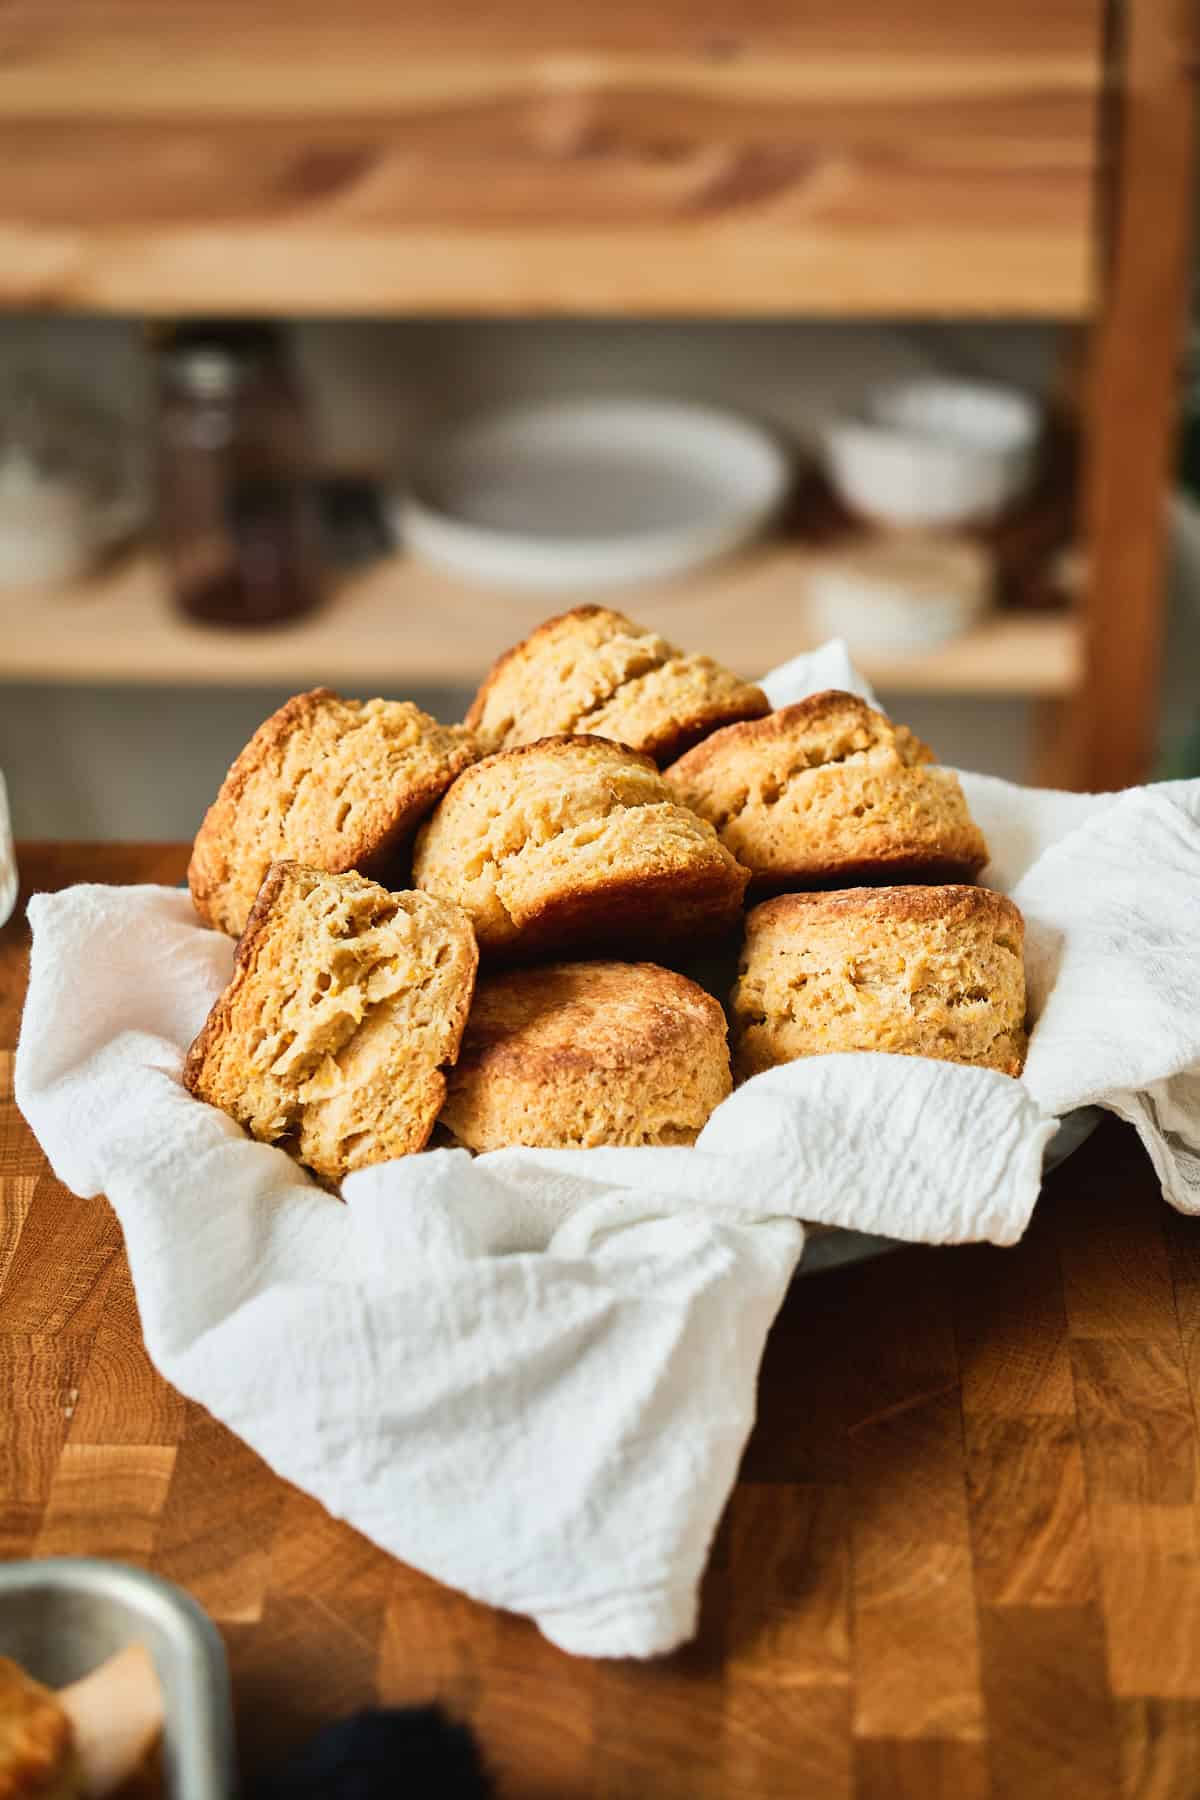
- Step 13: Bake for 15-20 minutes, until the biscuits have a golden brown top!
If you're unsure if your biscuits are done, use an instant-read thermometer.
You want them to be at least 190°F internally before removing them from the oven to make sure they're fully cooked and not raw on the inside.
*A target temperature of 200-205°F is ideal!
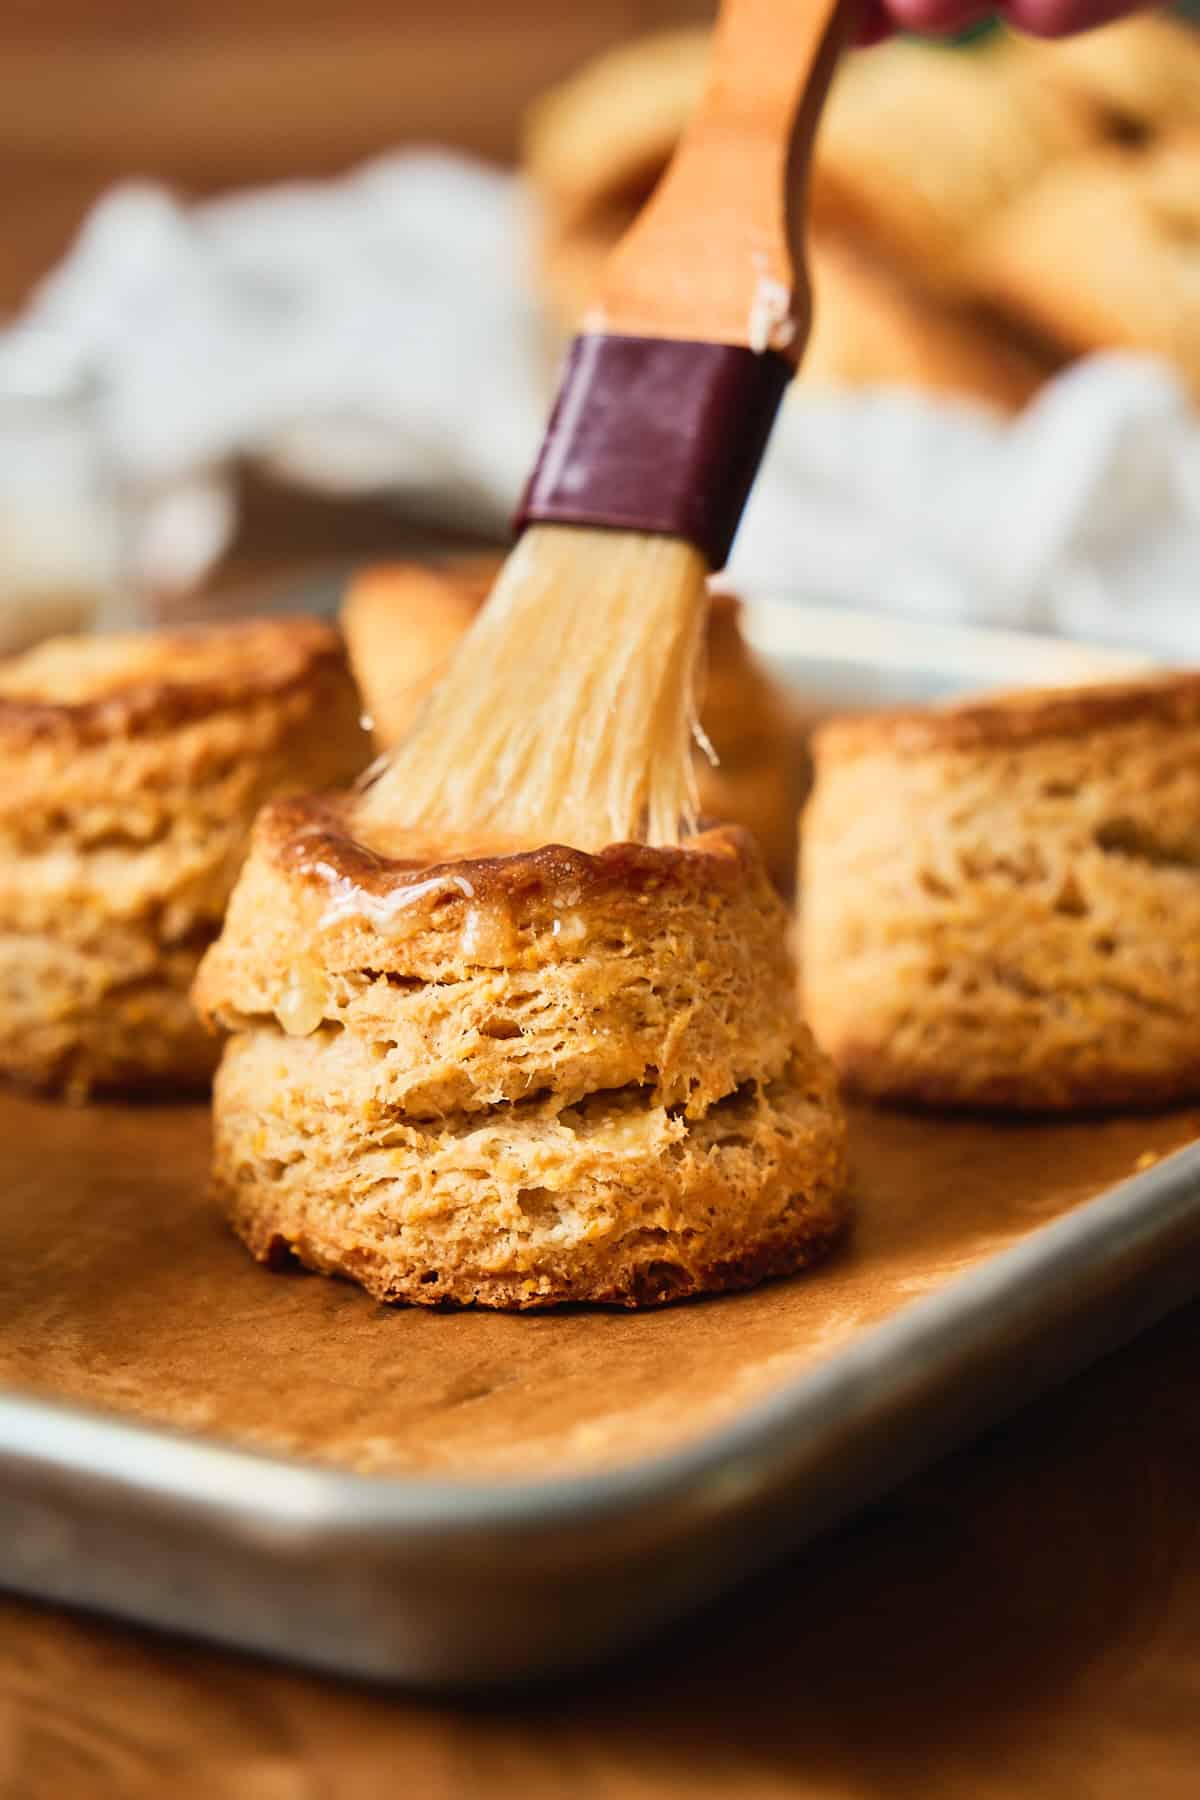
That's it! We like to brush the biscuits with a little bit of melted honey butter or maple butter right when they are fresh from the oven.
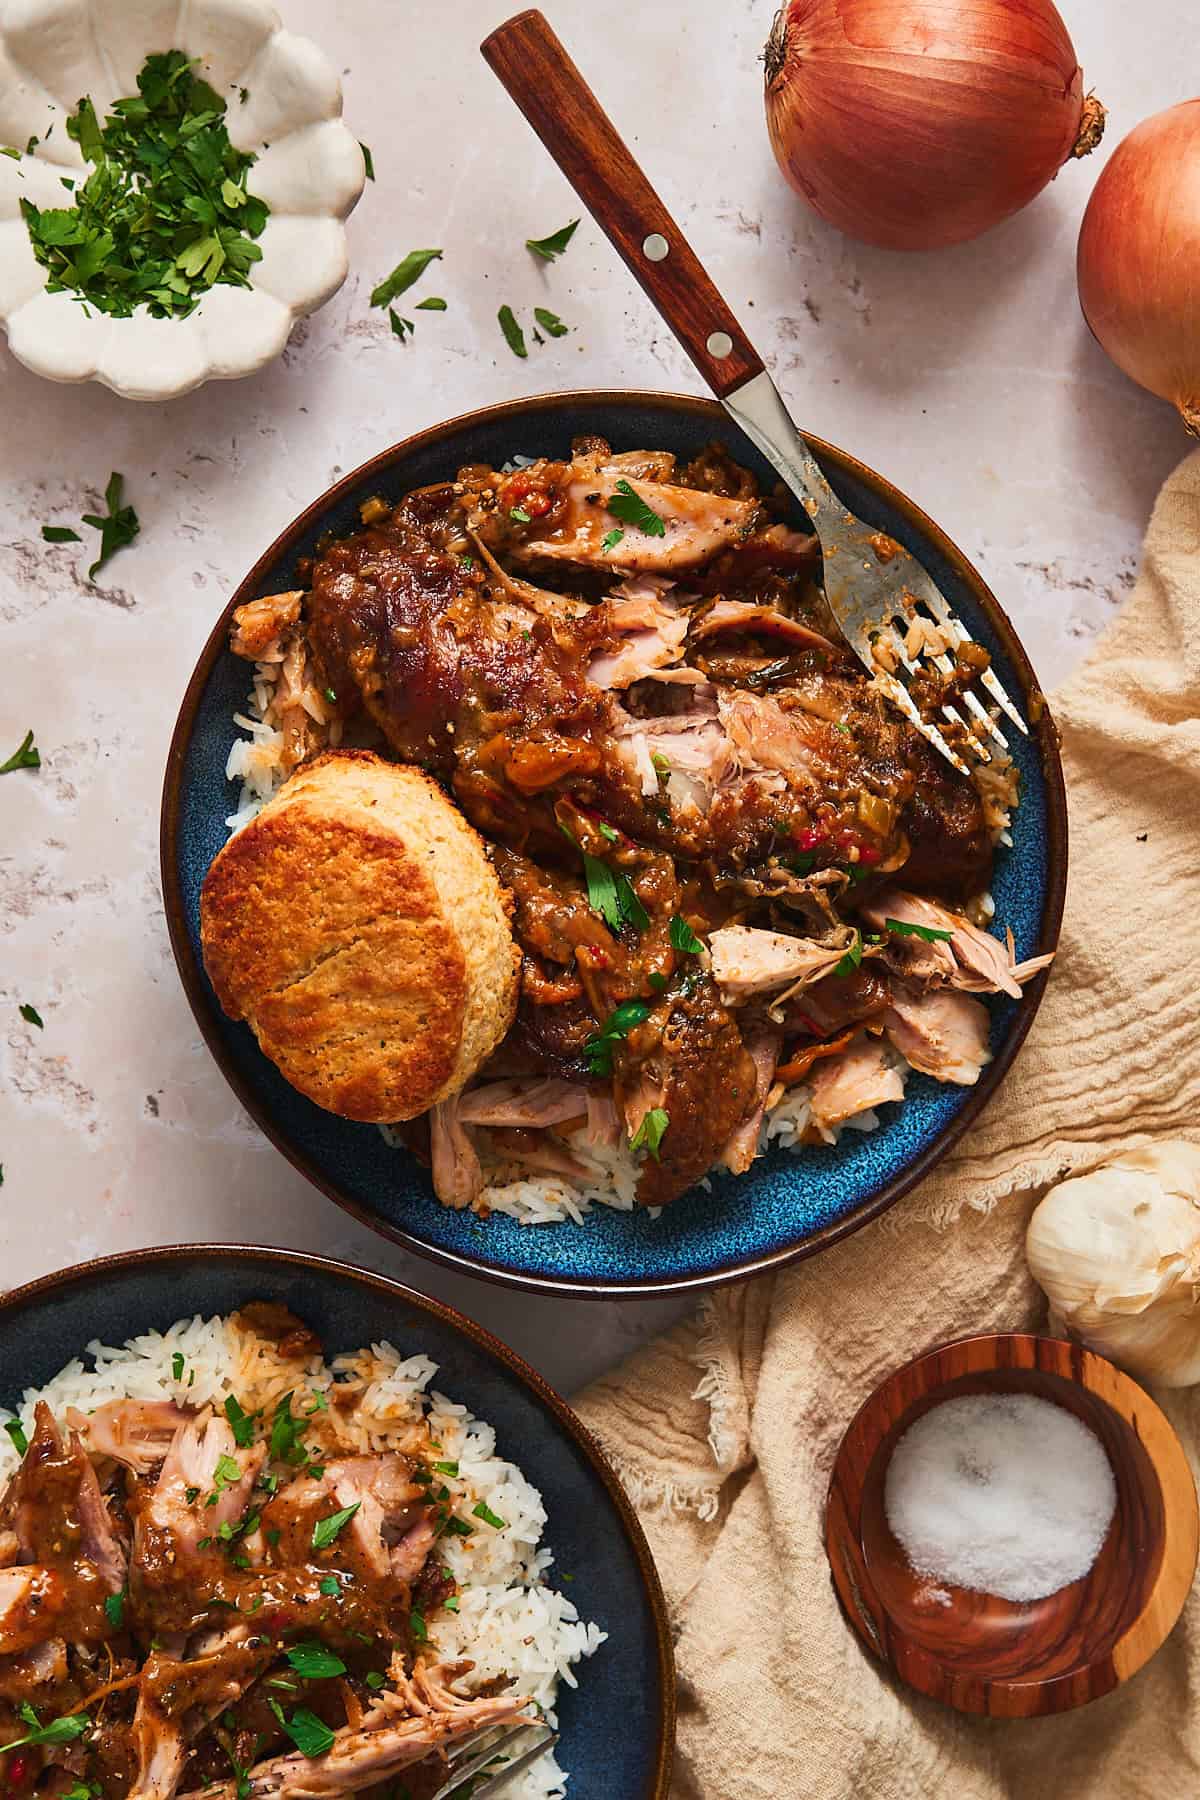
What to Serve With Cornbread Biscuits 🍴
Split them over a bowl of beer chili or ham and beans soup with collard greens when it's cold out to soak up everything at the bottom of the bowl. 🤤
You can slather them with bacon butter while they're still hot from the oven, or roasted tomato butter when tomatoes are at their peak!
For a holiday table, they shine next to our Southern smothered turkey wings instead of dinner rolls.
🌟Leave a Review!
If you make these cornmeal buttermilk biscuits, we'd love to hear from you! Leave a comment below with your rating for the recipe. Share with us by tagging us on Instagram! We love seeing your creations! 📸
📖 Recipe

Cornbread Biscuits (Flaky Buttermilk Recipe!)
Equipment
- 2 ½ inch round biscuit cutter optional
Ingredients
- 2 cups all purpose flour 272g
- 3 tablespoons sugar
- 1 tablespoon baking powder
- ½ teaspoon baking soda
- 1.5 teaspoons kosher salt
- ¾ cup medium grind cornmeal 114g, can also use fine ground, but not coarse ground
- 8 tablespoons unsalted butter cold and cut into large tablespoon sized chunks
- ¾ - 1 cup buttermilk very cold!, added slowly and as needed to hydrate the dough
Instructions
- Mix dry ingredients. In a large bowl, sift together flour, sugar, baking powder, baking soda, and salt. Whisk in the cornmeal until evenly combined.2 cups all purpose flour , 3 tablespoons sugar, 1 tablespoon baking powder, ½ teaspoon baking soda, 1.5 teaspoons kosher salt, ¾ cup medium grind cornmeal
- Work in the butter. Add the cold butter chunks and toss to coat in flour. Using your fingers, press each piece of butter flat into thin sheets, tossing with flour as needed to prevent sticking. Continue until all butter is flattened into thin, flat pieces throughout the flour mixture.8 tablespoons unsalted butter
- Add buttermilk. Pour ¾ cup of the cold buttermilk over the flour mixture. Using your hand in a claw shape, gently fold the ingredients together until a shaggy, loose dough forms. Add more buttermilk 1-2 tablespoons at a time if the dough seems too dry. The dough should be sticky and very shaggy, don't overmix, it will come together!¾ - 1 cup buttermilk
- Shape the dough. Turn the dough onto a floured surface and gently pat it into a rough rectangle about 1-inch thick.
- Create the layers (lamination!). Fold the dough in half, then cut it in half lengthwise with a bench scraper. Stack the two pieces on top of each other and press into a rectangle. Turn the dough 90 degrees. Repeat this fold-cut-stack-turn process 2-3 more times (for a total of 3-4 times) to create flaky layers. If dough becomes sticky, refrigerate for 5-10 minutes.
- Roll and cut. Roll or pat the dough out to about ¾-1 inch thick. Using a 2.5-inch round cutter (or cut into squares with a bench scraper), press straight down without twisting so the biscuits rise tall and even. Gently gather and re-roll the scraps to cut the last few. You should get 12 biscuits total.
- Chill. Place biscuits on a parchment-lined baking sheet and freeze for at least 15 minutes.
- Bake. Preheat oven to 425°F. Brush biscuit tops with buttermilk or egg wash. Bake for 15-20 minutes until golden brown and the internal temperature reaches 200-205°F. Brush with melted butter or honey butter while warm.
Save This Recipe! 💌
Notes
- Cold ingredients are key. Keep your butter and buttermilk refrigerated until you're ready to use them. Work quickly when mixing and shaping the dough. If the butter starts to soften or feel greasy, refrigerate the dough for 5-10 minutes before continuing.
- Salt. This recipe uses Diamond Crystal kosher salt. If using Morton's kosher salt or table salt, reduce the amount by half.
- Cornmeal. Medium-grind gives a denser, crunchier texture. Fine-grind also works well, and yellow or white are interchangeable. Do not use coarse-grind for these.
- No buttermilk? Add 1 tablespoon of vinegar or fresh lemon juice to 1 cup of whole milk. Let it sit 5 minutes to curdle, then stir.
- Don't overwork the dough. The dough should look shaggy and rough after adding the buttermilk-this is normal! Overmixing builds gluten and creates tough, dense biscuits instead of tender, flaky ones.
- Laminating creates layers. The fold-cut-stack-turn process (repeated 3-4 times) creates those beautiful flaky layers. Don't skip this step!
- Cut straight down. When cutting biscuits, press the cutter straight down and lift straight up without twisting. Twisting seals the edges and prevents the biscuits from rising properly.
- Alternative methods for cutting in butter. If pressing butter by hand is difficult, you can grate frozen butter into the flour using a box grater, use a pastry blender, or pulse the butter and dry ingredients in a food processor until crumbly. Work quickly to keep everything cold.
- Make-ahead tip. Cut biscuits can be frozen on a baking sheet, then transferred to a freezer bag for up to 3 months. Bake directly from frozen, adding 2-3 extra minutes to the baking time.
Storage
- Room temperature: Store baked biscuits in an airtight container at room temperature for up to 3 days. Reheat in a 350°F oven for 5-7 minutes.
- Refrigerator: Keep baked biscuits in an airtight container in the refrigerator for up to 5 days. Reheat before serving for best texture.
- Freezer (unbaked): Freeze cut, unbaked biscuits on a baking sheet until solid, then transfer to a freezer bag for up to 3 months. Bake directly from frozen, adding 2-3 minutes to the bake time.
- Freezer (baked): Freeze fully baked and cooled biscuits in a freezer bag for up to 2 months. Thaw overnight in the refrigerator and reheat in a 350°F oven for 8-10 minutes.


Comments
No Comments