Who says you need beans to make a mean chili? Dive into this Beanless Chili Recipe that's jam-packed with bold spices, peppers, and hearty goodness that'll have you asking for seconds before you know it! It's hearty, delicious and so satisfying- we promise you won't miss the beans!

Disclosure: This recipe was originally published in October 2018, but the recipe has been improved with new photos as of November 5th, 2023. We hope you enjoy the new look!
Growing up in the Midwest, beans in your chili were just the way it was. However, from time to time, we love making this no bean chili recipe. It's become a household staple, especially in the colder months. We usually make a big batch and keep the rest for later because it just becomes more crave-worthy over time!
Looking for more delicious chili recipes? Try our Dutch oven chili, buffalo chicken chili, or this spicy ground turkey chili too!
Jump to:
❤️Why we love this recipe
- A no-fuss, one-pot dish. This recipe is so straightforward, that you’ll have a simmering pot of delicious chili in as quickly as less than an hour made on the stove top. The perfect hearty dinner for any night of the week!
- Perfect for meal prep. This a good chili recipe for prepping meals throughout the week. Make a double batch! The flavor intensifies as it sits, making it an even more delicious meal after it sits for a day or two.
- Easy to customize. You can adjust the spice level, the type of meat used, and the combination of spices to suit your personal preferences. Play around with the recipe to discover various flavor profiles.
- Made with simple ingredients. Everything you need to make this delicious recipe can be found at any grocery store if you don't already have them on hand in your fridge and pantry.
- Adaptable for different diet types. This low carb version of classic chili is great for those on a keto diet. It's also perfect for those with legume sensitivity, and it's naturally dairy free. It can easily be made gluten-free, and even vegan!
- So versatile. Enjoy it in a bowl topped with green onions, cilantro, sour cream, shredded cheese, Fritos, jalapeno slices, raw white onion, or your favorite toppings!
🫑Ingredients
Here are the ingredients we used for this recipe. You can find more information for substitutions below.
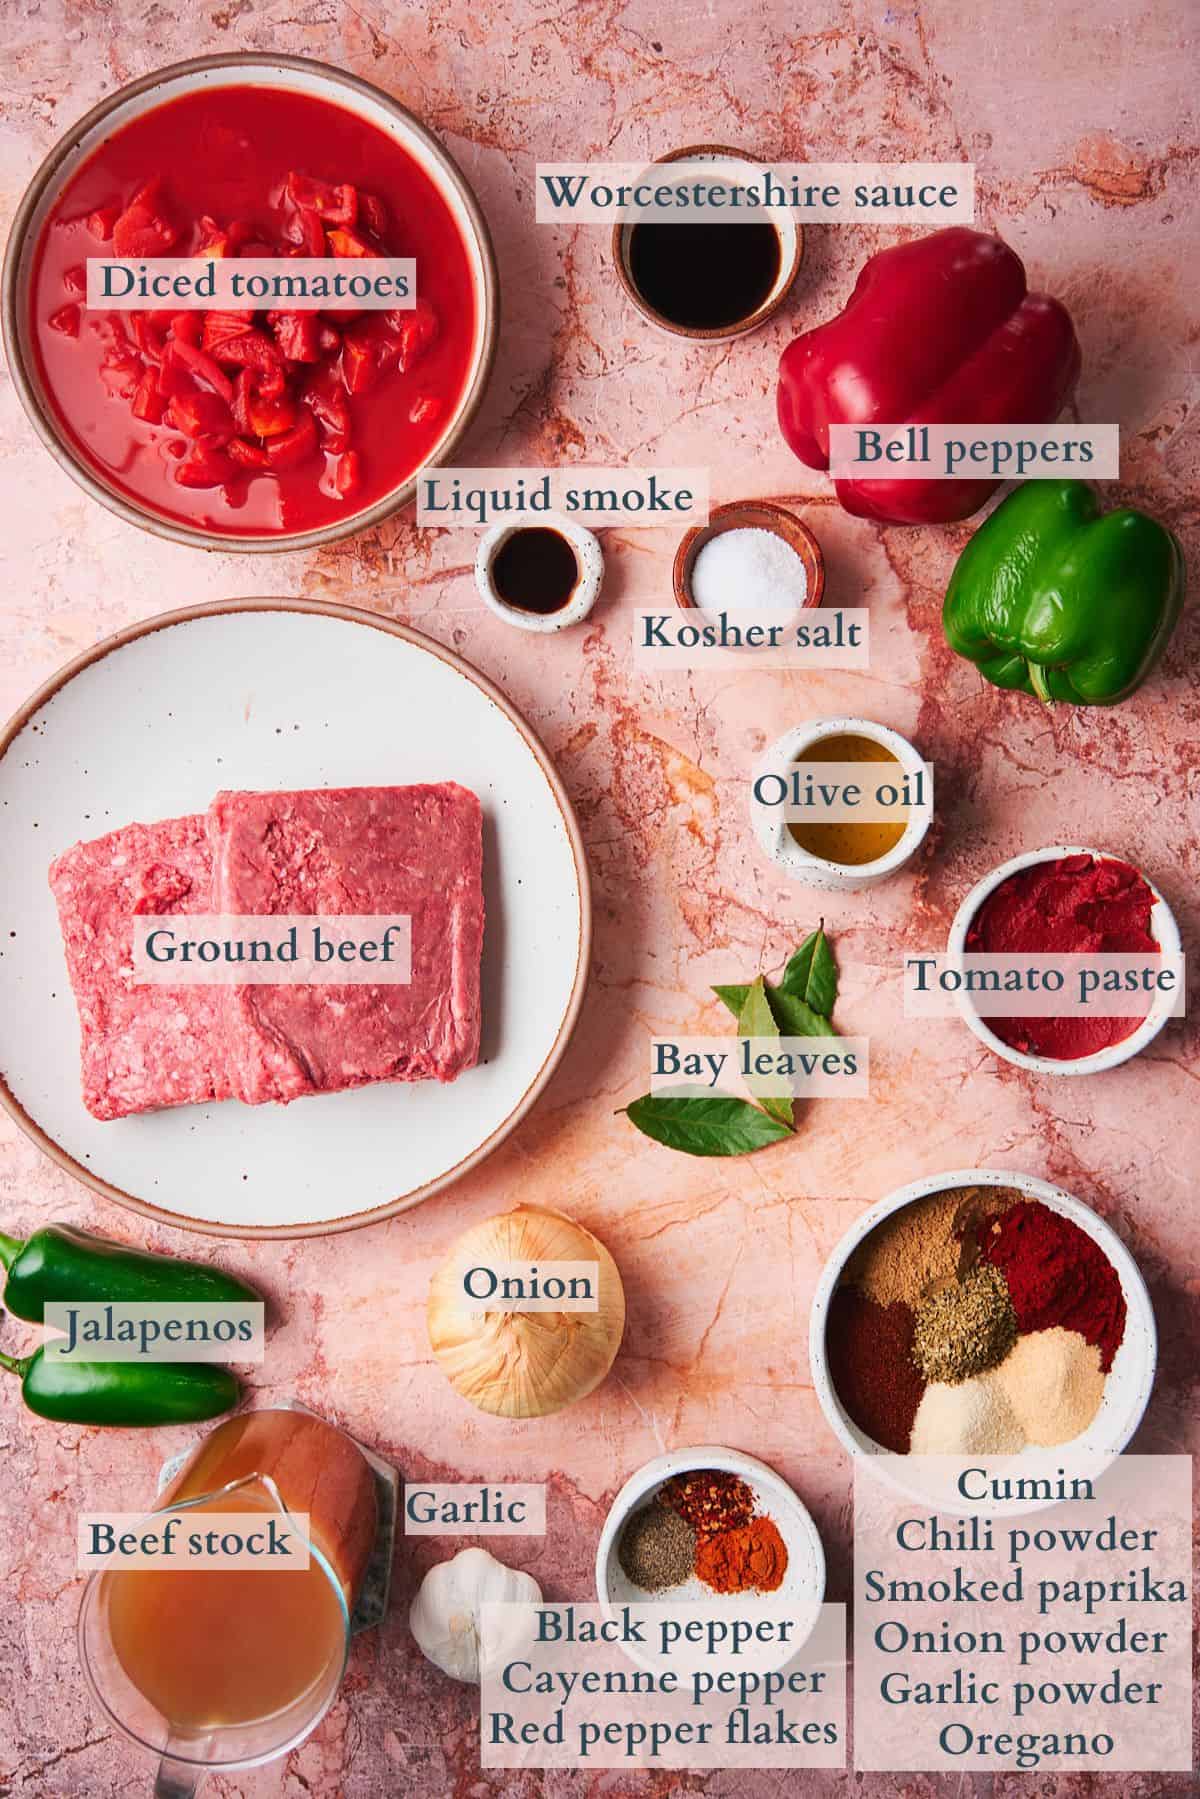
- Ground beef. We prefer using 85% lean ground beef because it has just the perfect amount of fat to make the chili flavorful. However, you can use leaner blends if you prefer.
- Spices. We used chili powder, cumin, smoked paprika, onion powder, garlic powder, oregano, red pepper flakes, and cayenne pepper for this recipe. We tend to like things a little bit on the spicy side, so keep that in mind when dealing with the hotter spices. Also, this spice blend is simply a suggestion; do feel free to adjust it to your liking.
- Tomato paste. Aside from intensifying the savory tomato flavor, this will also help thicken the chili.
- Bell peppers. You can use any color you like. We usually use green bell peppers, and then usually a colorful bell pepper as well, like red, yellow, or orange.
- Worcestershire sauce. This adds a great source of umami goodness!
- Liquid smoke. This is optional but we just love how it adds tons of smoky flavor to the dish which gives it that simmered-for-hours flavor.
Visit the recipe card for the full quantities and nutritional information.
✨Substitutions
Here are a few suggestions on additional flavors to try, or simple variations to this recipe.
- Use a different protein. Aside from beef, you can use other proteins like group pork, turkey, chicken, or crumbled Italian sausage.
- Broth options. Aside from beef stock, you can also use beef broth or beef bone broth for more protein and nutrients. Chicken or vegetable broth can also be used in a pinch.
- Crushed tomatoes. Love tomato flavor without the chunks of tomatoes? Just use crushed tomatoes instead!
✨Variations
- Make it gluten-free. The majority of the ingredients are naturally gluten-free. All you need is to use certified gluten-free Worcestershire sauce. You can also just omit the Worcestershire sauce entirely.
- Vegan. You’ll have to replace a few of the ingredients to make this recipe plant-based, but it can be done! Use a ground meat substitute instead of beef, replace the beef broth with vegetable broth, and use a vegan Worcestershire sauce.
- Add veggies! Sneak in some veggies to your chili for added nutrition. Add diced carrots, celery, potatoes, squash, chickpeas, spinach, or peas for more veggies and nutrition.
- Less spicy. Adjust the spices to your taste. For less spicy, make sure to leave out all of the jalapeno membranes and seeds. You can also omit them entirely. You'll also want to scale back on the red pepper flakes, cayenne pepper, and chili powder.
- More spicy. Add in the jalapeno seeds and membranes for more heat! You can also add more spicy ingredients like chipotle in adobo, green chiles, serrano peppers, or even poblano peppers in place of bell peppers. You can add more dry seasonings for a spicier broth as well.
🔪Prep work
- If using frozen ground beef, thaw it overnight in the fridge.
- Dice the bell peppers, jalapeños, yellow onion, and mince the garlic cloves.
- Measure the rest of the ingredients.
- Heat a large stock pot or Dutch oven over medium heat.
📋Instructions
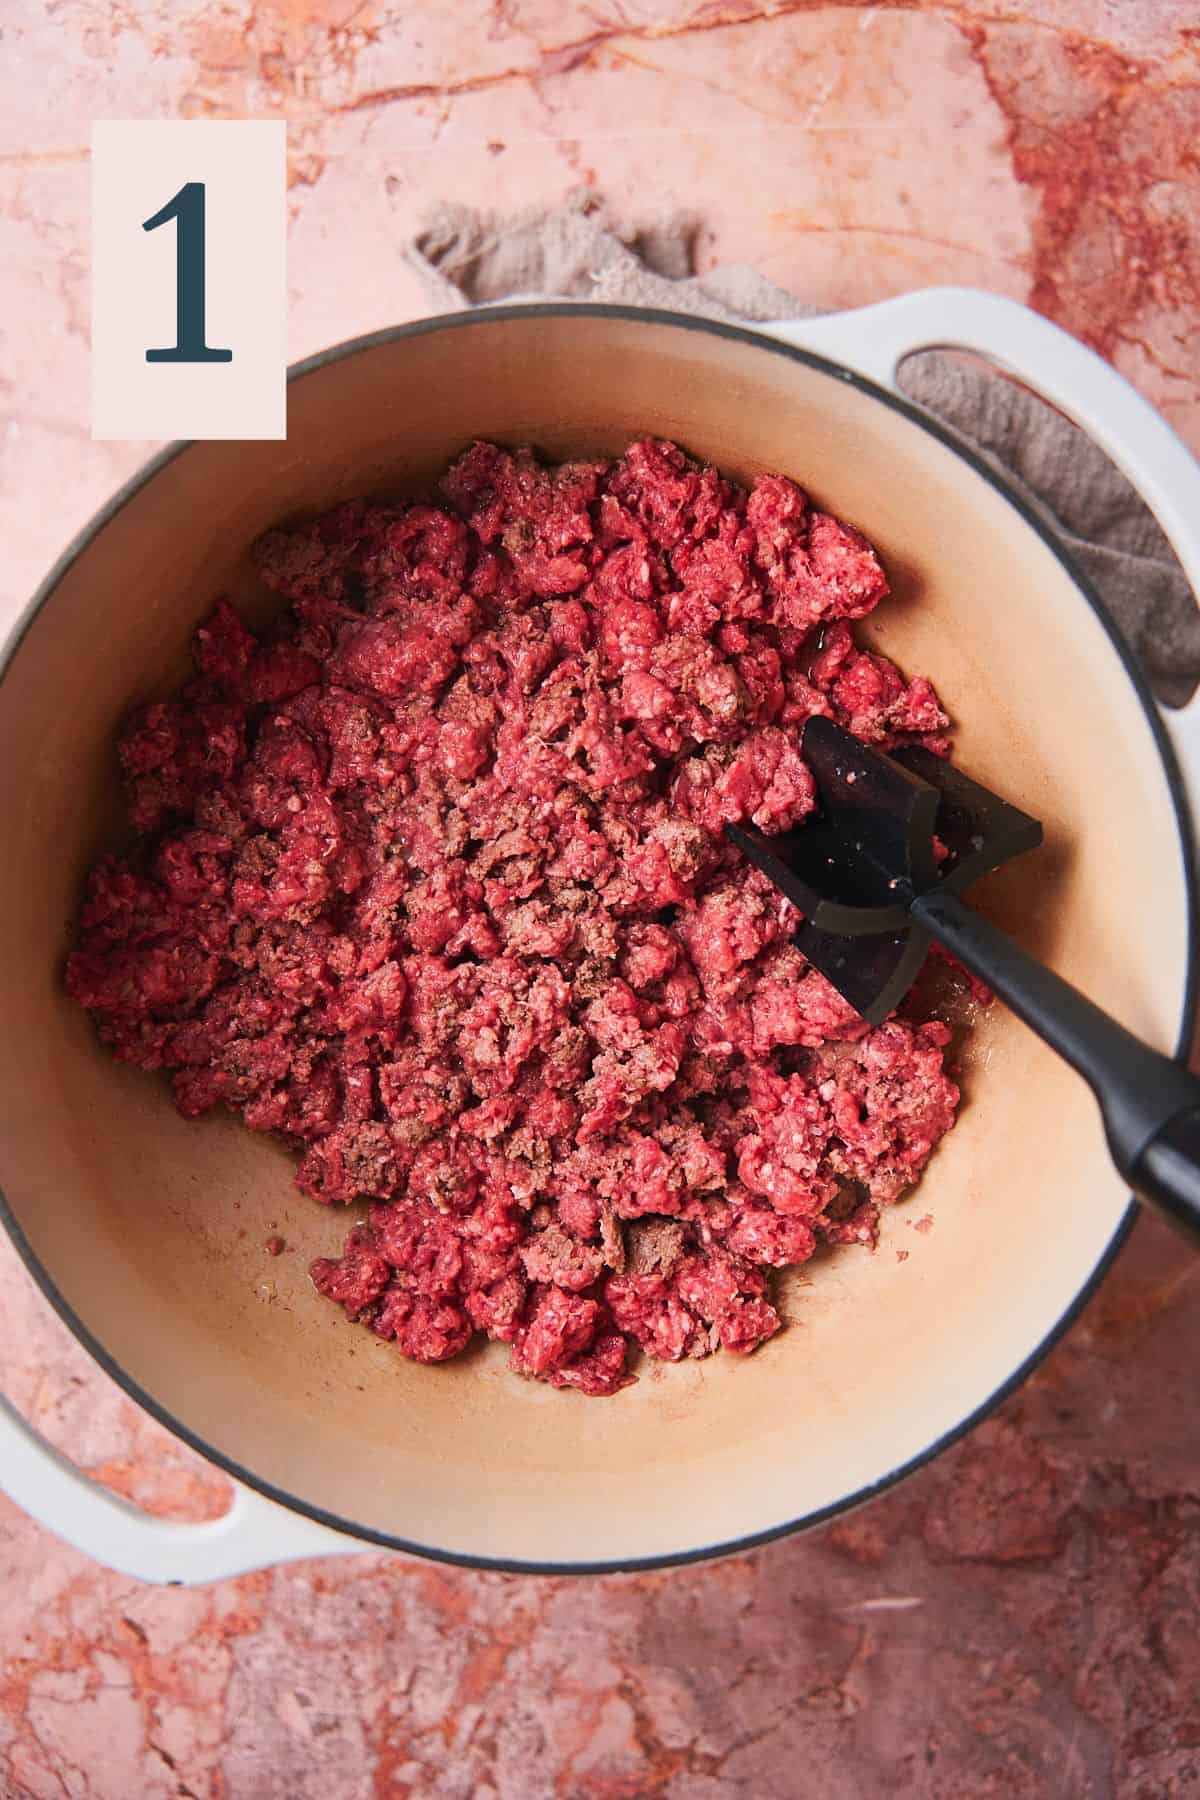
Add olive oil to a large Dutch oven over medium heat. Add the ground beef, with a large pinch of salt, and break the meat into small pieces. (Image 1)
Cook until the beef is mostly browned, about 5 minutes. (Image 2)
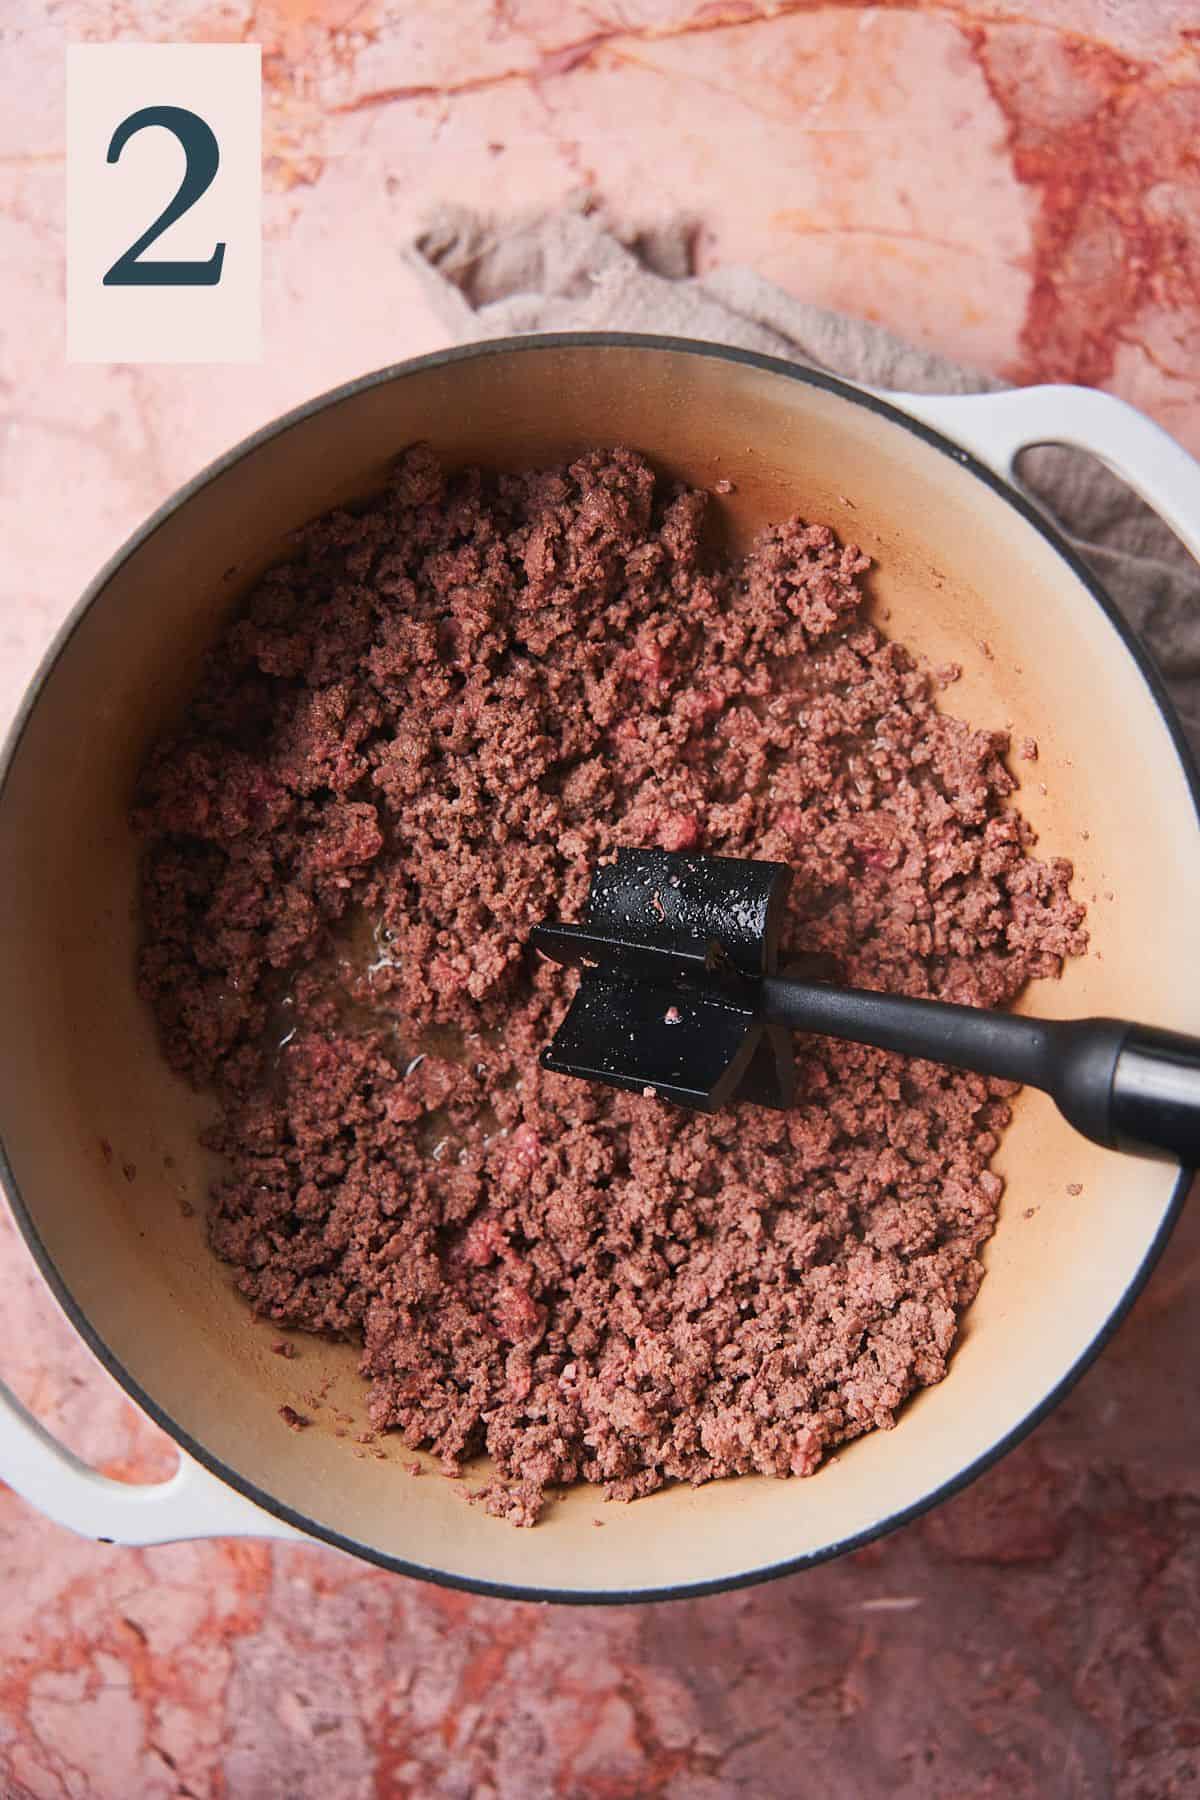
Next add the tomato paste, minced garlic cloves, chili powder, smoked paprika, cumin, onion powder, garlic powder, oregano, black pepper, cayenne pepper, and red pepper flakes. (Image 3)
Stir to prevent any burning, and cook for 3-5 minutes, until the tomato paste has deepened in color. (Image 4)
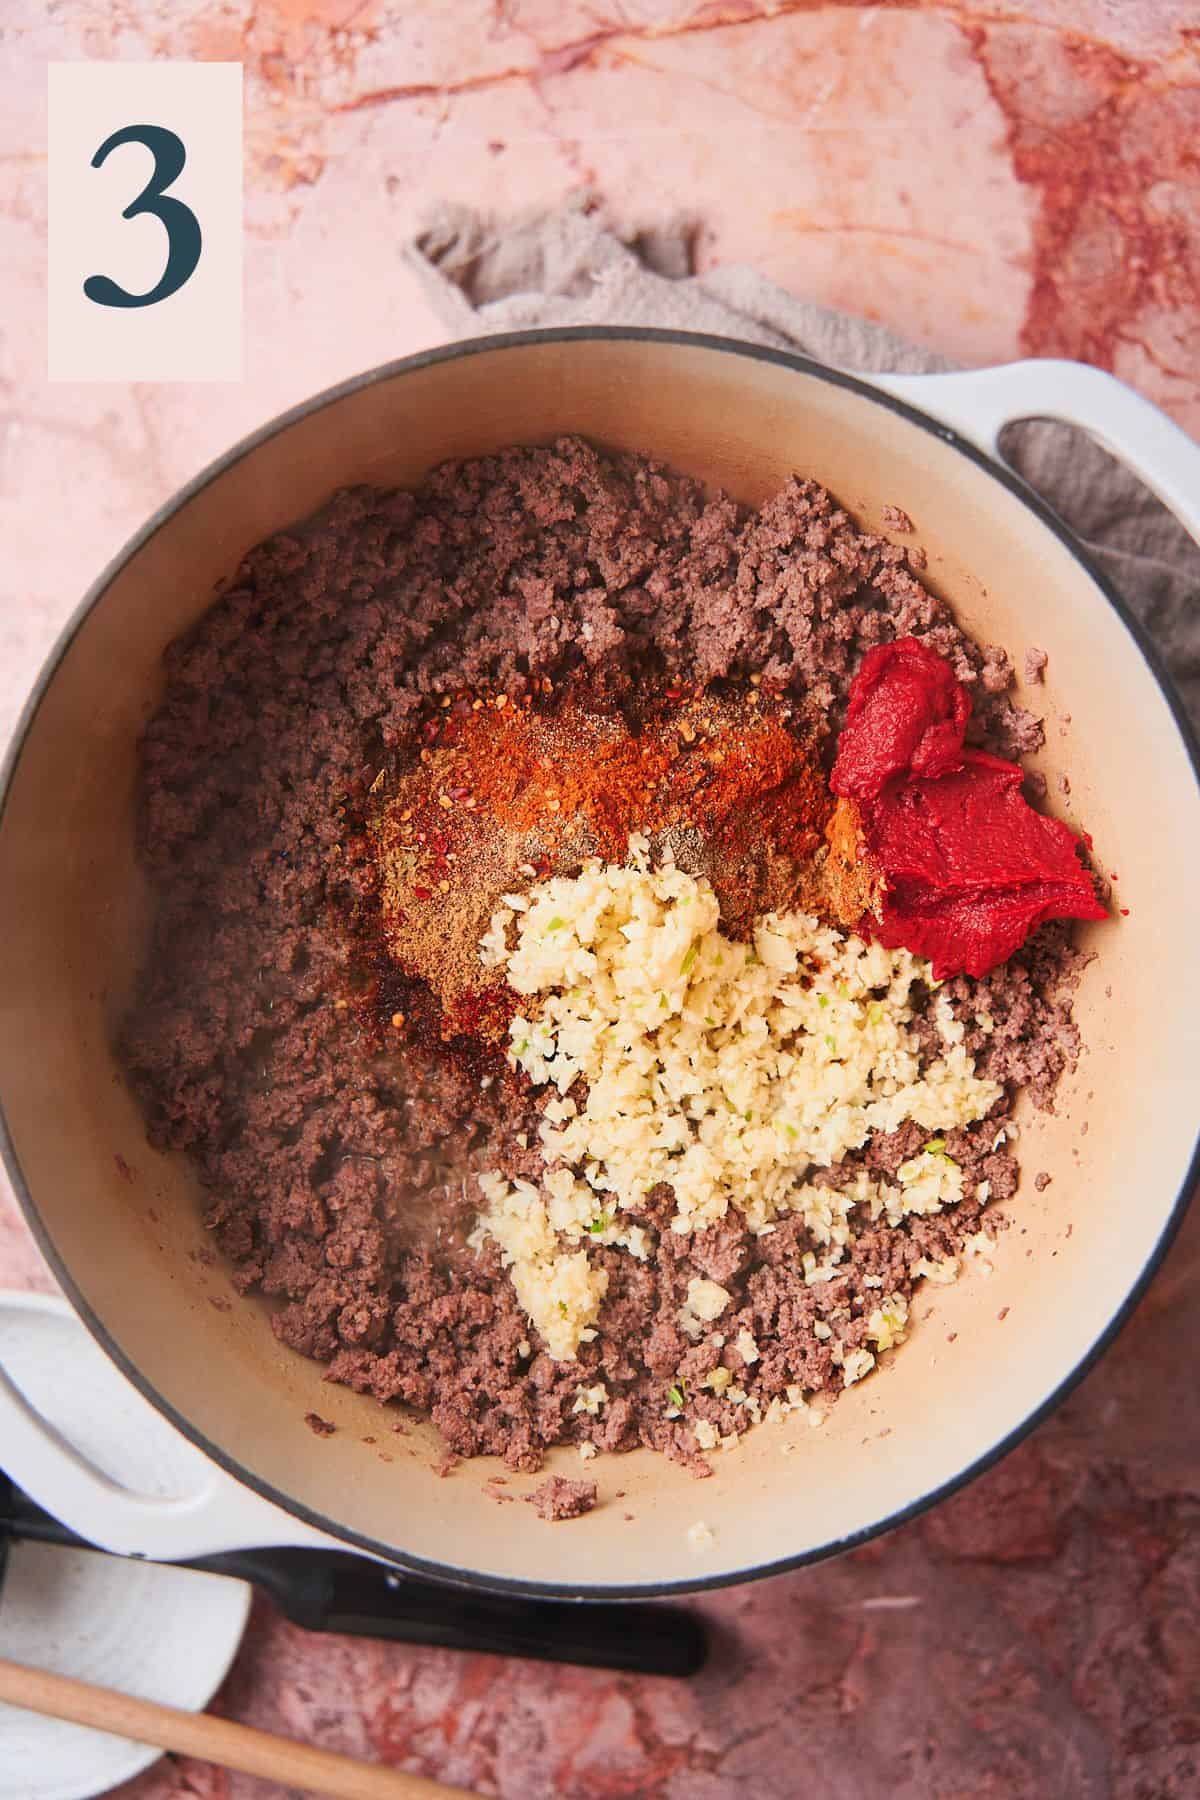
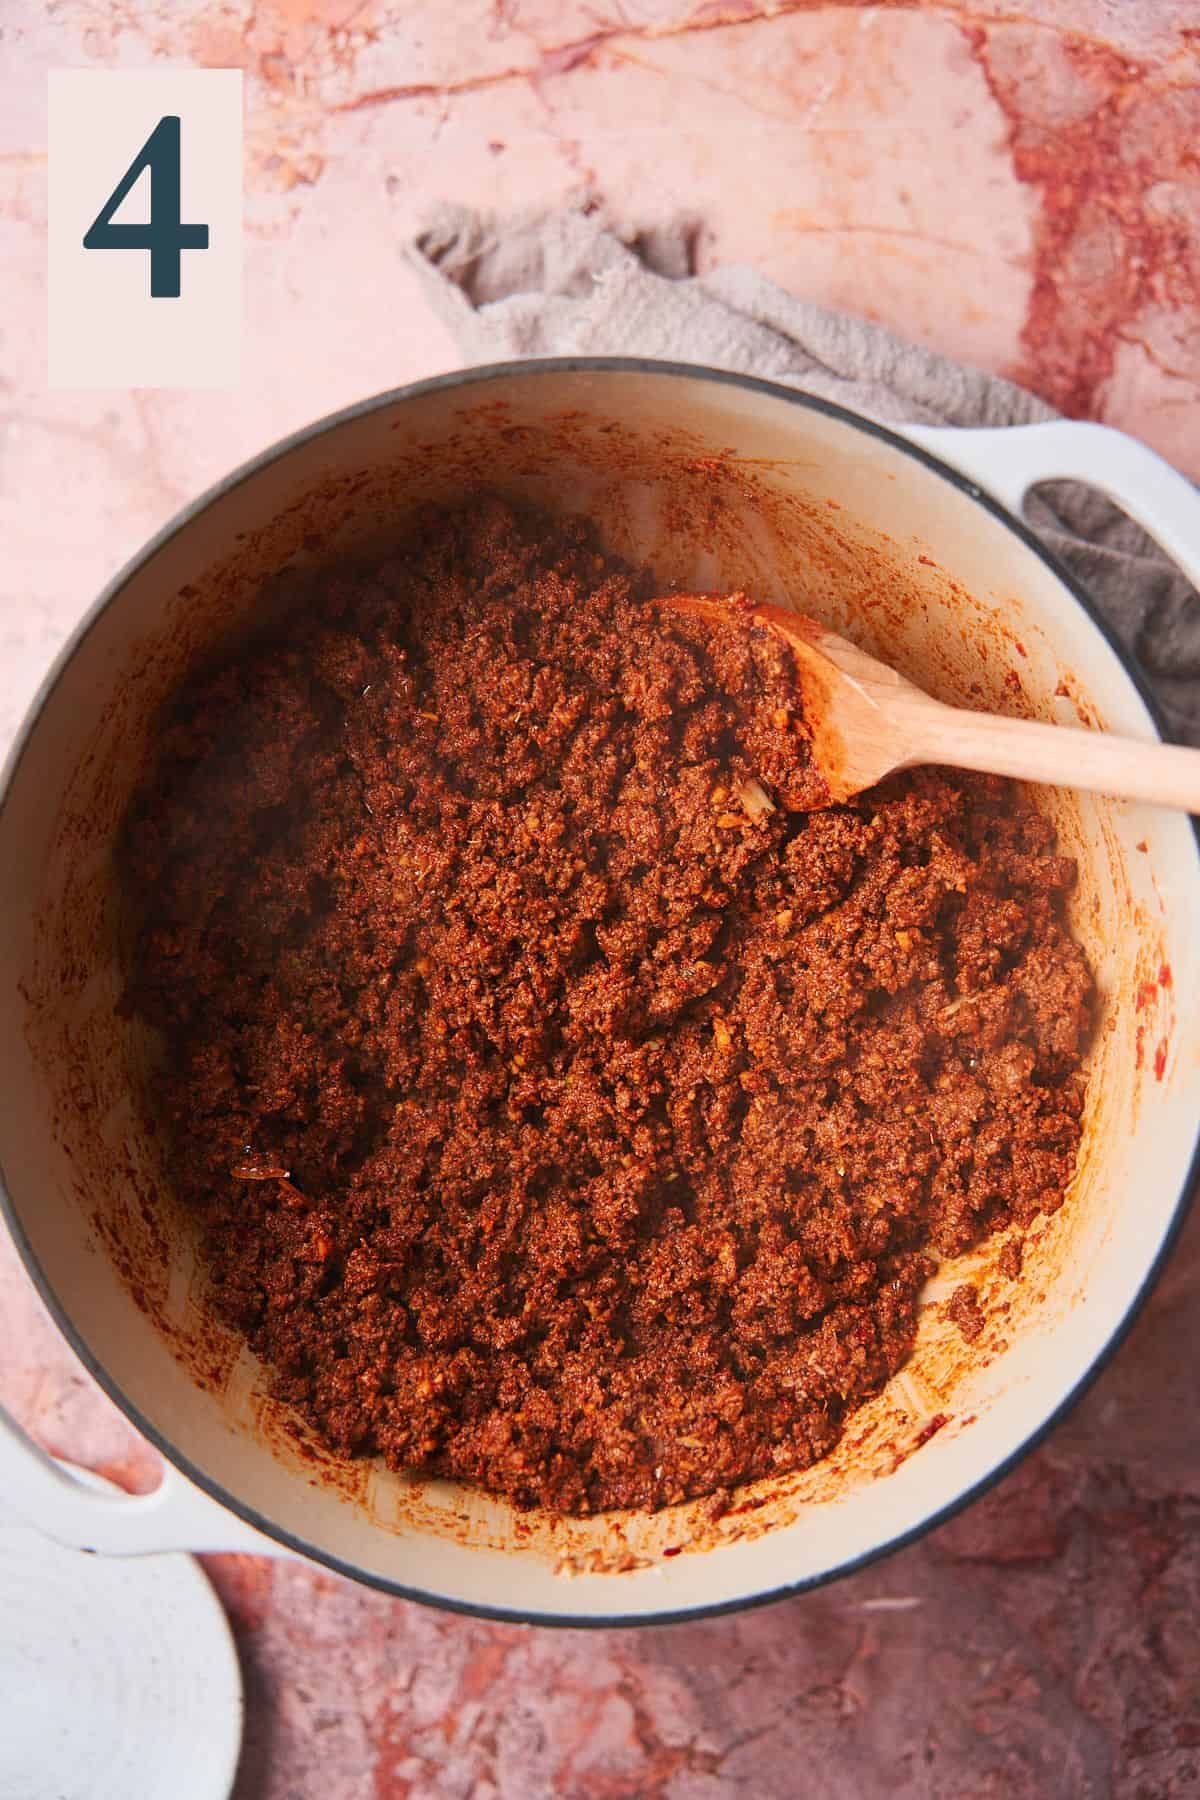
✨Pro Tip: Stir constantly to prevent sticking and burning of the tomato paste or garlic.
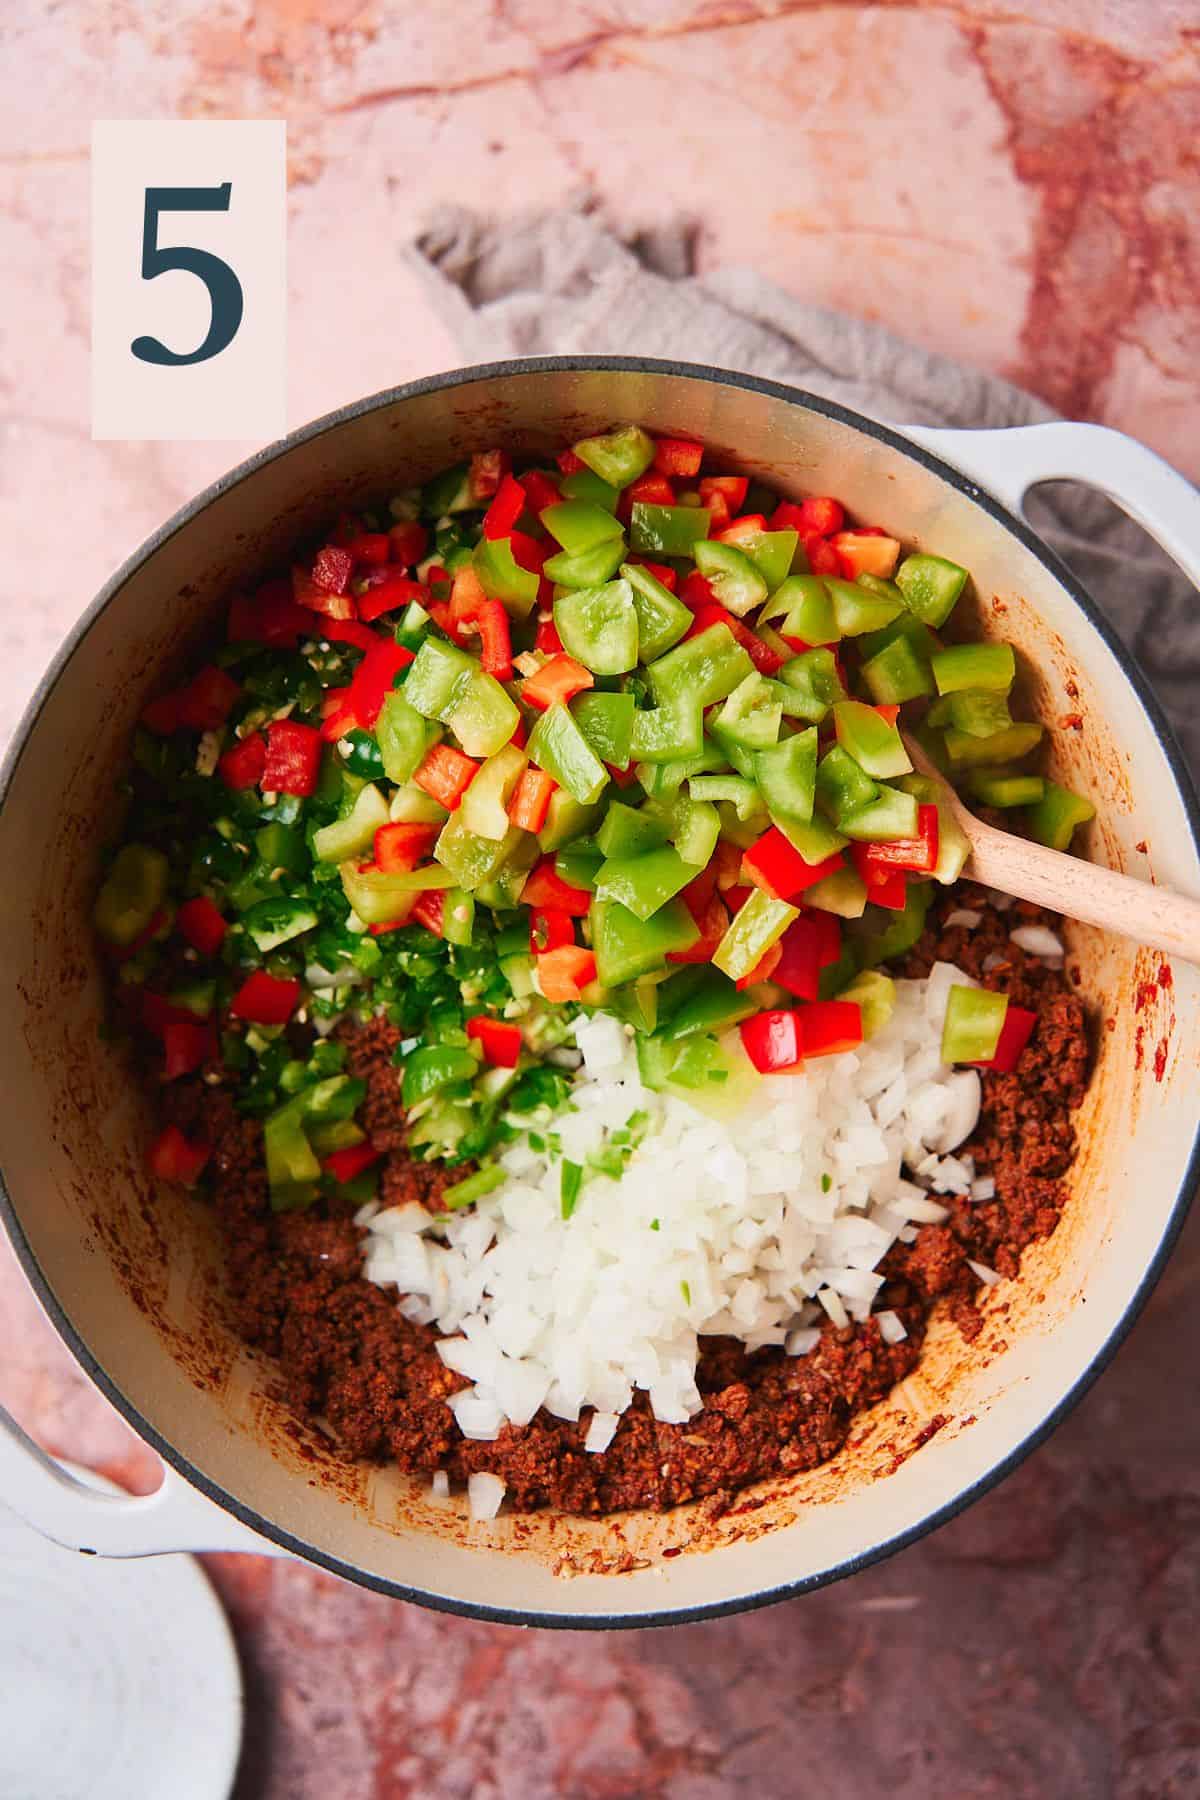
Now add the jalapeños, onions, and bell peppers with another large pinch of salt. (Image 5)
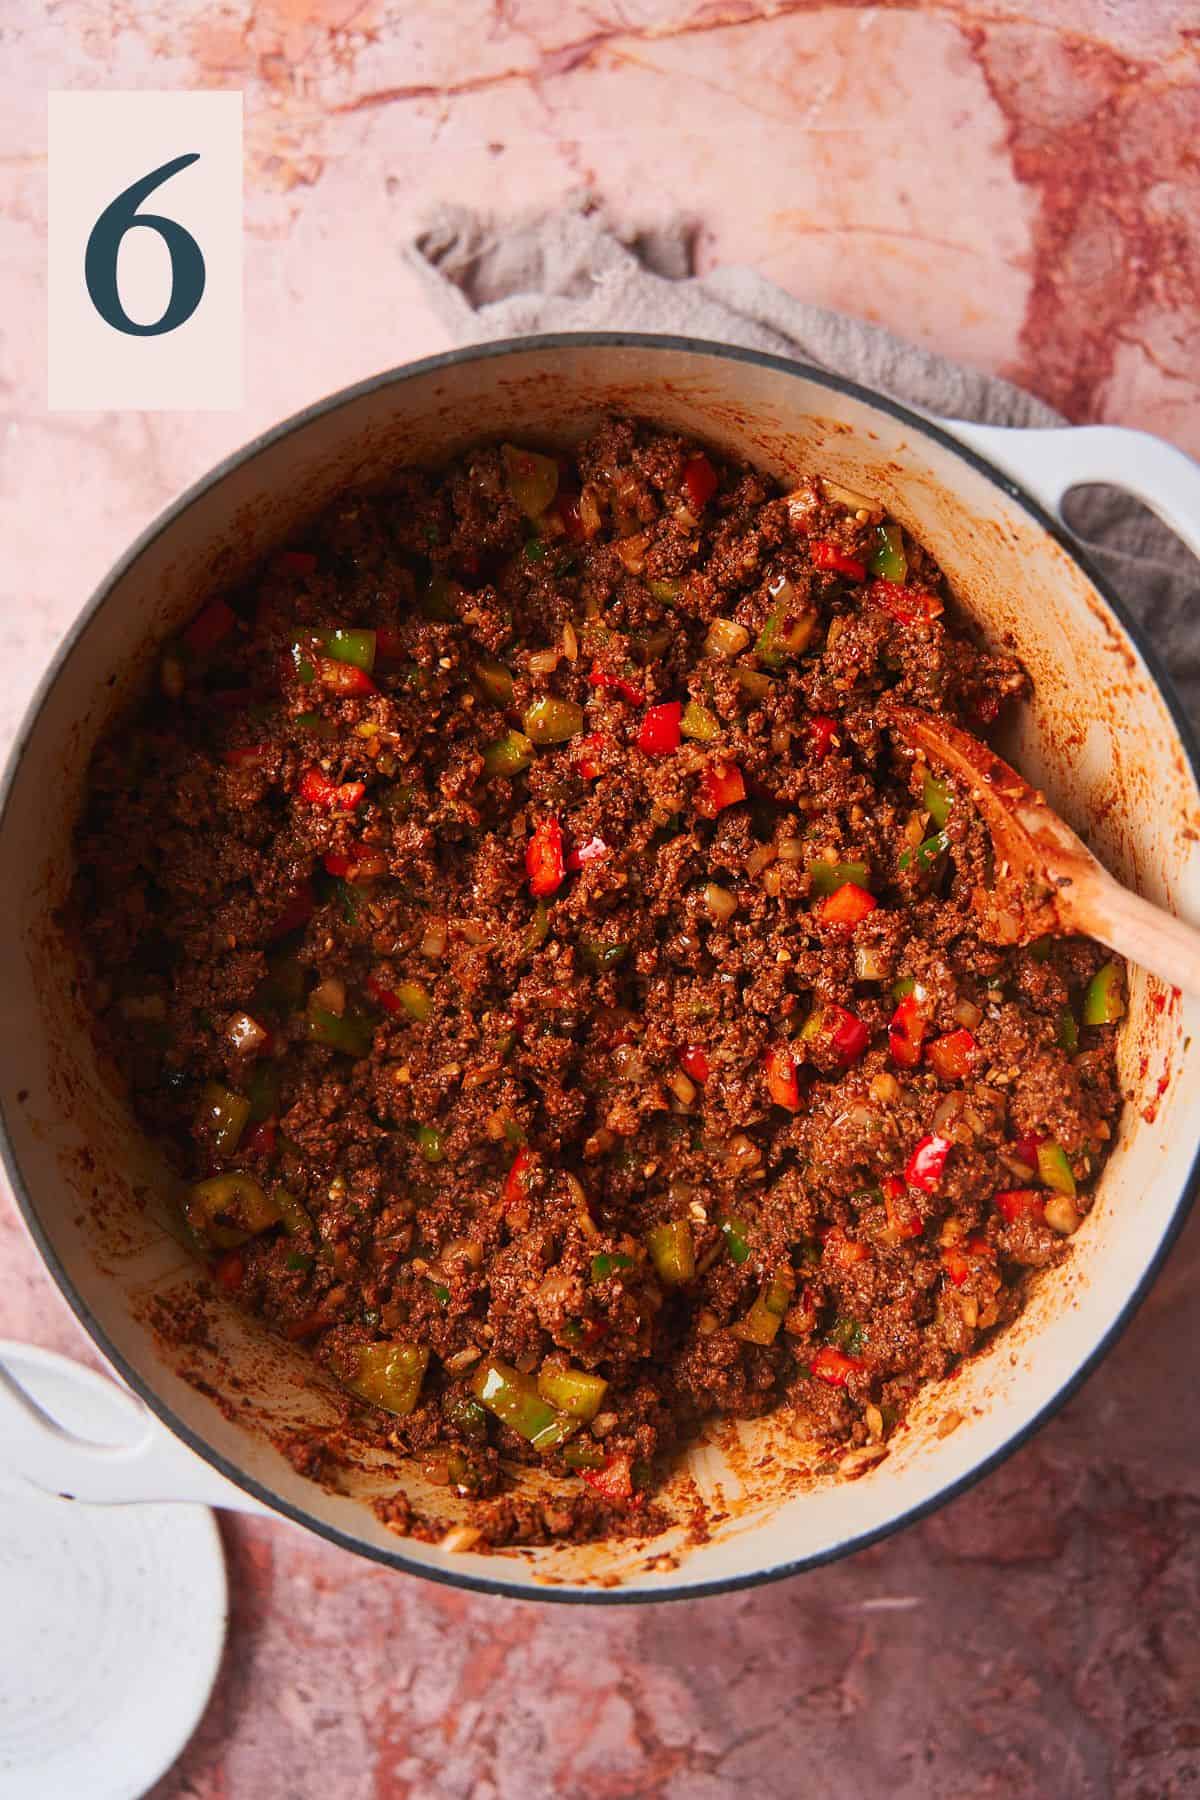
Cook until the vegetables are beginning to soften, about 3 to 5 minutes. (Image 6)
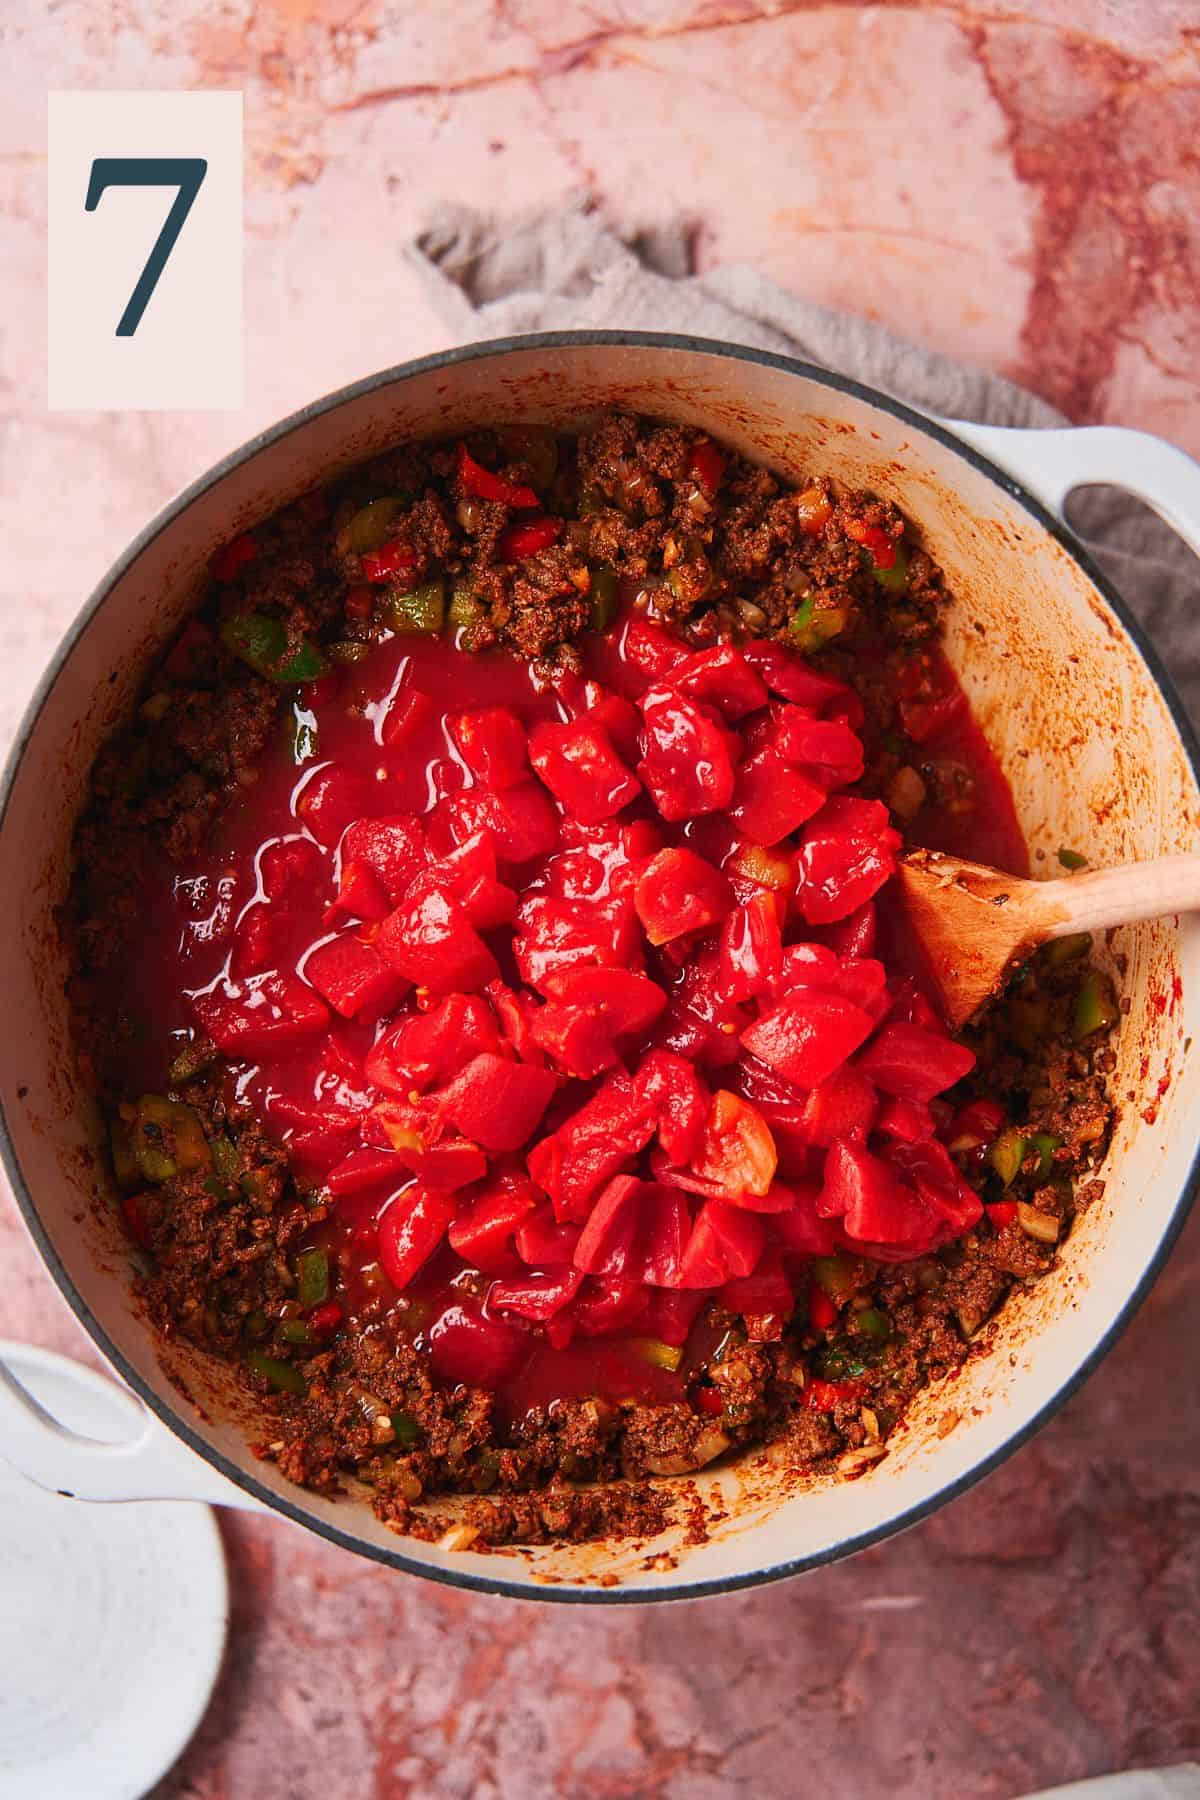
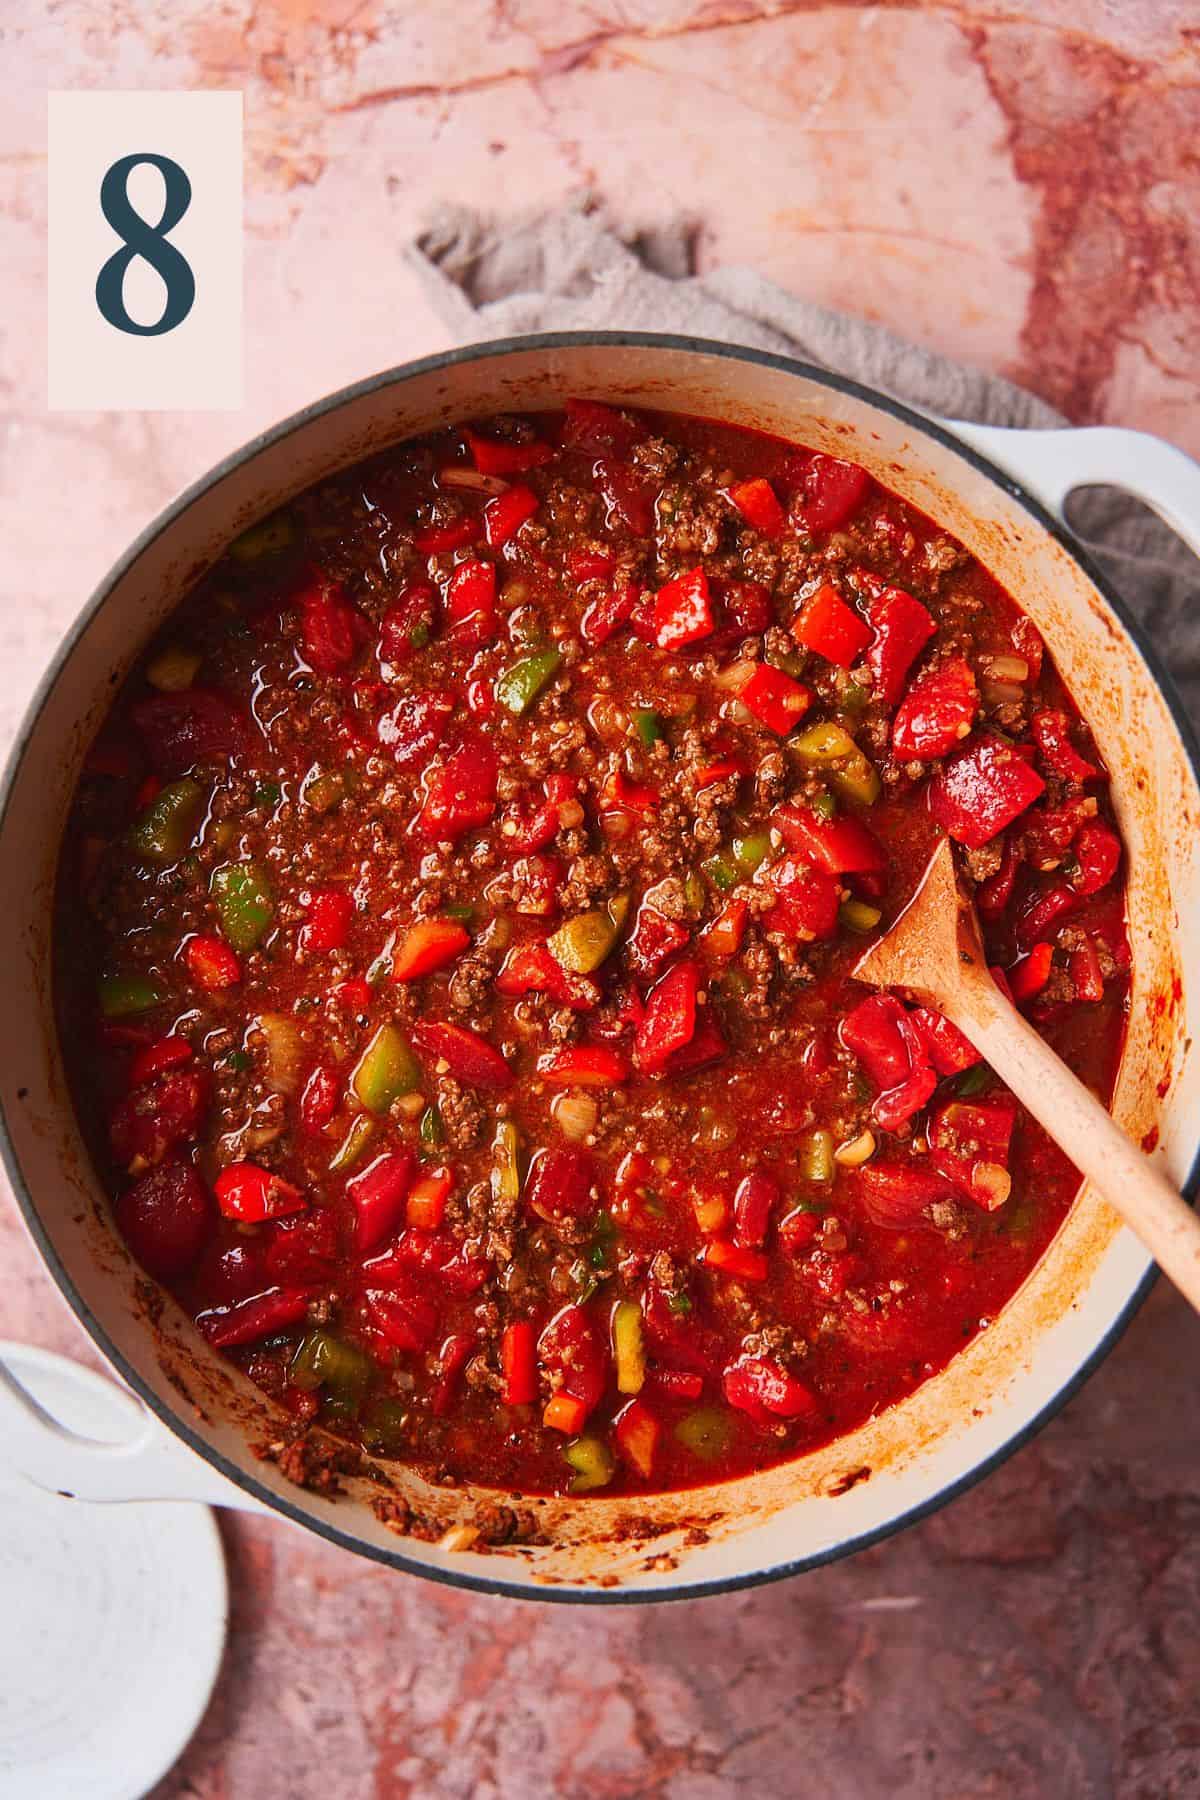
Now, add in the diced tomatoes (Image 7), followed by the Worcestershire sauce, liquid smoke, and some of the beef broth. (Image 8)
*We recommend adding about half of the beef broth, as the veggies will release liquid when they cook. You can always add more later. If you like a thinner consistency, add all of the beef broth.
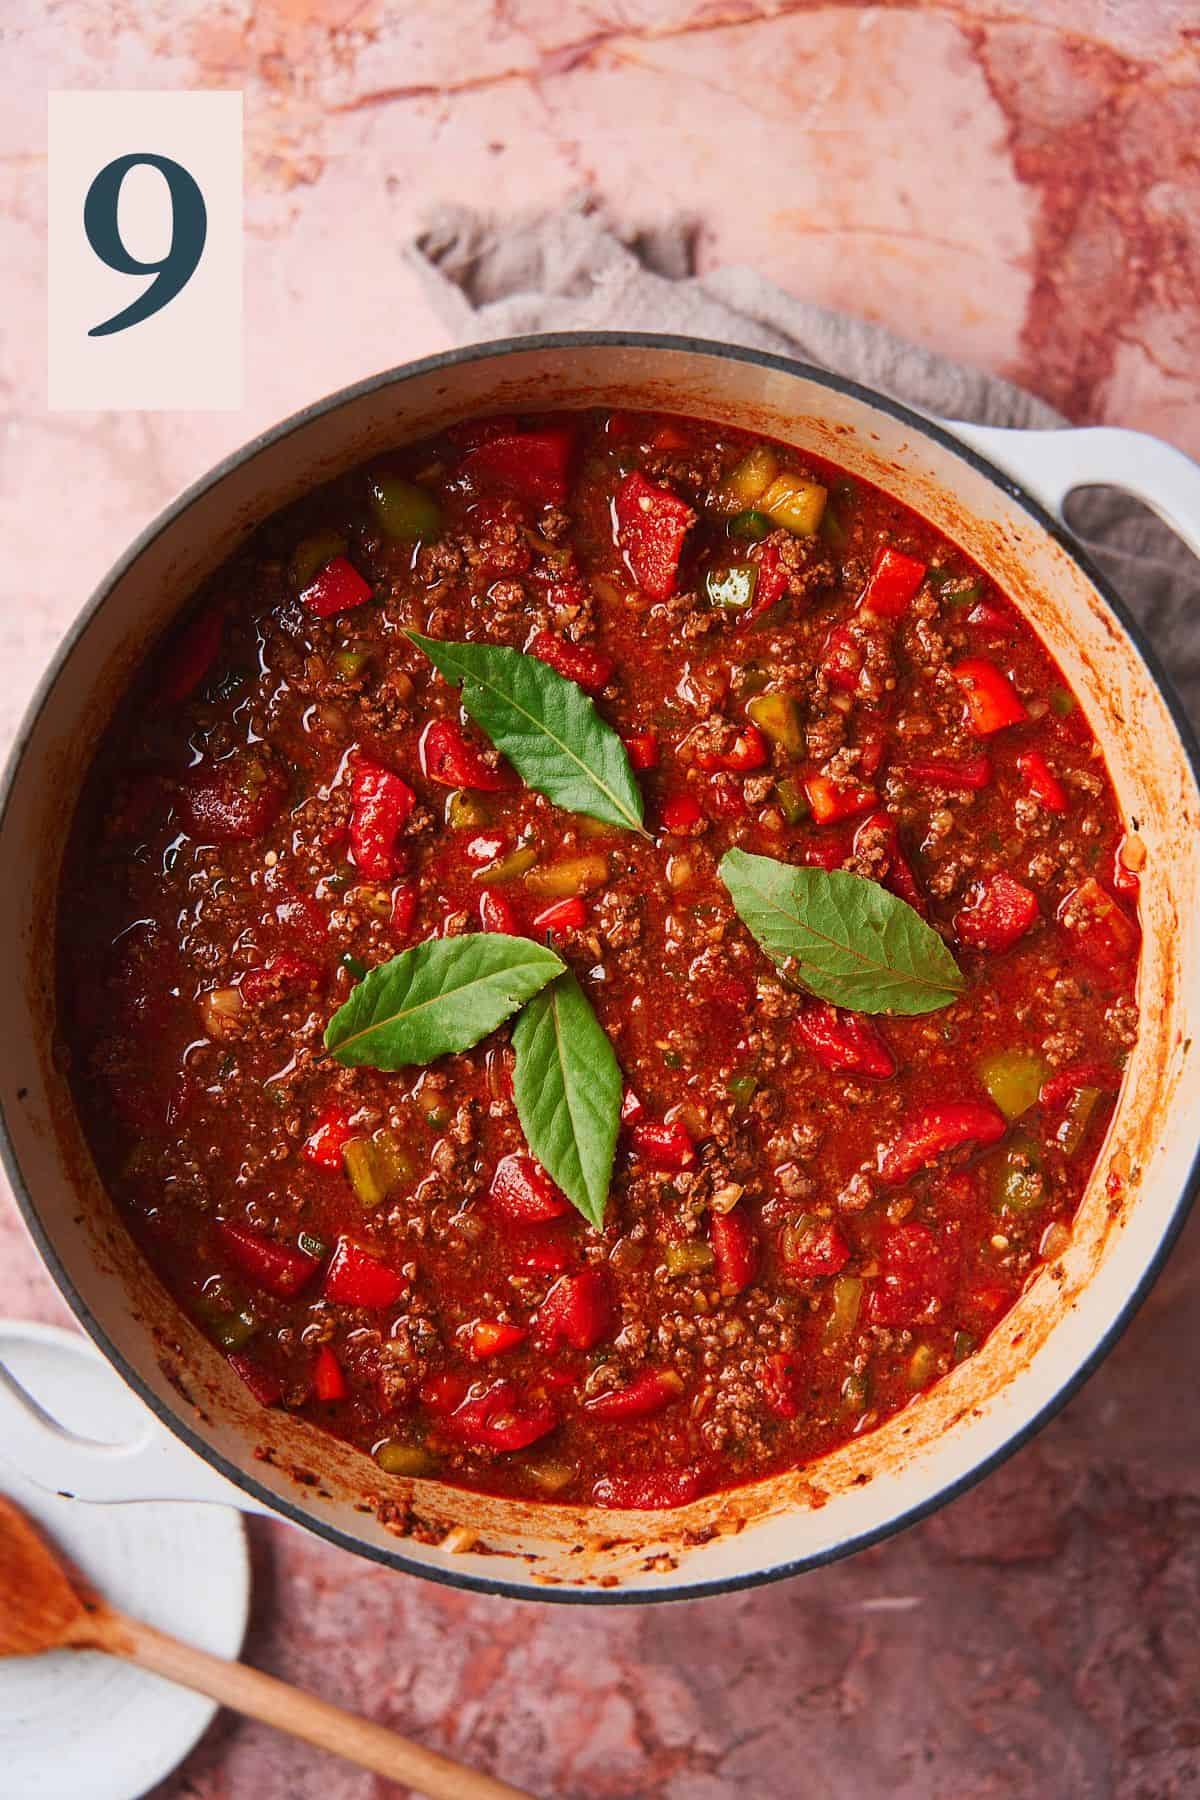
Give the mixture a good stir, and adjust the seasonings to taste. Add in the bay leaves, (Image 9) then cover. Simmer for at least 30 minutes, but for as long as possible, stirring every so often to ensure nothing is sticking to the bottom of the Dutch oven. We like to simmer ours for about 2.5 hours. (Image 10)
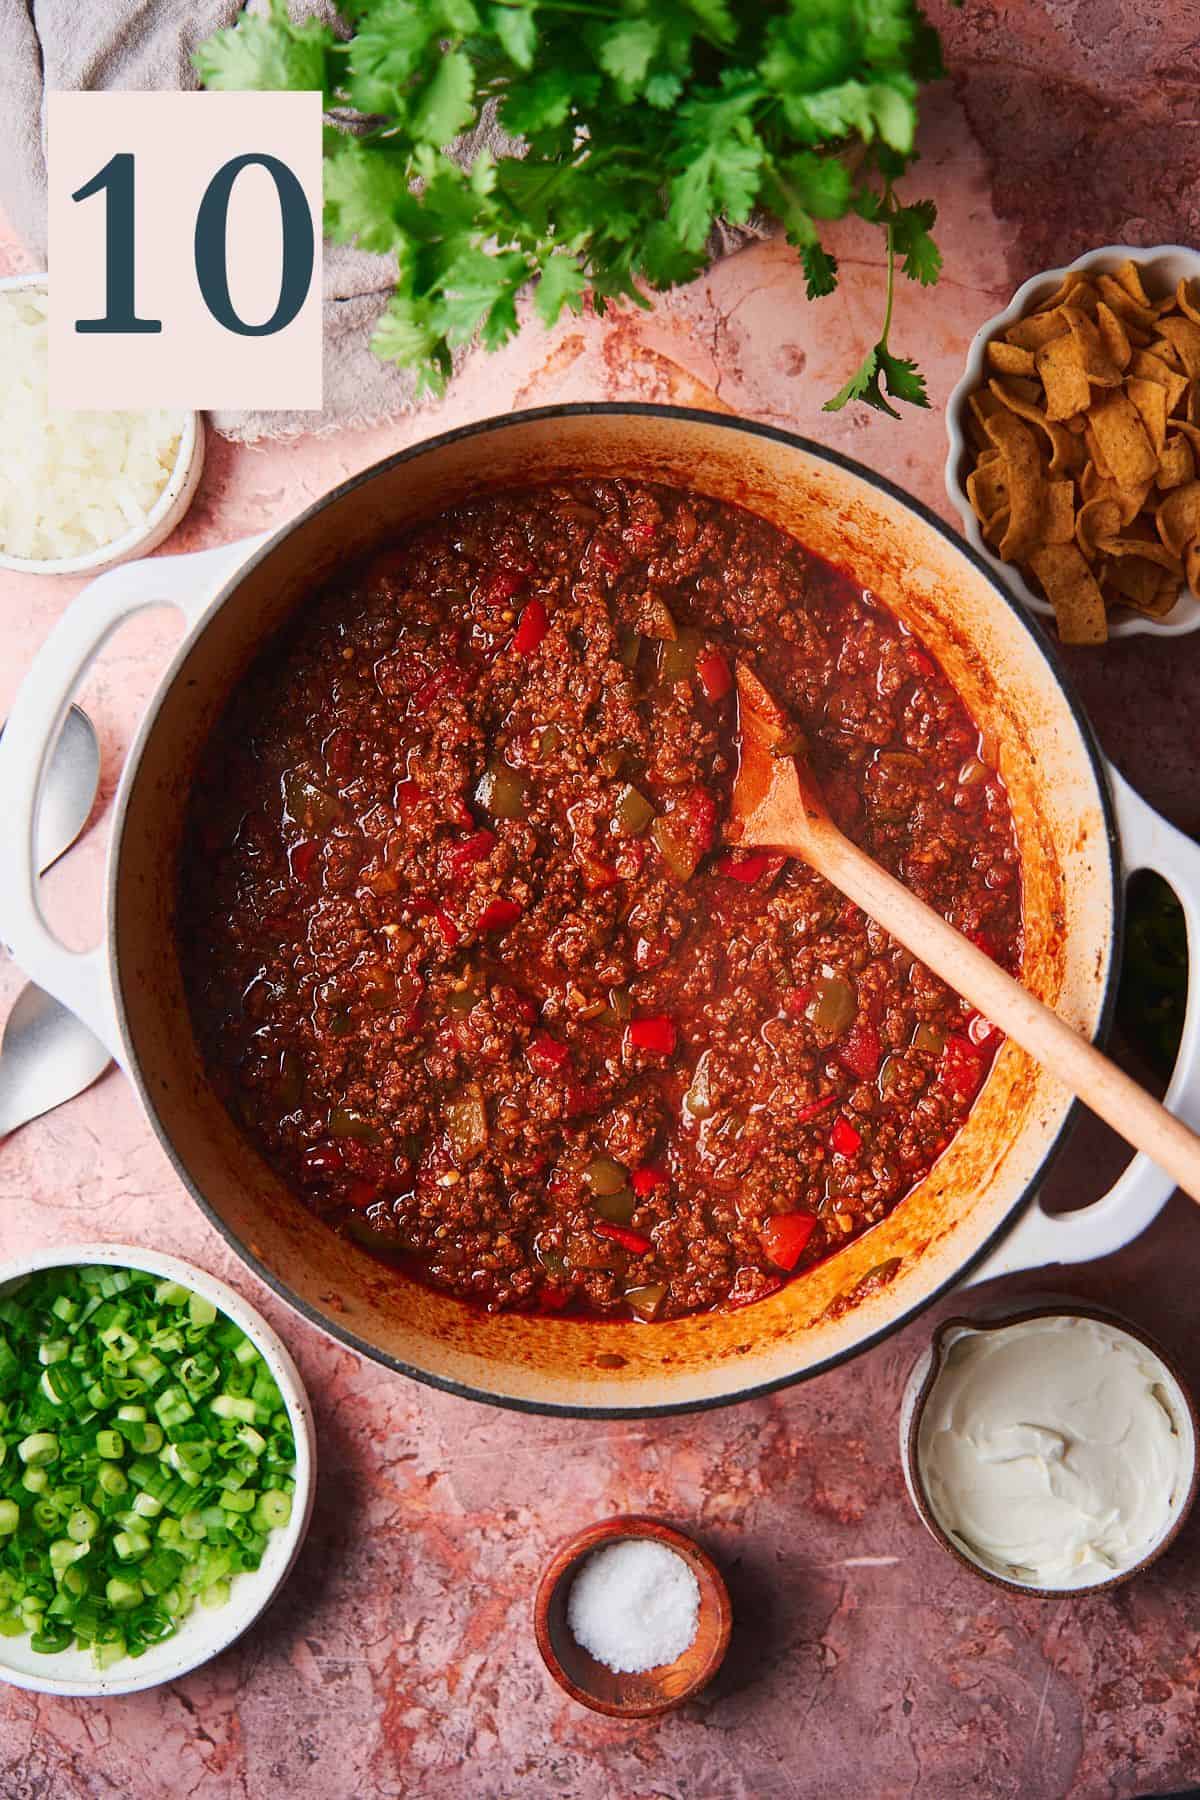
✨Pro Tip: The longer you simmer the chili, the better! You only need about 30 minutes technically, but letting your chili simmer for a while really deepens the flavors and makes the meat really tender.
When time to serve, adjust the seasonings and remove the bay leaves. Top with your favorite chili toppings, and enjoy!

✨Tips & tricks
- Use high-quality ground beef. Use high-quality ground beef with a good meat-to-fat ratio (like 85% lean, 15% fat) for the best flavor and texture.
- Sear the meat. When browning the meat, allow it to sear and develop a flavorful crust before breaking it apart. This adds depth of flavor to the chili!
- Salt slowly throughout the cooking process and taste as you go. Be cautious when adding salt. You can always add more later, so start with a smaller amount and adjust to taste as the chili cooks. It is important to add salt at all stages of cooking, however, to ensure everything is well seasoned.
- Adjust spice levels to your preference. Adjust the amount of chili powder, cumin, red pepper flakes, and cayenne to your preferred level of spiciness. Start with the lower end of the range and add more if desired.
- Layer flavors. When adding spices and tomato paste, let them cook for a few minutes to develop deeper flavors. This step is crucial for a rich-tasting chili.
- Get the perfect consistency. If the sauce is too thick, you can add a splash of broth.
- Simmer for a while! Simmering the chili for an extended period (about 2.5 hours or more) allows the flavors to meld together. Stir occasionally to prevent sticking and burning. The longer the chili cooks, the more flavorful and tender it will become.
Need supplies? Shop our Amazon store! Stock your pantry, and find all of our favorite kitchen tools! A Full Living LLC earns a small commission through purchases on our storefront to help support this site.
💭Frequently Asked Questions
Store in an airtight container in the fridge for up 5 days. To freeze, allow to cool completely, then freeze in an airtight container for up to 6 months.
Thaw in the fridge for 24 hours, then add to a stockpot on the stove on medium-low heat to warm through. You can also reheat gently in the microwave.
Yes, you can! We do recommend browning the meat and the vegetables on the stovetop before adding them to the slow cooker for best results. Browning just adds more flavor overall and you will be more pleased with the results.
After browning the meat and veggies, add to the slow cooker with broth, diced tomatoes, and bay leaves. Cook on high for 3-4 hours, or on low for 6-8 hours. Remove bay leaves and discard before enjoying.
Yes, absolutely! It's our preferred method when we are low on time. Again, you just want to make sure everything is cooked and ready to go for best results.
After browning the meat and veggies, add liquid ingredients, tomatoes, and bay leaves and seal the lid. Allow to come to full pressure, then cook for 30 minutes. After 30 minutes, allow the pressure to naturally release for 5-10 minutes before releasing the rest of the pressure. Remove the bay leaves before eating.
More Recipes To Consider
Did you try this recipe? Make sure to leave a 5-star review below! 🌟 This helps other readers find our recipes and encourages them to try them. Also, be sure to leave a comment with your experience. Follow along, and tag @AFullLiving on Instagram with your photos!
📖 Recipe

Beanless Chili Recipe
Equipment
- dutch oven (or large stockpot)
- meat chopper (or wooden spoon)
Ingredients
- 3 tablespoons olive oil
- 2 pounds ground beef, 85% lean
- 5 teaspoons kosher salt (add slowly and to taste)
- 1 - 1.5 tablespoons cumin (to taste)
- 1 - 1.5 tablespoons chili powder (to taste)
- 1 - 1.5 tablespoons smoked paprika (to taste)
- 1 tablespoon onion powder
- 1 tablespoon garlic powder
- 1 tablespoon oregano
- ¼ - ½ teaspoon black pepper (to taste)
- ¼ - ½ teaspoon red pepper flakes (optional and to taste)
- ¼ - ½ teaspoon cayenne pepper (optional and to taste)
- 3 tablespoons tomato paste
- 12 cloves garlic, minced (about 1 head of garlic)
- 2 medium bell peppers, diced (any color you want)
- 2 whole jalapeños, diced or roughly chopped
- 1 medium yellow onion, diced
- 2 cans diced tomatoes (14.5 ounce cans)
- 1- 2 teaspoons Worcestershire sauce (to taste)
- 1 teaspoon liquid smoke (optional)
- 1.5 - 2 cups beef broth (as needed to reach desired consistency)
- 3-4 whole bay leaves
Instructions
- In a Dutch oven, add 3 tablespoons olive oil, followed by 2 pounds of ground beef with a big pinch of salt. Break the meat into small pieces using a meat chopper or wooden spoon. Cook until the beef is mostly browned, about 5 minutes.
- Next add 3 tablespoons of tomato paste, the minced garlic, 1 - 1.5 tablespoons of chili powder, 1 - 1.5 tablespoons of smoked paprika, 1 - 1.5 tablespoons of cumin, 1 tablespoon of onion powder, 1 tablespoon of garlic powder, 1 tablespoon of oregano, ¼ - ½ teaspoon of black pepper, ¼ - ½ teaspoon of cayenne pepper, and ¼ - ½ teaspoon of red pepper flakes. Stir to prevent any burning, and cook for 3-5 minutes, until the tomato paste has deepened in color.
- Now add the jalapeños, onions, and bell peppers with another large pinch of salt. Cook until the vegetables are beginning to soften, about 3 to 5 minutes.
- Now, add in the diced tomatoes, followed by 1-2 teaspoons of Worcestershire sauce, 1 teaspoon of optional liquid smoke, and about 1 cup of beef broth to start. *We recommend adding about half of the beef broth, as the veggies will release liquid when they cook. You can always add more later. If you like a thinner consistency, add all of the beef broth.
- Give the mixture a good stir, and adjust the seasonings to taste. Add in the bay leaves, then cover. Simmer for at least 30 minutes, but for as long as possible, stirring every so often to ensure nothing is sticking to the bottom of the Dutch oven. We like to simmer ours for about 2.5 hours.
- When time to serve, adjust the seasonings and remove the bay leaves. Top with your favorite chili toppings, and enjoy!
- Store in an airtight container in the fridge for up 5 days. To freeze, allow to cool completely, then freeze in an airtight container for up to 6 months. Thaw in the fridge for 24 hours, then add to a stockpot on the stove on medium-low heat to warm through. You can also reheat gently in the microwave.
Notes
- Nutrition facts do not include any additional toppings.
- Use high-quality ground beef. Use high-quality ground beef with a good meat-to-fat ratio (like 85% lean, 15% fat) for the best flavor and texture.
- Sear the meat. When browning the meat, allow it to sear and develop a flavorful crust before breaking it apart. This adds depth of flavor to the chili!
- Salt slowly throughout the cooking process and taste as you go. Be cautious when adding salt. You can always add more later, so start with a smaller amount and adjust to taste as the chili cooks. It is important to add salt at all stages of cooking, however, to ensure everything is well seasoned.
- Adjust spice levels to your preference. Adjust the amount of chili powder, cumin, red pepper flakes, and cayenne to your preferred level of spiciness. Start with the lower end of the range and add more if desired.
- Layer flavors. When adding spices and tomato paste, let them cook for a few minutes to develop deeper flavors. This step is crucial for a rich-tasting chili.
- Get the perfect consistency. If the sauce is too thick, you can add a splash of broth.
- Simmer for a while! Simmering the chili for an extended period (about 2.5 hours or more) allows the flavors to meld together. Stir occasionally to prevent sticking and burning. The longer the chili cooks, the more flavorful and tender it will become.





Sam Kegley says
I just prepped this last night as the base for a low carb chili shepherd's pie and the seasoning mix is on point! I used a pulled pot roast instead of ground beef because that's what I had on hand and it still came out very well. Going to bake it all tonight and put up some instagram photos!
Briana says
This is the best comment ever!! Thank you so much Sam, we are so happy you love the recipe. 😀