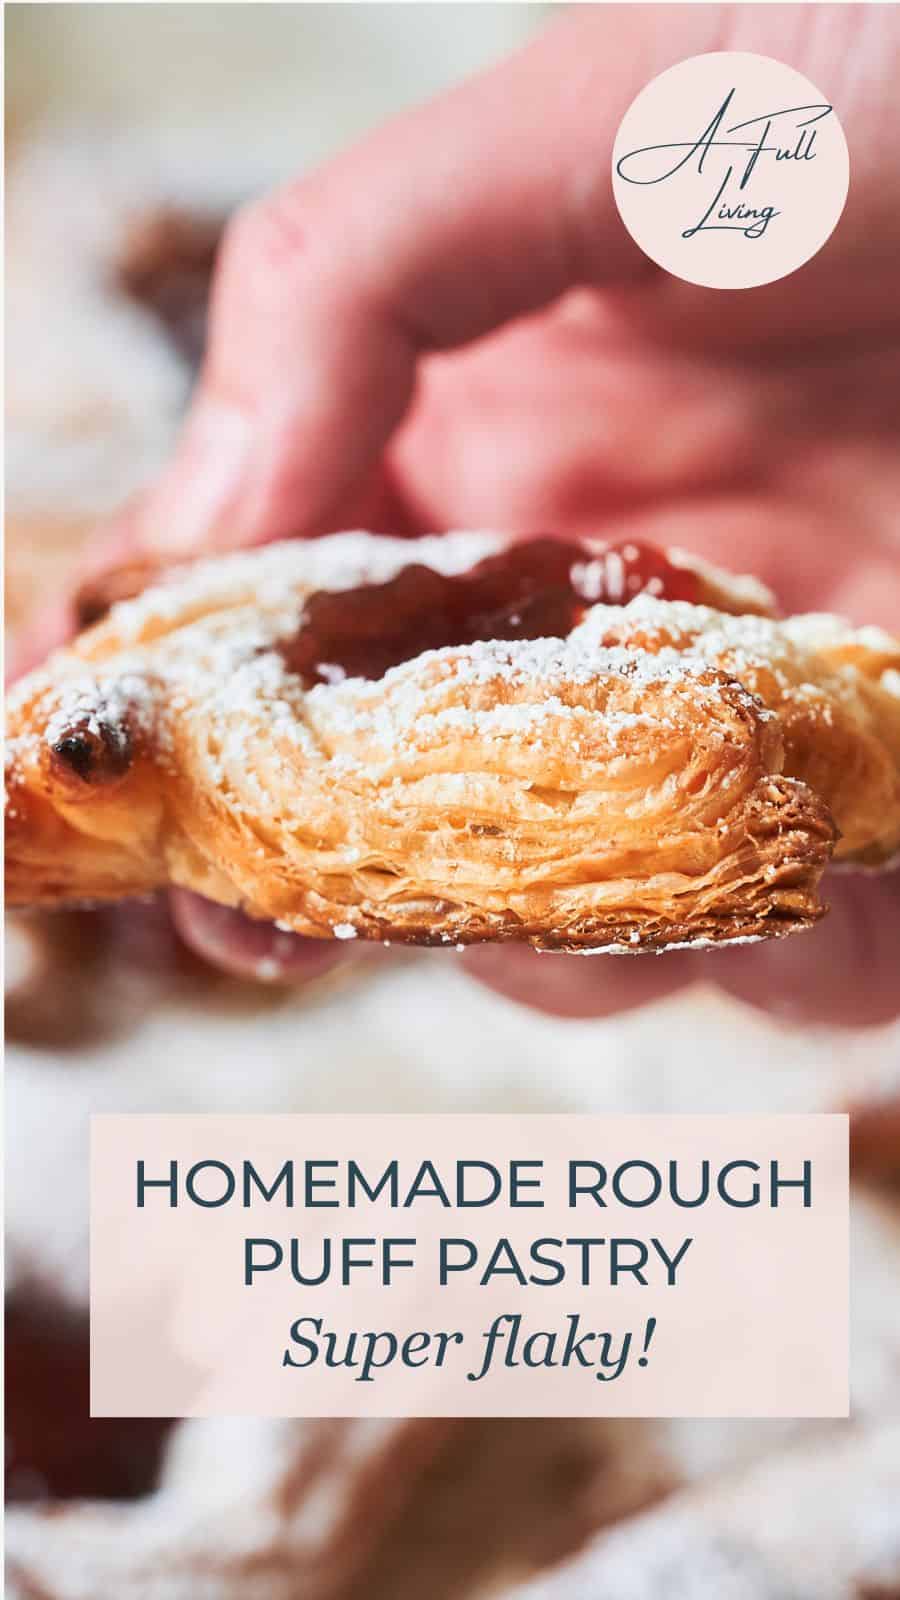
If you've been intimidated by making your own flaky rough puff pastry dough, let us encourage you to try it - it's easier than you think! This easy recipe is a streamlined version of classic puff pastry that still delivers those impressive flaky layers. Made with just 5 simple ingredients and a series of folds, this homemade rough puff creates buttery, sky-high layers perfect for everything from savory tarts to sweet pastries. While it does require a bit of time (mostly hands-off chilling!), the technique is surprisingly approachable, and the results are absolutely worth it!

Save This Recipe! 💌
We totally get it: puff pastry sounds fancy and complicated! For the longest time, we felt the same way. But after getting hands-on experience at the Bake from Scratch Magazine test kitchen back in October (check out some behind-the-scenes moments here), everything changed for us!
Turns out, rough puff is WAY more forgiving than traditional puff pastry, which requires precise lamination and folding techniques. We're taking a much more relaxed approach here that still gives you those gorgeous, buttery layers you're after, just without all the fuss!
The secret to the best homemade rough puff is large chunks of cold butter getting folded into the dough multiple times, creating hundreds of flaky layers as the butter melts and creates steam in the oven. Pastry magic! ✨
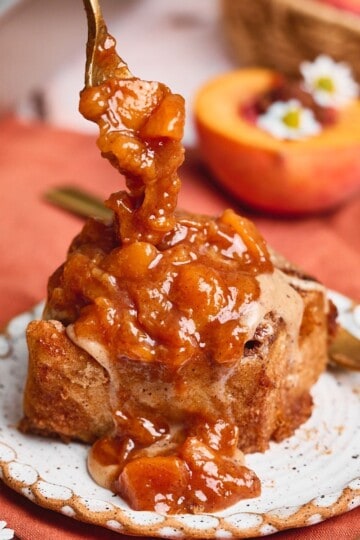
This rough puff pastry is incredibly versatile, too! We use it for our Finnish Christmas Stars and our savory Burrata and Prosciutto Tarts, but it's also perfect for pot pies, cheese straws, fruit galettes, palmiers, Napoleons, and SO much more!
The best part? You can make a big batch, freeze it, and have flaky, buttery pastry on hand whenever you need it!
🧈Ingredients
This recipe only uses 5 simple ingredients: flour, butter, salt, sugar, and ice-cold water. That's it! You probably have everything you need to make it!
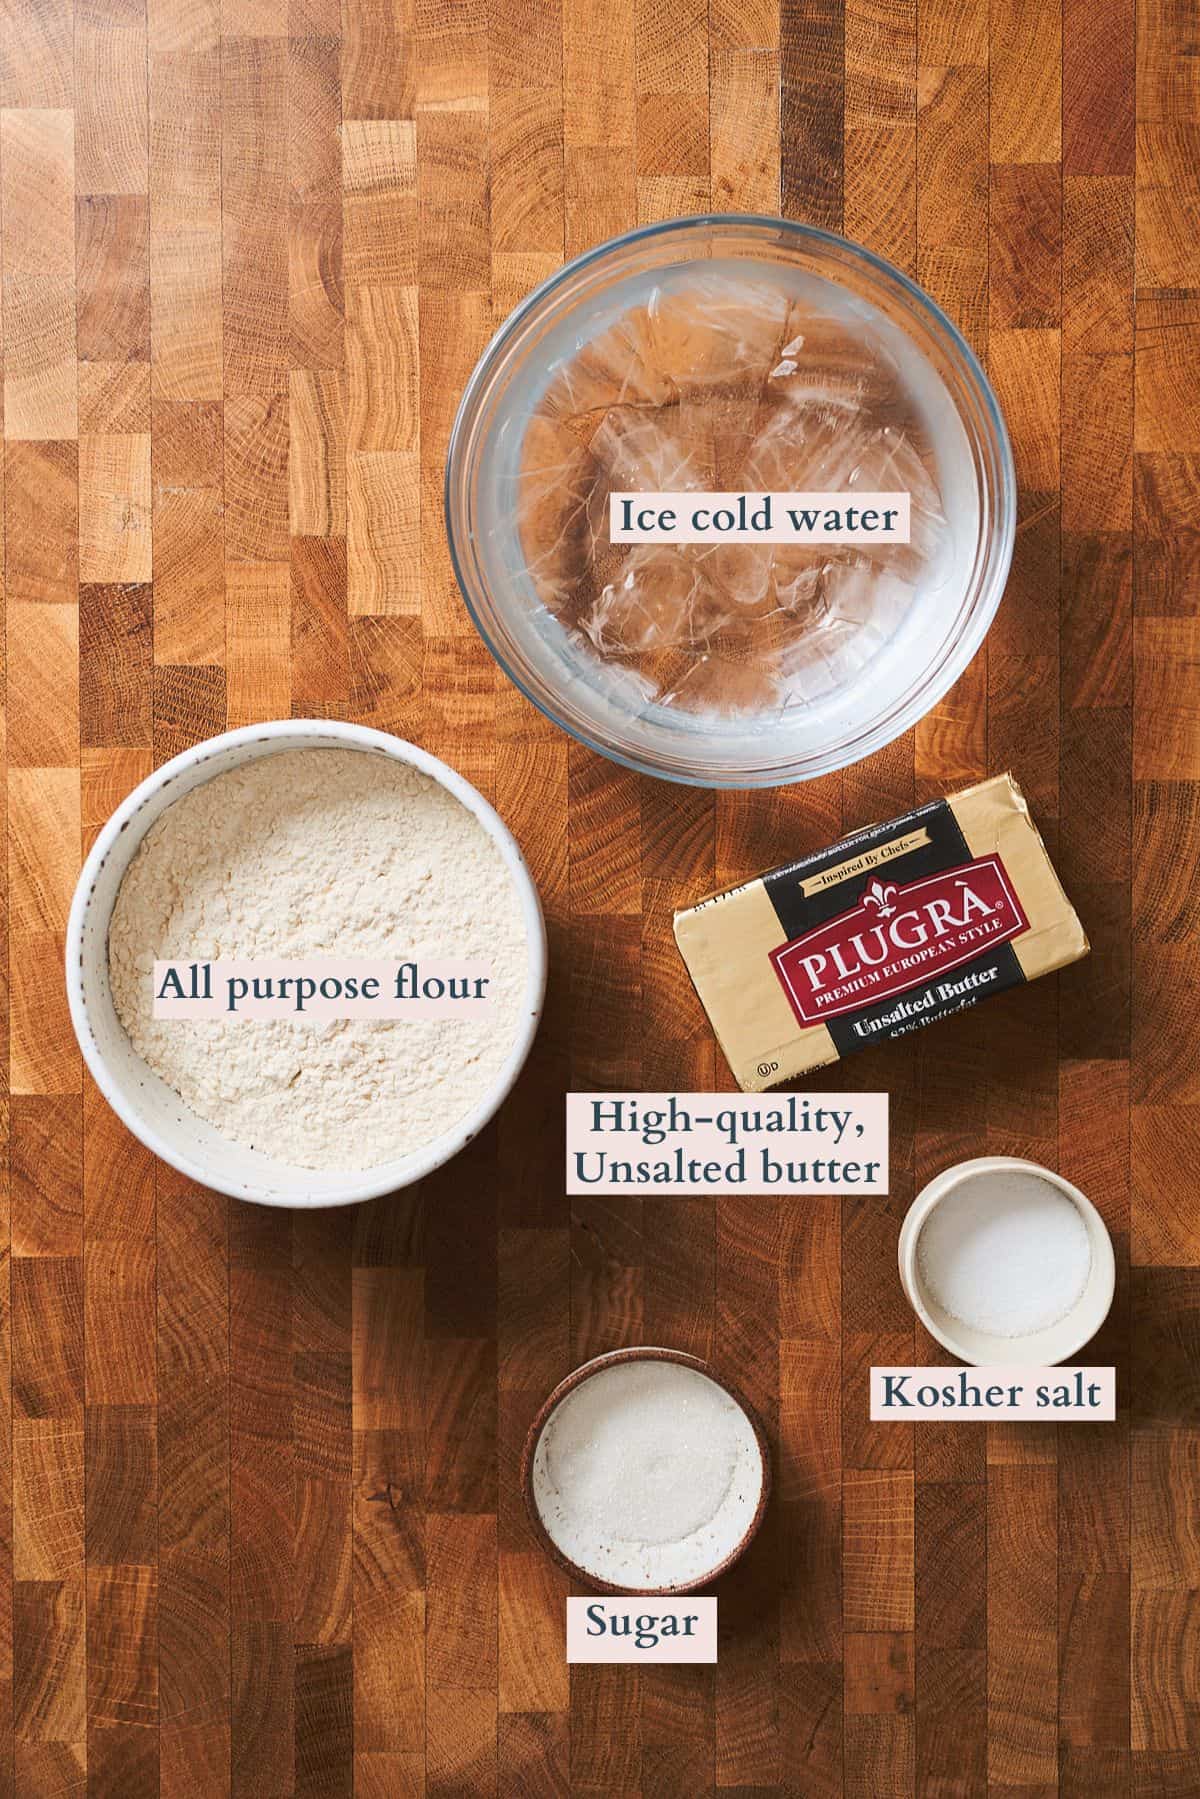
🧈Ingredient Spotlight: Butter
The butter you use makes ALL the difference in rough puff pastry, so make sure you use high-quality butter! We're using Plugrà Premium European-Style Butter! Plugrà is now the official butter partner for this website☺️, and we've been working together since 2024! We're baking with Plugrà for this recipe because it truly creates the best results!
Plugrà is made with 82% butterfat compared to 80% in standard American butter. That extra 2% might not sound like much, but it means less water content and more pure butterfat, which translates to richer flavor, creamier texture, and flakier layers. 🤤
The slow-churned process also creates a more pliable butter that's easier to work with when you're pressing and folding it into the dough.
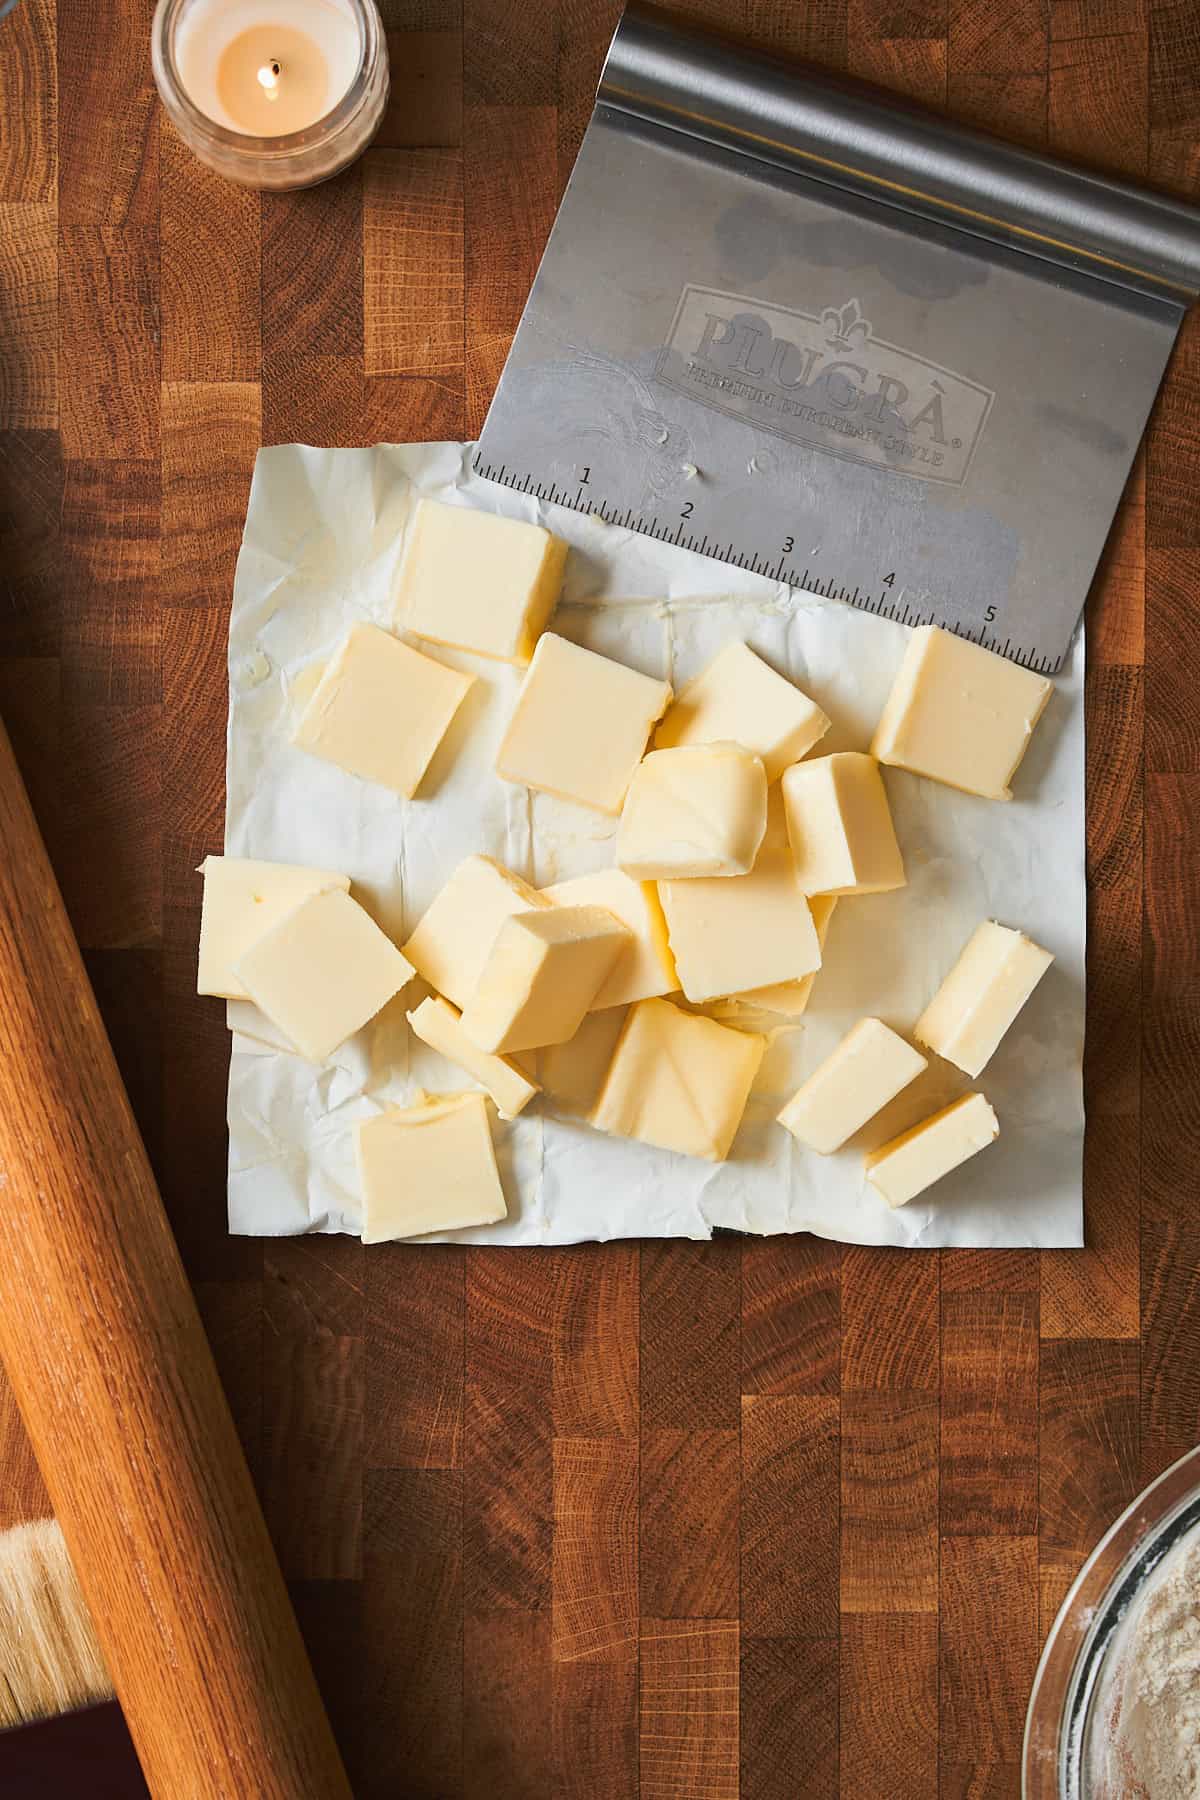
For this recipe, you'll cut the butter into tablespoon-sized pieces before working it into the flour. Keep it very cold until the last minute - cold butter is what creates all those gorgeous flaky layers!
3 Tips for the Flakiest Rough Puff Pastry
1. Keep Everything Cold. 🧊 This is the golden rule of pastry making! Cold butter is what creates those flaky layers. If your butter starts to soften or feel greasy (you'll know because you'll start to smell that buttery aroma!), just pop the dough in the fridge for 10-15 minutes before continuing.
2. Don't Overwork the Dough. Unlike bread (and these delicious buttery ham and cheese rolls), where you want to develop gluten, with pastry dough, you want to keep mixing to a minimum. The dough will look shaggy and rough - that's exactly what you want! Trust the process.
3. Be Patient with the Chilling.❄️ We know it's tempting to rush through the chilling times, but this step is REALLY IMPORTANT! When the dough is chilling, the gluten relaxes, so your pastry doesn't shrink when baking. It's also important to keep the butter firm so all of the layers we create stay distinct.
How to Make Rough Puff Pastry
Making rough puff pastry is all about the folds! Don't worry - each step is simple, and with a little practice, you'll be folding like a pro in no time.☺️
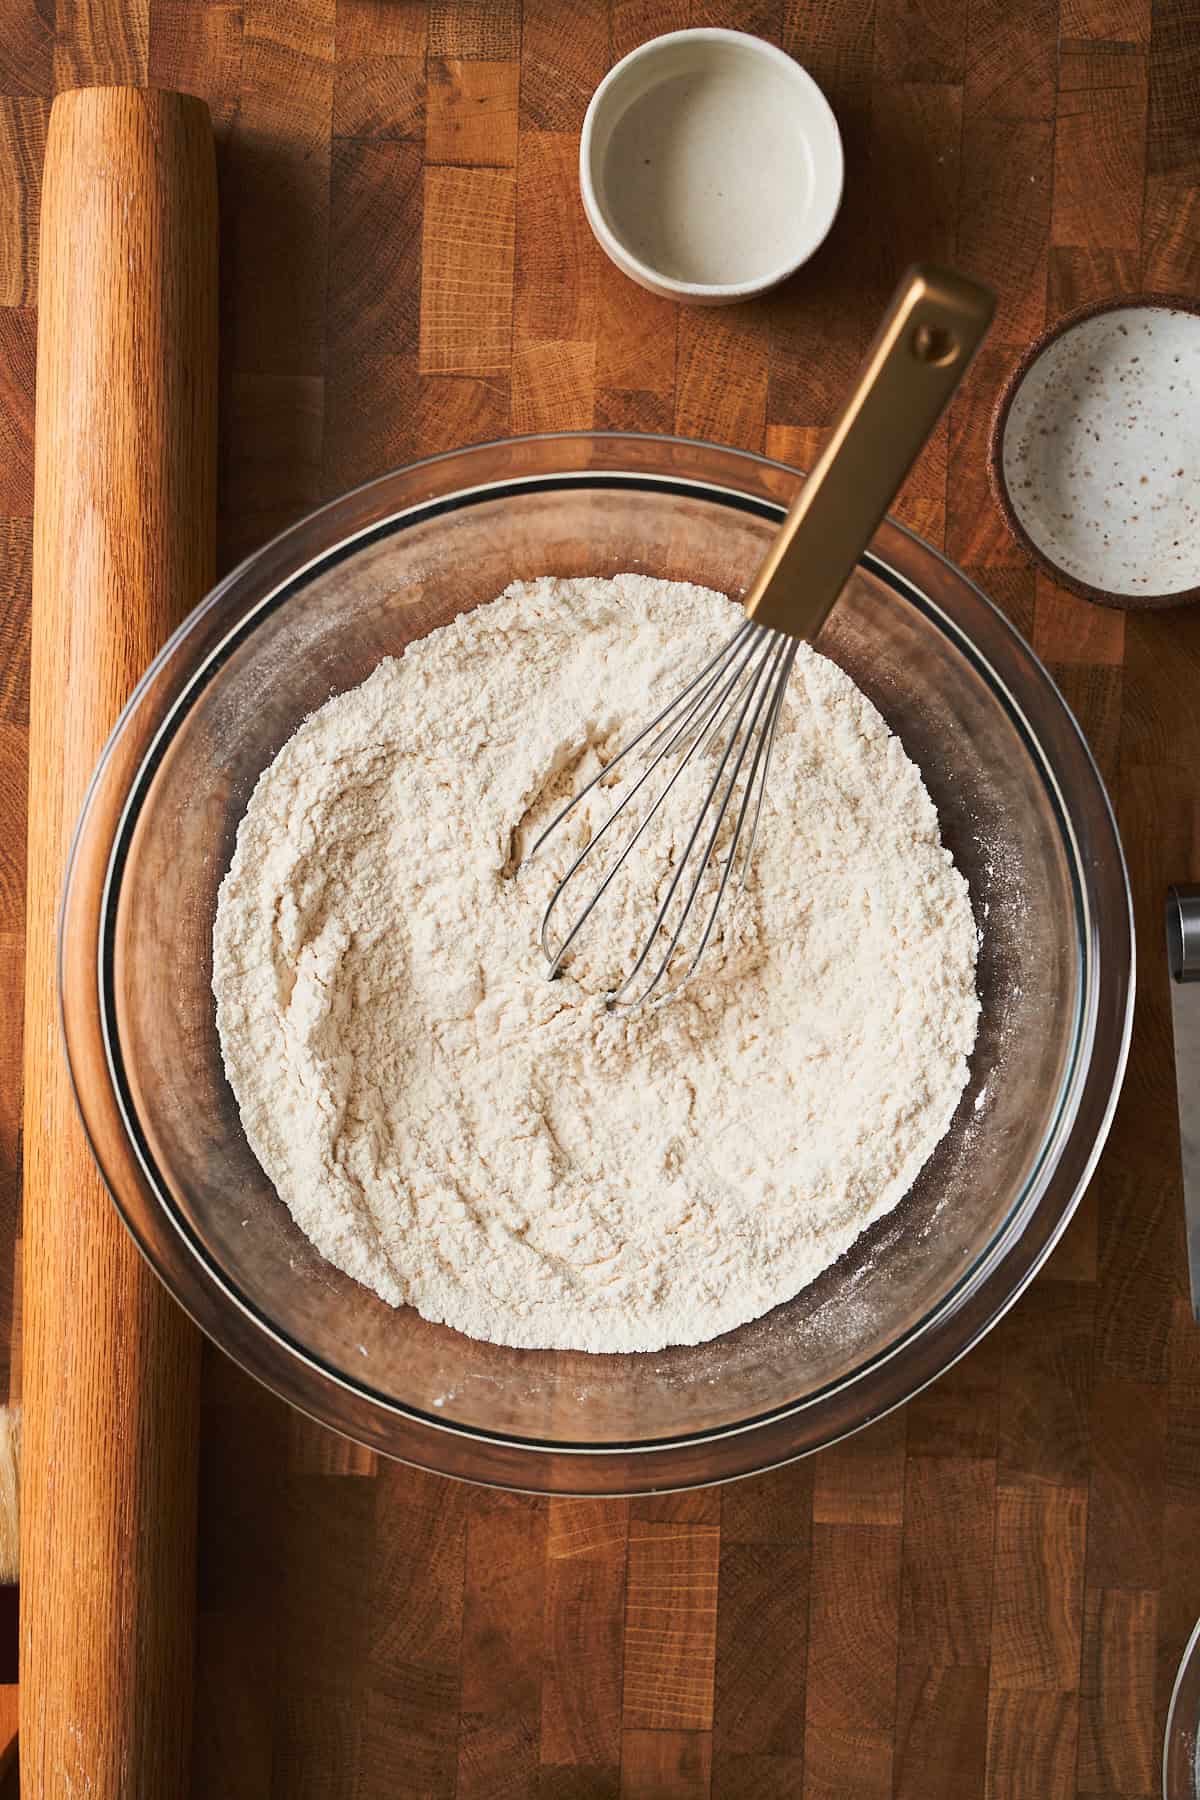
- Step 1: In a large mixing bowl, whisk together the flour, salt, and sugar until well combined.
🧂Salt. We use Diamond Crystal kosher salt in all our recipes. If using Morton's kosher salt or table salt, reduce the amount by half since it's more concentrated.
✨The small amount of sugar in the dough helps with browning and adds a touch of sweetness that balances the buttery richness. Sugar also tenderizes the dough by inhibiting gluten development, which creates more delicate, flaky layers. Plus, it helps draw moisture out during baking, giving you that crisp, golden-brown crust we're after!
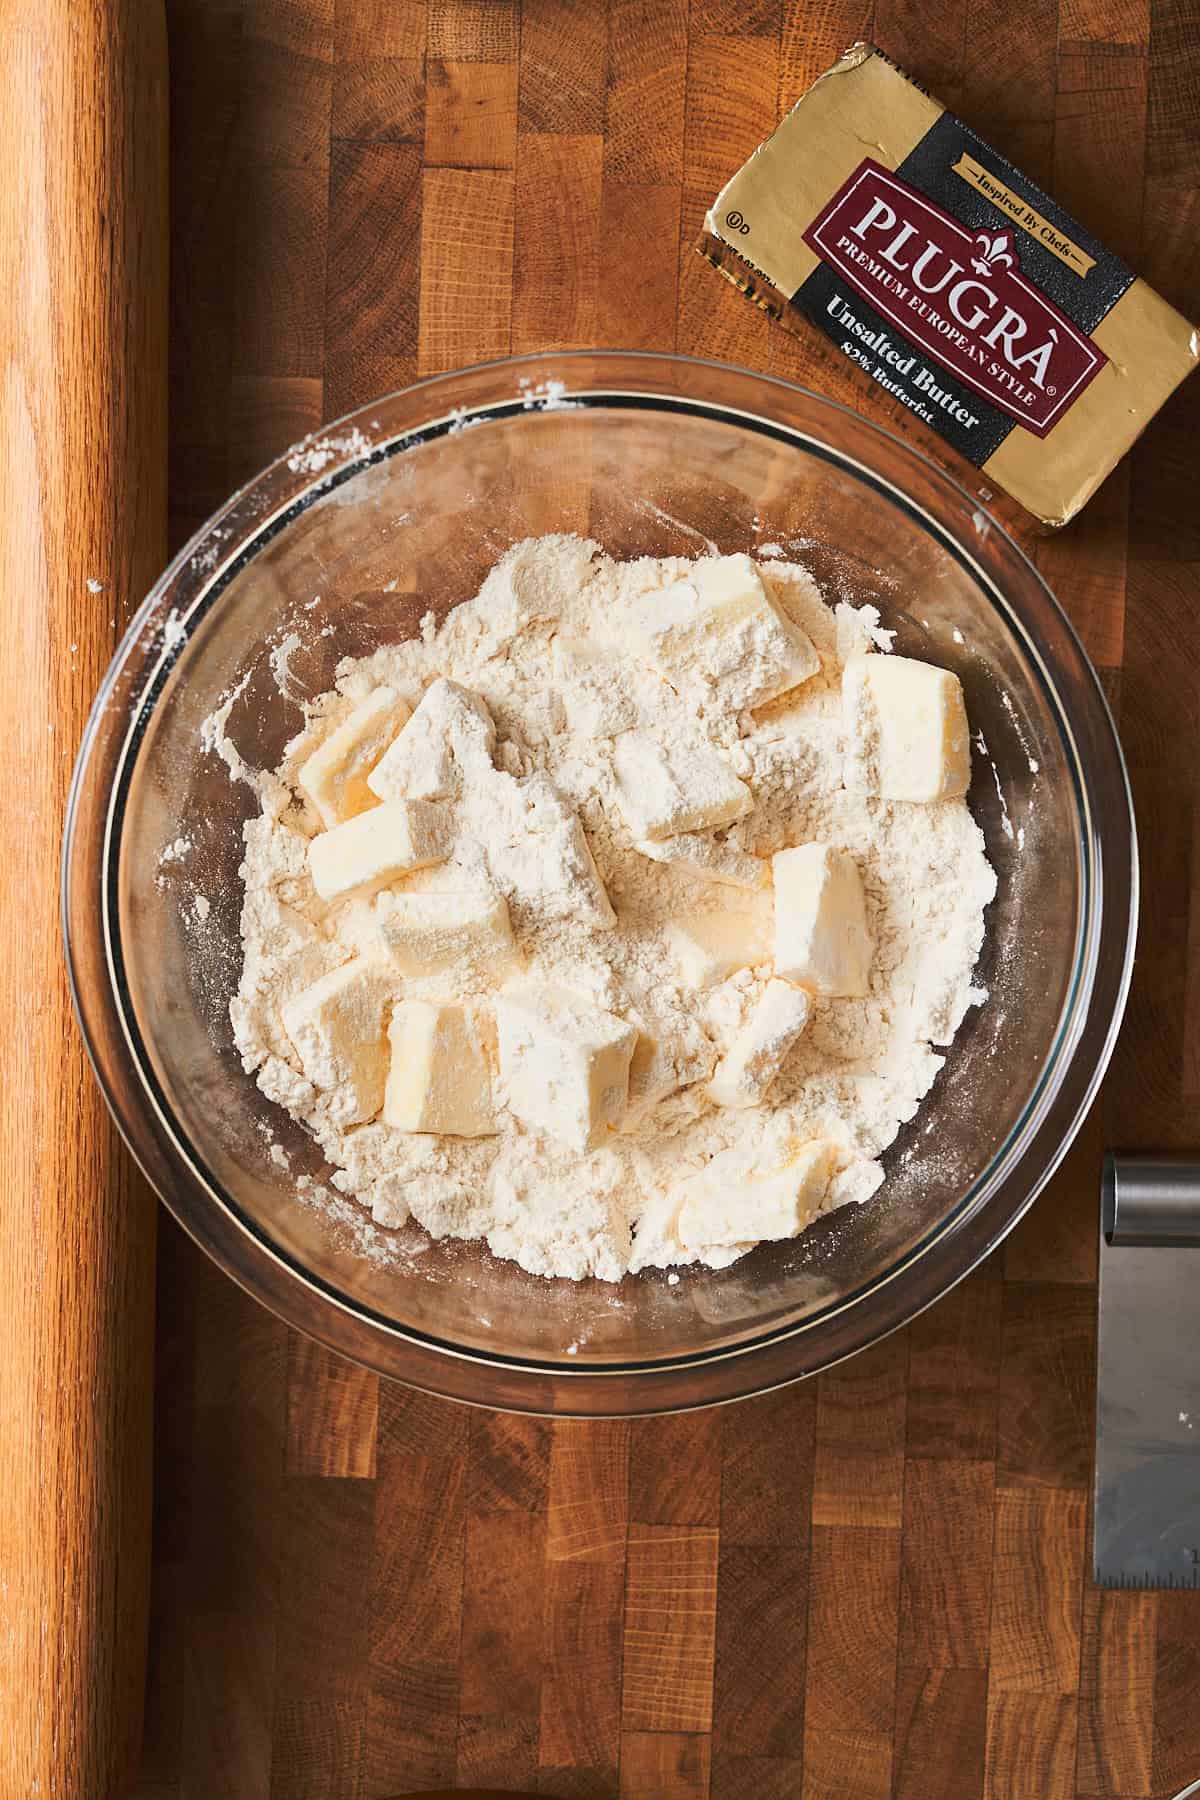
- Step 2: Add the butter pieces to the flour mixture and toss to coat them in flour. This prevents them from sticking together.
🌾Flour. We use all-purpose flour for the perfect balance of structure and tenderness. Bread flour would make the pastry too tough, while cake flour wouldn't provide enough structure for those tall layers we're after.
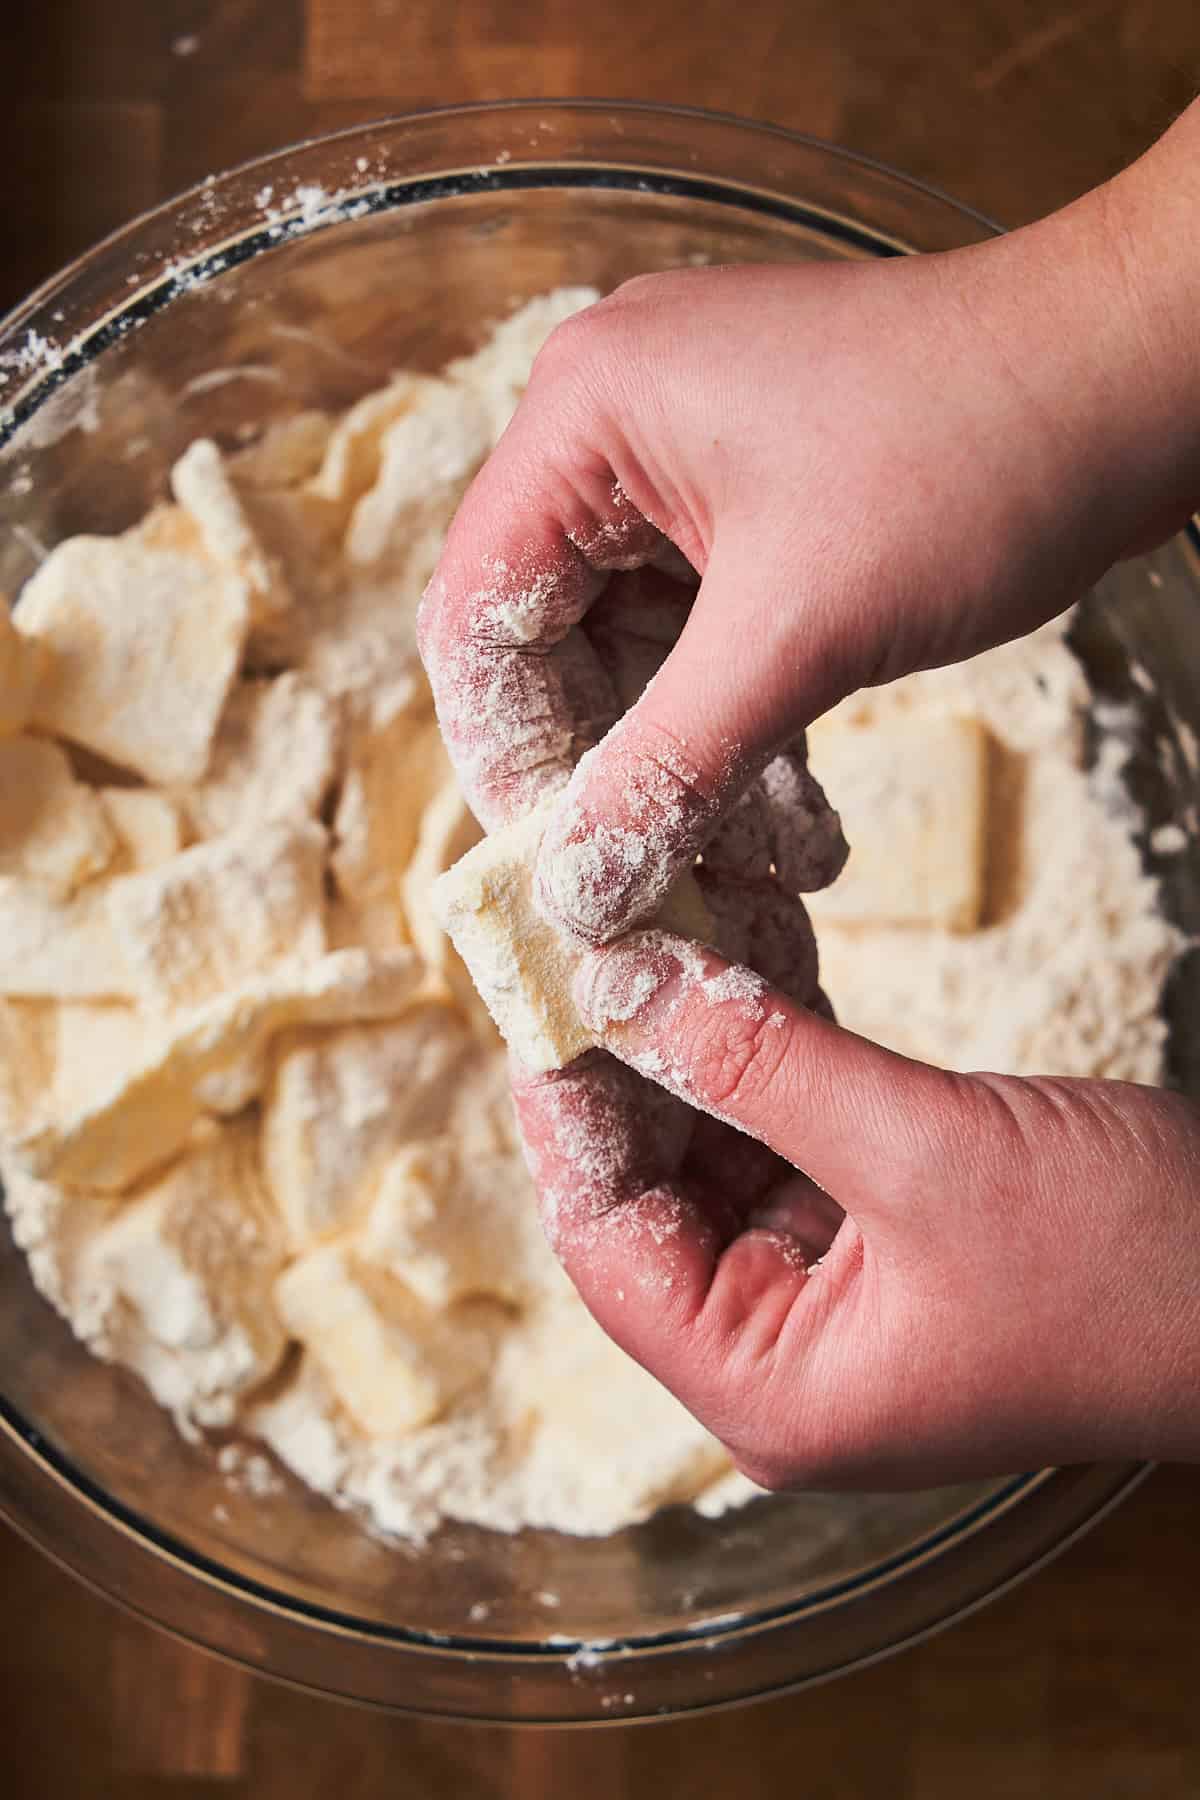
- Step 3: Using your fingertips and thumbs, press and flatten each piece of butter into thin, flat sheets throughout the flour mixture.
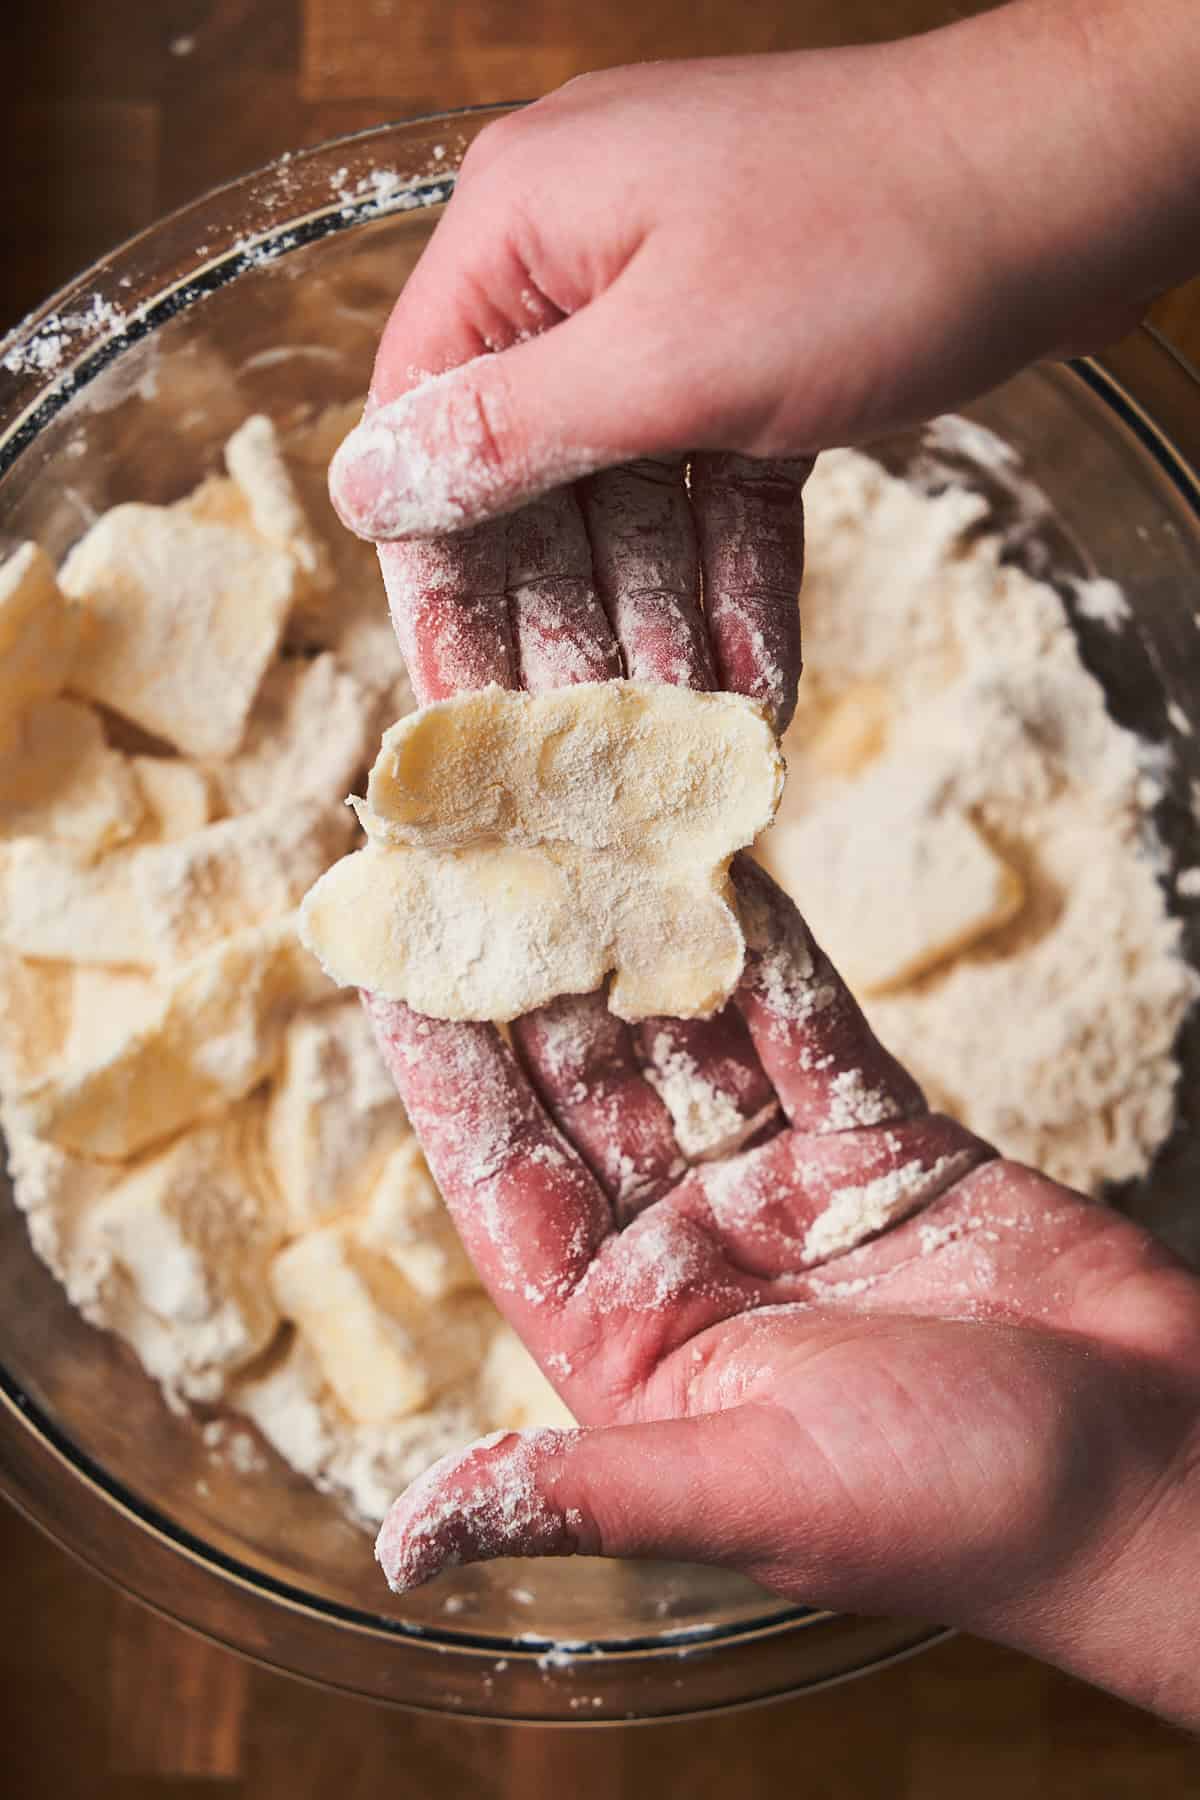
- The butter should create a nice, thin sheet. These thin sheets of butter are the secret to creating those amazing flaky layers as steam escapes in the oven!
Hot hands? If your hands tend to run warm, you can use a pastry blender to work in the butter, or even grate frozen butter directly into the flour using a box grater! Just work quickly to keep everything cold.
🧈If the butter starts to melt and get greasy, place the bowl in the fridge or freezer for 10-15 minutes to help things firm up again.
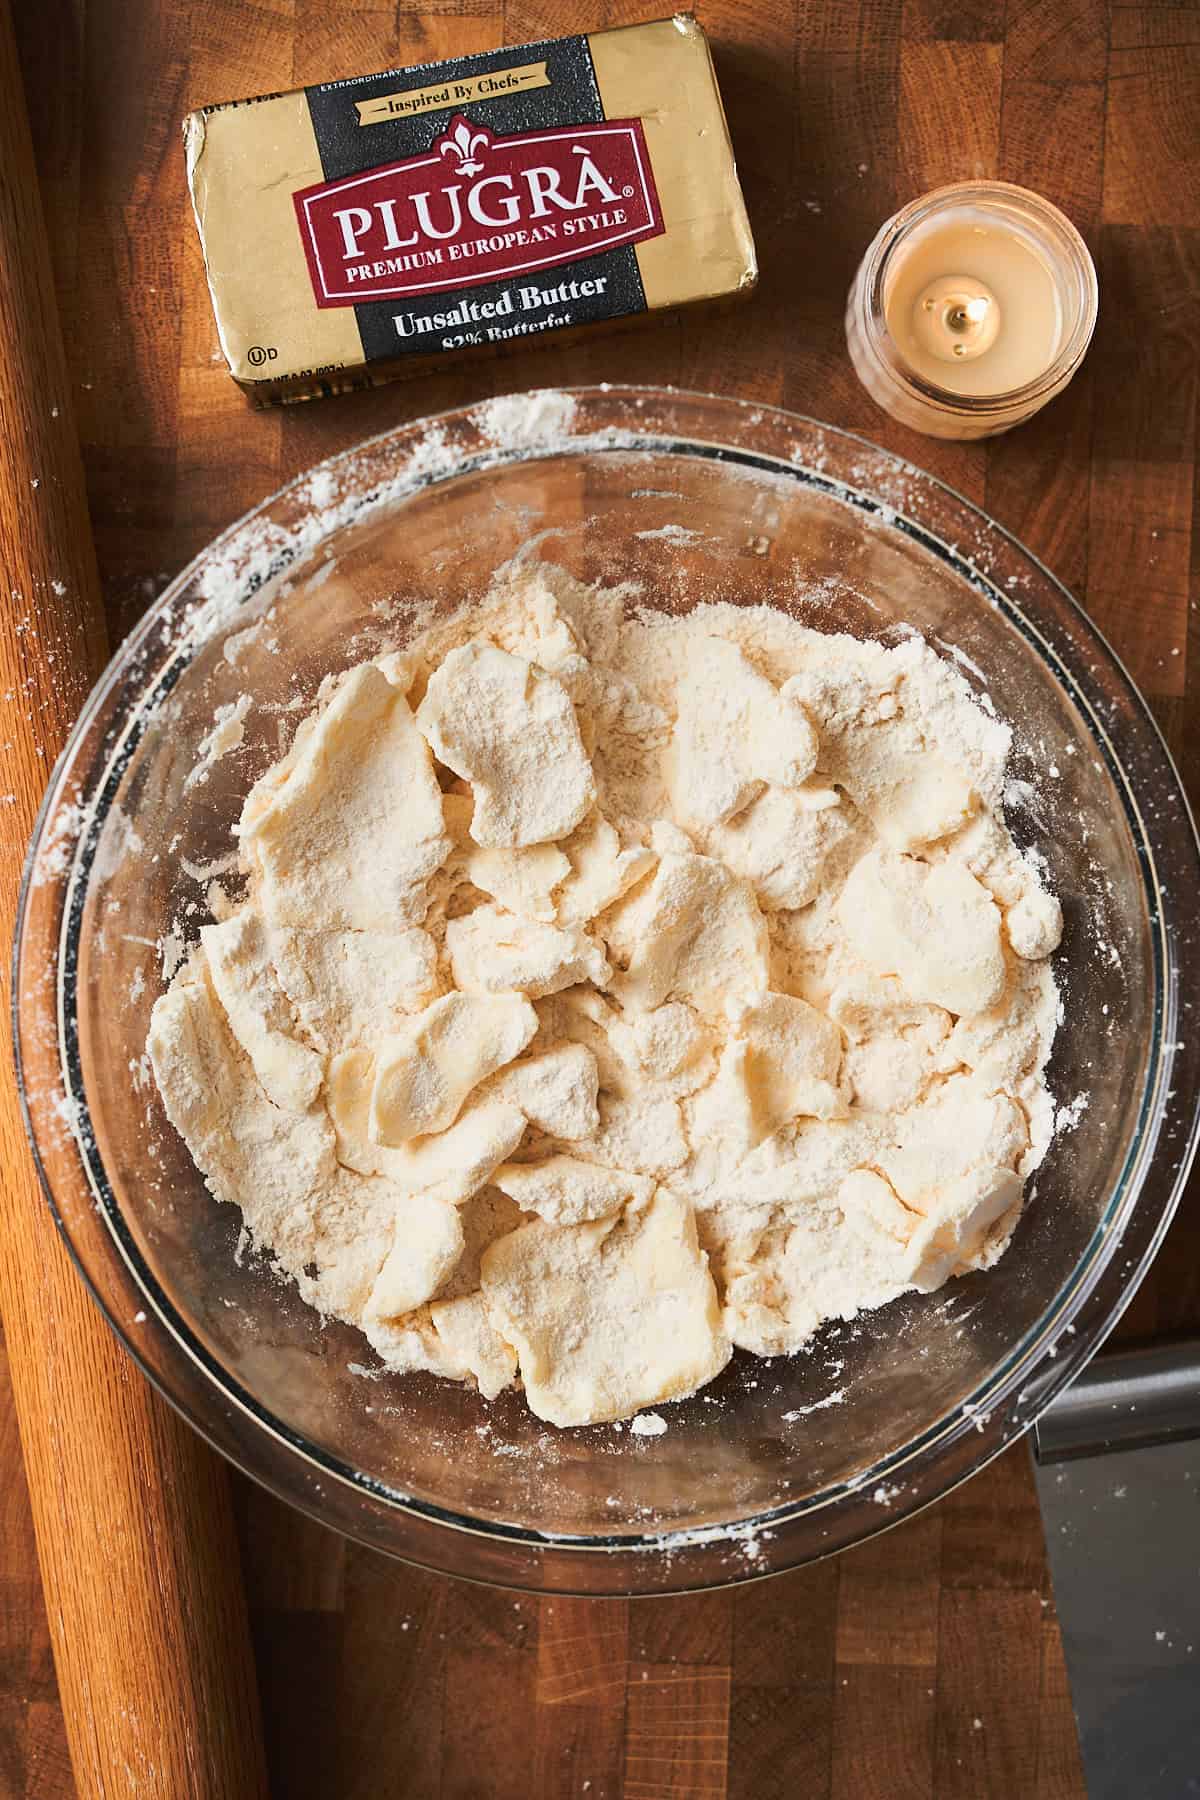
- Step 4: Keep working the butter until all the pieces have been flattened into thin sheets. Make sure to coat each flattened piece with more flour as you go. The mixture will still look shaggy and rough - that's exactly what you want!

- Step 5: Drizzle ice-cold water into the bowl 1 tablespoon at a time, using your hand in a "claw" shape (or a fork), gently tossing the mixture together after each addition.
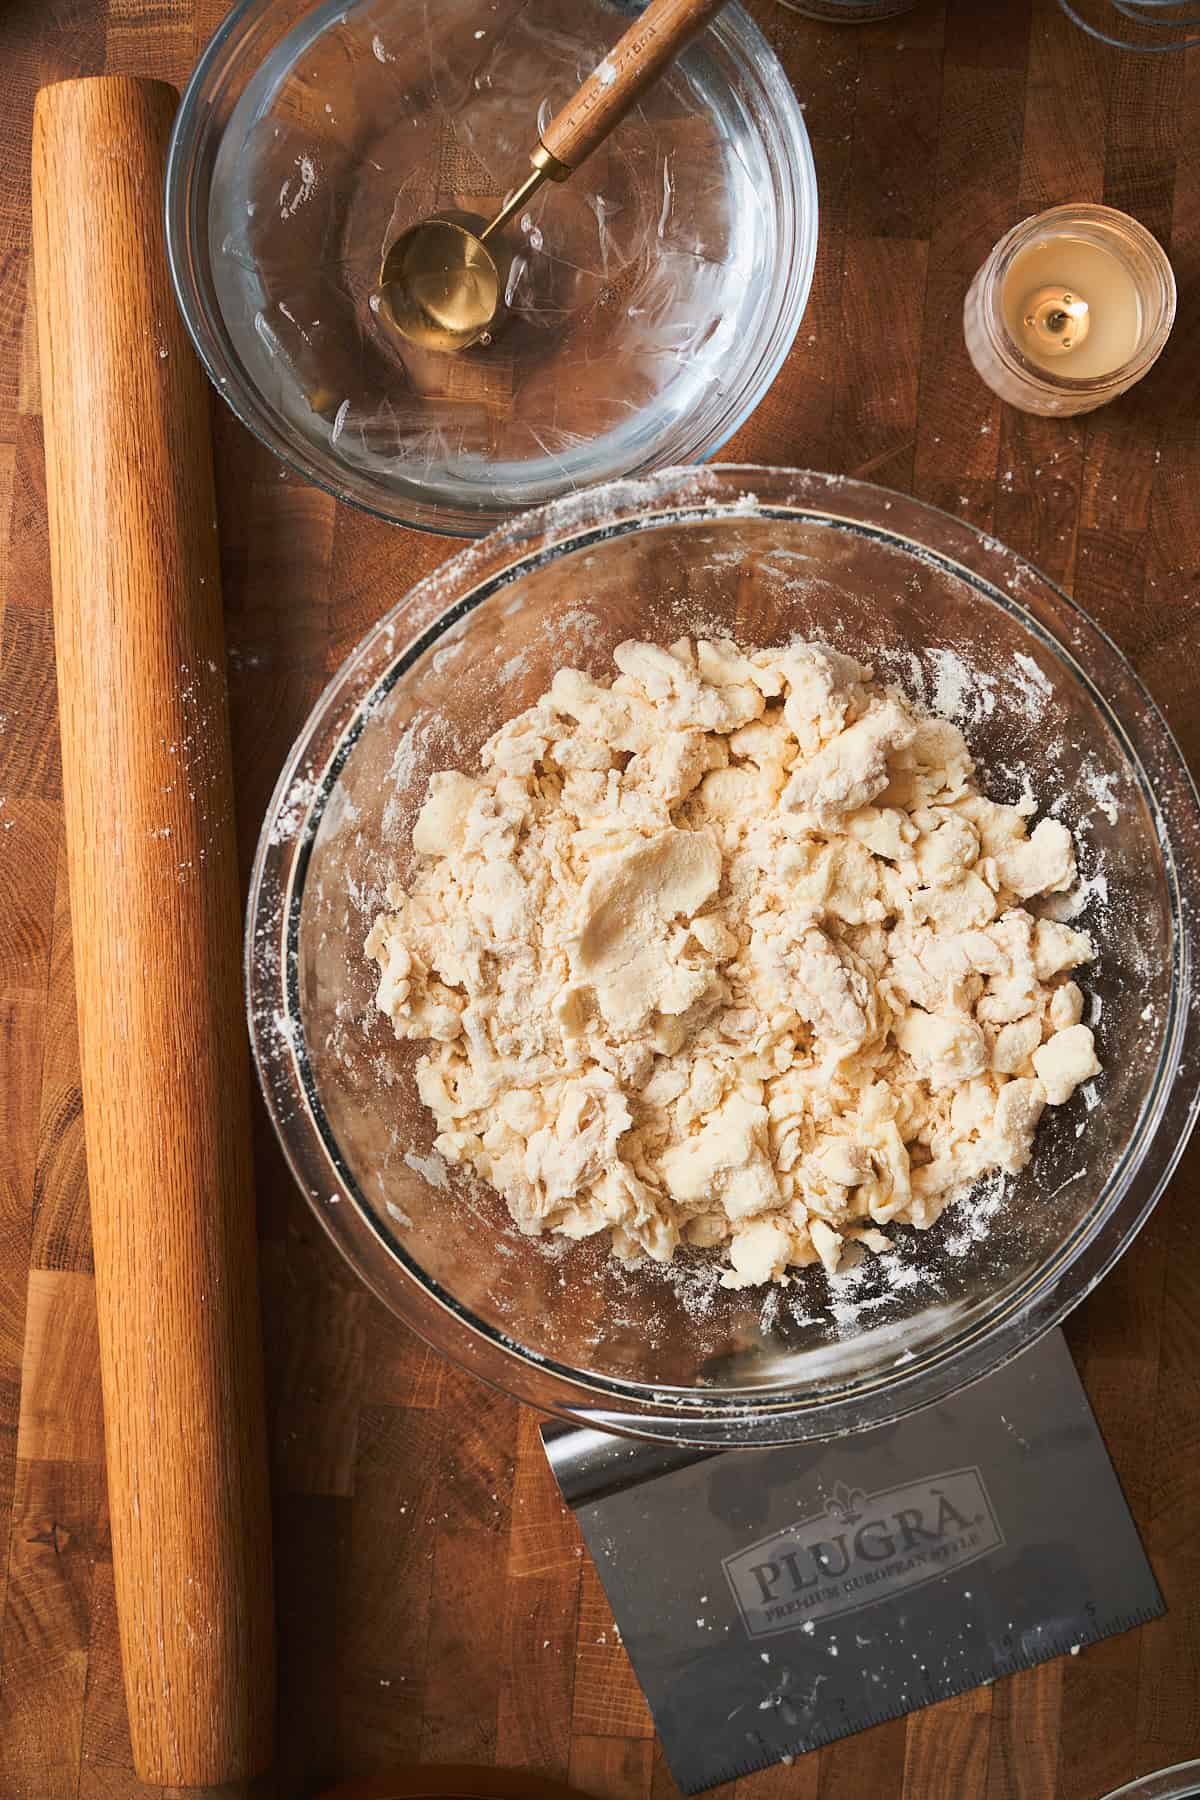
- Continue to toss and fold the ingredients together, adding water slowly until a shaggy dough just begins to form. The dough should barely hold together when pressed but will still look rough. Don't panic, this is exactly how it should be!
❄️🧊The water needs to be ICE COLD! This helps prevent the butter from getting too warm and melting.
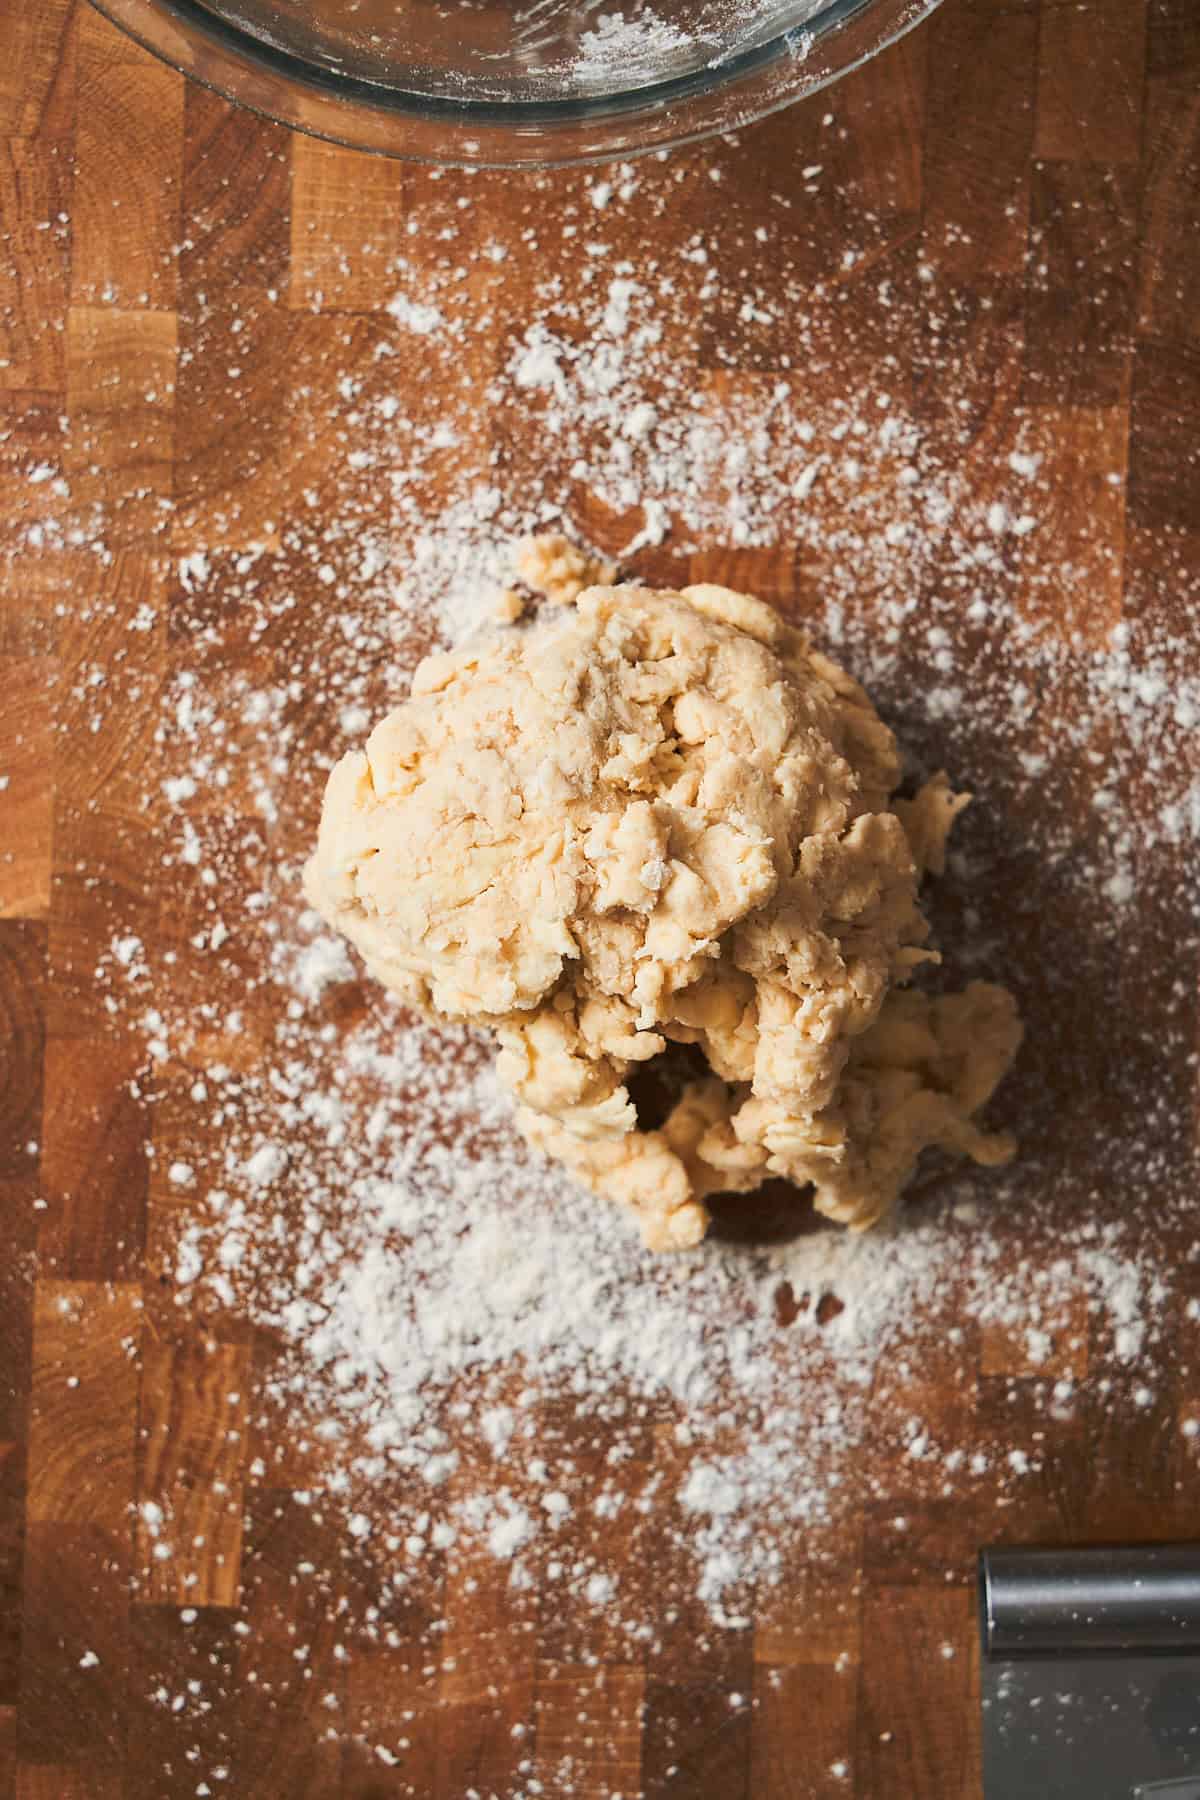
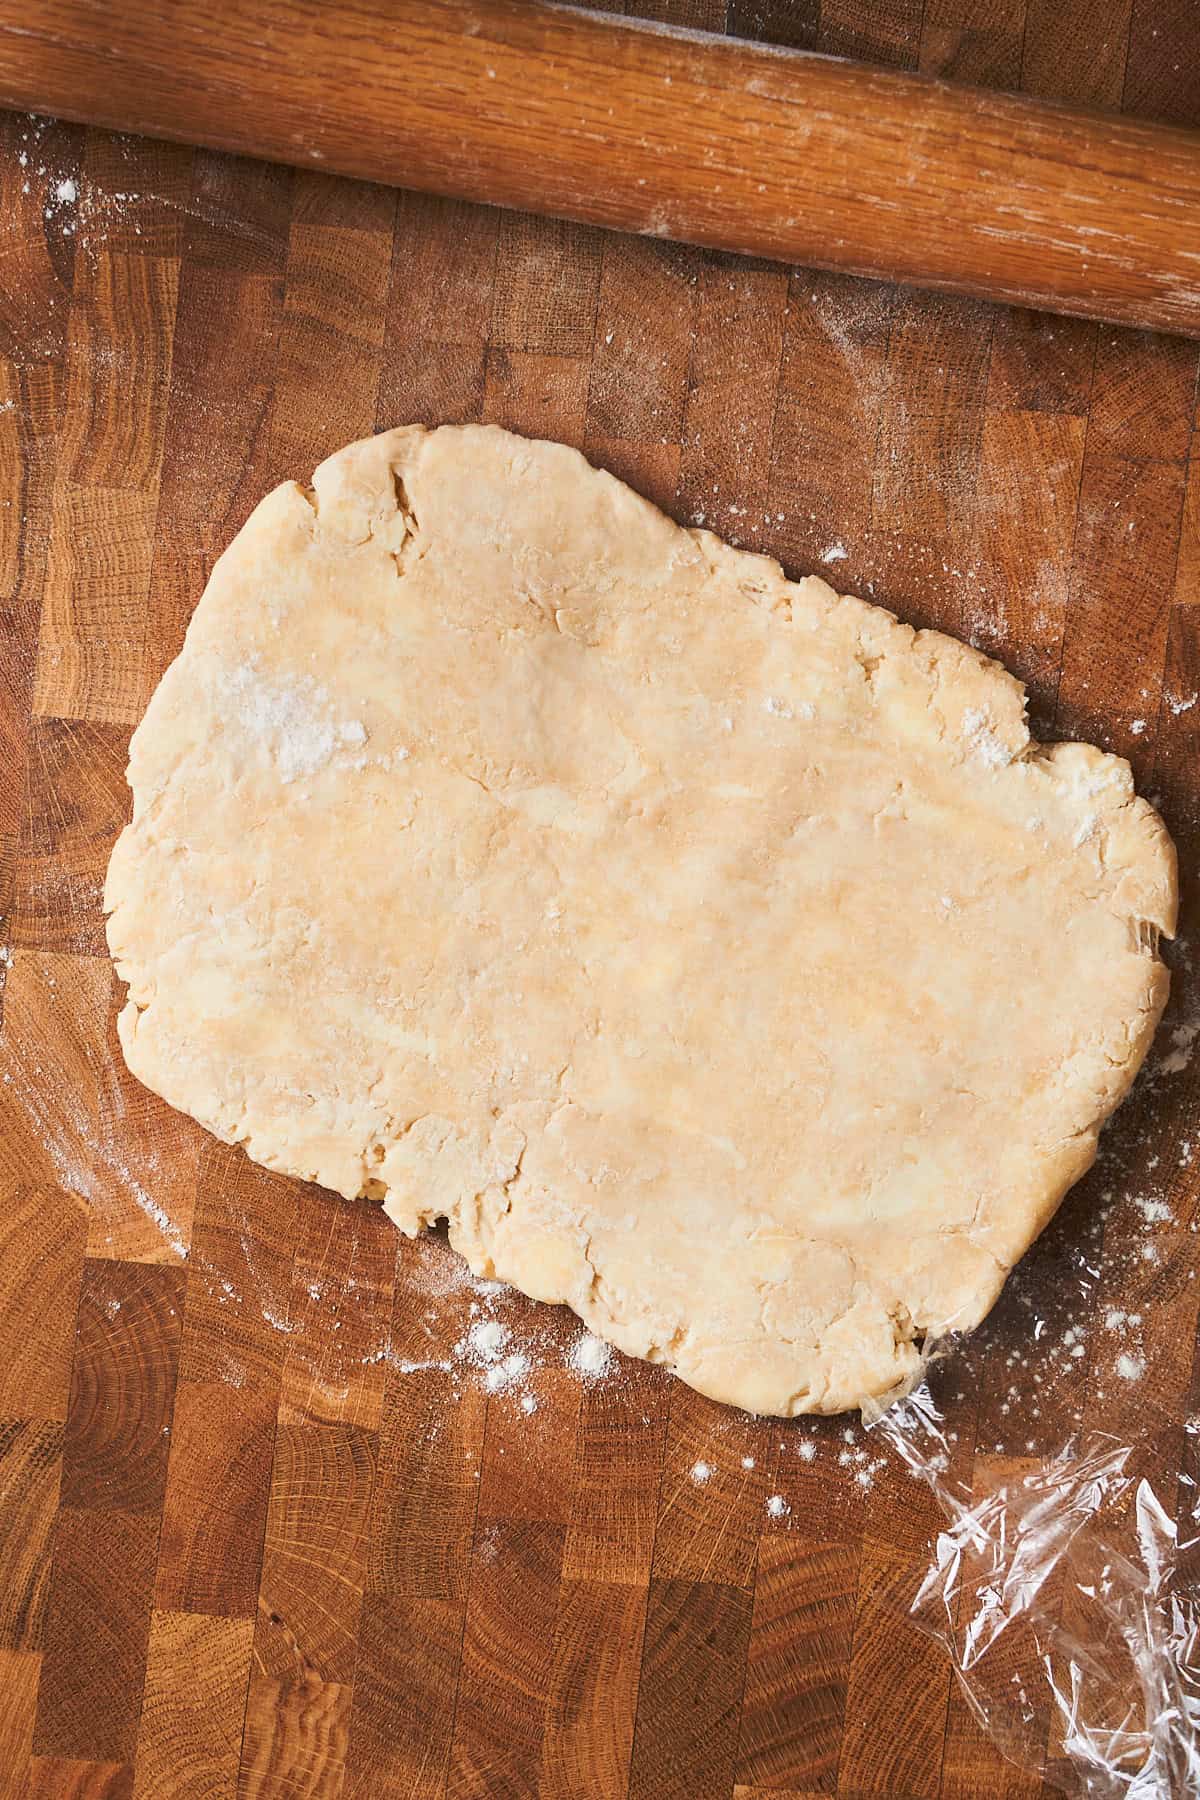
- Step 6: Turn the shaggy dough out onto a lightly floured work surface.

- Step 7: Use your hands to gently pat and push the dough together into a rough square shape, about 1 inch thick.
Don't knead or work the dough too much. Just push it together enough so it holds its shape!
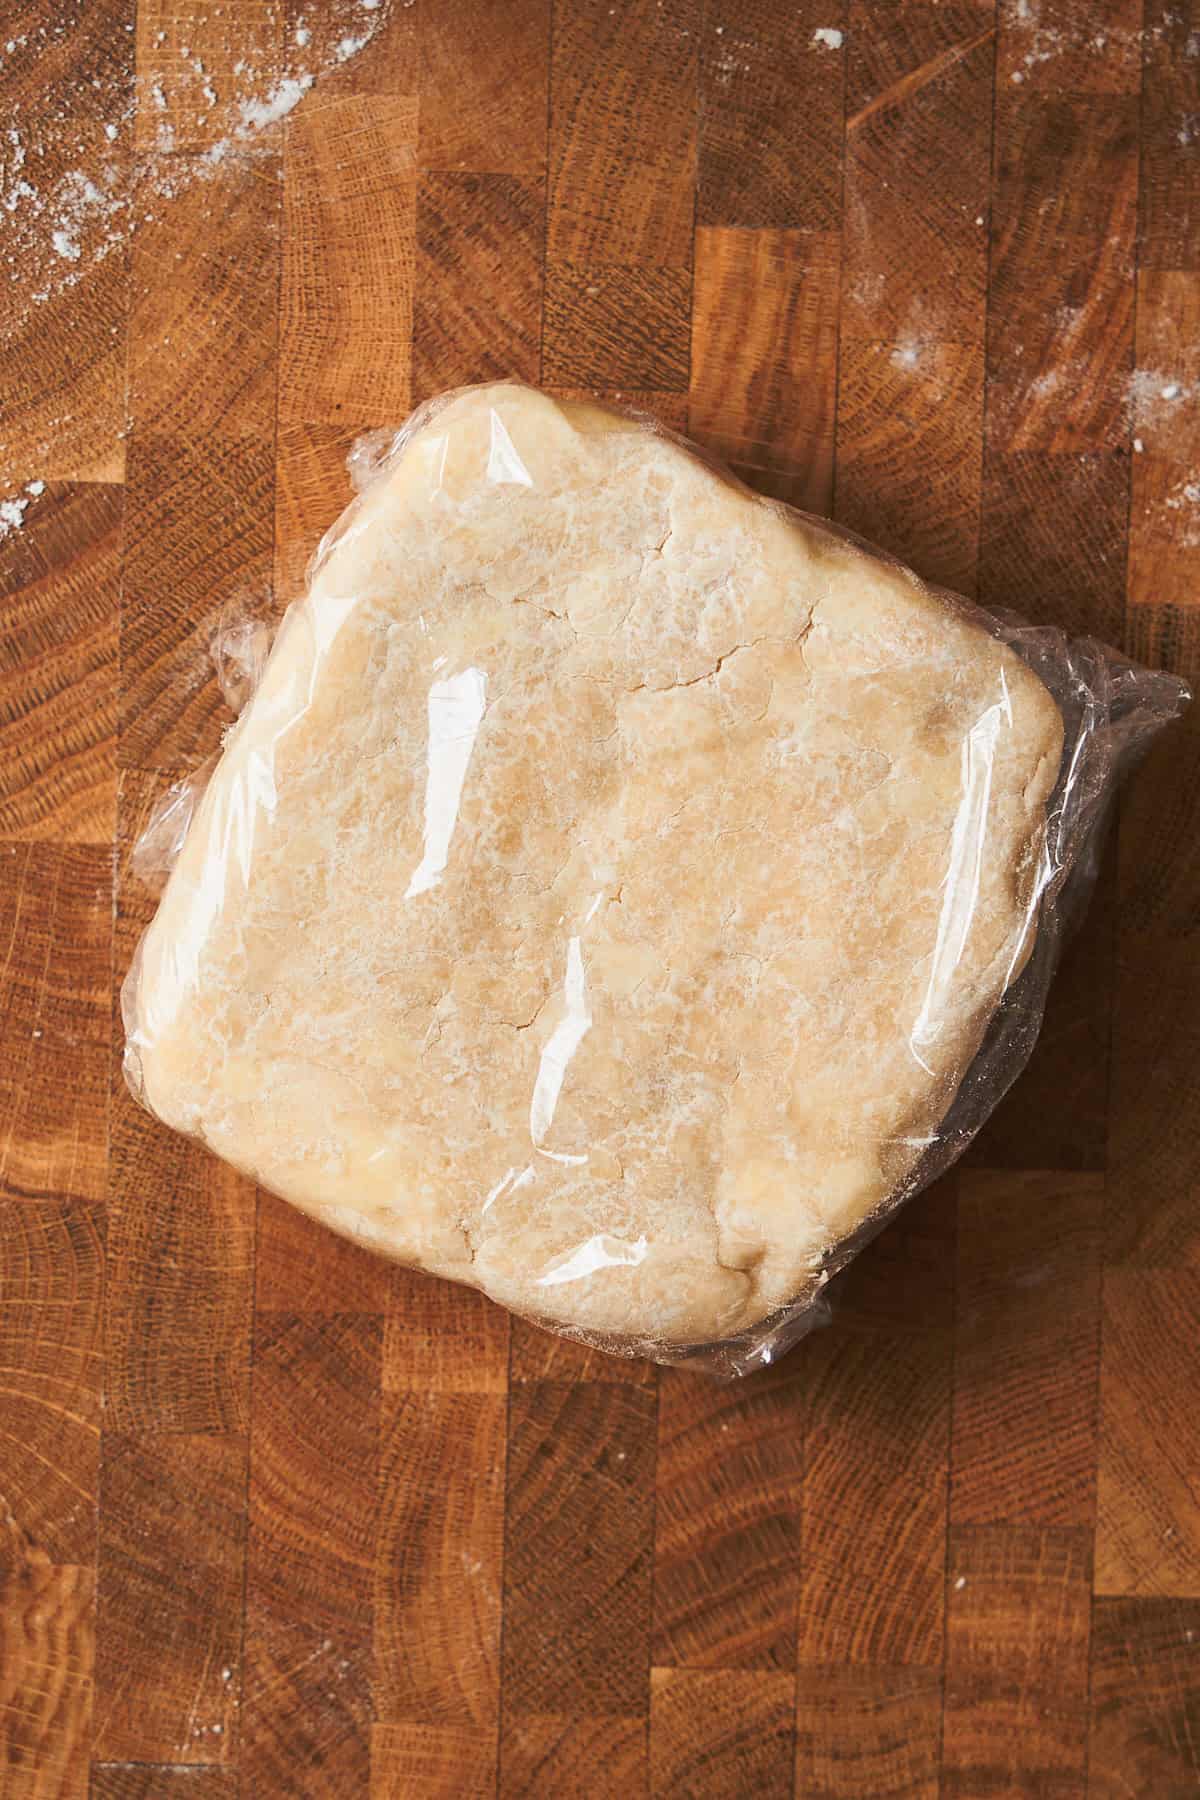
- Step 8: Wrap the dough square in plastic wrap and refrigerate for at least 2 hours (or up to overnight). This chilling time is important for the dough to hydrate and for the butter to firm back up.
⏰If you're in a rush, you can pop it in the freezer for 30-45 minutes instead, but the fridge is better!
Folding the Dough
Now comes the fun part - the series of folds that create all those flaky layers!
Make sure to wipe down the work surface and rolling pin before adding fresh flour to the work surface to avoid any dry, crusty bits from being incorporated into the dough.
- Step 9: After at least two hours of chilling, remove the dough from the fridge.
💡If it's been chilled overnight and feels rock-hard, let it sit at room temperature for 5-10 minutes to soften slightly. It should still be cold, but pliable enough to roll.
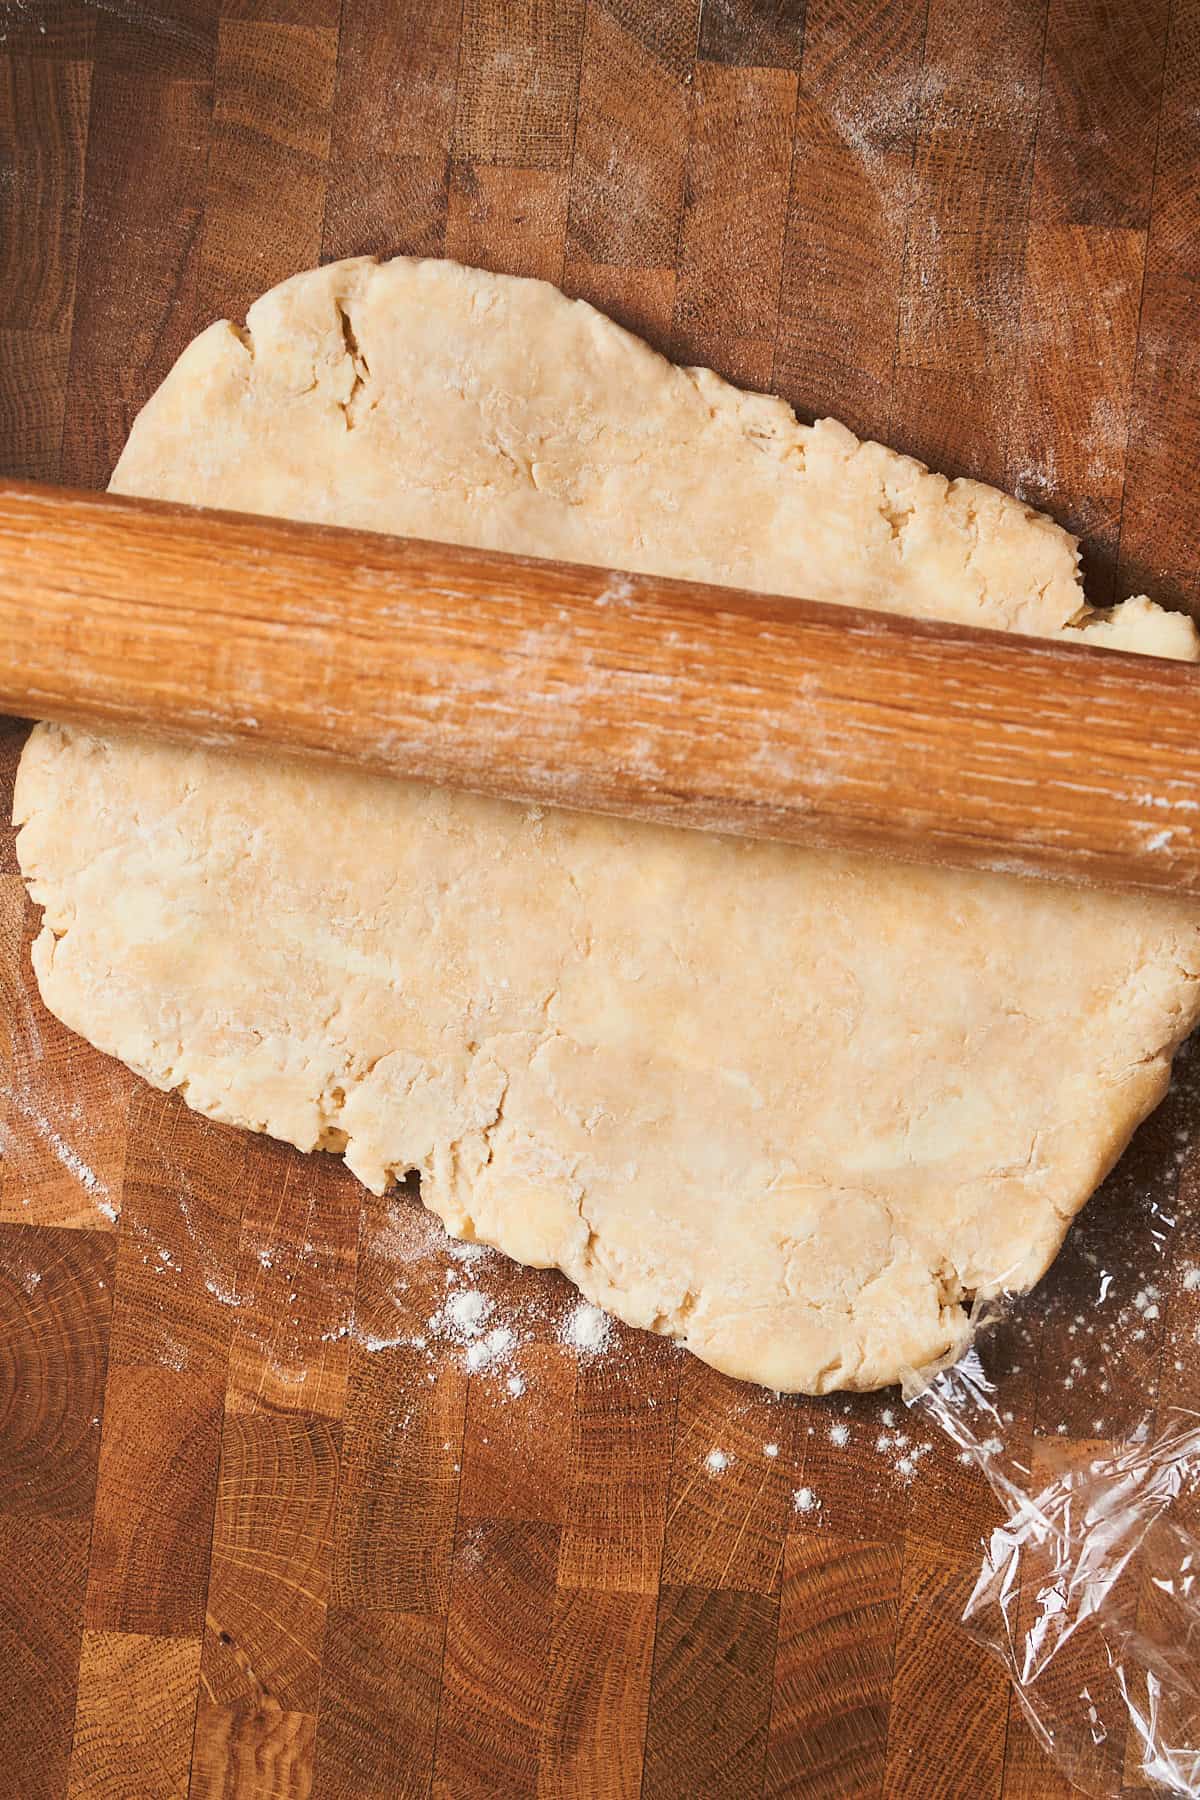
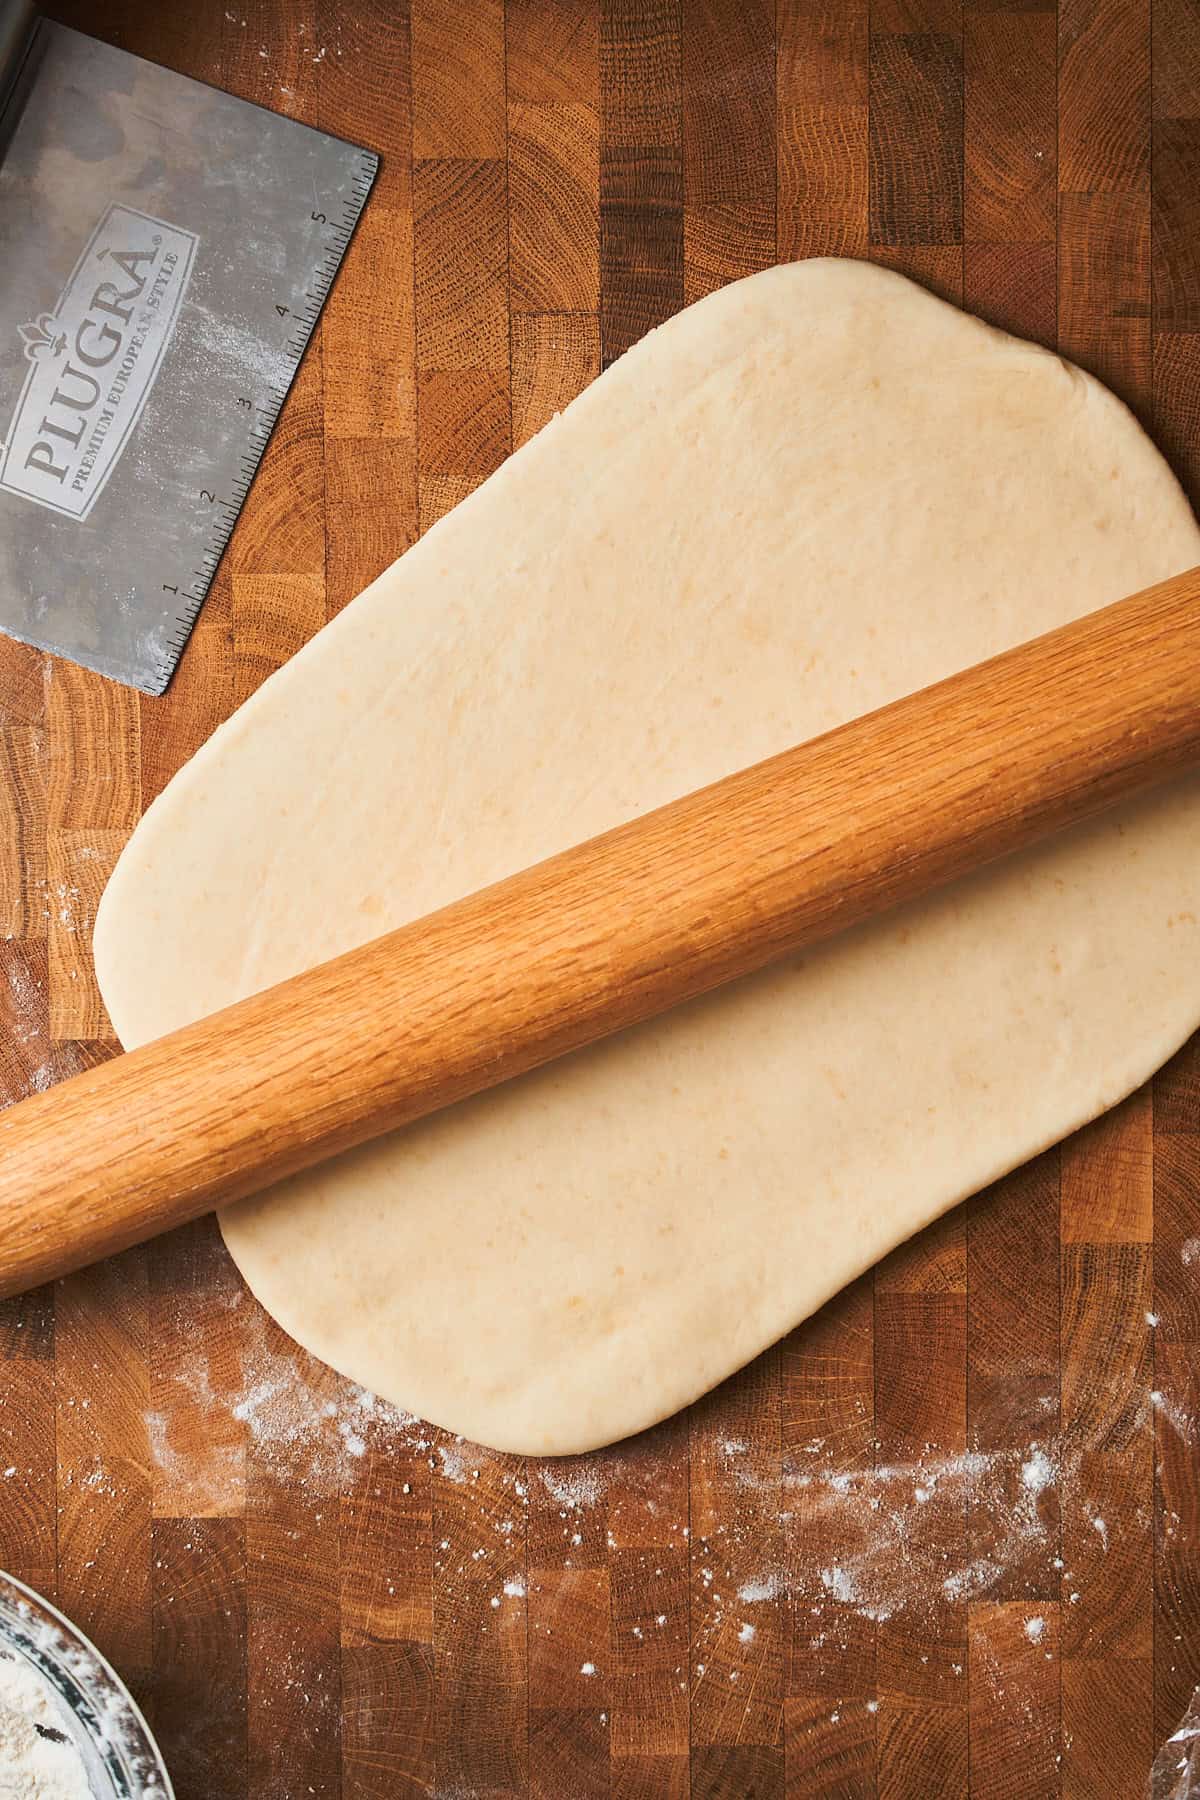
- Step 10: On a lightly floured surface, roll the dough into a rectangle roughly 12 x 8 inches. Try to keep the edges as straight as possible!
Use a bench scraper to help straighten those edges and lift the dough if it sticks. Feel free to add extra flour to the surface as well!
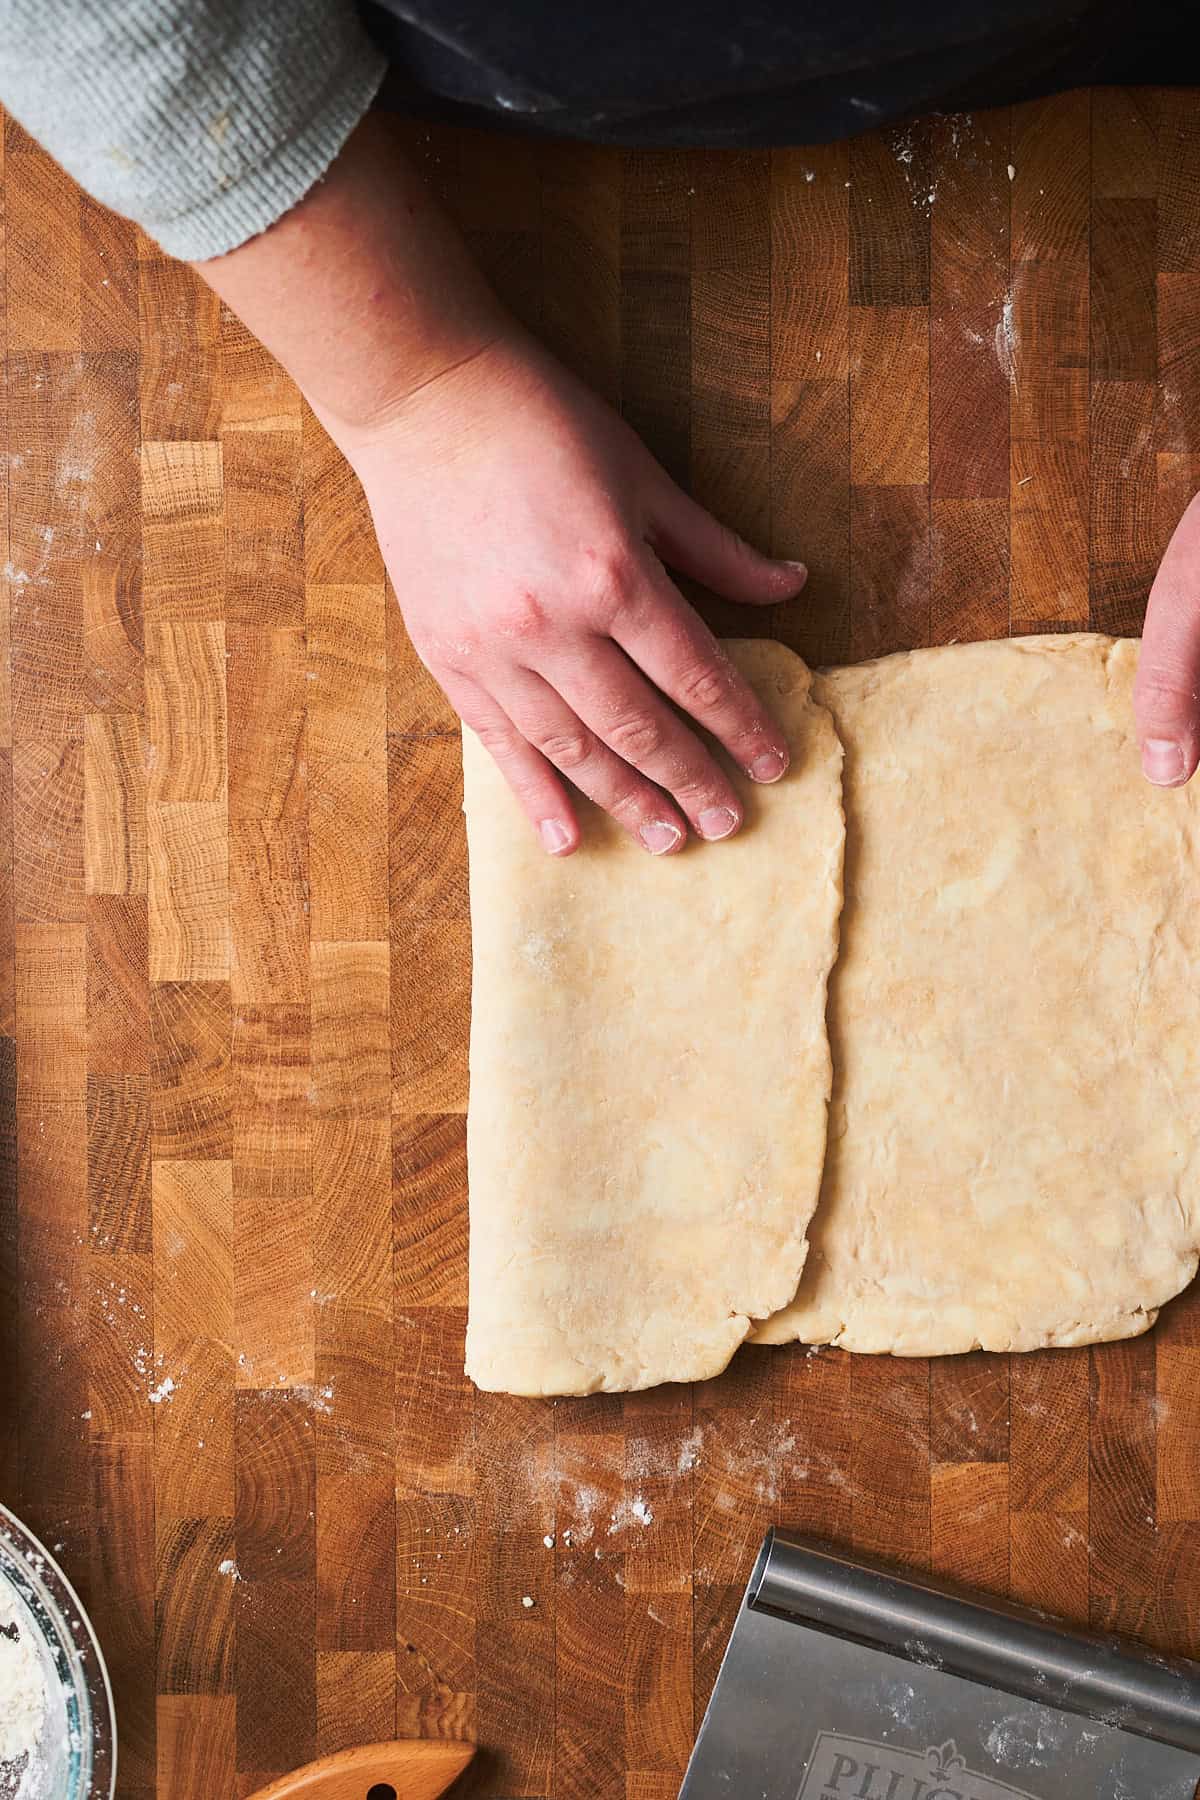
- Step 11: Fold the dough into thirds like a business letter. Take one-third and fold it toward the center.
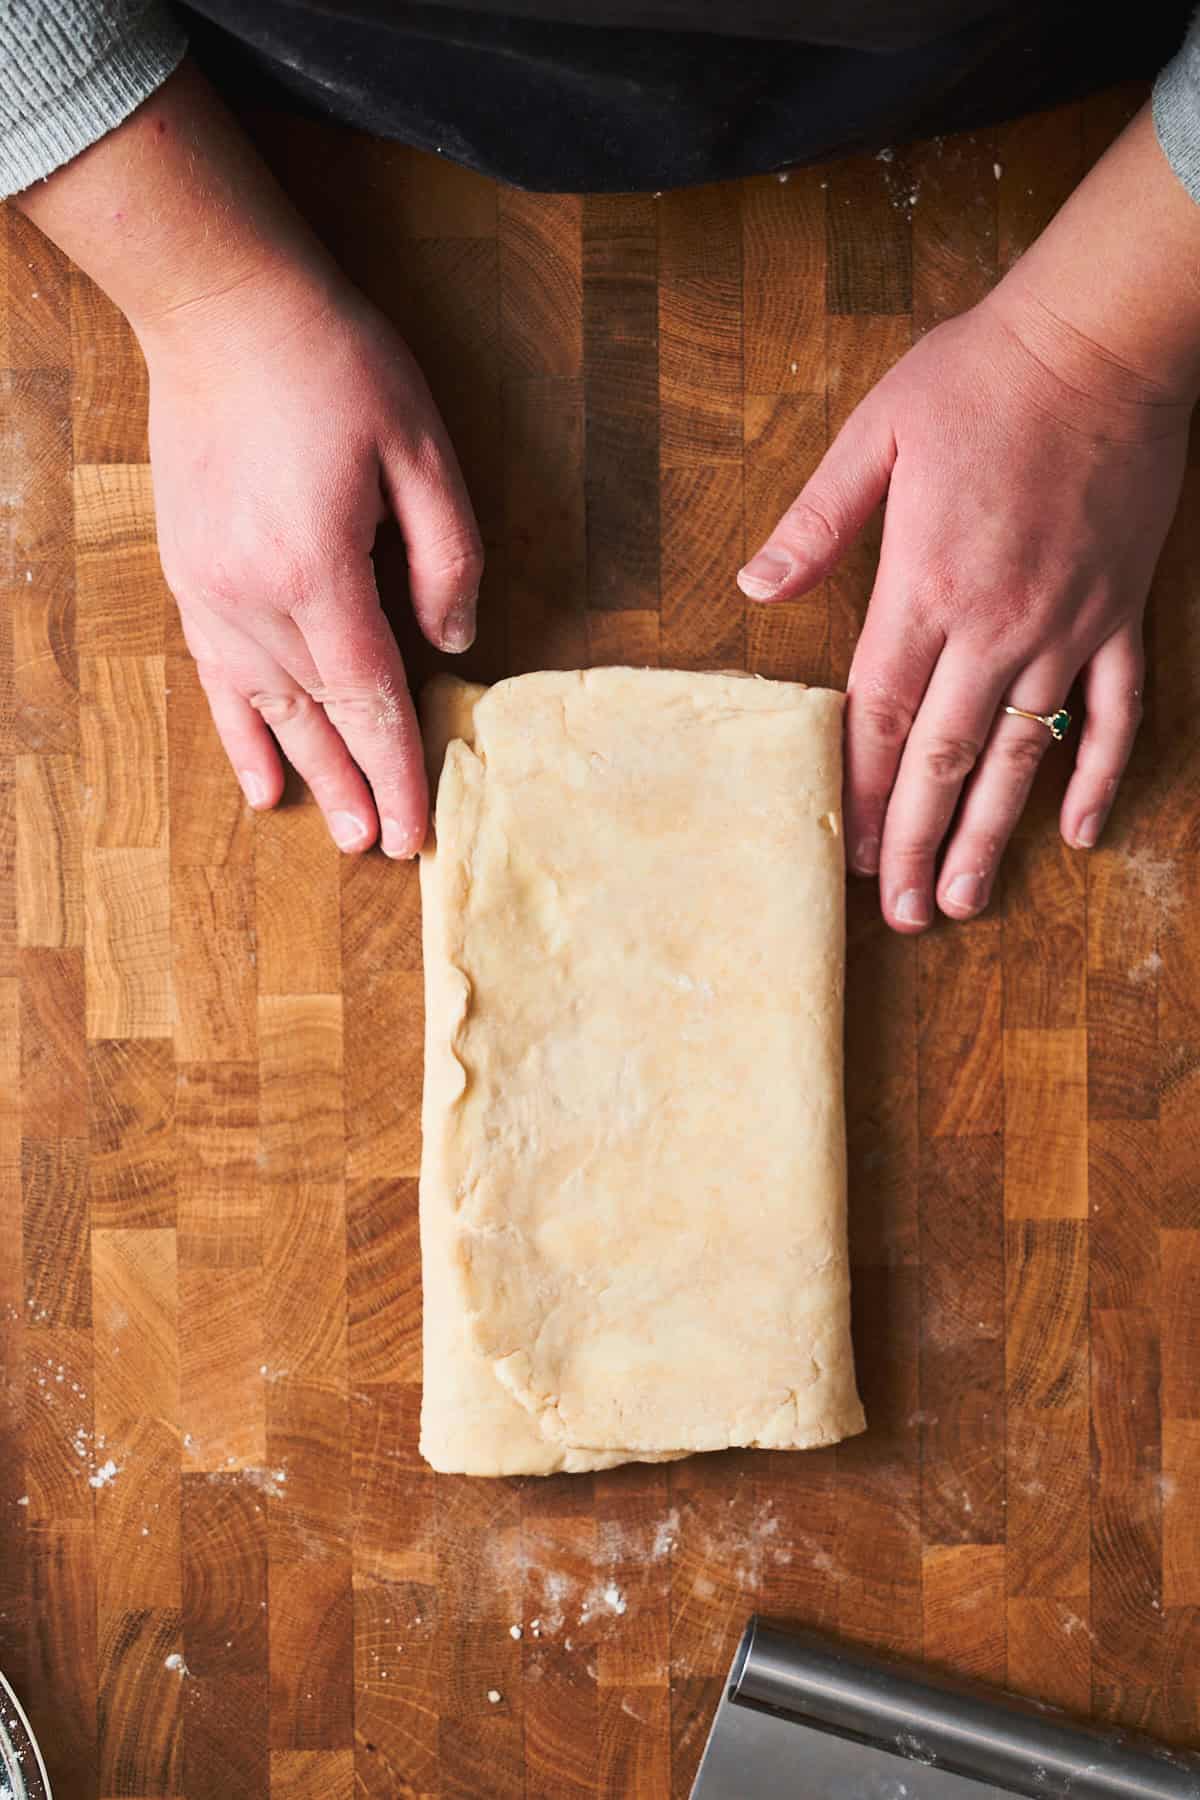
- Step 12: Then fold the second third down over it. You've just completed your first "turn"!
Turn the dough 90 degrees so the seam is on your left (like a book).
Roll the dough out again into a rectangle roughly 12 x 8 inches. Fold into thirds again. That's your second turn!
Repeat the process of rolling, folding into thirds, and turning 90 degrees four more times for a total of 6 turns.
💡It helps to keep track! Make little indentations in the dough with your finger after each turn so you don't lose count. After 2 turns, make 2 dimples. After 4 turns, make 4 dimples. You get the idea!
🧈If the dough becomes sticky or you can see butter starting to melt: Stop immediately and refrigerate the dough for 15-20 minutes before continuing. Better to take a break than to let that butter melt out!
- Step 13: On the final roll, your dough should be soft and pliable! Roll the dough out again into a rectangle about ¼-inch thick or so, or whatever thickness the recipe you're using calls for.
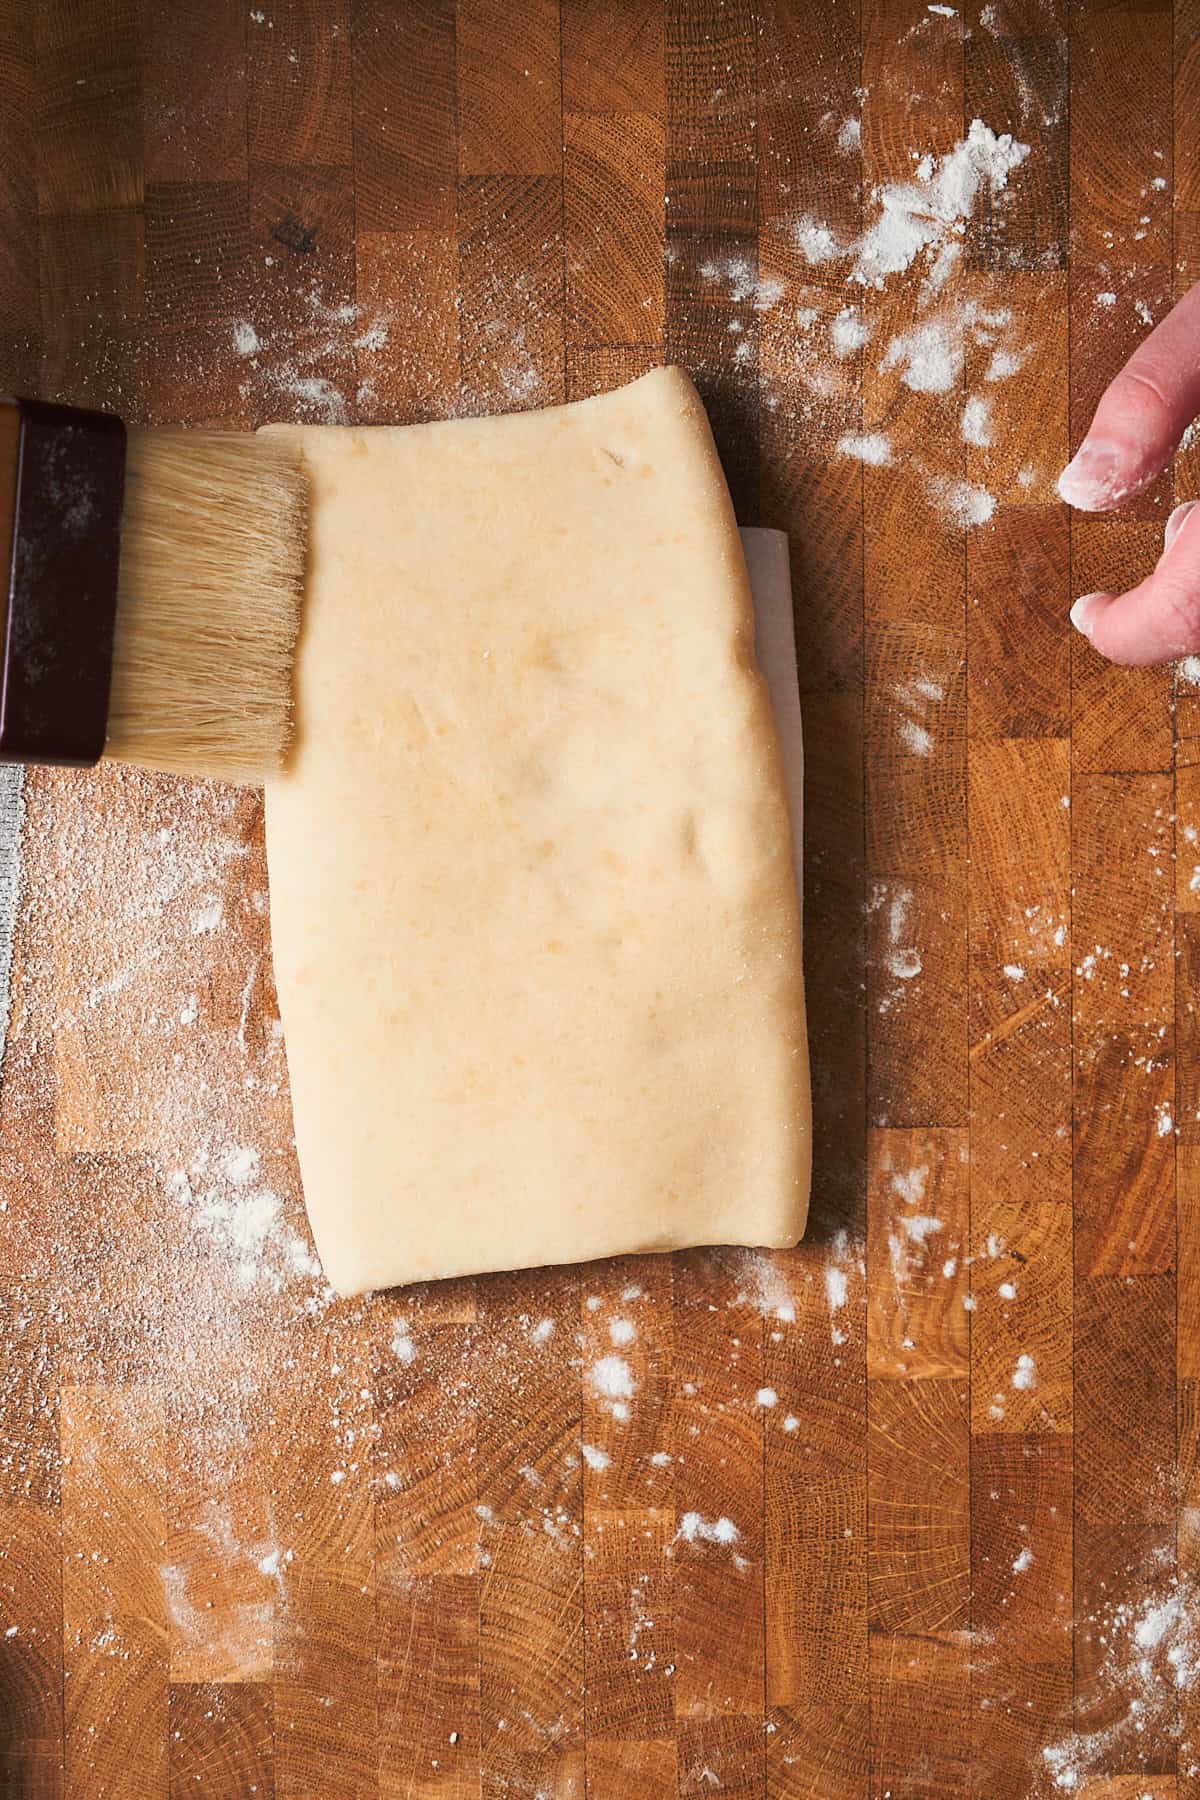
- Step 14: Use a pastry brush to brush off excess flour.
- Step 15: Your rough puff is now ready to use in your favorite recipes. Just make sure to chill it for a final 15 minutes before cutting it into shapes!
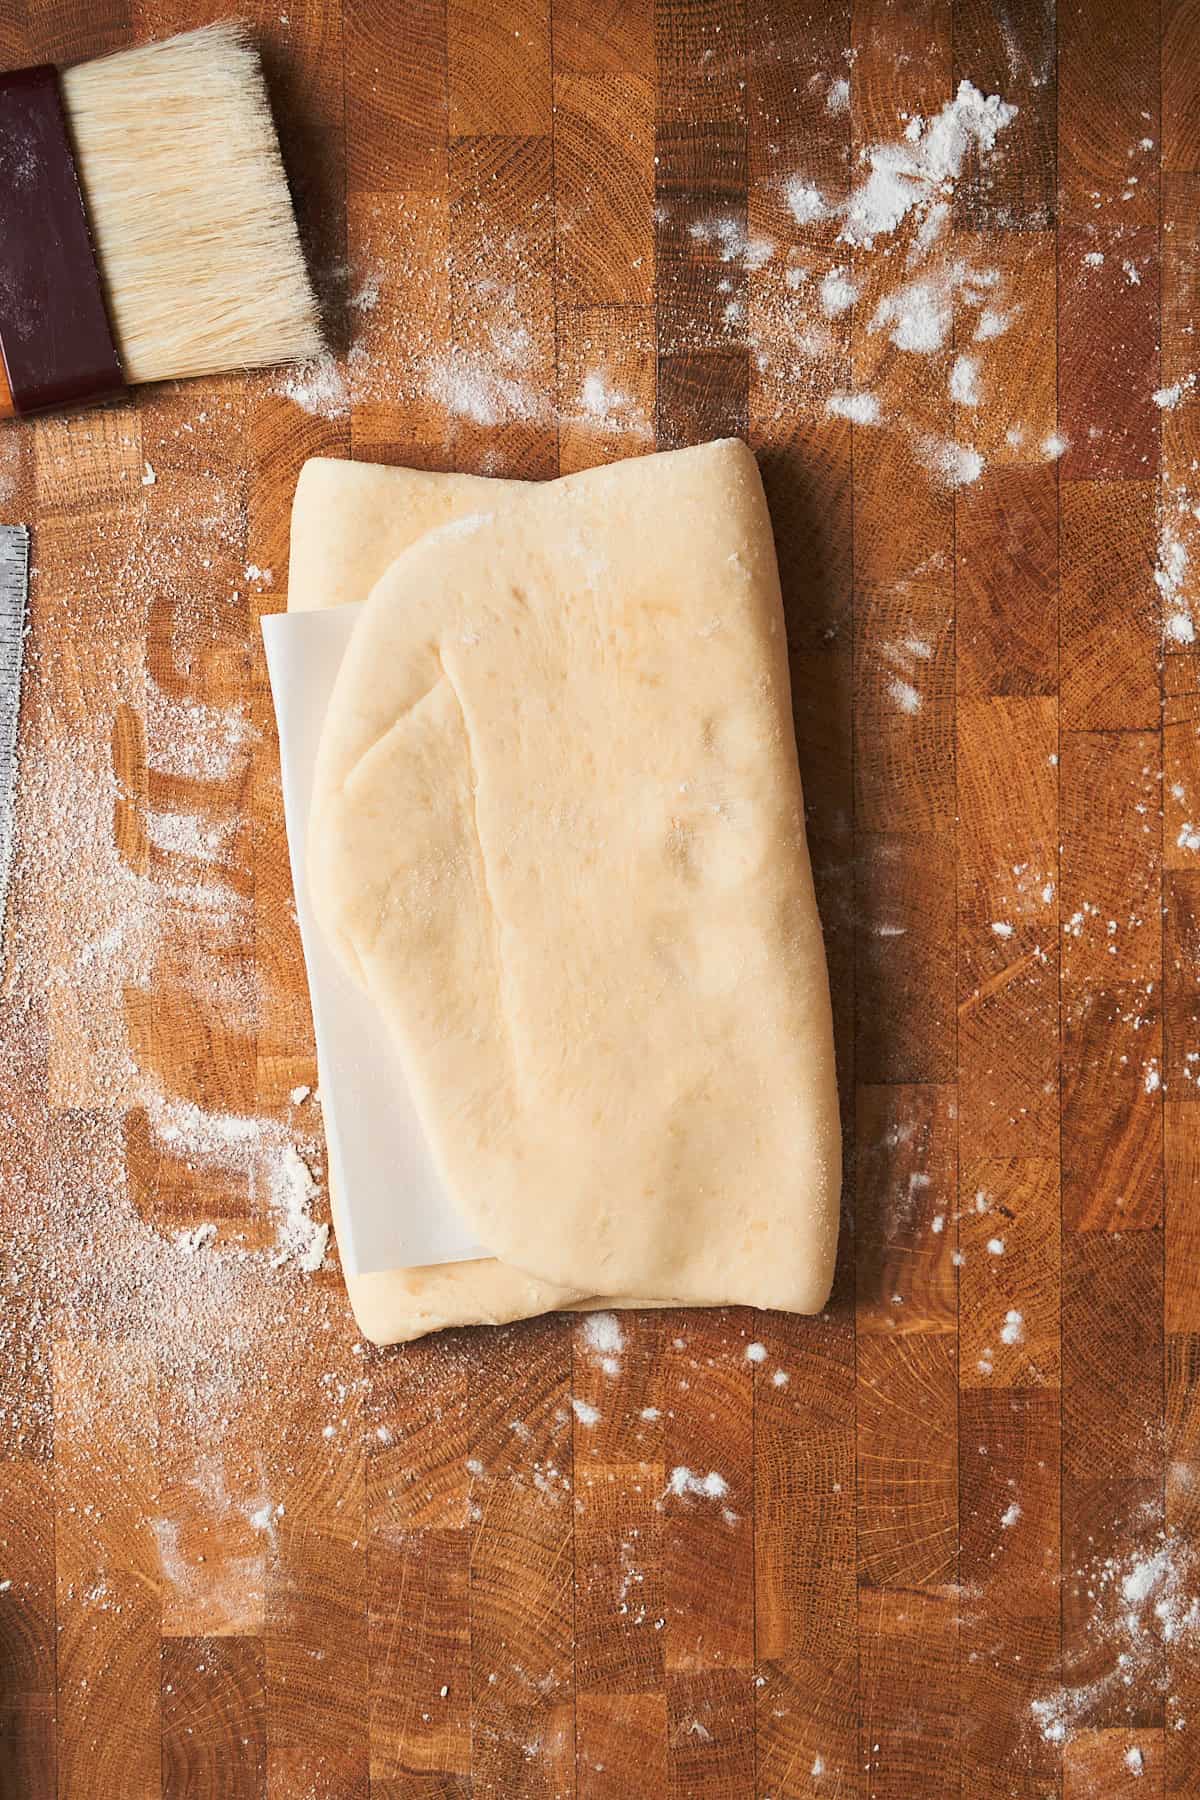
We were storing our puff pastry for later, so we took layers of parchment paper and folded the dough into thirds again. Add a piece of parchment to the center, then fold a third over top. Add another piece of parchment, then fold the second half over the top toward the center.
To use later, wrap tightly in plastic wrap and store in the fridge for up to 2 days, or in the freezer for 2-3 months.
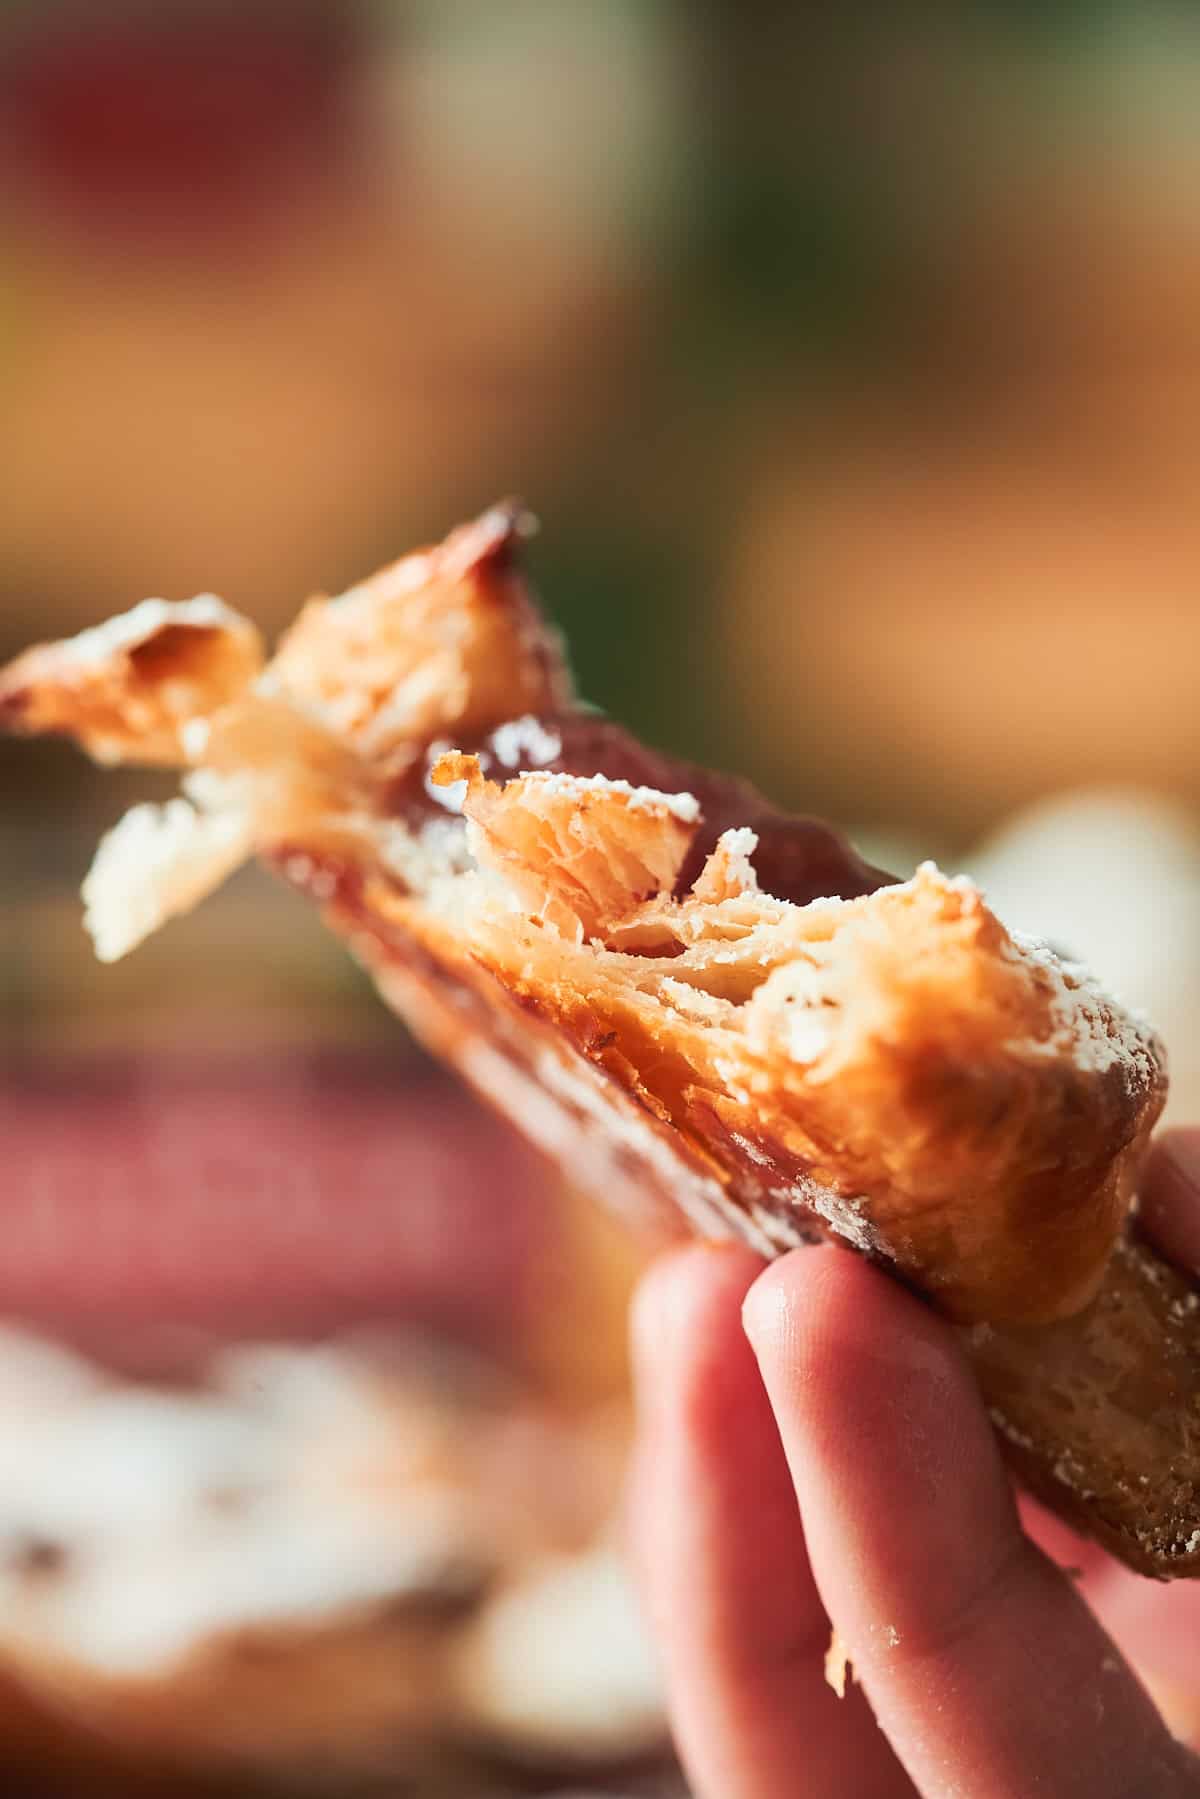
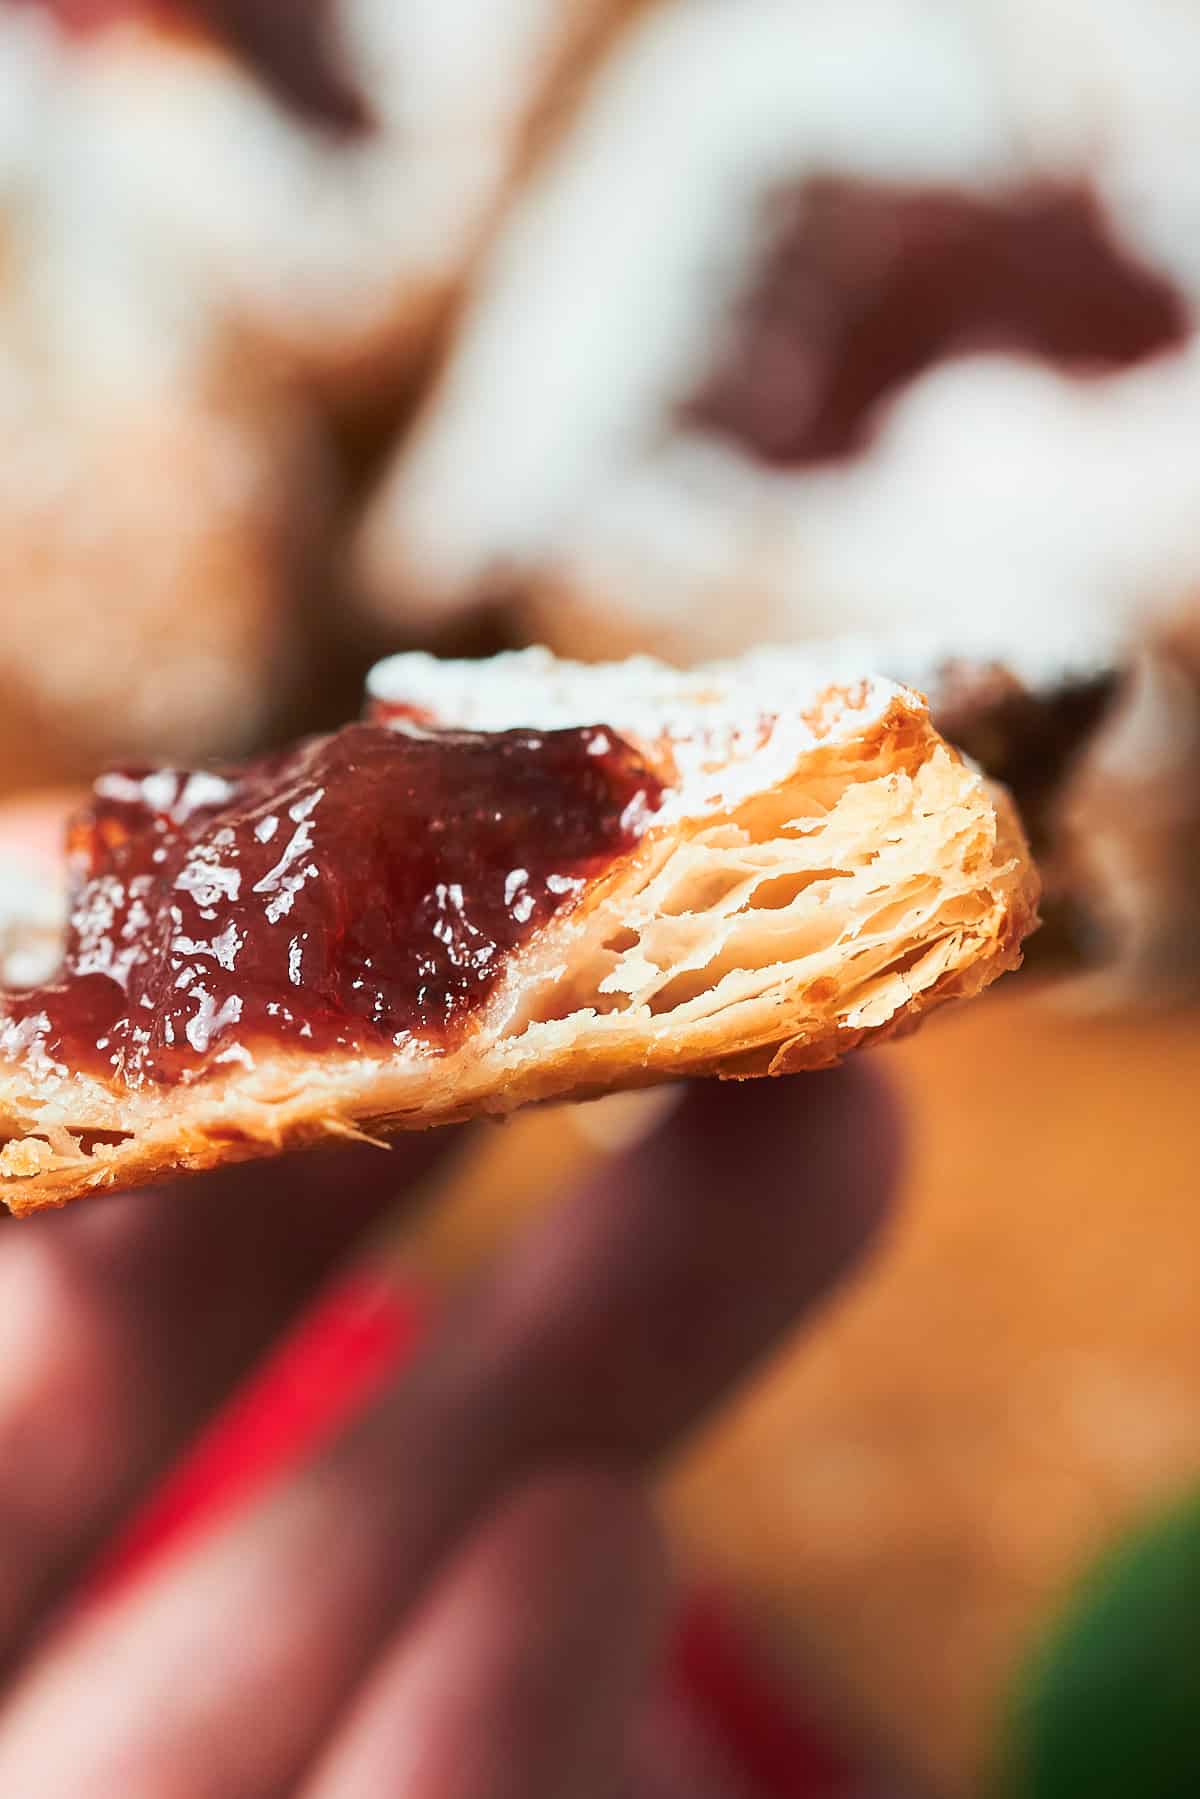
Use in your favorite recipes, like these Finnish Christmas Star Pastries!
🌟Leave a Review!
If you make this recipe, we'd love to hear from you! Leave a comment below with your rating for the recipe. Share with us by tagging us on Instagram! We love seeing your creations! 📸
📖 Recipe

Easy Rough Puff Pastry Recipe (Flaky Homemade Pastry Dough!)
Equipment
- bench scraper optional but helpful!
- pastry brush optional but helpful
Ingredients
- 1 ¾ cups all purpose flour 222g
- 2 teaspoons kosher salt 6g
- 1 tablespoon sugar 12g
- 1 cup unsalted butter 227g, 2 sticks, very cold and cut into tablespoon-sized chunks
- 8-10 tablespoons ice water 120-150ml, added SLOWLY and as needed
Instructions
- Mix dry ingredients. In a large bowl, whisk together flour, salt, and sugar until well combined.1 ¾ cups all purpose flour, 2 teaspoons kosher salt, 1 tablespoon sugar
- Work in the butter. Add the cold butter pieces and toss to coat in flour. Using your fingertips or a pastry cutter, press and flatten each piece of butter into thin sheets throughout the flour mixture, tossing with flour as needed to prevent sticking. Continue until all butter is flattened. The mixture should still look shaggy and rough.1 cup unsalted butter
- Add water. Drizzle 8 tablespoons ice water over the mixture. Using your hand in a claw shape or a fork, gently toss and fold until a shaggy dough just begins to form. Add more water 1 tablespoon at a time if needed. The dough should barely hold together when pressed but will still look rough.8-10 tablespoons ice water
- Shape and chill. Turn the dough onto a lightly floured surface and gently pat into a rough square about 1-inch thick. Wrap in plastic wrap and refrigerate for at least 2 hours (or up to overnight).
- First two turns. Remove chilled dough from fridge. If it's been chilled overnight and feels rock-hard, let it sit at room temperature for 5-10 minutes. On a floured surface, roll into a rectangle roughly 12 x 8 inches. Fold into thirds like a business letter. Turn 90 degrees. Roll out again and fold into thirds. That's 2 turns! If dough becomes sticky, refrigerate for 15-20 minutes.
- Complete remaining turns. Repeat the roll-fold-turn process 4 more times for a total of 6 turns. Keep track by making small dimples in the dough with your finger after every 2 turns.
- Ready to use! After completing all 6 turns, the dough is ready to roll out and use according to your specific recipe. Refrigerate until ready to use, or freeze for longer storage.
Save This Recipe! 💌
Notes
Pro tips, tricks, and notes
- Cold is key. If butter starts to soften or feel greasy at any point, immediately refrigerate the dough for 10-20 minutes before continuing. This is the most important rule!
- Salt. This recipe uses Diamond Crystal kosher salt. If using Morton's kosher salt or table salt, reduce the amount by half.
- Don't overwork the dough. The dough should look shaggy and rough with visible butter pieces throughout. This is exactly what creates those flaky layers!
- Keep track of turns. Make small dimples in the dough with your finger to track how many turns you've completed. It's easy to lose count!
- Bench scraper is your friend. Use it to straighten edges, lift sticky dough, and keep everything moving smoothly on your work surface.
- European-style butter. Using a high-quality European-style butter like Plugrà (82% butterfat) creates noticeably flakier, more flavorful results than standard American butter.
- Ice cold water = crucial. Fill a glass with ice cubes and water, then measure what you need from there. The water must be ice cold to prevent the butter from melting as you work the dough.
Storage
- Refrigerator: Wrapped tightly in plastic wrap, rough puff pastry keeps in the refrigerator for up to 2-3 days.
- Freezer (unbaked): This pastry freezes beautifully! For best results, roll the dough to ¼-inch thickness after completing all turns, then fold into thirds with strips of parchment paper between each fold to prevent sticking. Wrap tightly in plastic wrap, then place in a freezer bag for up to 3 months. Thaw overnight in the refrigerator before using.
- Freezer (baked): Baked pastries can be frozen in an airtight container for up to 1 month. Reheat in a 350°F oven for 5-10 minutes to re-crisp.


Comments
No Comments