

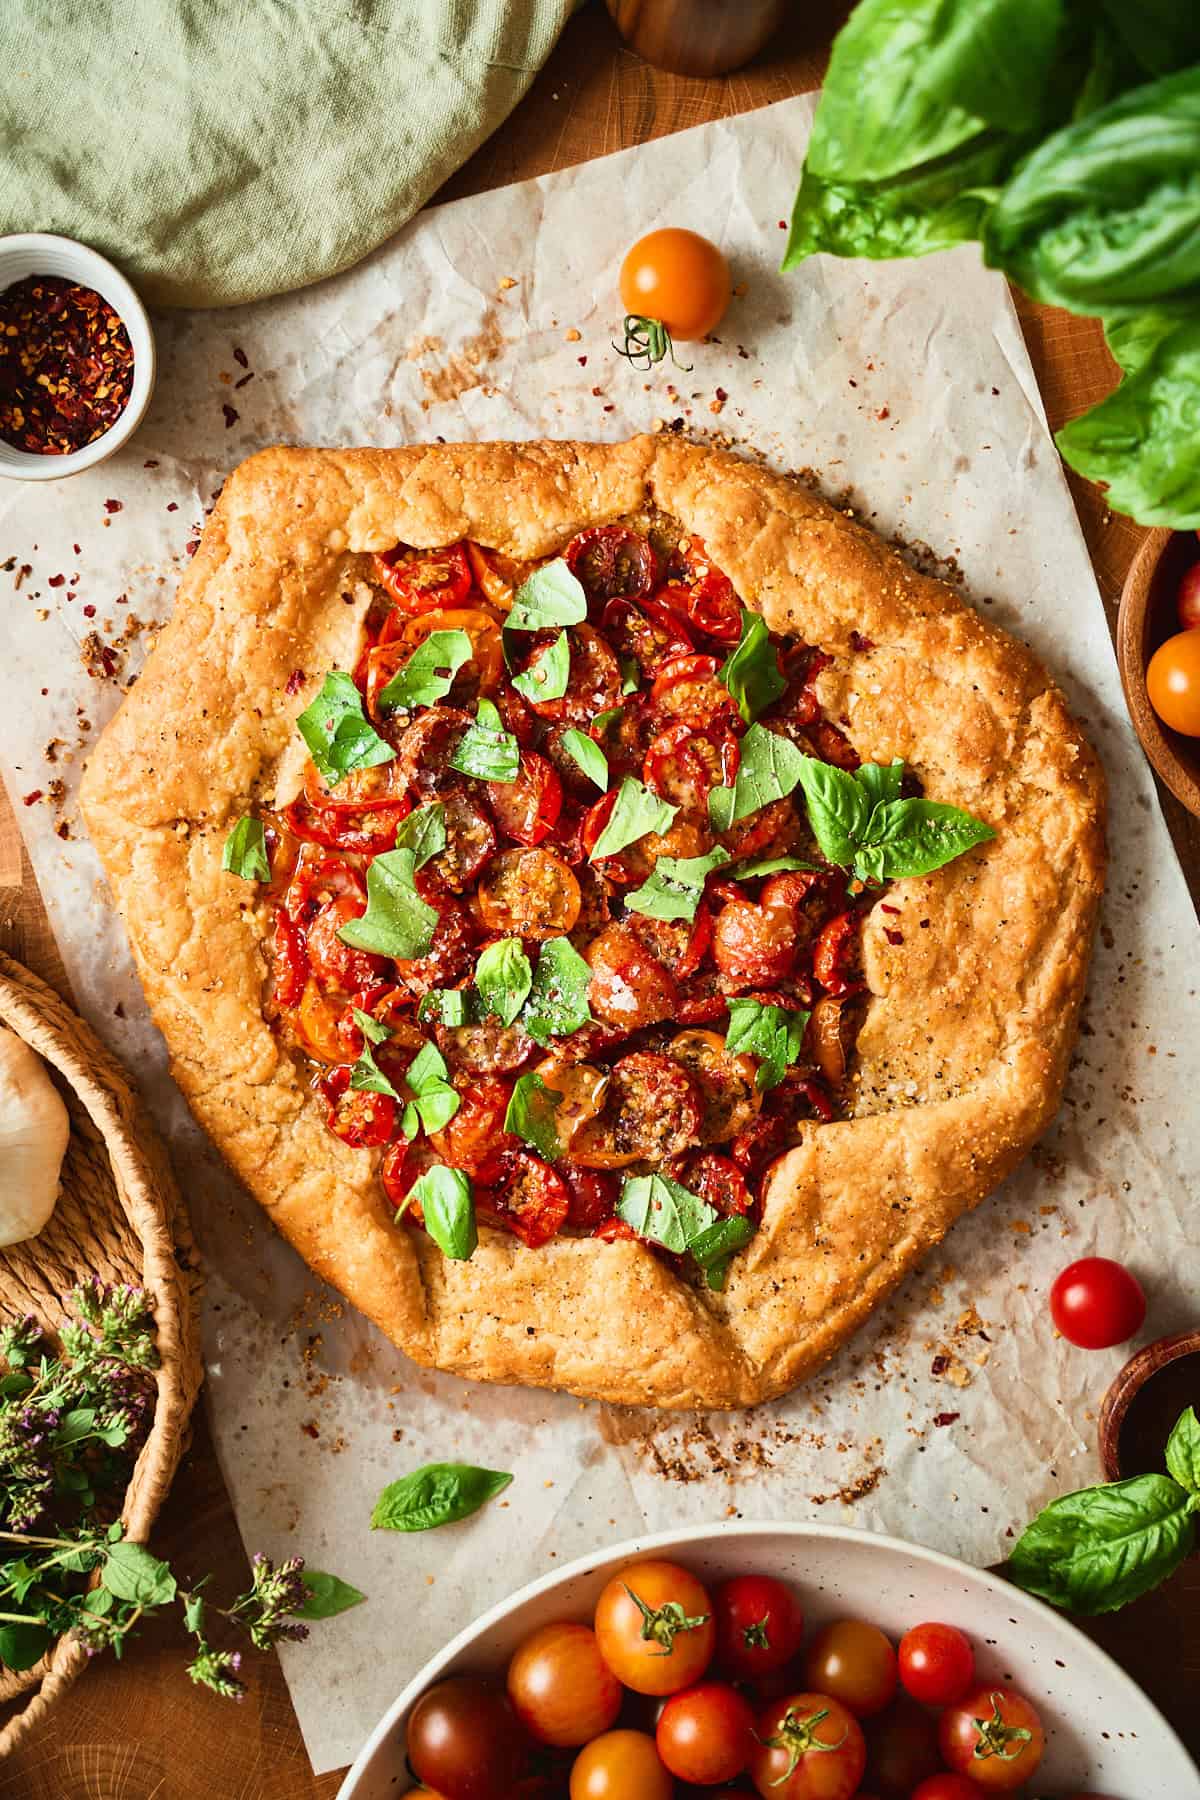
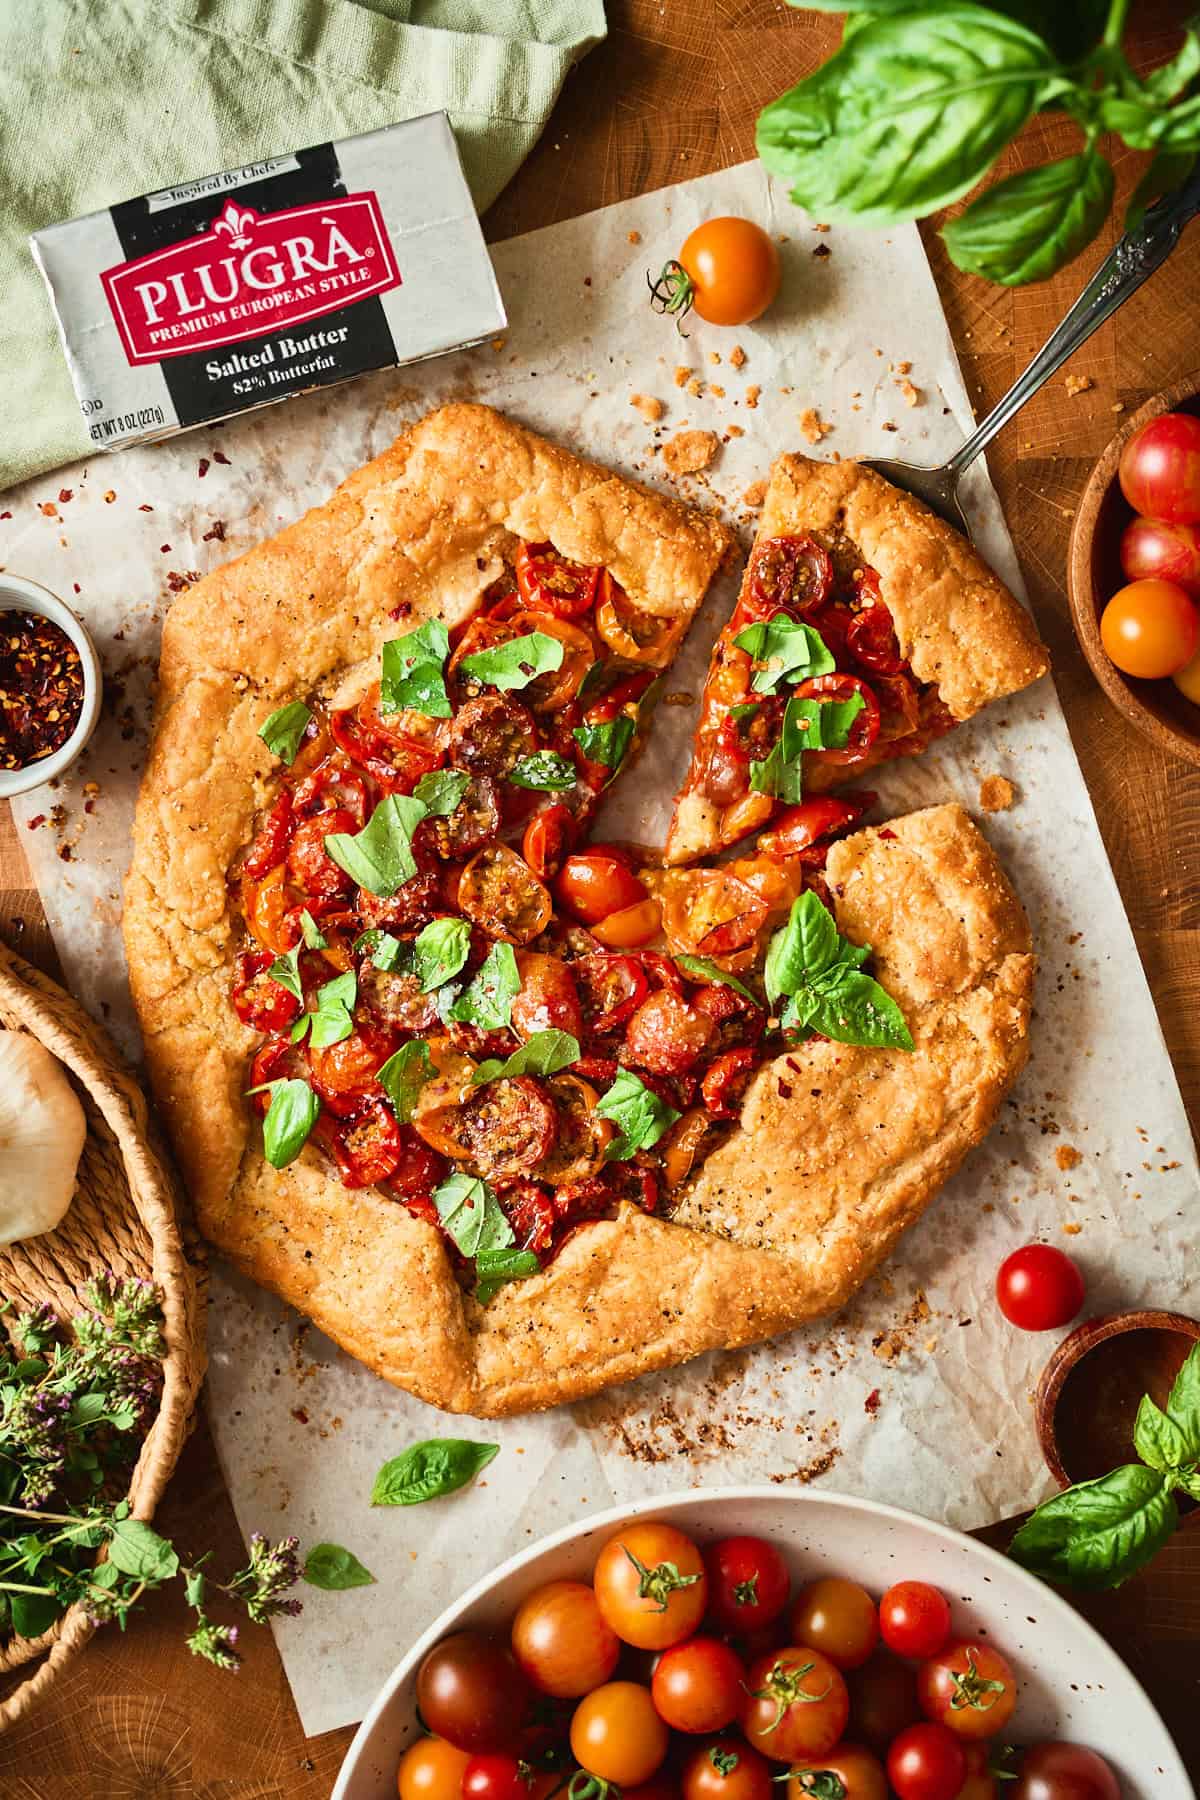
The end of summer always hits the point where the cherry tomatoes cover the entire counter, and we're eating them by the handful just to keep up. This Cherry Tomato Galette is our favorite way to deal with the pile! It uses three full sticks of butter across four separate moments: cut cold into the crust so it bakes up in flaky sheets, whipped with garlic, herbs, and lemon zest and smeared underneath the tomatoes, brushed over the pastry the second it leaves the oven, and melted with more lemon to spoon over the whole thing at the table. The tomatoes concentrate their flavor and come out all juicy and sweet. So skip the pie plate, the crimping, and the pressure.
Save This Recipe! 💌
Disclosure: This post is sponsored by Plugrà Premium European Style Butter. We're thrilled that they are our official butter partner! This recipe leans on their salted butter. At 82% butterfat, it's the reason this crust bakes up as flaky as it does. As always, all opinions are our own.
A Cherry Tomato Galette Is Pie Without the Pressure ✨
Galettes are like pie's charming and cool cousin. Not nearly as technical as a pie, but still hits all the marks. All you need is a handful of really good ingredients and a little patience. You can even split the work over a few days, which we love to do, btw!
Just roll out one round of dough, pile the tomato filling in the middle, and fold the edges up over it however you want. Uneven pleats look intentional; the cracks get patched with your thumb. There's no lattice to weave and no blind bake to fret over, and it still comes out of the oven looking like the perfect showstopping ode to summer.
And look, this one's personal for me specifically. The fact that I grew all the tomatoes and herbs for this galette has maybe seeped into my personality a bit too much. 😂 By the way, we used a mix of Sungold, Cherry Falls, Chocolate Cherry, and Tropical Sunset. You don't need those four exactly, but you do want a mix. Different varieties bake down at different rates, so you end up with some halves that collapse into jam and others that hold their shape and pop, which is fun and looks really pretty. 🥰
The crust is just butter and flour. The cornmeal works around it: a little on the parchment for crunch underneath, and a scatter over the herb butter to soak up the juice before it reaches the pastry.
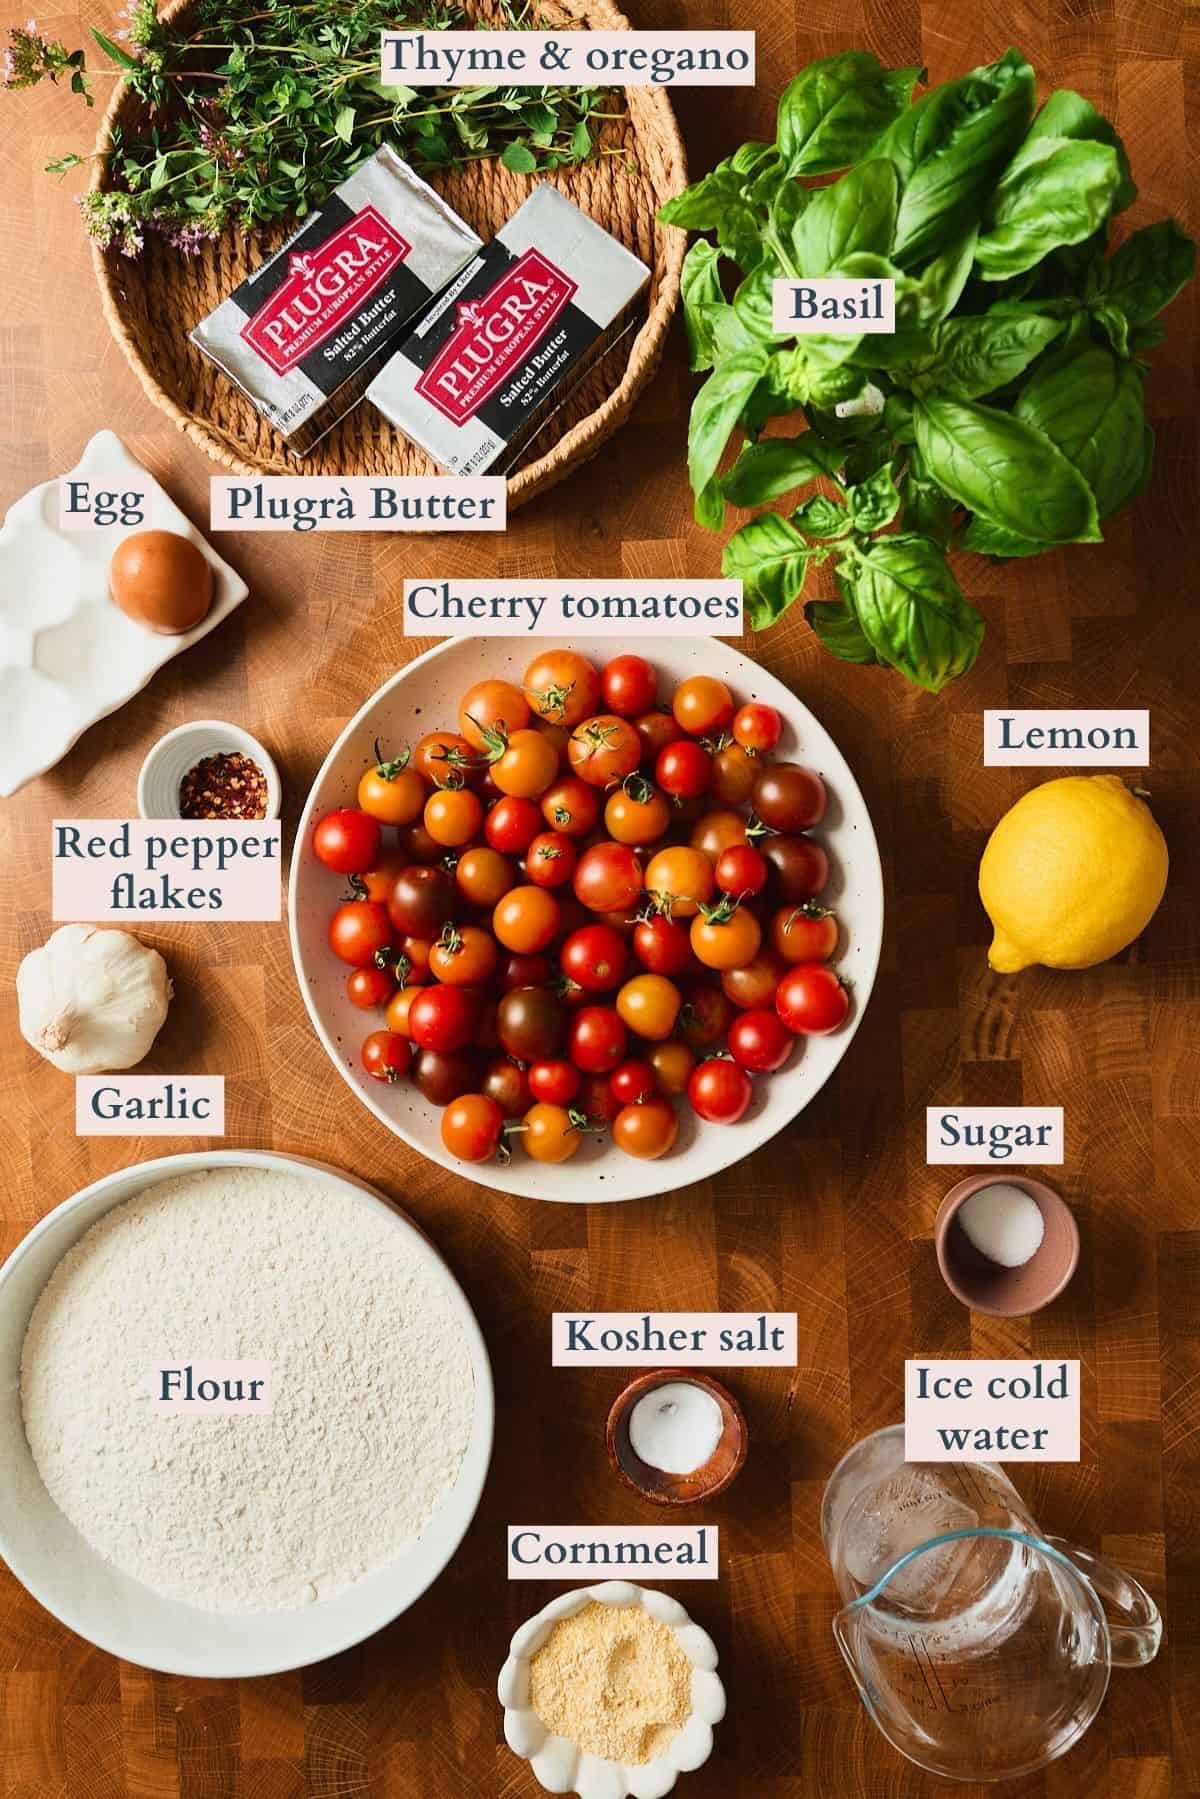
What You'll Need for This Tomato Galette Recipe ✨
Peak-season tomatoes and good butter are doing almost all the work here, so this is a short list worth shopping well for. Everything else is pantry staples.
🧈A few notes on the butter:
We used salted butter here, which is a switch for us. Butter shows up in four places in this recipe, and salted throughout means you're not stopping to season at every one. If unsalted is what you have on hand, the crust works exactly the same, but you'll want to salt the garlic herb butter and the lemon butter to taste.
Also worth noting that good butter makes a real difference in this recipe. Plugrà is 82% butterfat, compared to standard American butters at 80%, and slow-churned. Less water means the butter presses into smooth flat sheets instead of crumbling, and those sheets are what give you the layers. The result is better browning, richer flavor, and an impossibly flaky crust! 🤤
🍅 Swimming in cherry tomatoes right now? Our chicken pomodoro, Sungold tomato pasta, and our cherry tomato confit are where the rest of ours end up.
How to Make a Cherry Tomato Galette ✨
The dough comes together in one bowl with your hands, and the rest is mostly waiting. Read through the chilling times before you start so you can work them around dinner.
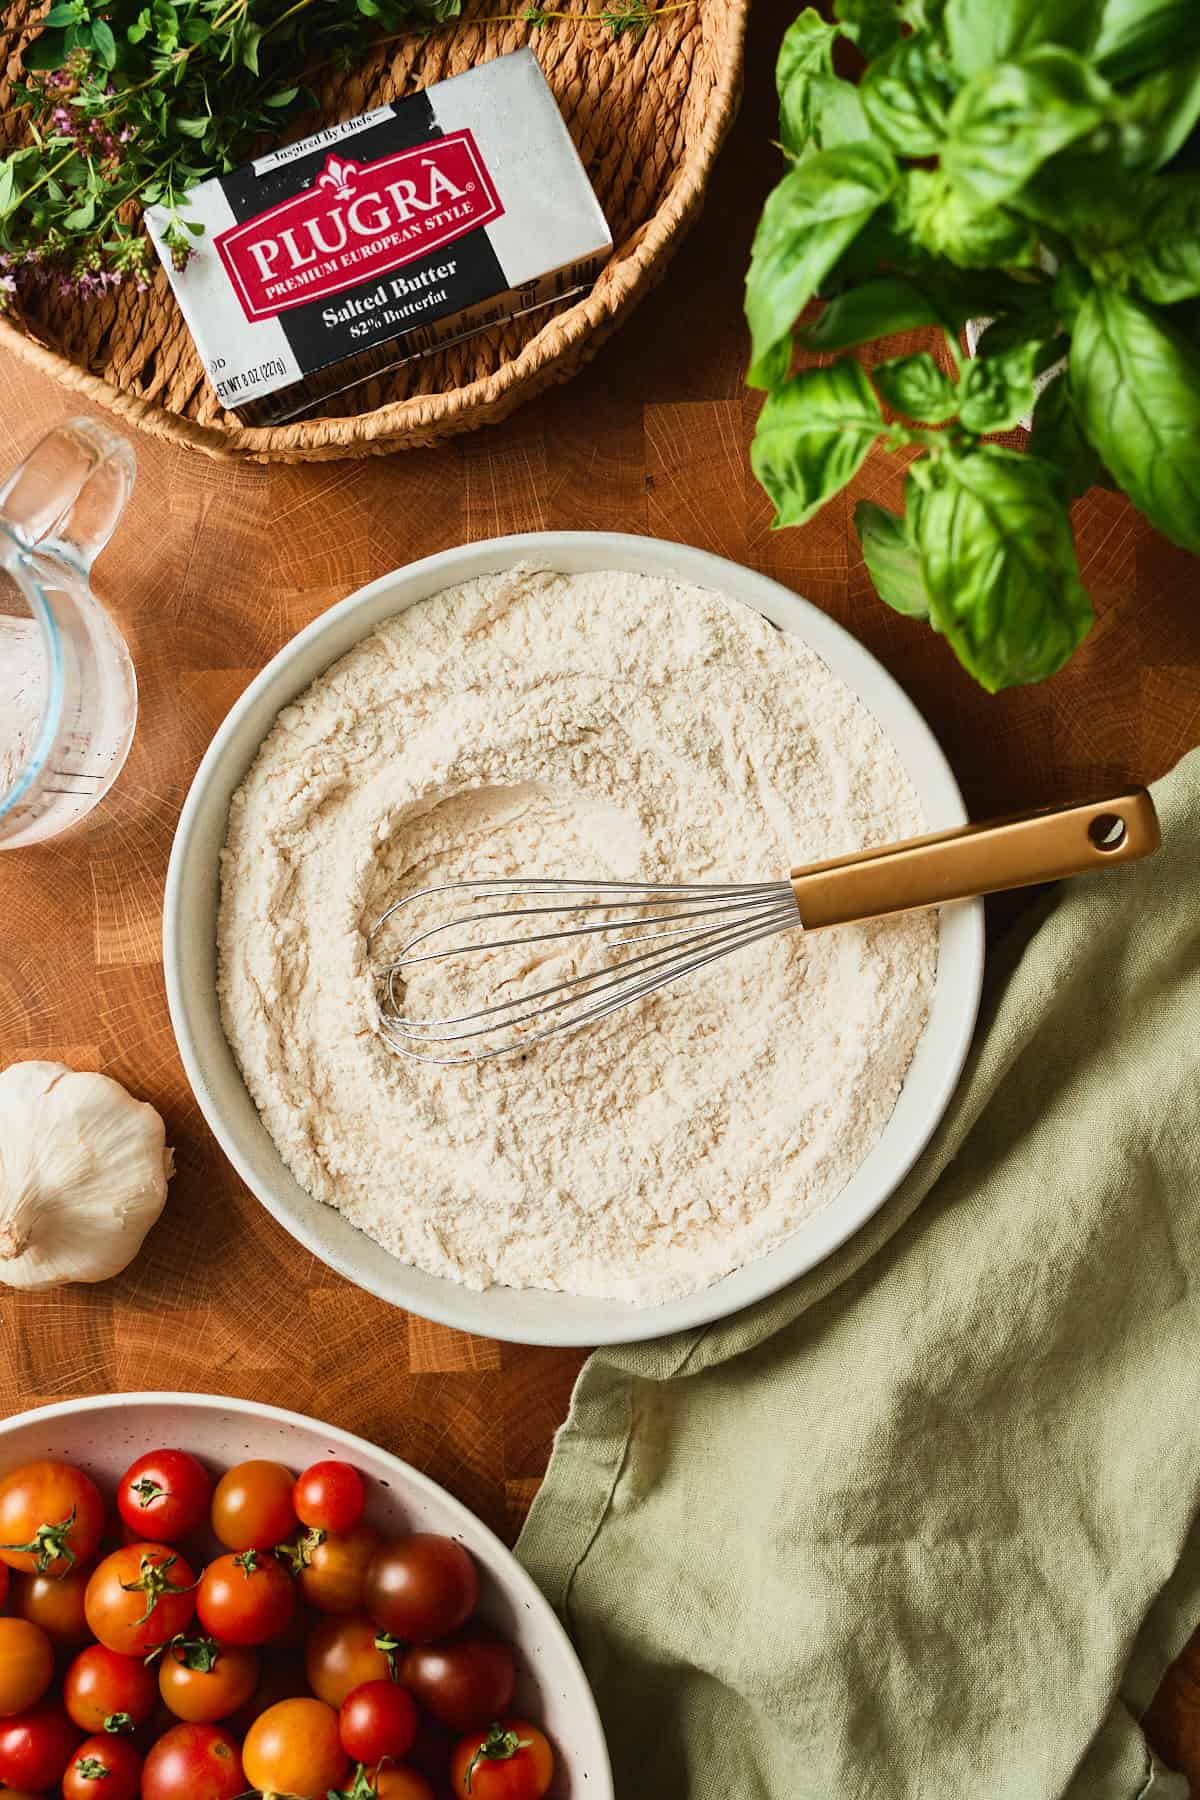
- Step 1: Whisk the flour, salt, and sugar together in a large bowl.
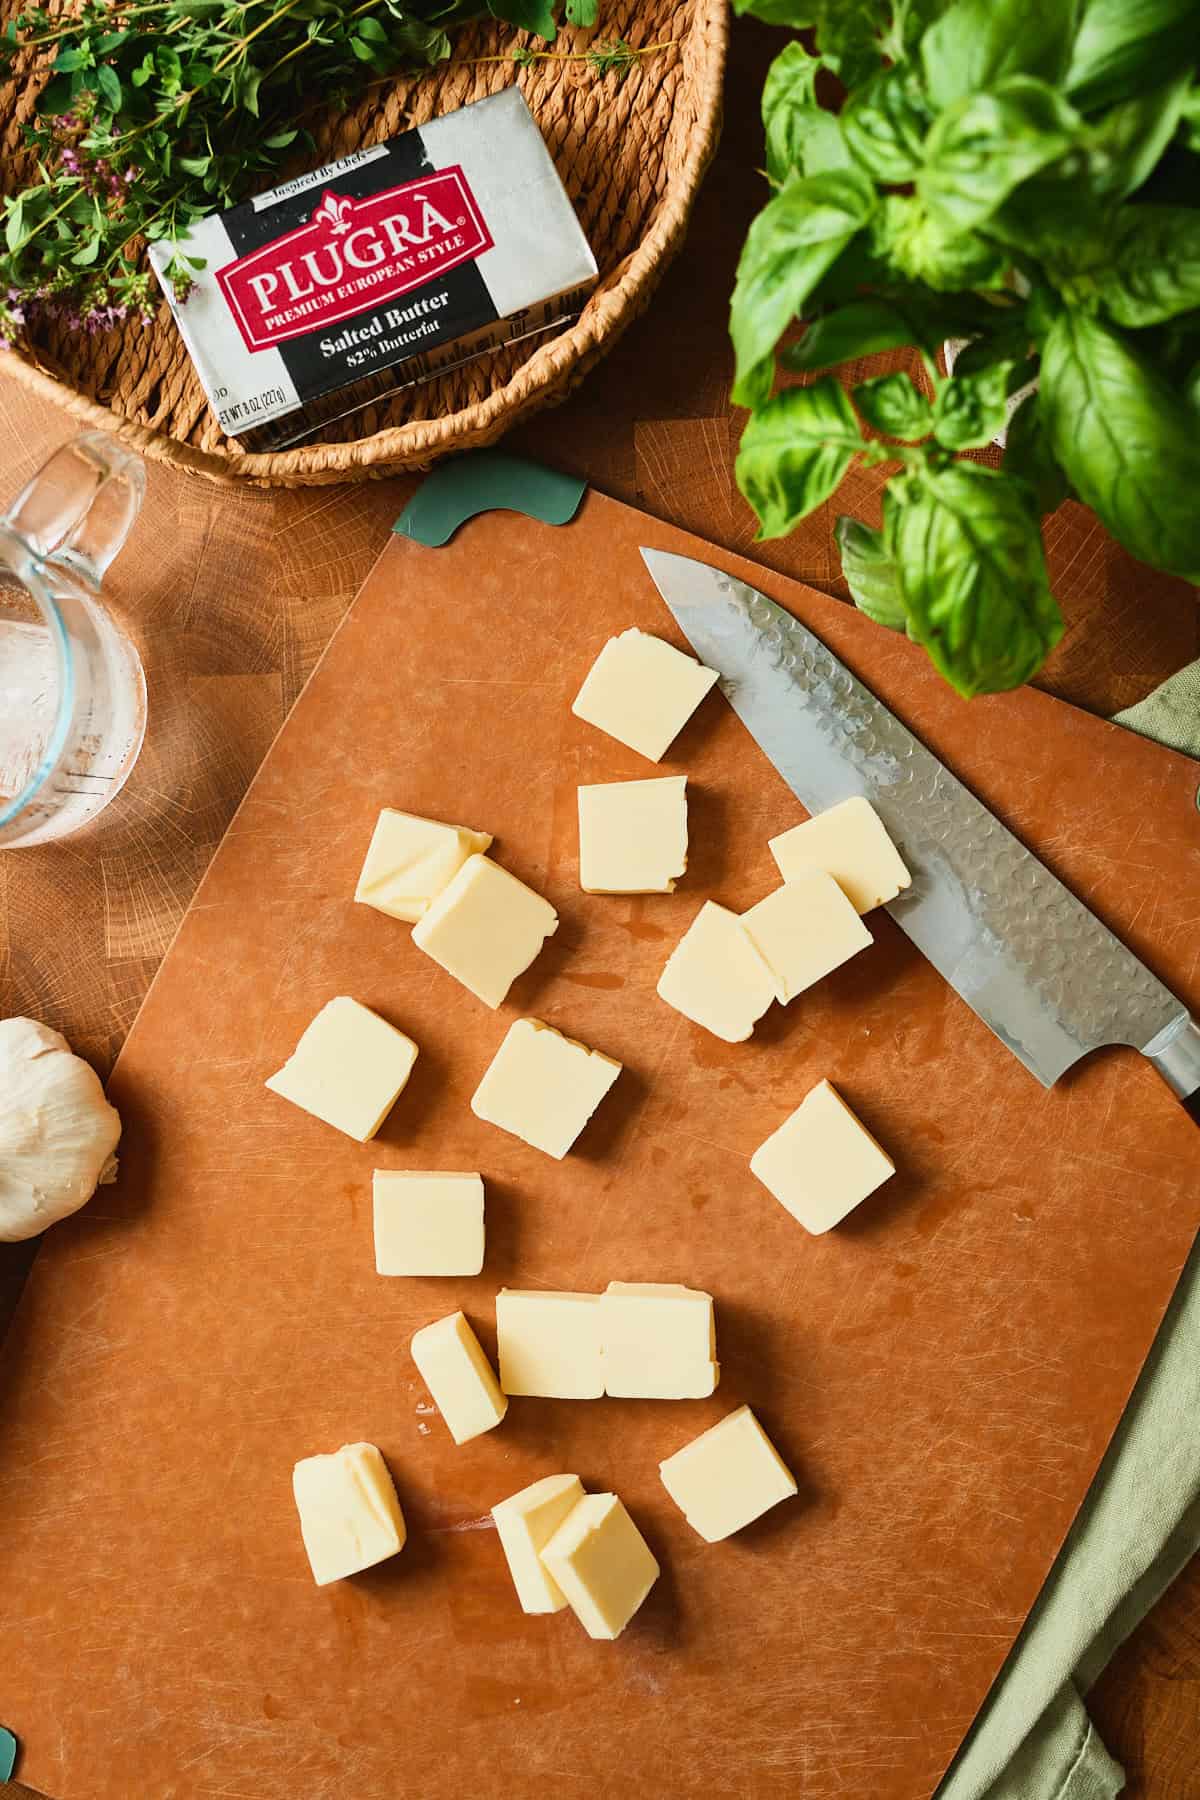
- Step 2: Cut the cold butter into tablespoon-size cubes.
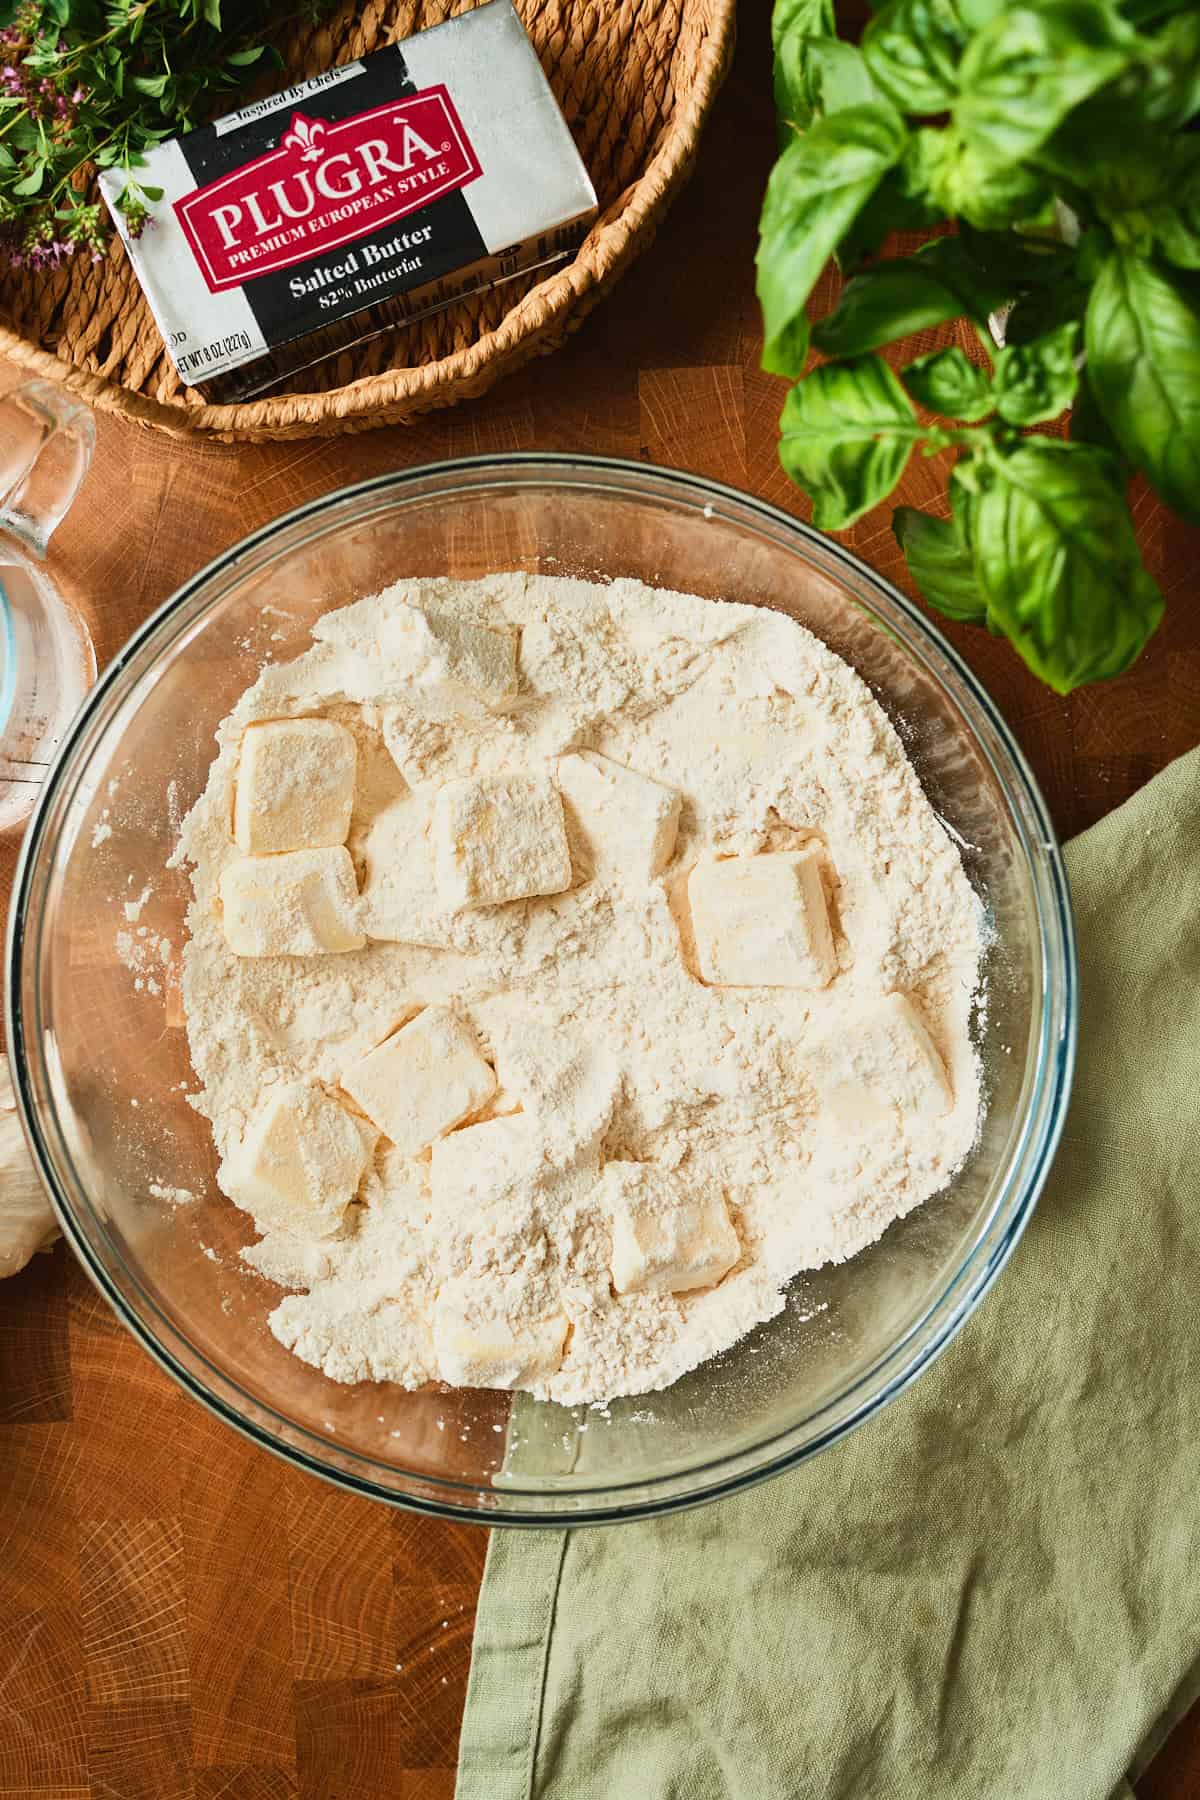
Add the butter to the flour, and toss to ensure every piece is coated.
🧈 Keep the butter cold: Cube the butter straight from the fridge and work quickly. Those cold pieces are what turn into steam pockets in the oven, and steam pockets are what make the crust flaky. If your kitchen is warm and the butter starts to look greasy, put the whole bowl in the freezer for ten minutes and pick up where you left off.
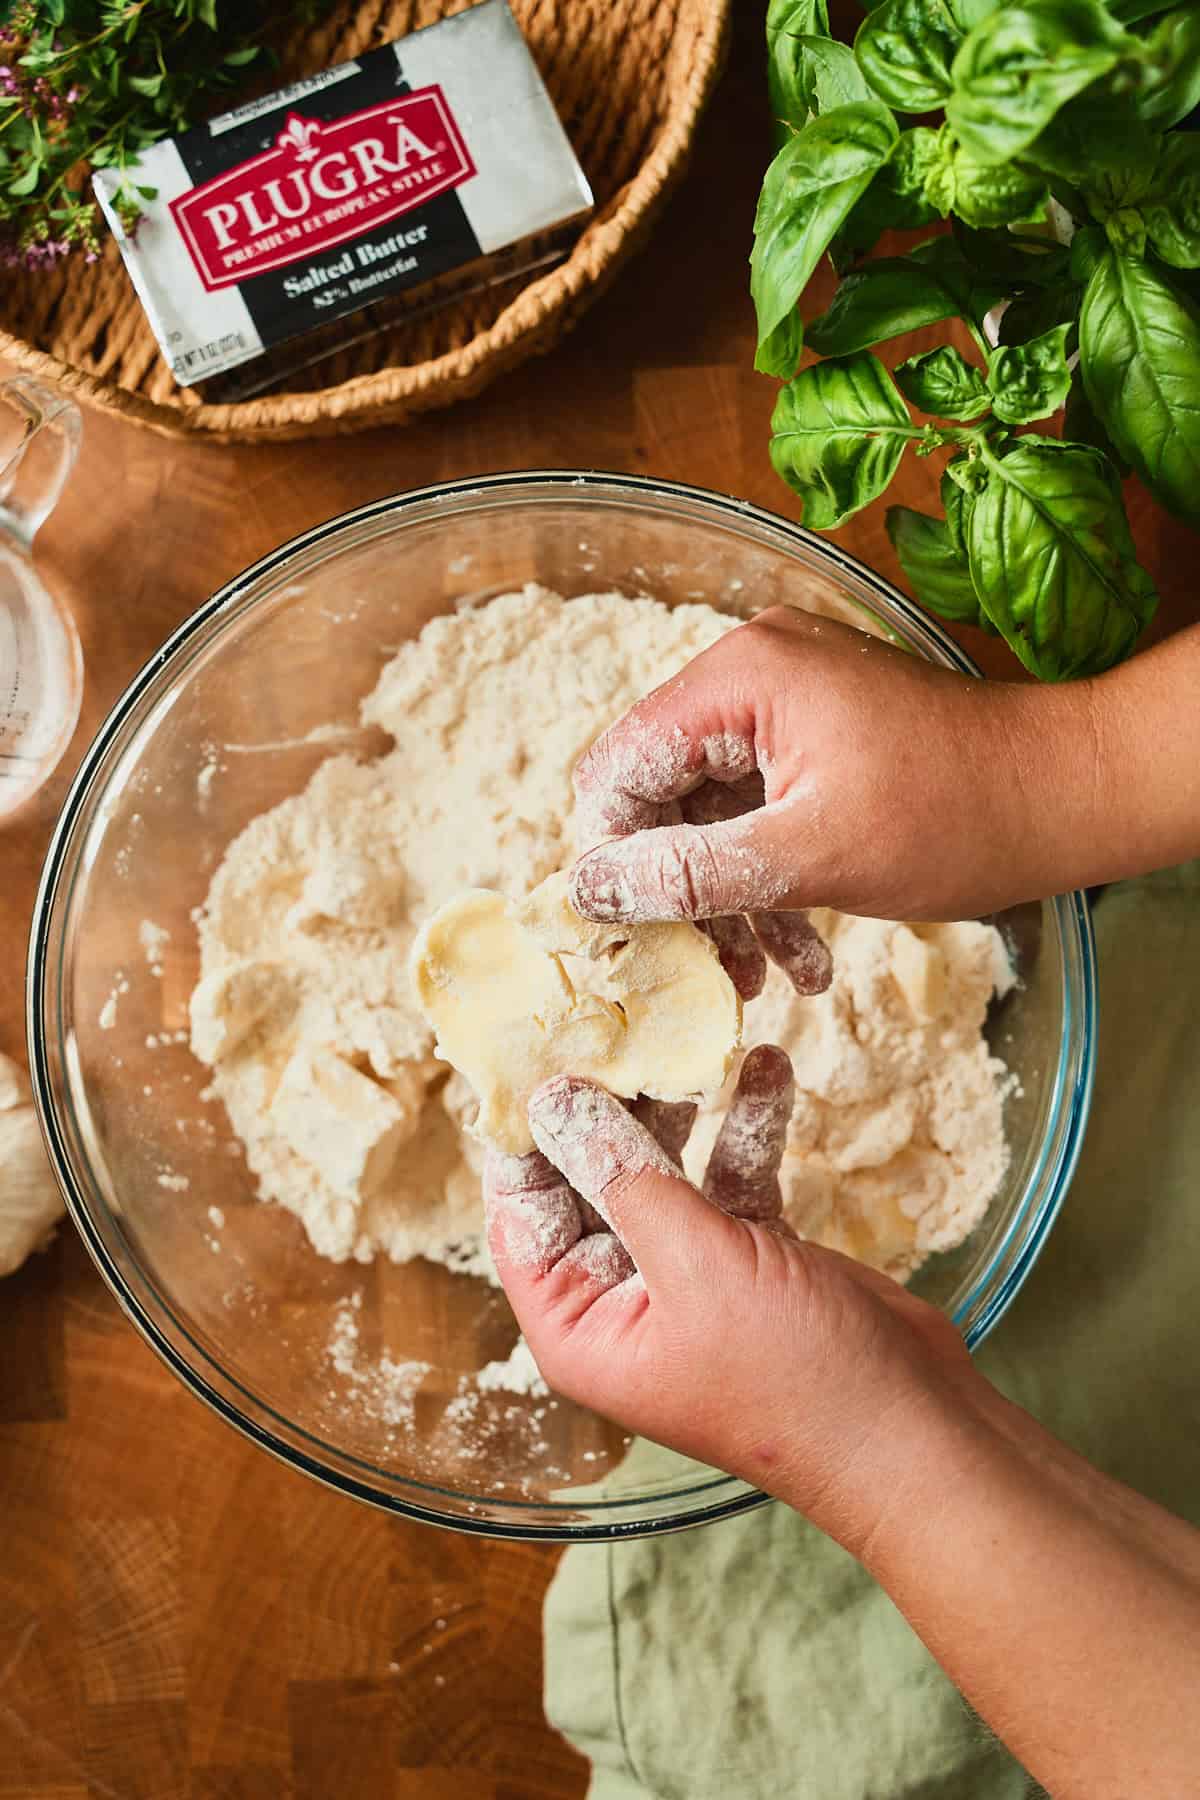
- Step 3: Working one piece at a time, smash each butter piece flat between your fingers.
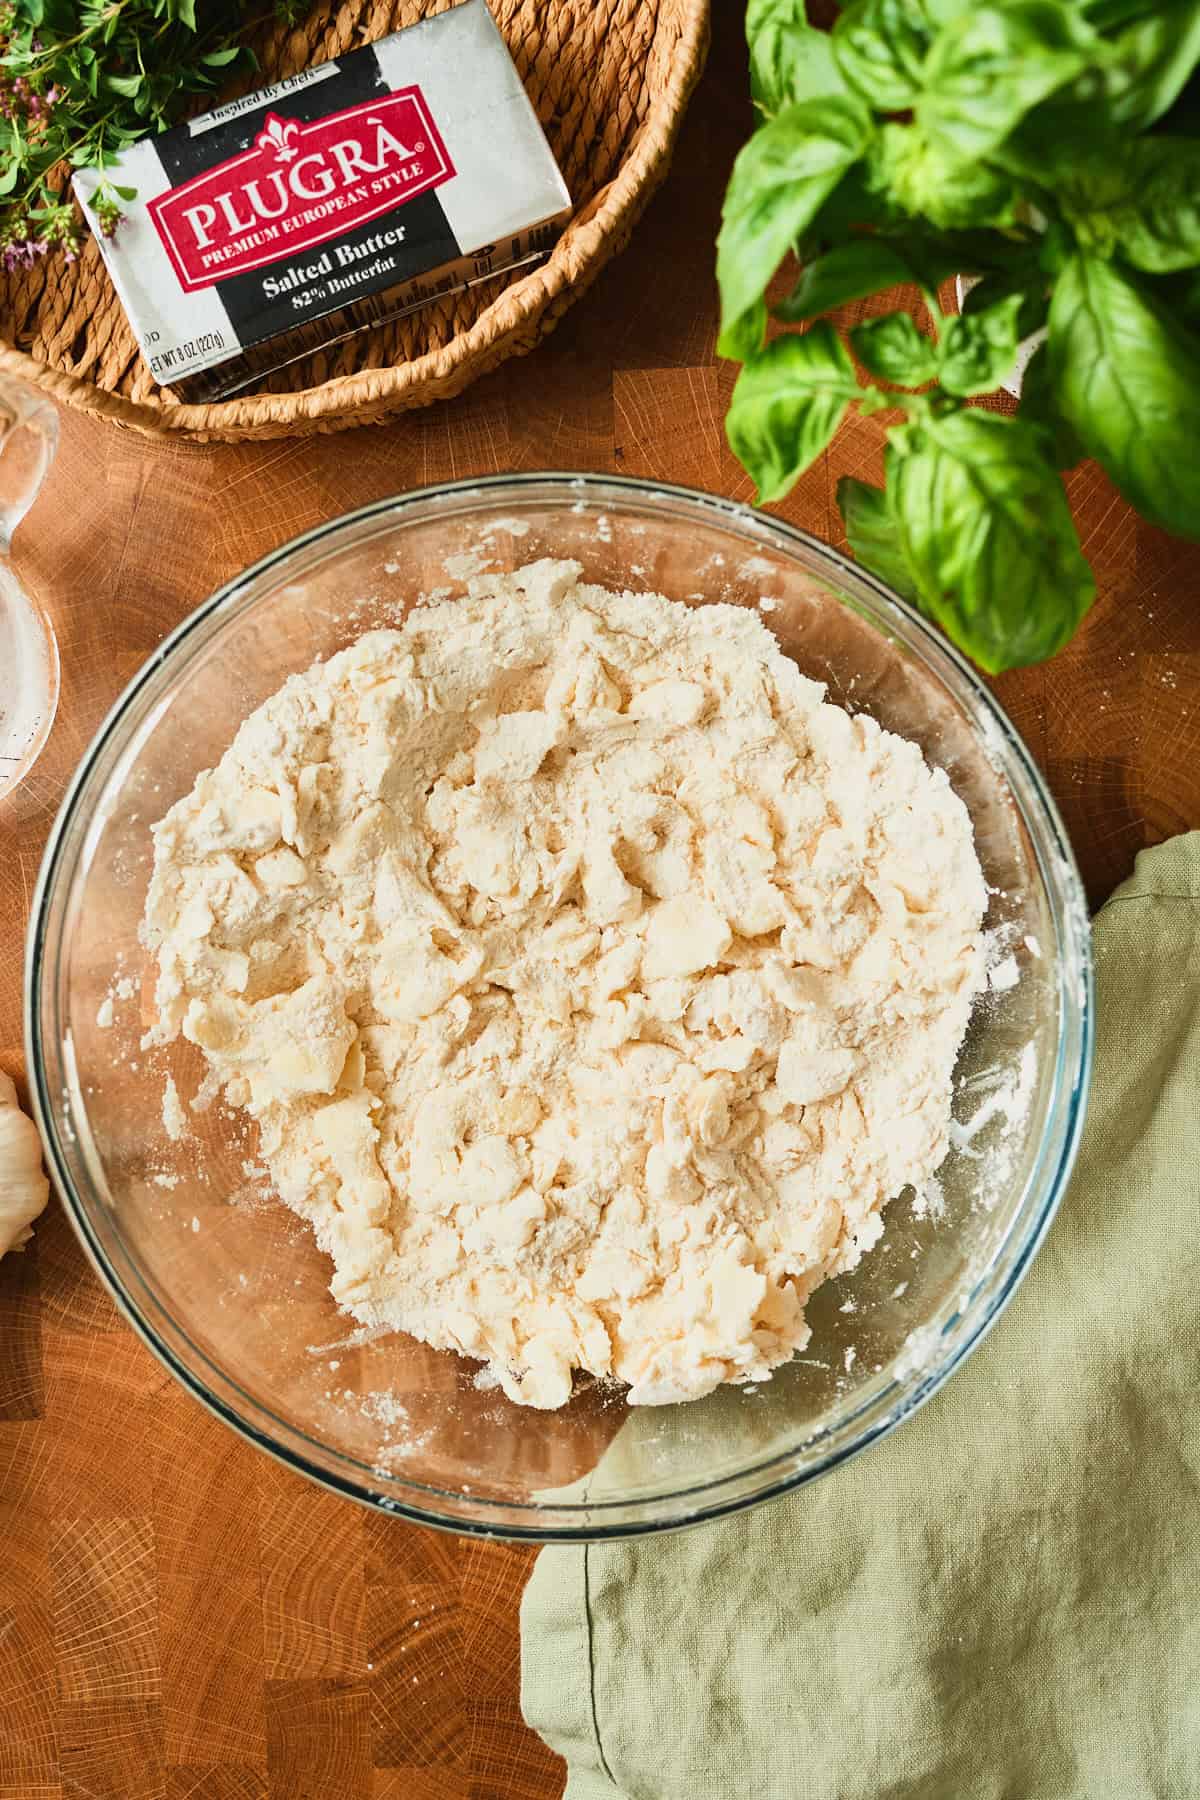
You're after a mix of pea-sized crumbs and big flat sheets. Do not keep going until it looks uniform. Those flat sheets are the whole point, and a food processor will chop right past them. Big flat sheets of butter = super flaky crust!
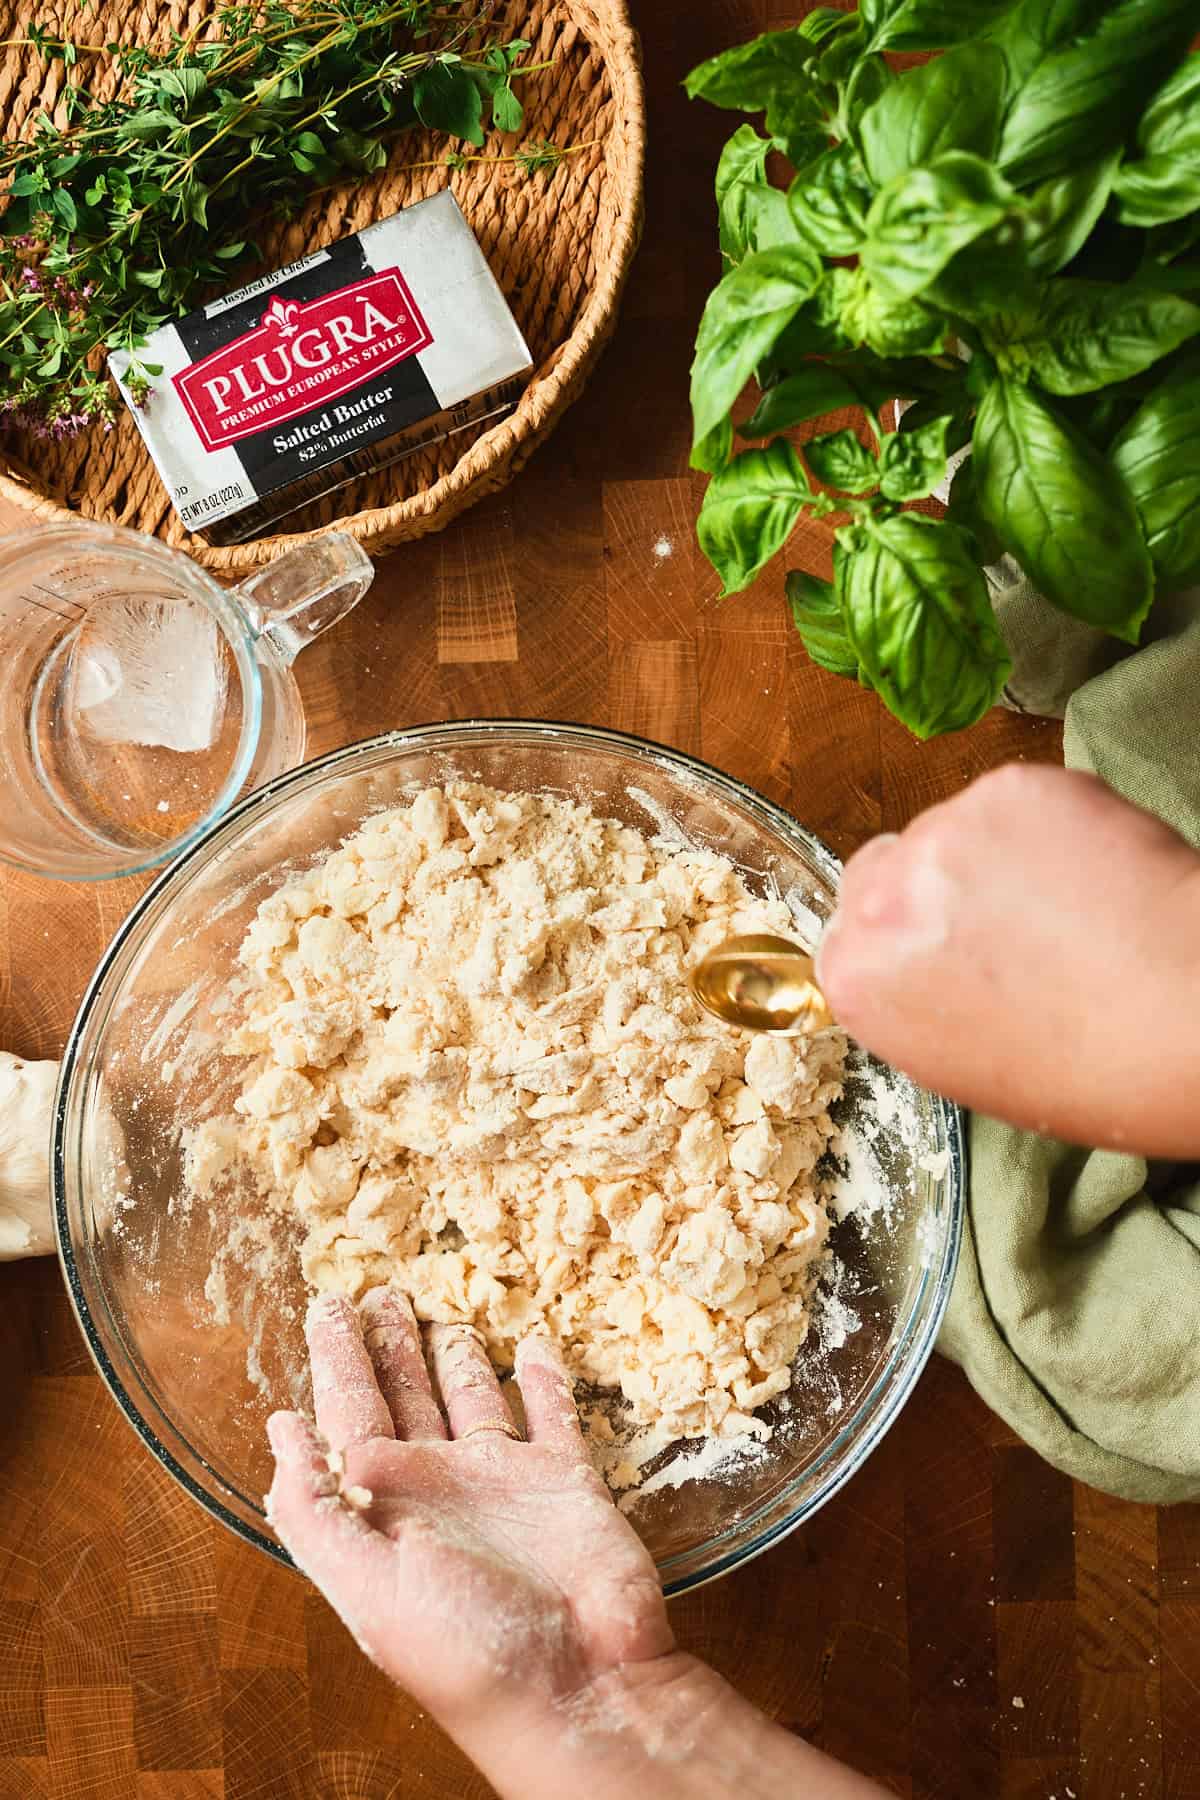
- Step 4: Add the ice water one tablespoon at a time, tossing after each addition. Start with six tablespoons. Squeeze a handful, and if it holds together, stop there. Add the seventh only if it's still crumbling apart on you.
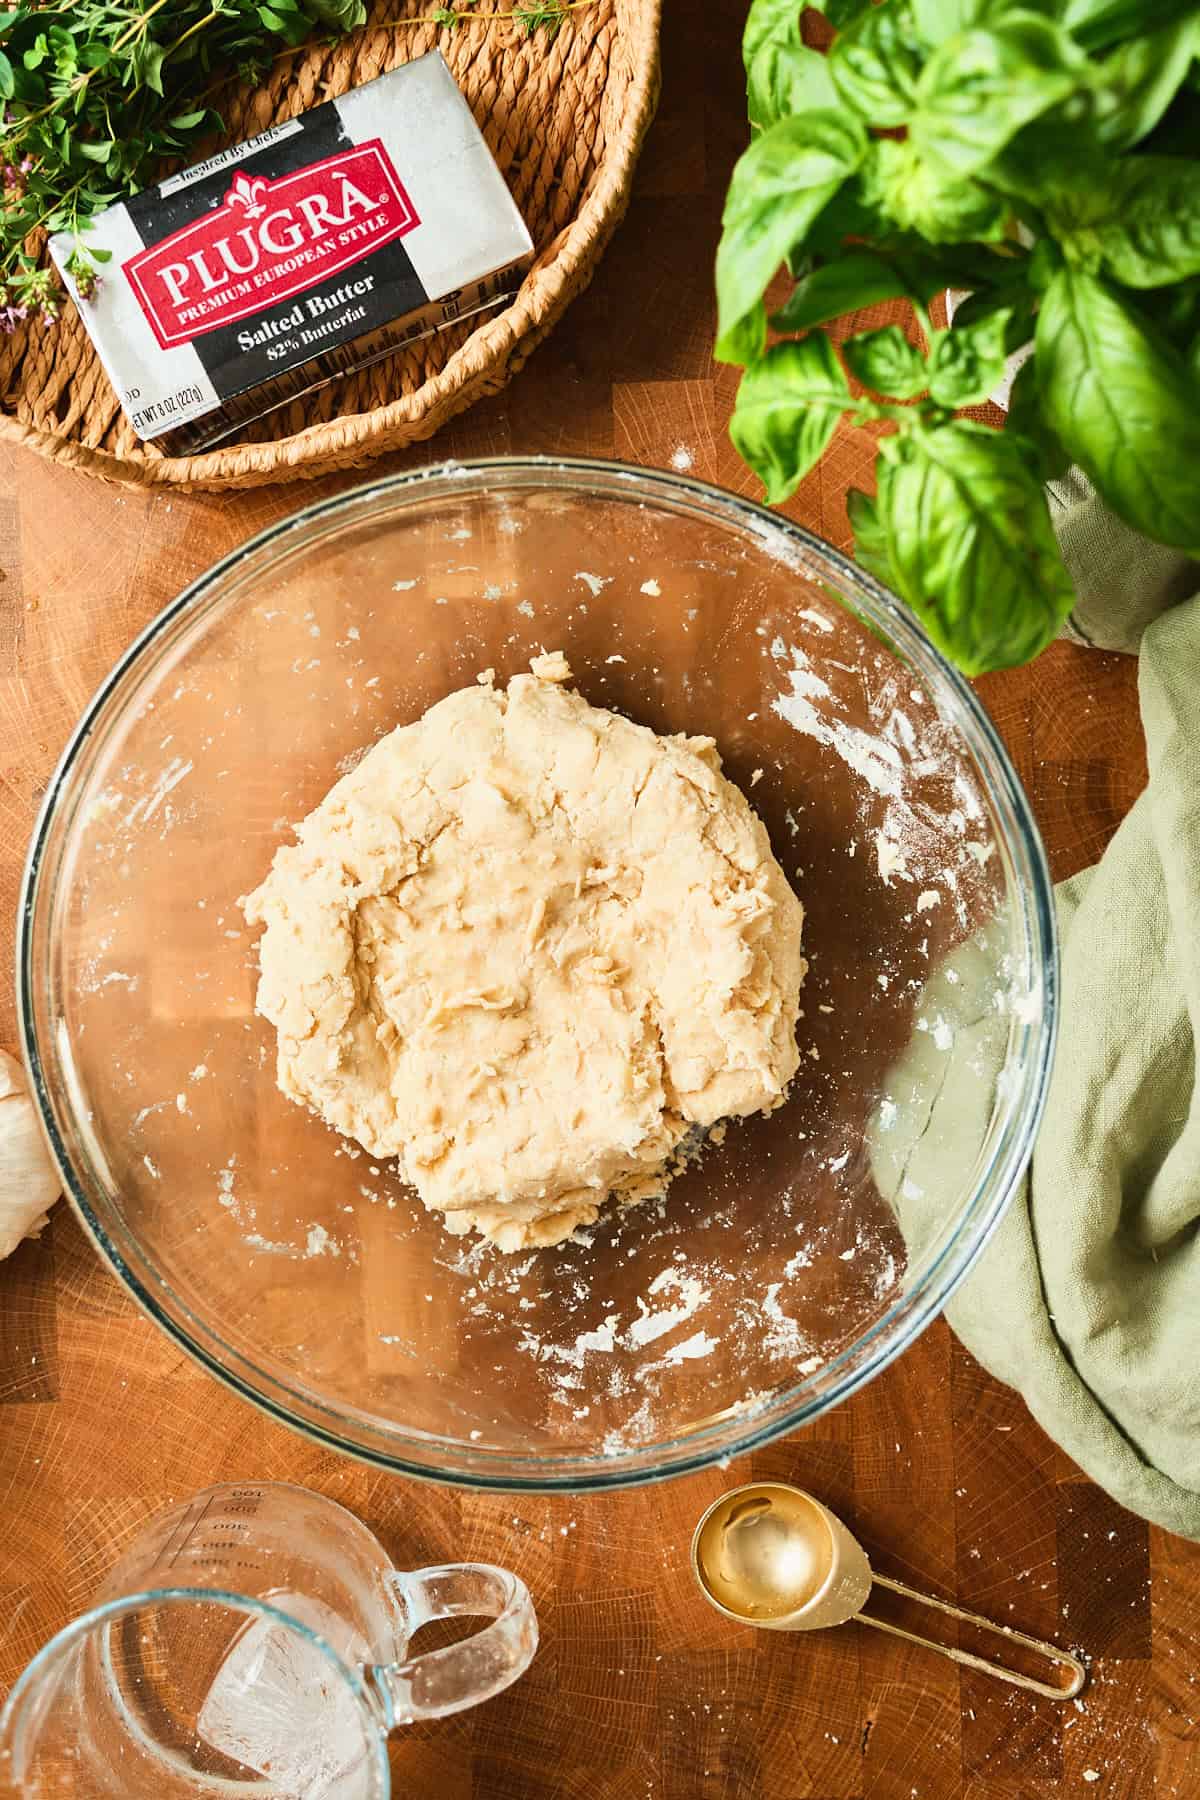
- Step 5: Gather the dough into a rough ball. It should look a little scrappy, not smooth.
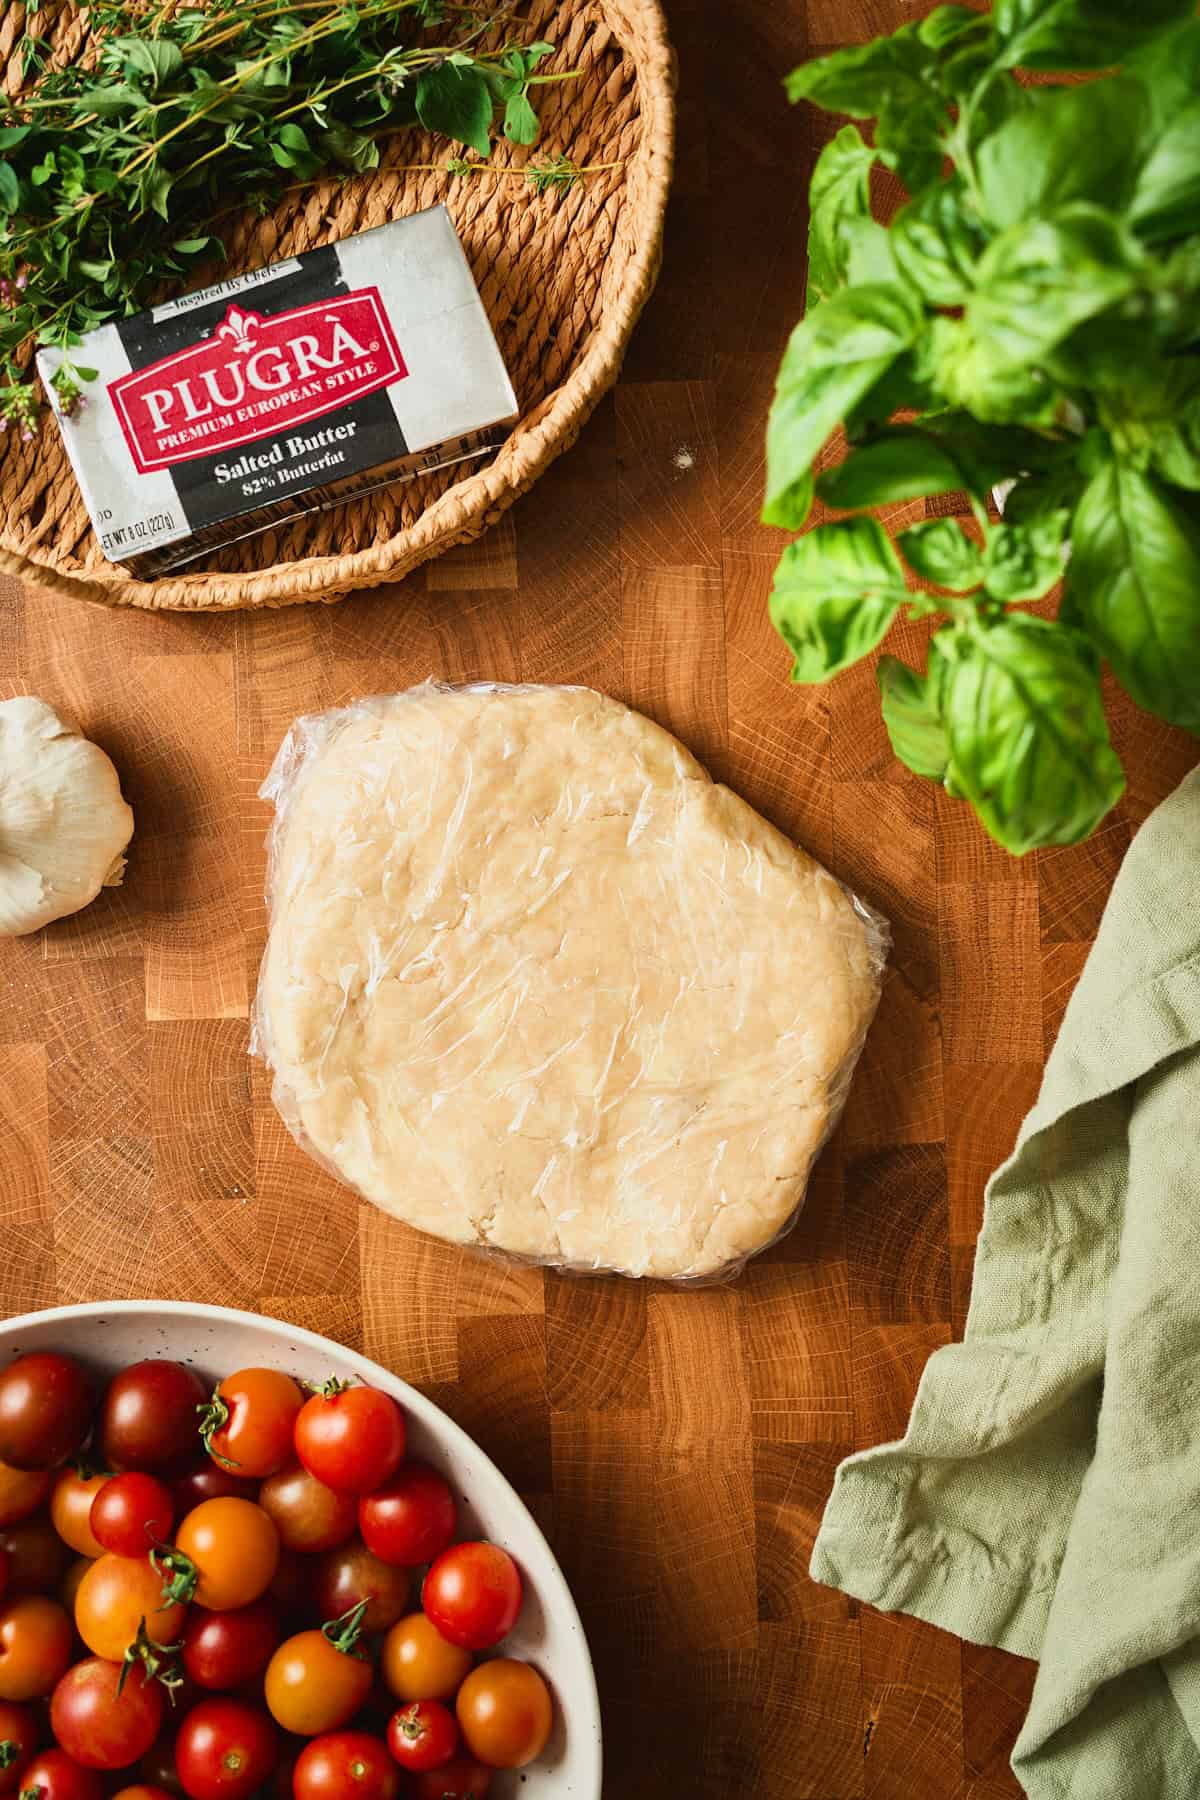
Flatten the dough into a disk, wrap it tightly, and chill for 30 minutes.
❄️ Why the disk shape: A disk rolls out into a round with a lot less coaxing than a ball does, and it chills through faster because it's thinner. Thirty minutes relaxes the gluten so the dough stops fighting you, and it firms the butter back up after all that handling. Thirty is the minimum, not a maximum, so if you want to get ahead, the dough keeps for three days in the fridge or three months in the freezer.
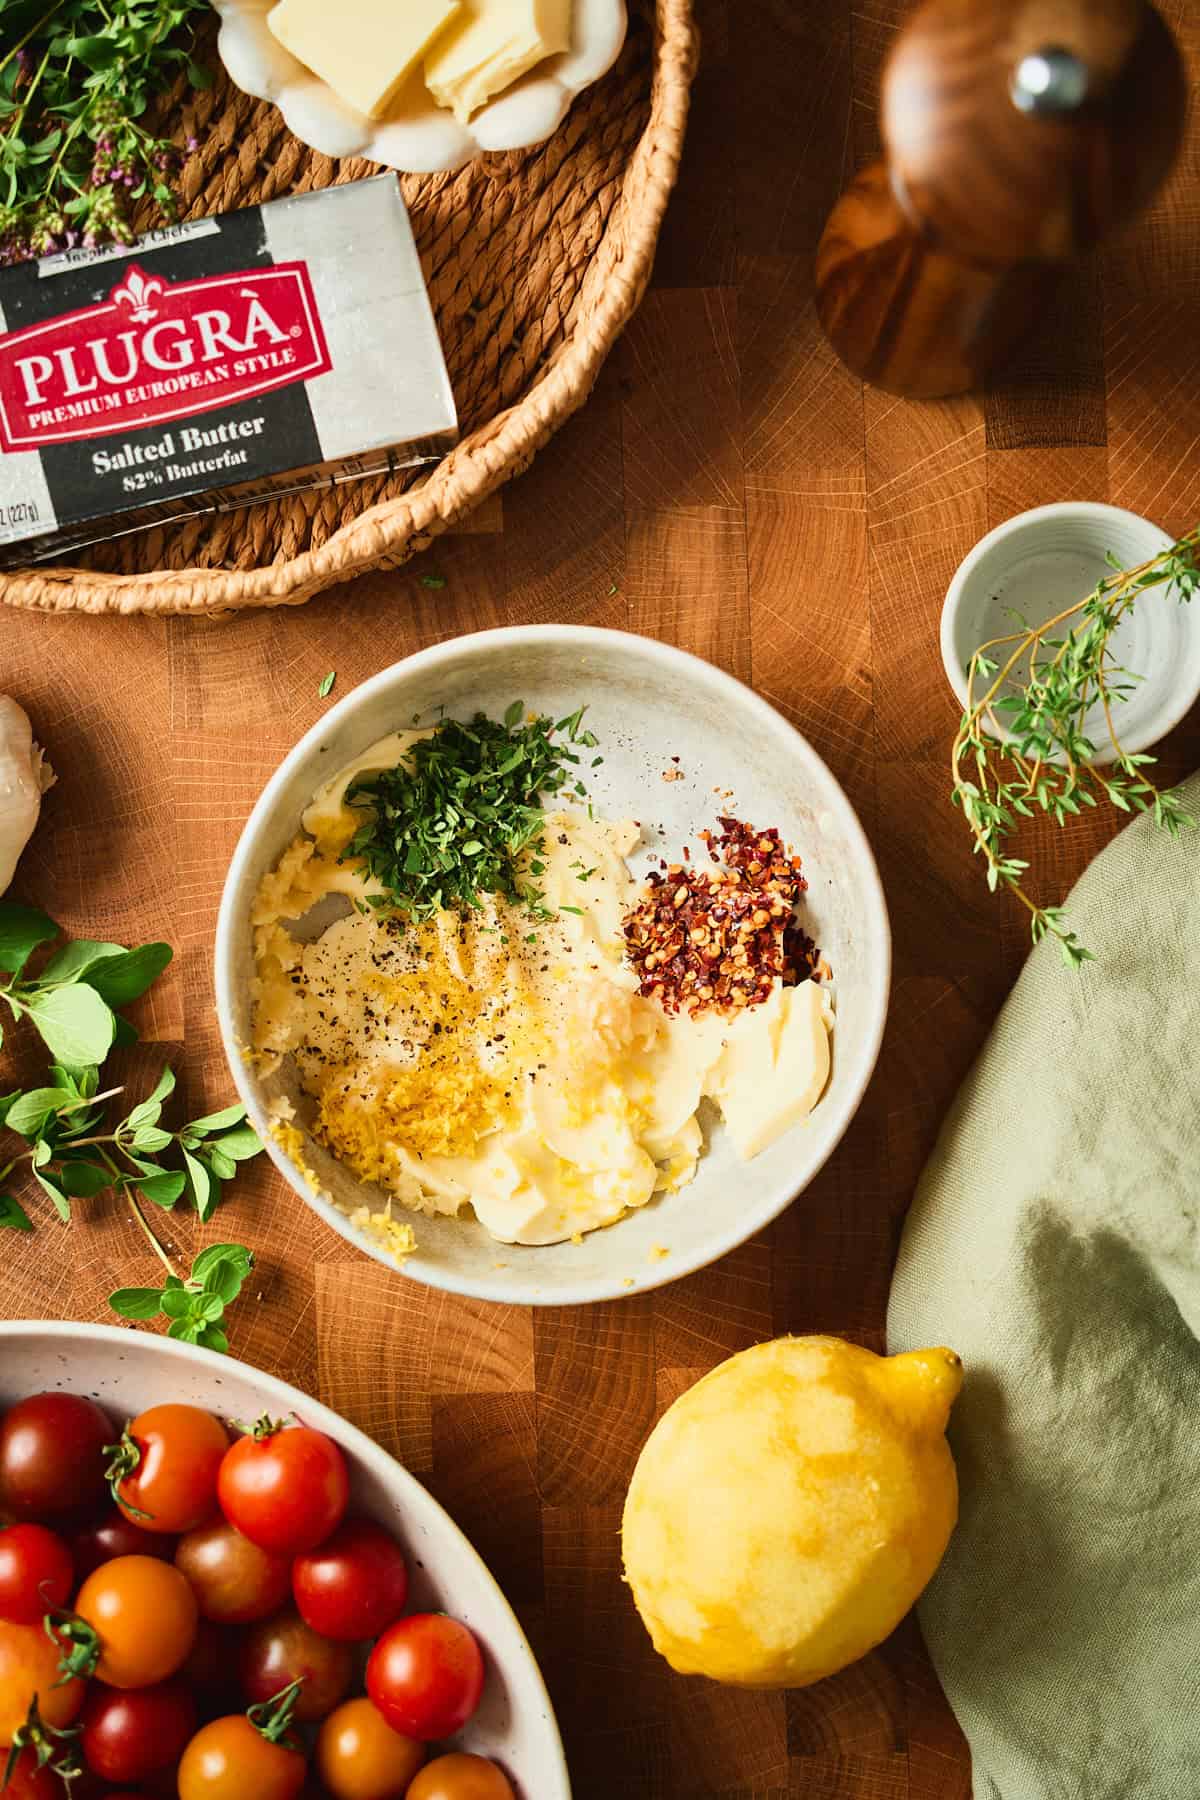
- Step 6: While the dough chills, make the garlic herb butter. Combine the softened butter, grated garlic, thyme, oregano, lemon zest, and red pepper flakes.
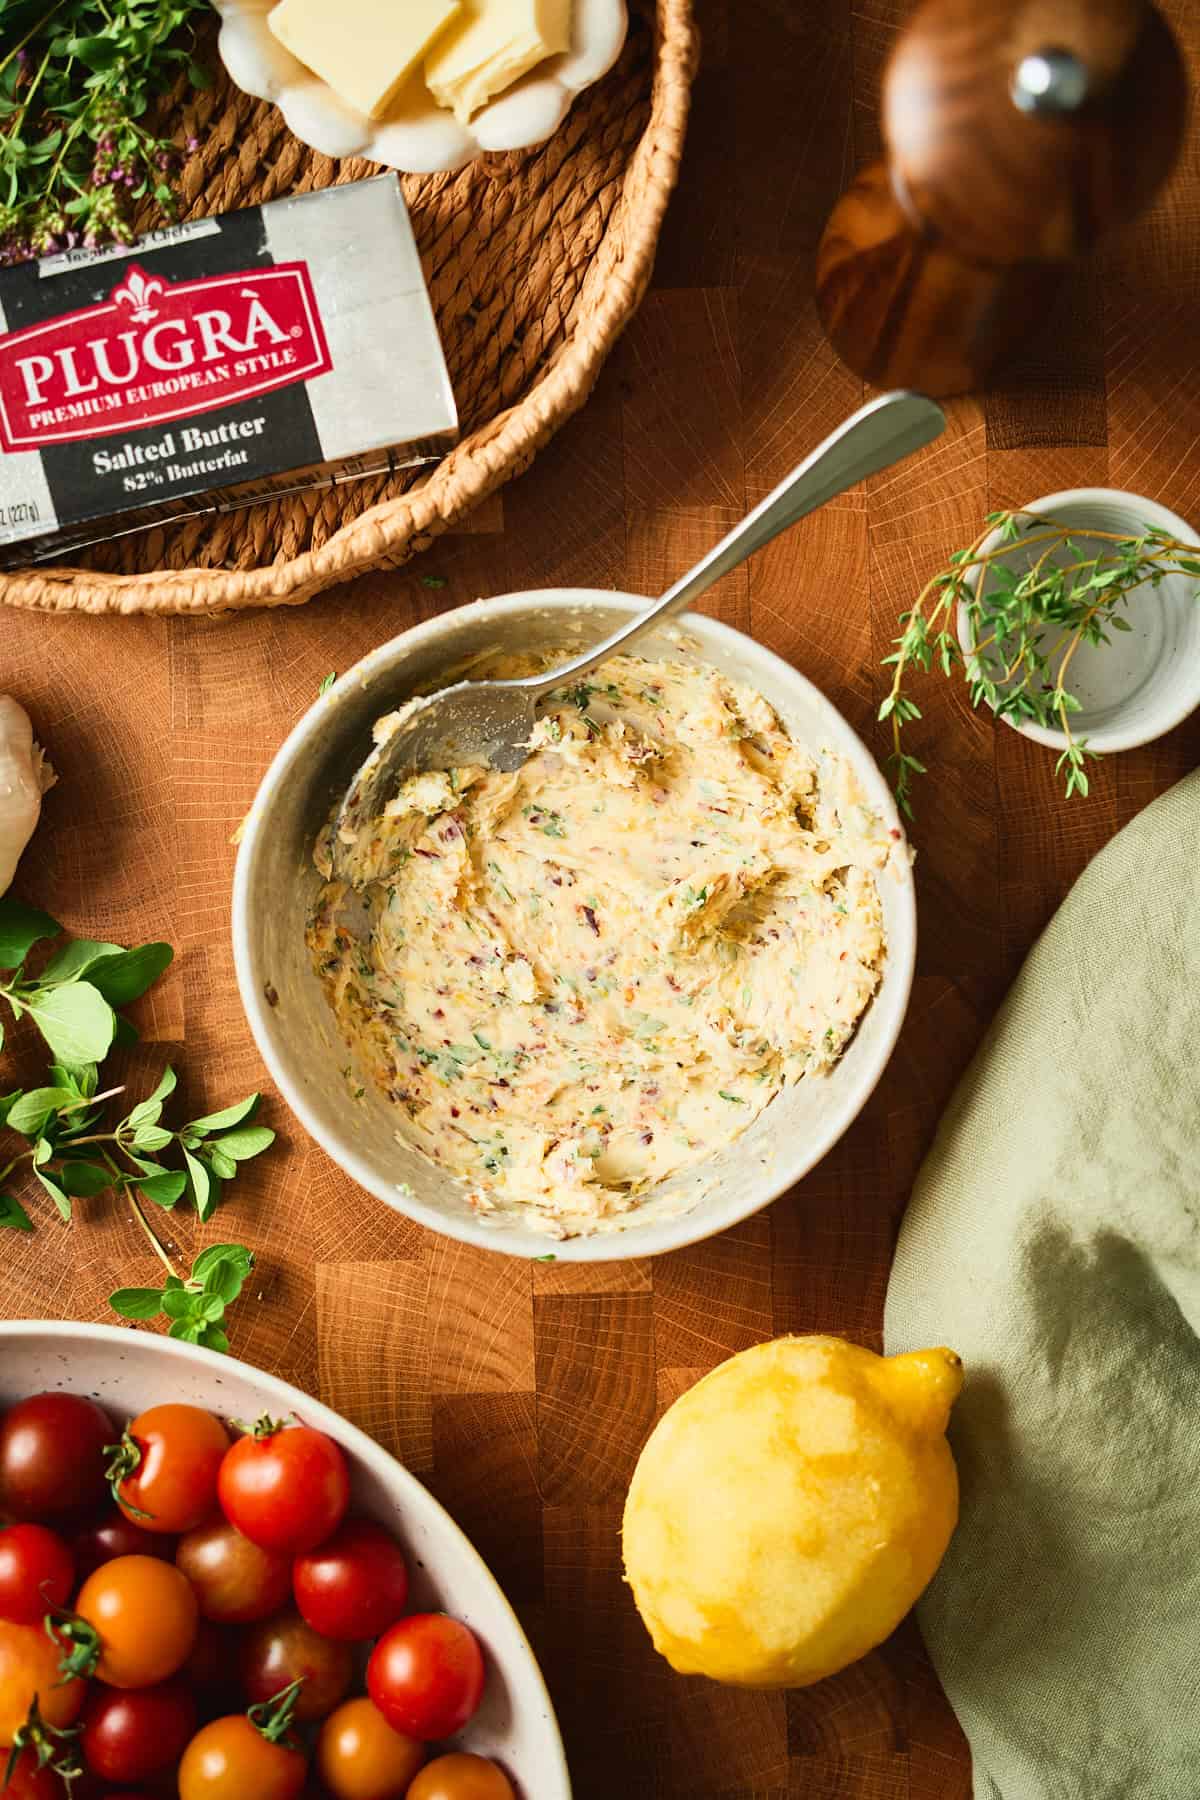
Mash and stir until everything is evenly worked through. Set it somewhere cool but not cold, because you want it spreadable when the dough is ready.
🌿 Use fresh herbs if you can! During testing, we tried dried, and they vanished completely under a mound of tomatoes. Fresh is the difference between tasting them and not. Go a little easy on the oregano though, especially if yours has flowered, because it can turn bitter and start to bully the thyme.
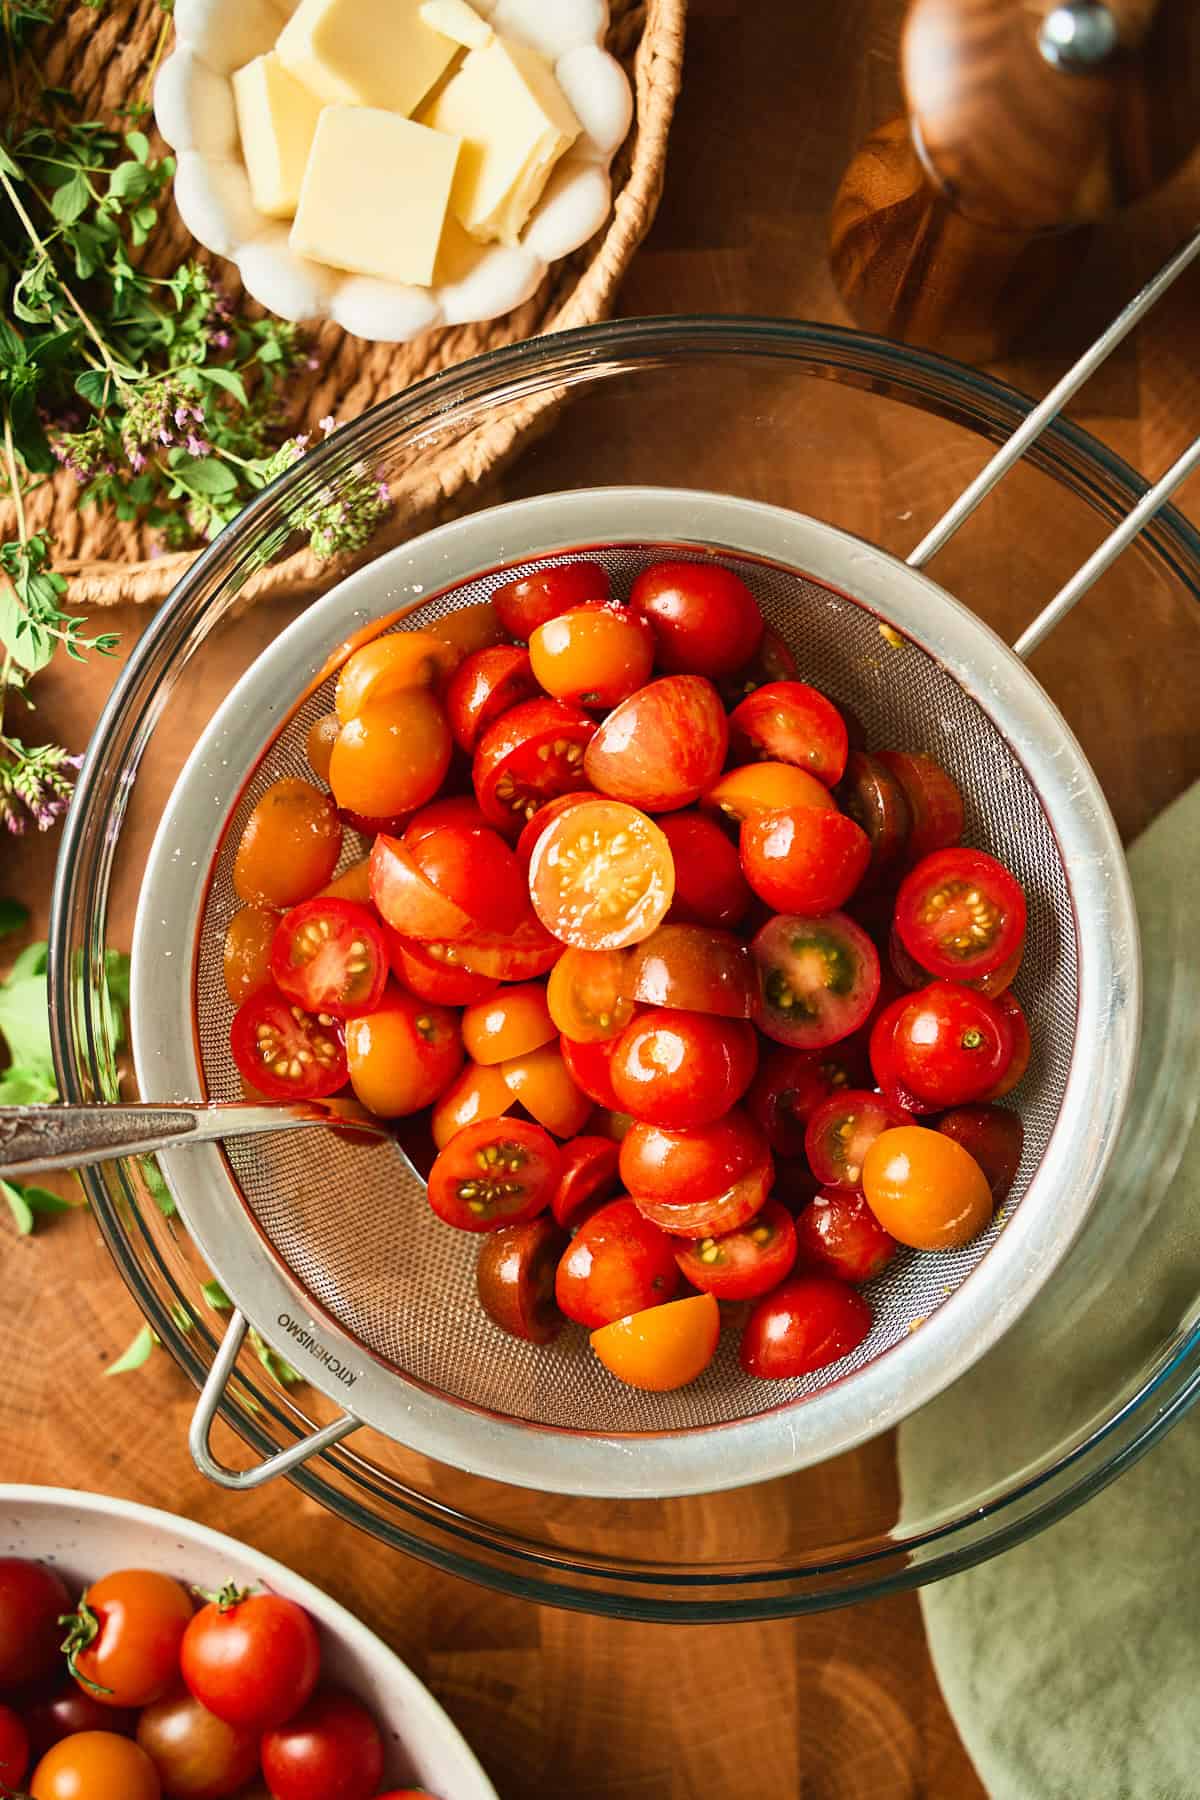
- Step 7: Halve the tomatoes, toss them with salt, and let them drain in a sieve set over a bowl for 15 minutes. Then blot them dry, and really commit to it. A damp paper towel run over the top isn't enough.
💧 Don't dump that juice: You'll have close to a cup of tomato water in the bowl underneath, and it's too good to pour down the drain. It makes a bright vinaigrette whisked with olive oil and a little vinegar; it's excellent in a Bloody Mary or stirred into a pan sauce, and it freezes well.
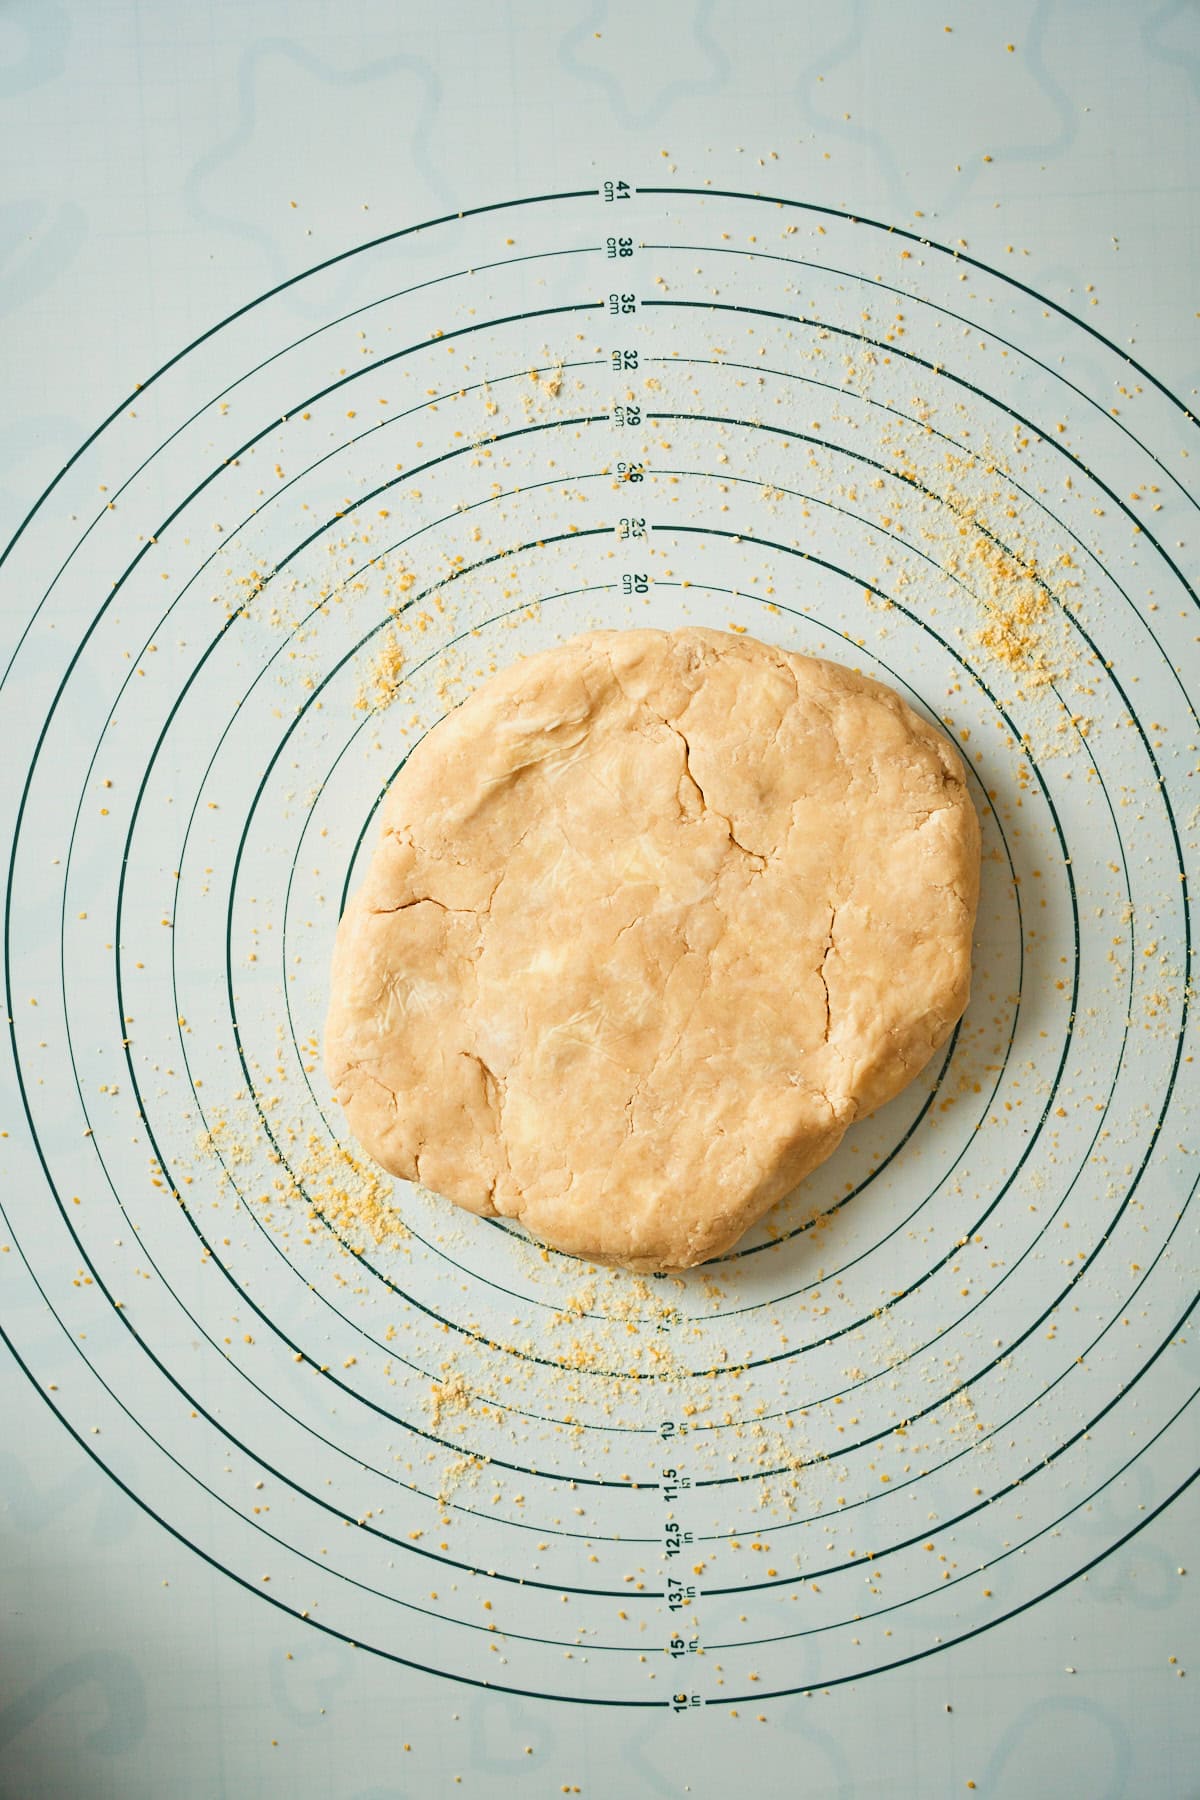
- Step 8: Unwrap the chilled disk onto a surface dusted with a mix of flour and cornmeal.
🌽 Why cornmeal in the dusting: Cornmeal doesn't absorb into the dough the way flour does. It sits on the surface and lets the dough slide, so you can keep it moving without working too much more flour into a crust that you want tender. It's the trick that keeps a nervous roller from toughening the whole thing.
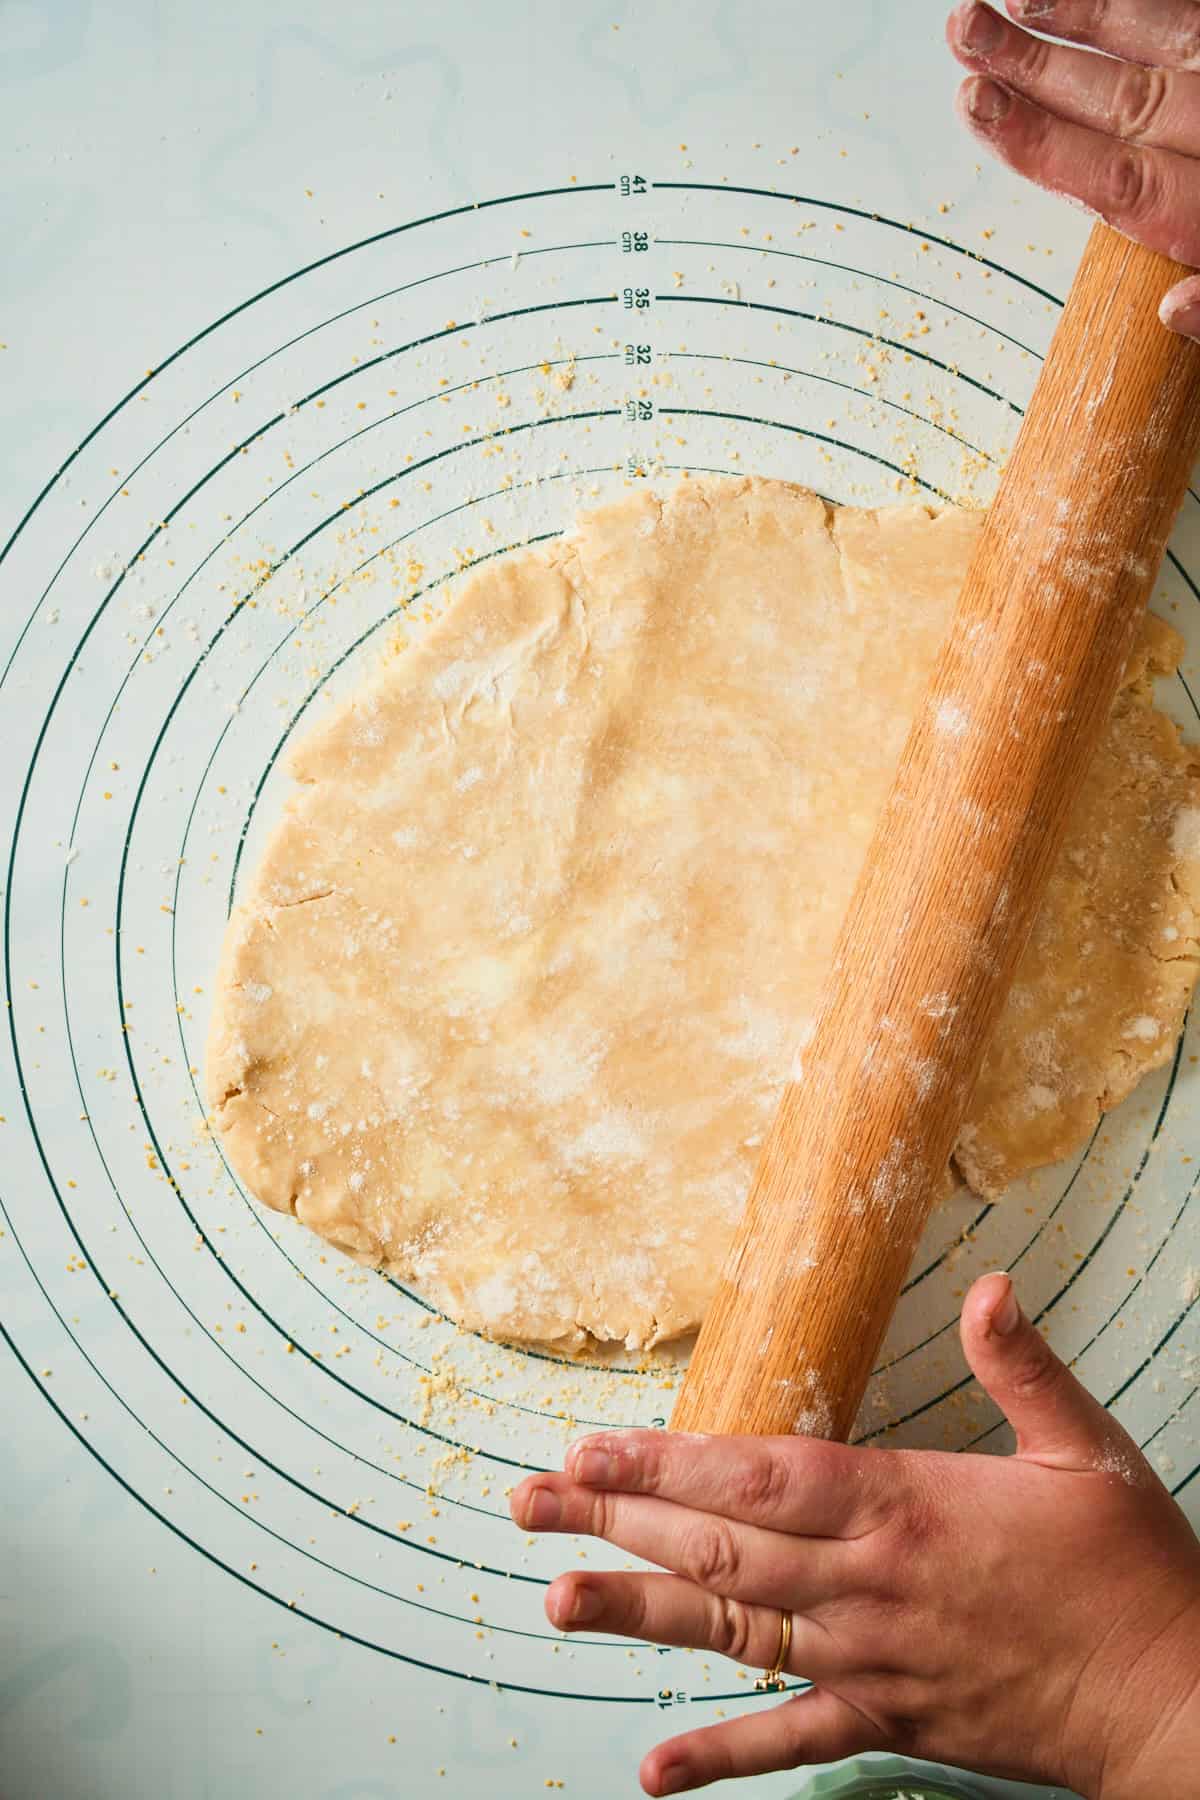
- Step 9: Roll from the center out, giving the dough a quarter turn every few passes.
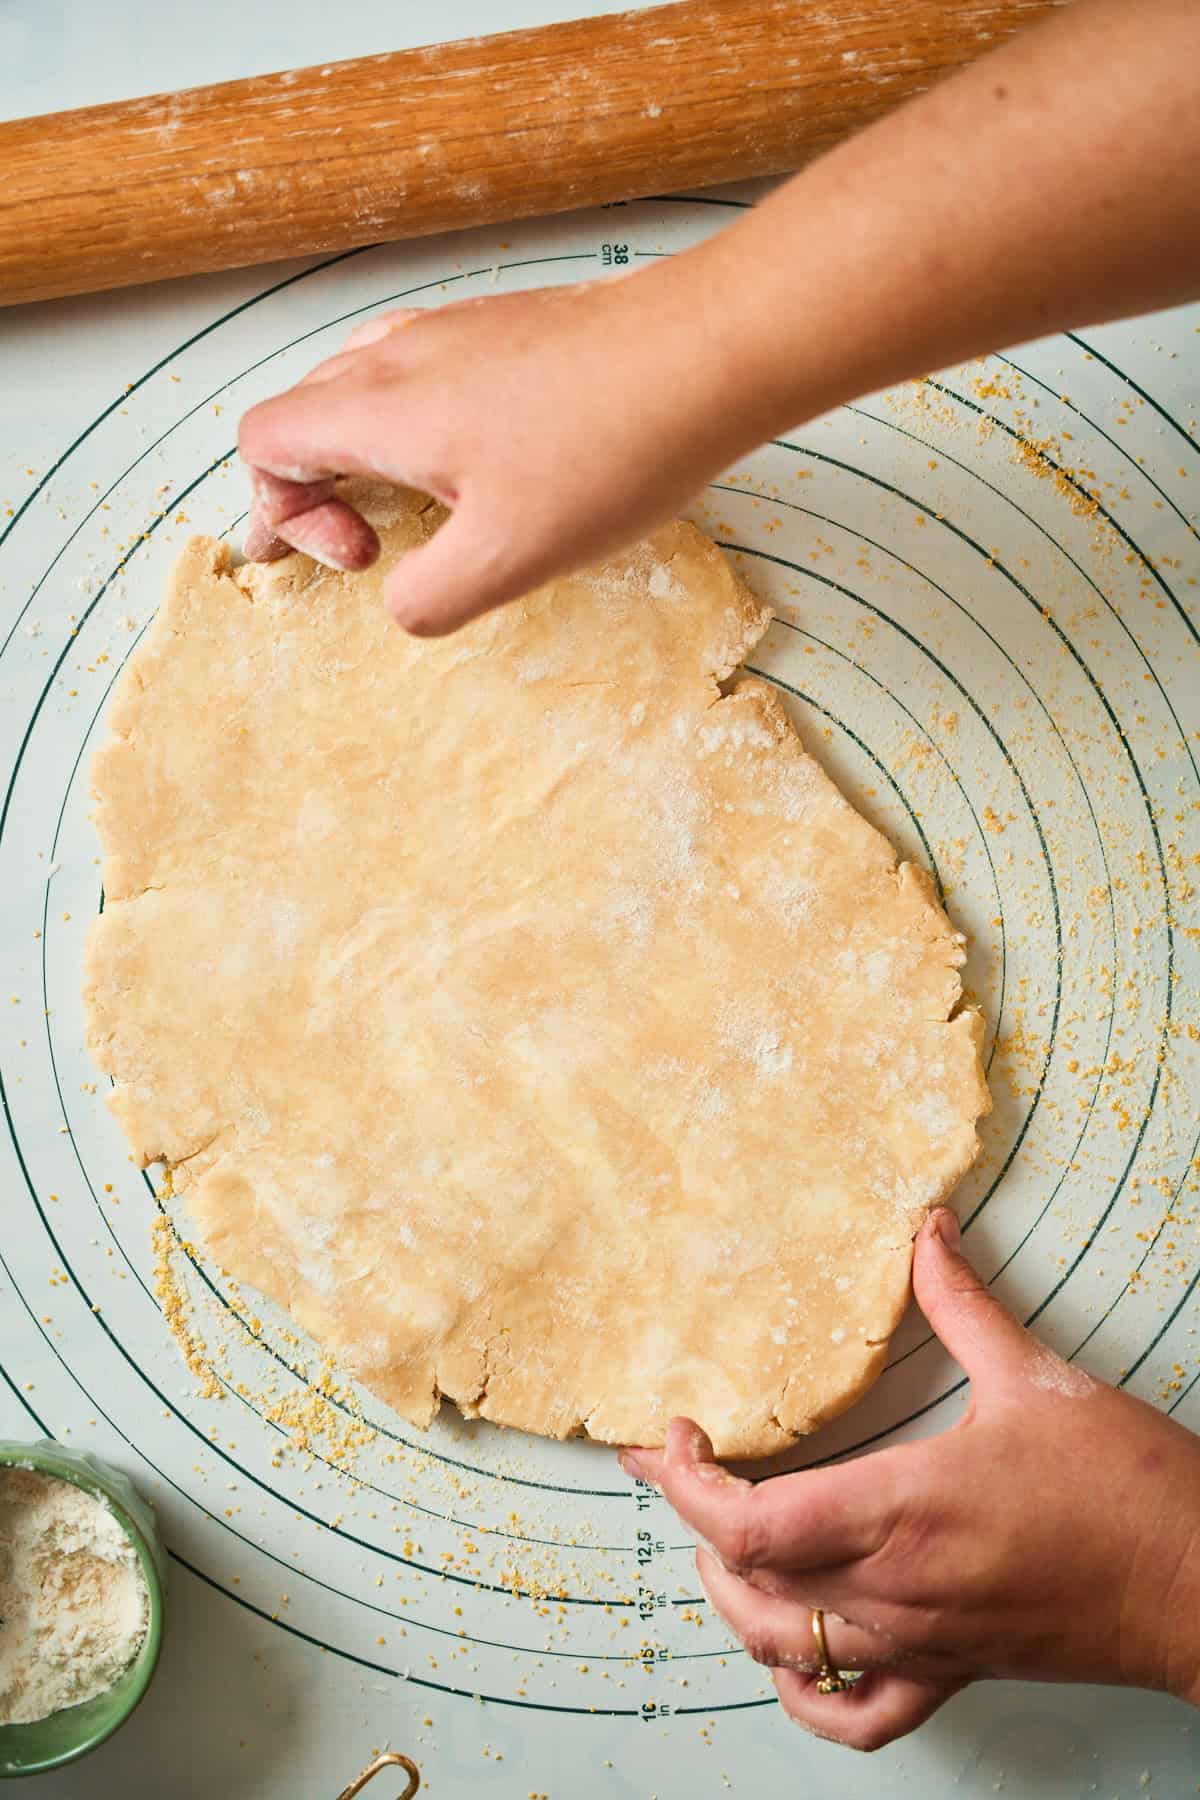
Cracks along the edge are normal. Pinch them back together with your fingers as you go and keep rolling. Roll to a 13 to 14-inch round. It doesn't need to be a circle; the rustic shape is part of the charm!
Now, line a sheet pan with parchment, scatter the ½ tablespoon of cornmeal over it, and transfer the dough round onto the parchment.
🥧 The easiest way to move a big round of dough: Set your rolling pin at one edge and roll the dough loosely up around it, like a scroll. Lift, hold it over the parchment, and unroll. It goes down flat without stretching or tearing, and you never have to lift it with your hands. If the dough feels soft or sticky when you get there, slide it back into the fridge for ten minutes and try again with firmer dough.
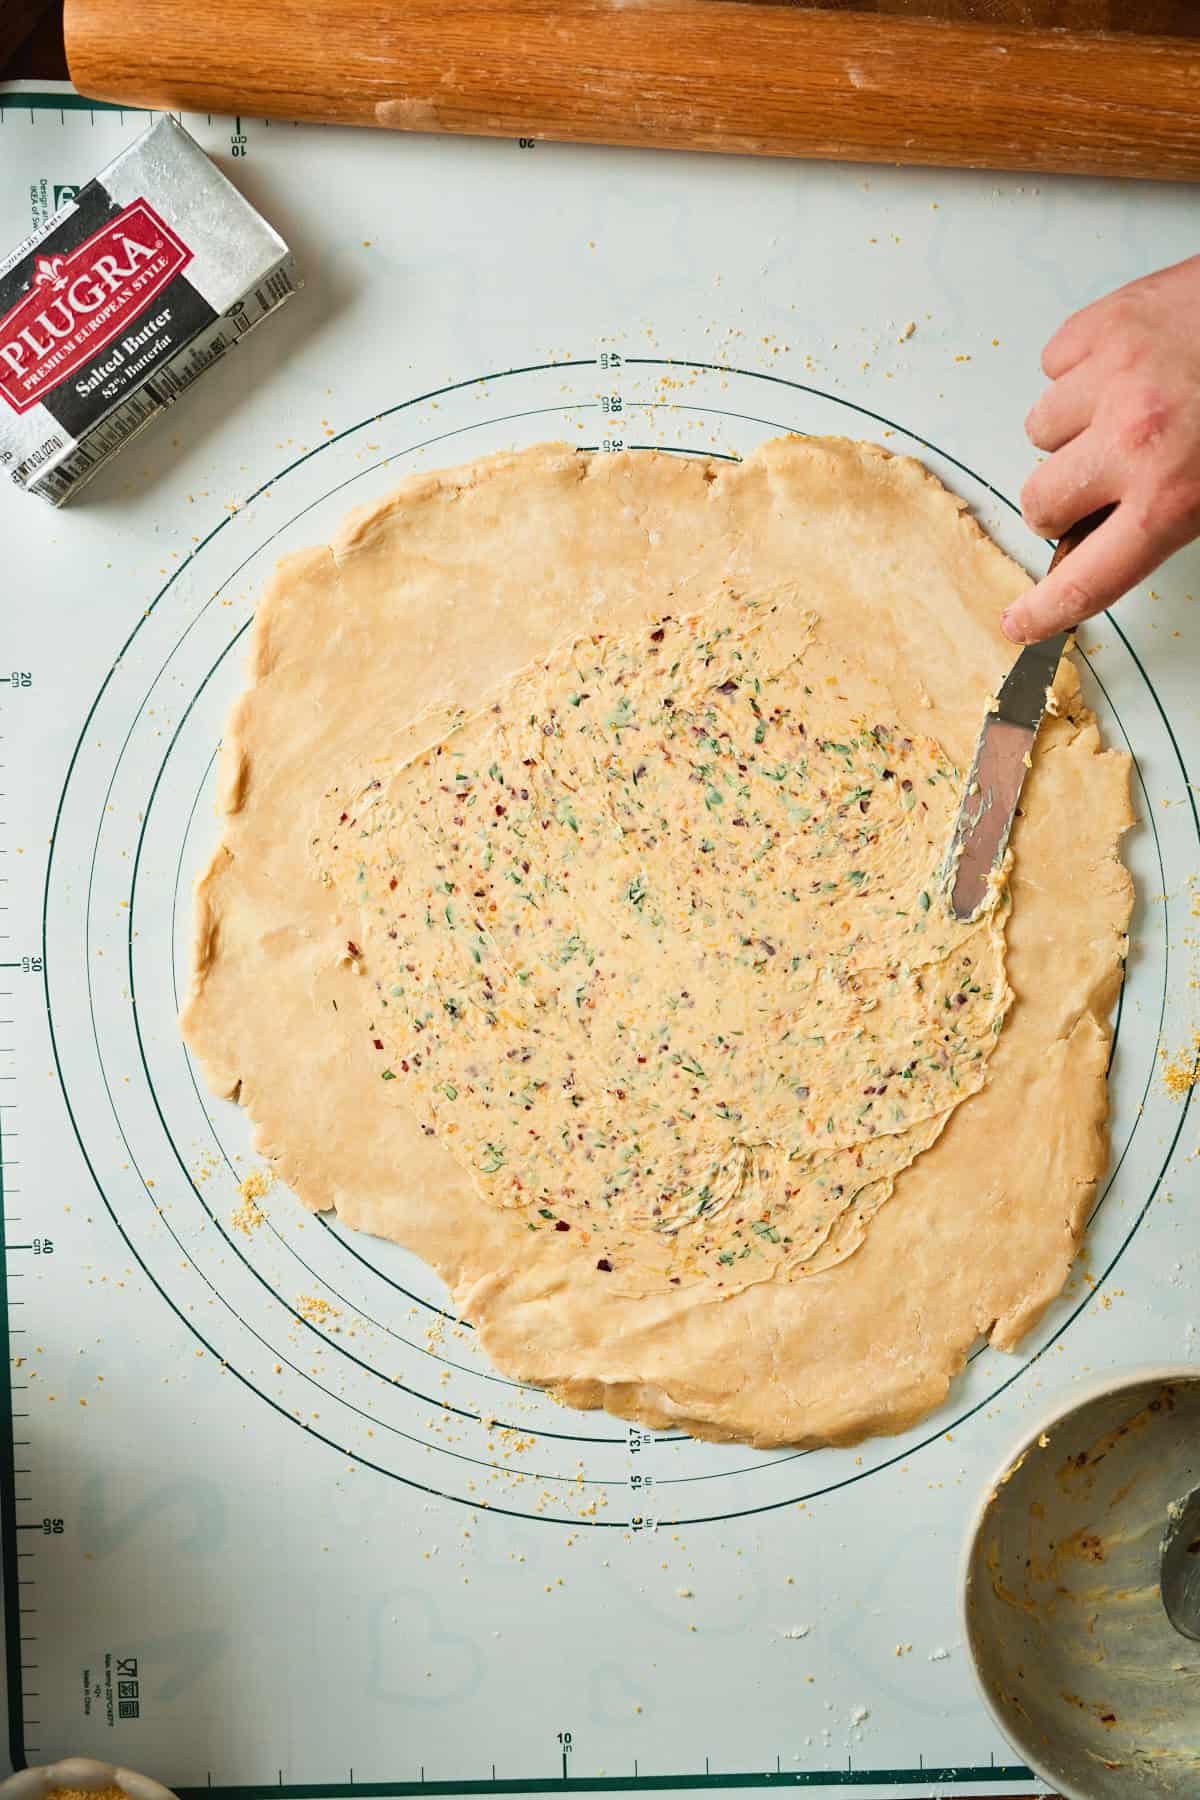
- Step 10: Spread the garlic herb butter over the center, leaving a clean 2-inch border all the way around.
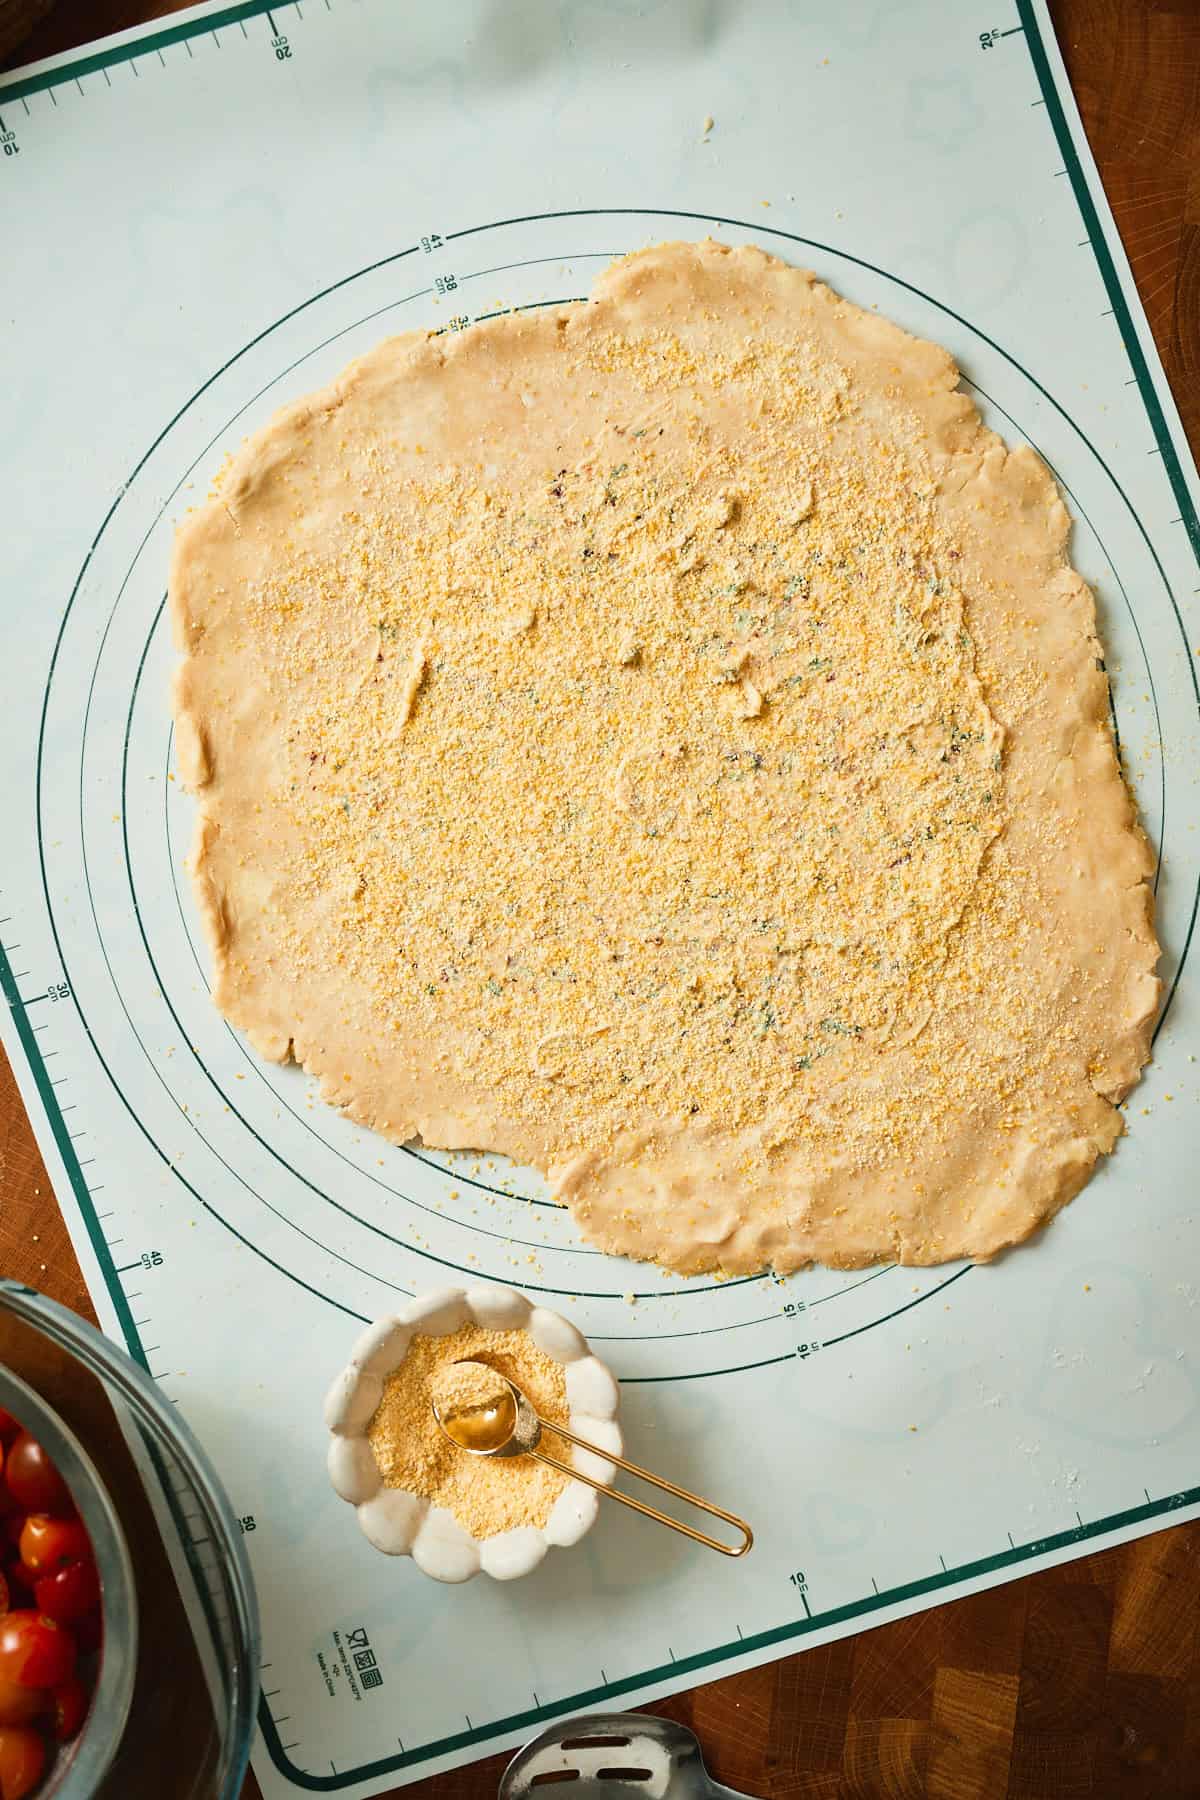
Scatter the remaining 2 tablespoons of cornmeal evenly over the butter.
🌽 This is the soggy bottom fix: The butter is fat sitting right on the pastry, so it repels moisture from below. The cornmeal sits directly under the tomatoes, where it drinks up the juice as it releases. During testing, we found that stacking in that order keeps the crust crisp.
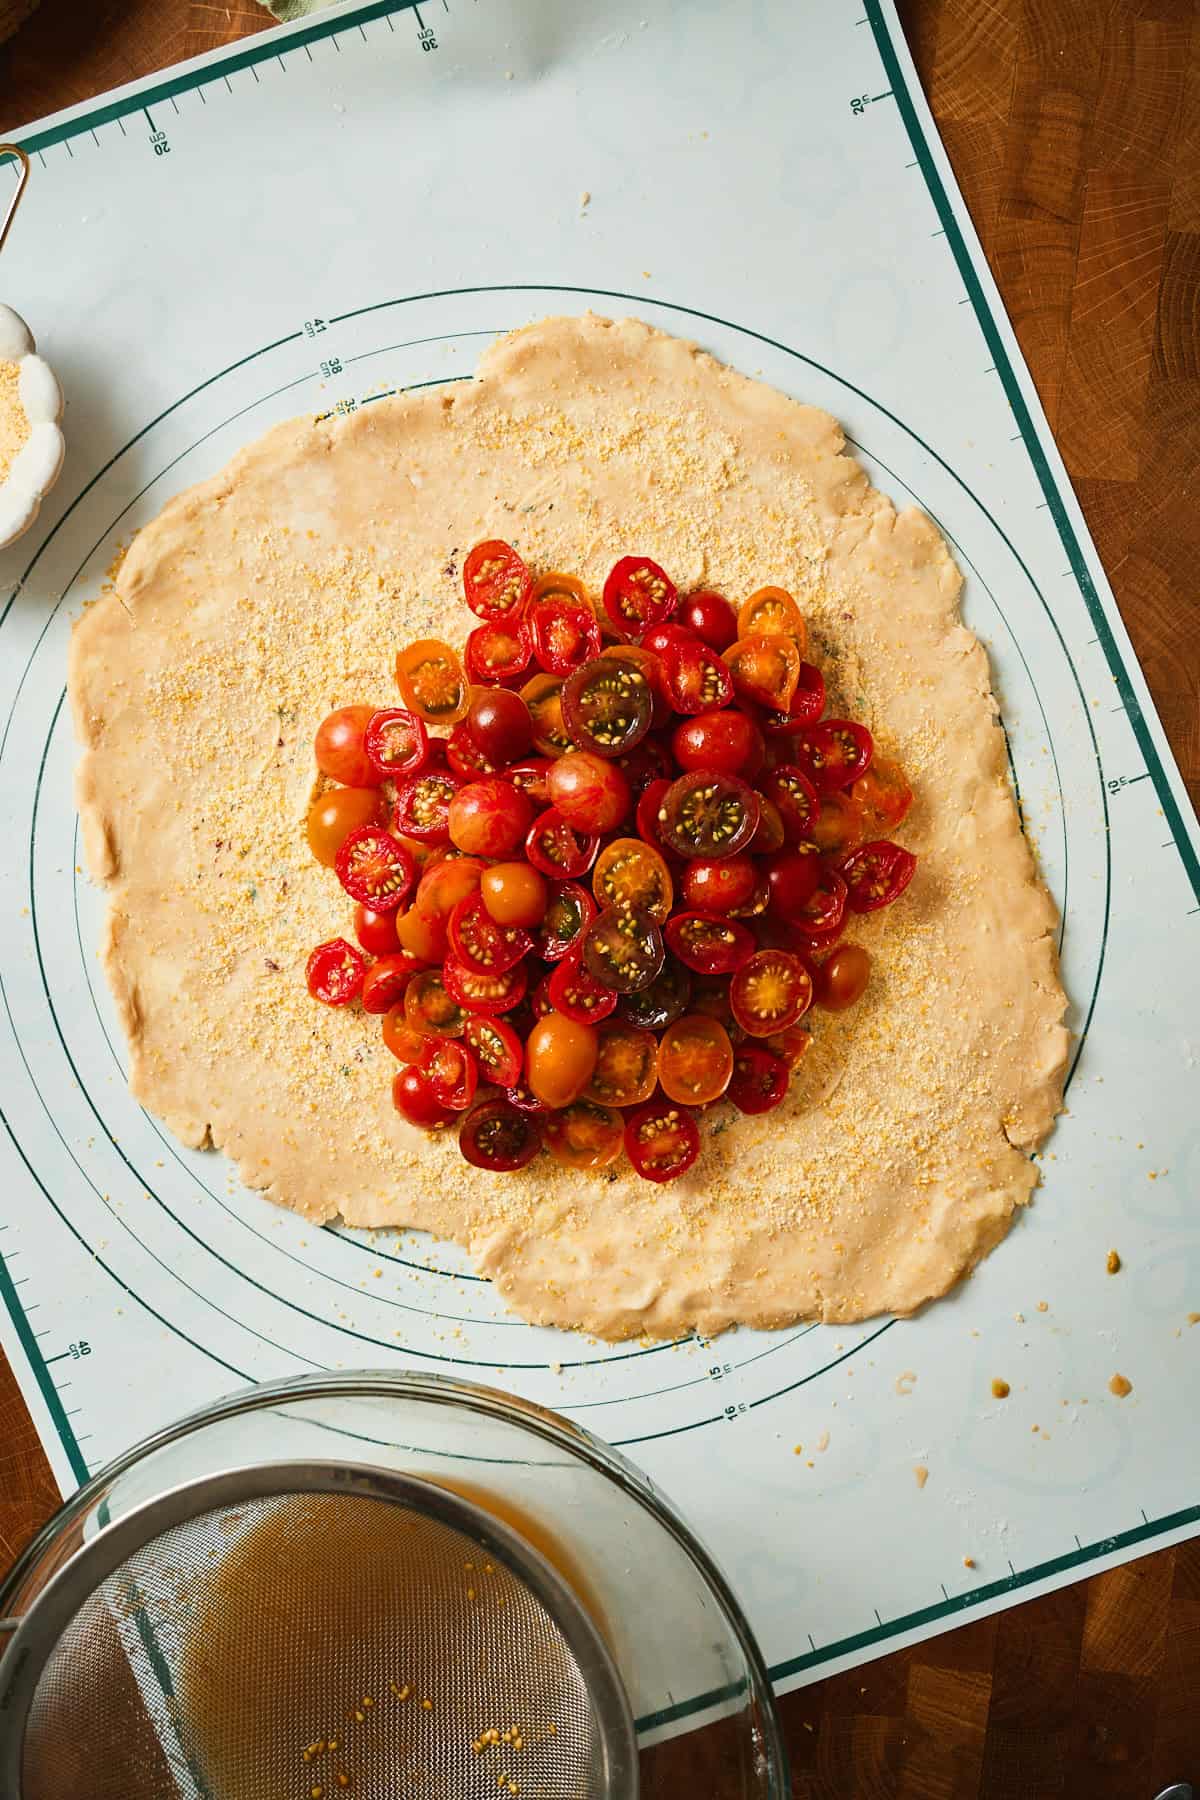
- Step 11: Pack the tomatoes on cut side up, tighter than feels right. They shrink a lot.
🍅 Tight, not tall: Shoulder to shoulder is what you want. Stacked deep is not. Keep the mound low enough that you can still see the shape of the tomatoes on top rather than a heap, because anything deeper steams instead of roasting, and the ones at the bottom come out raw. We learned this the hard way.
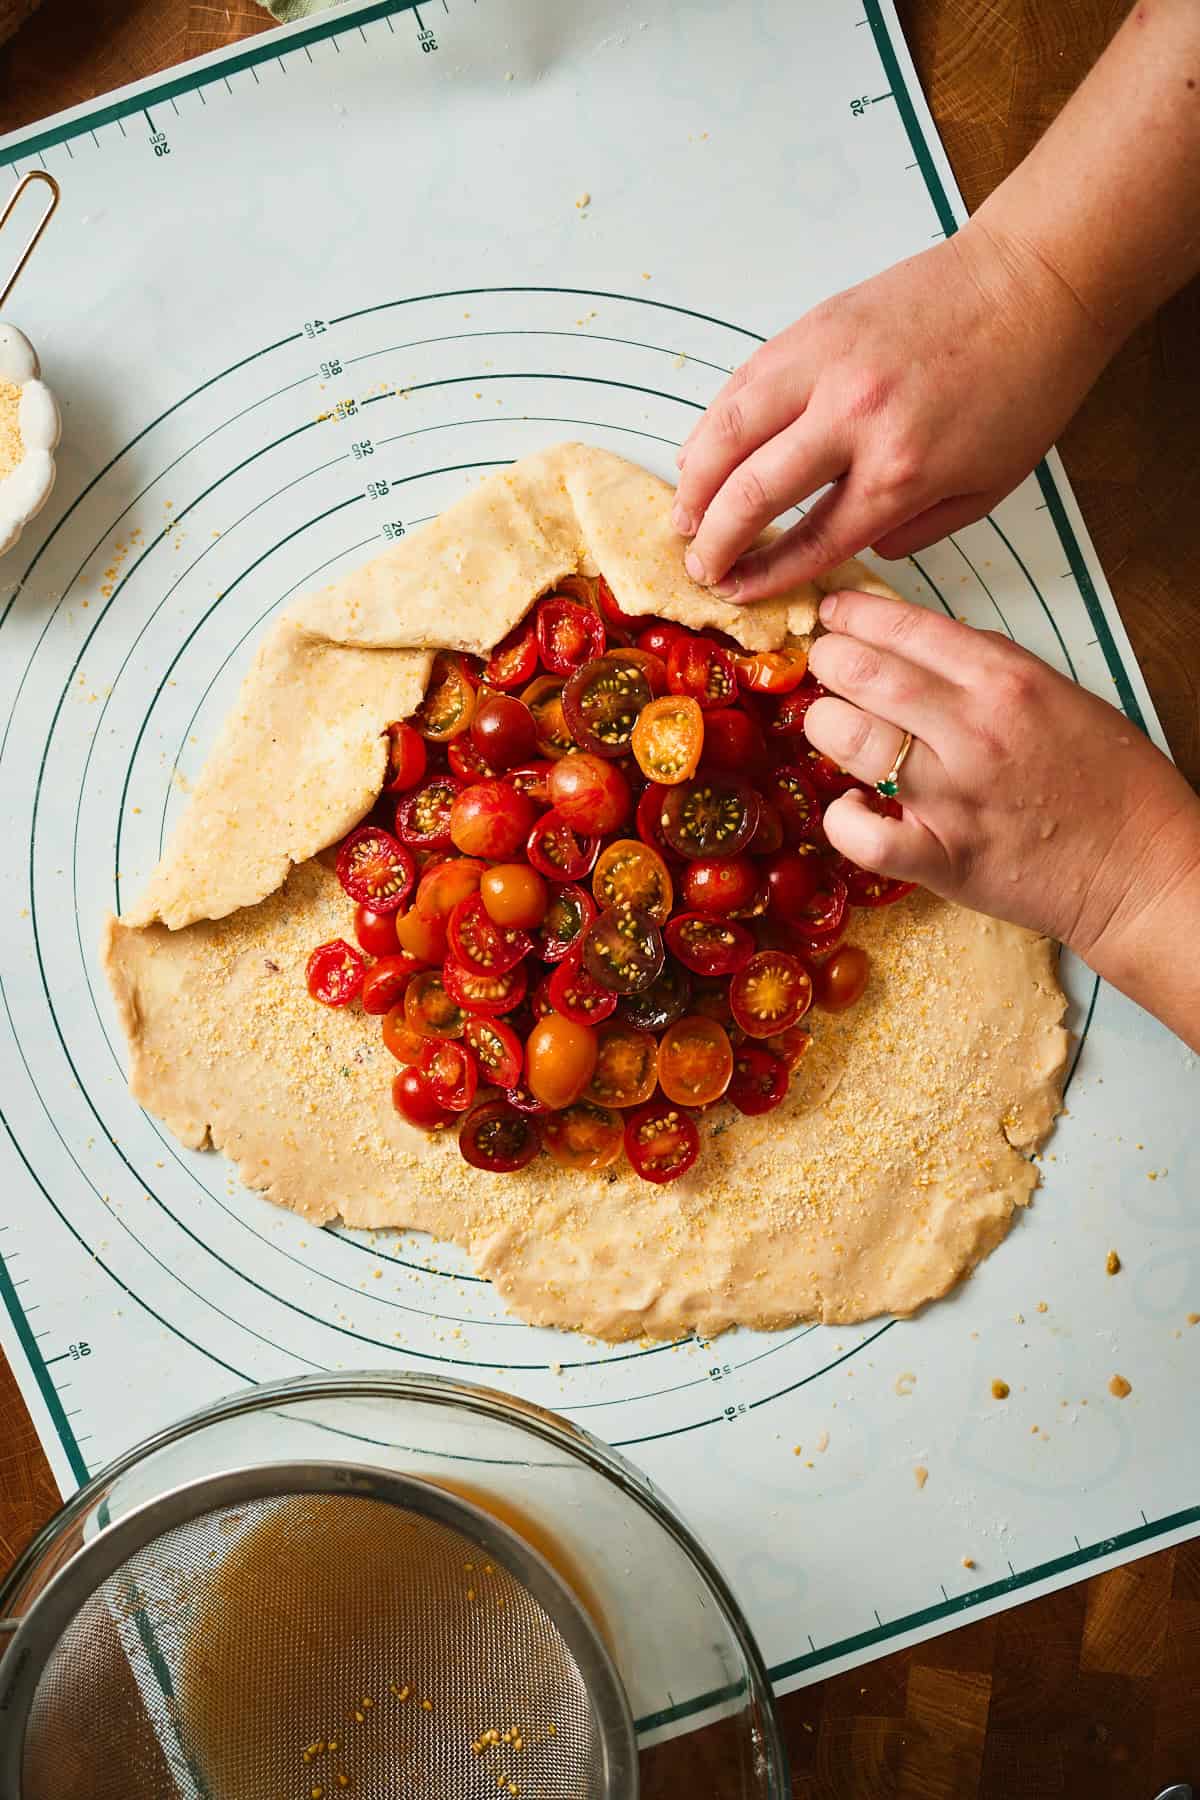
- Step 12: Fold the border up over the edge of the tomatoes, pleating as you work your way around.
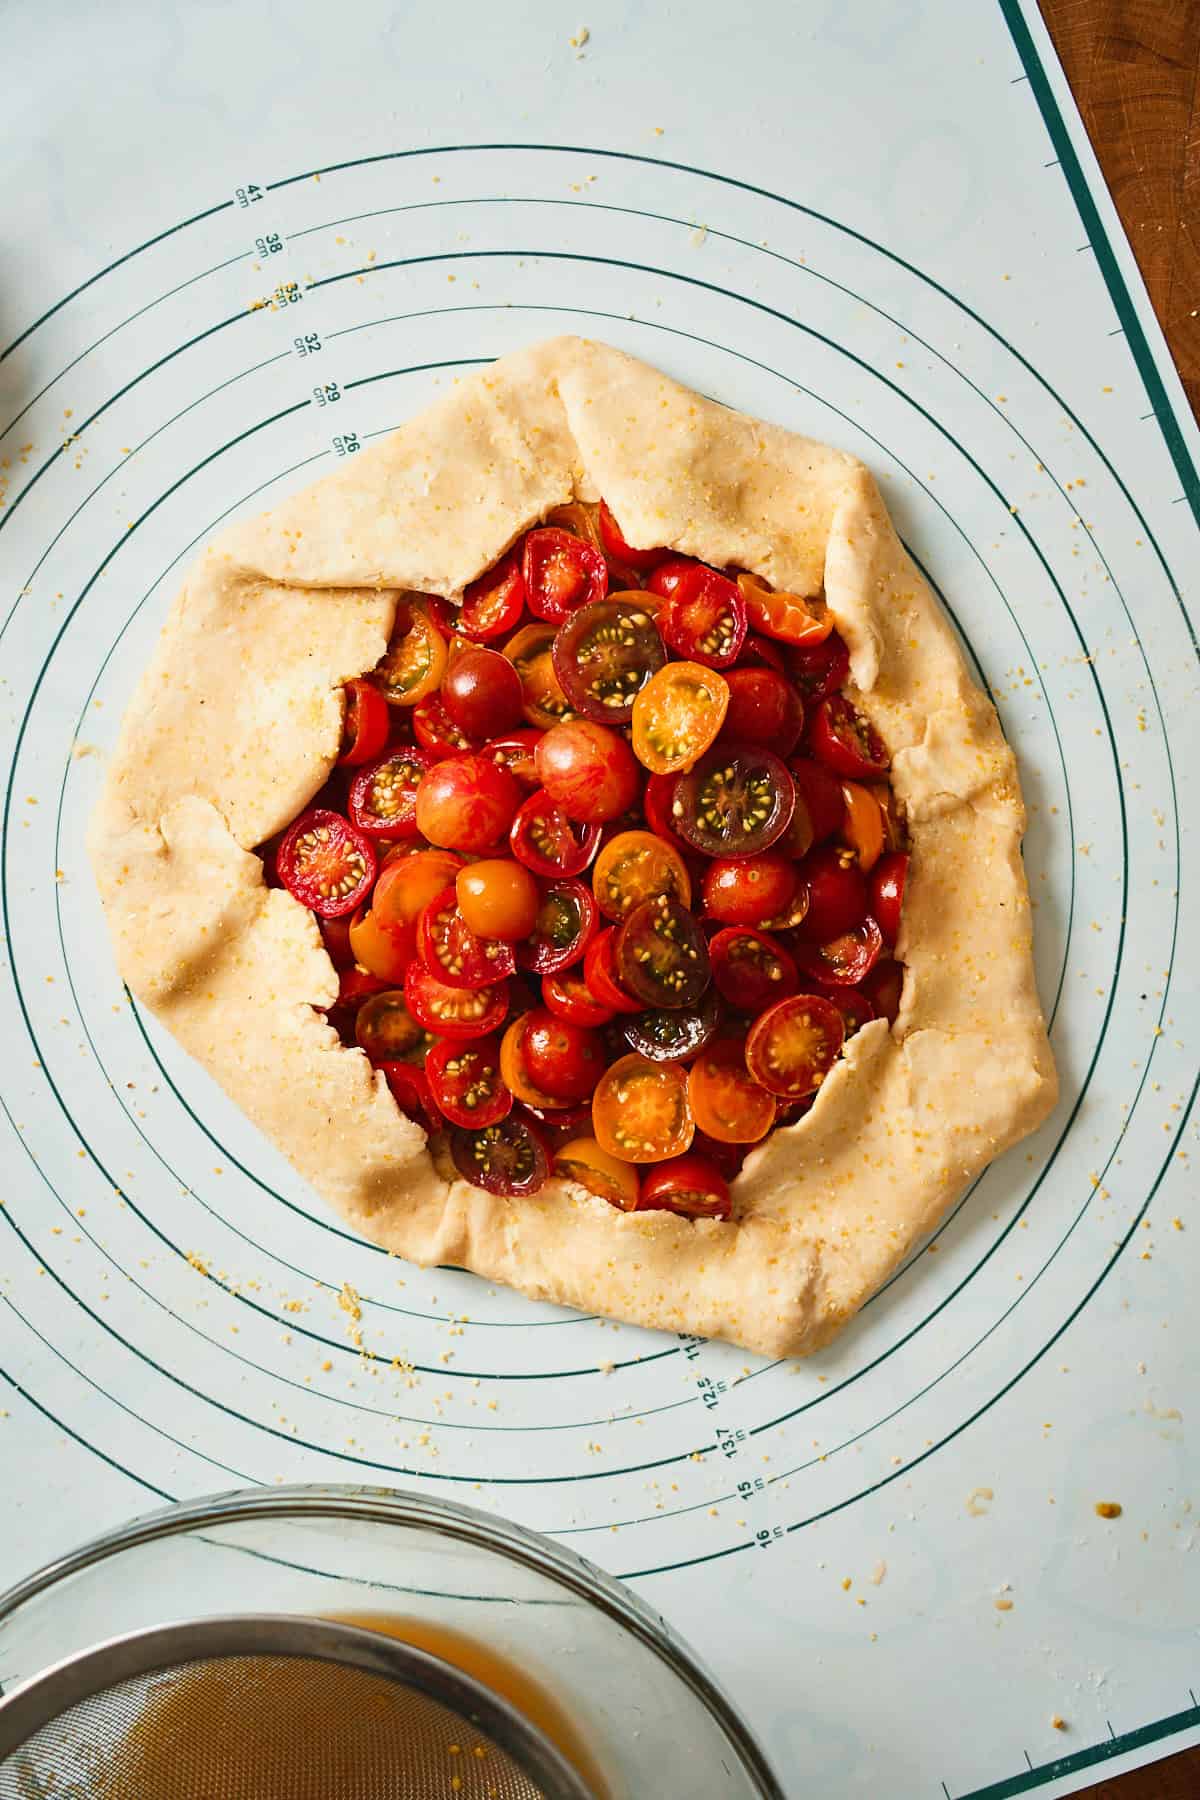
Pleat tightly and press each fold against the one before it. A loose pleat will slump open in the oven, and that corner browns faster than the rest.
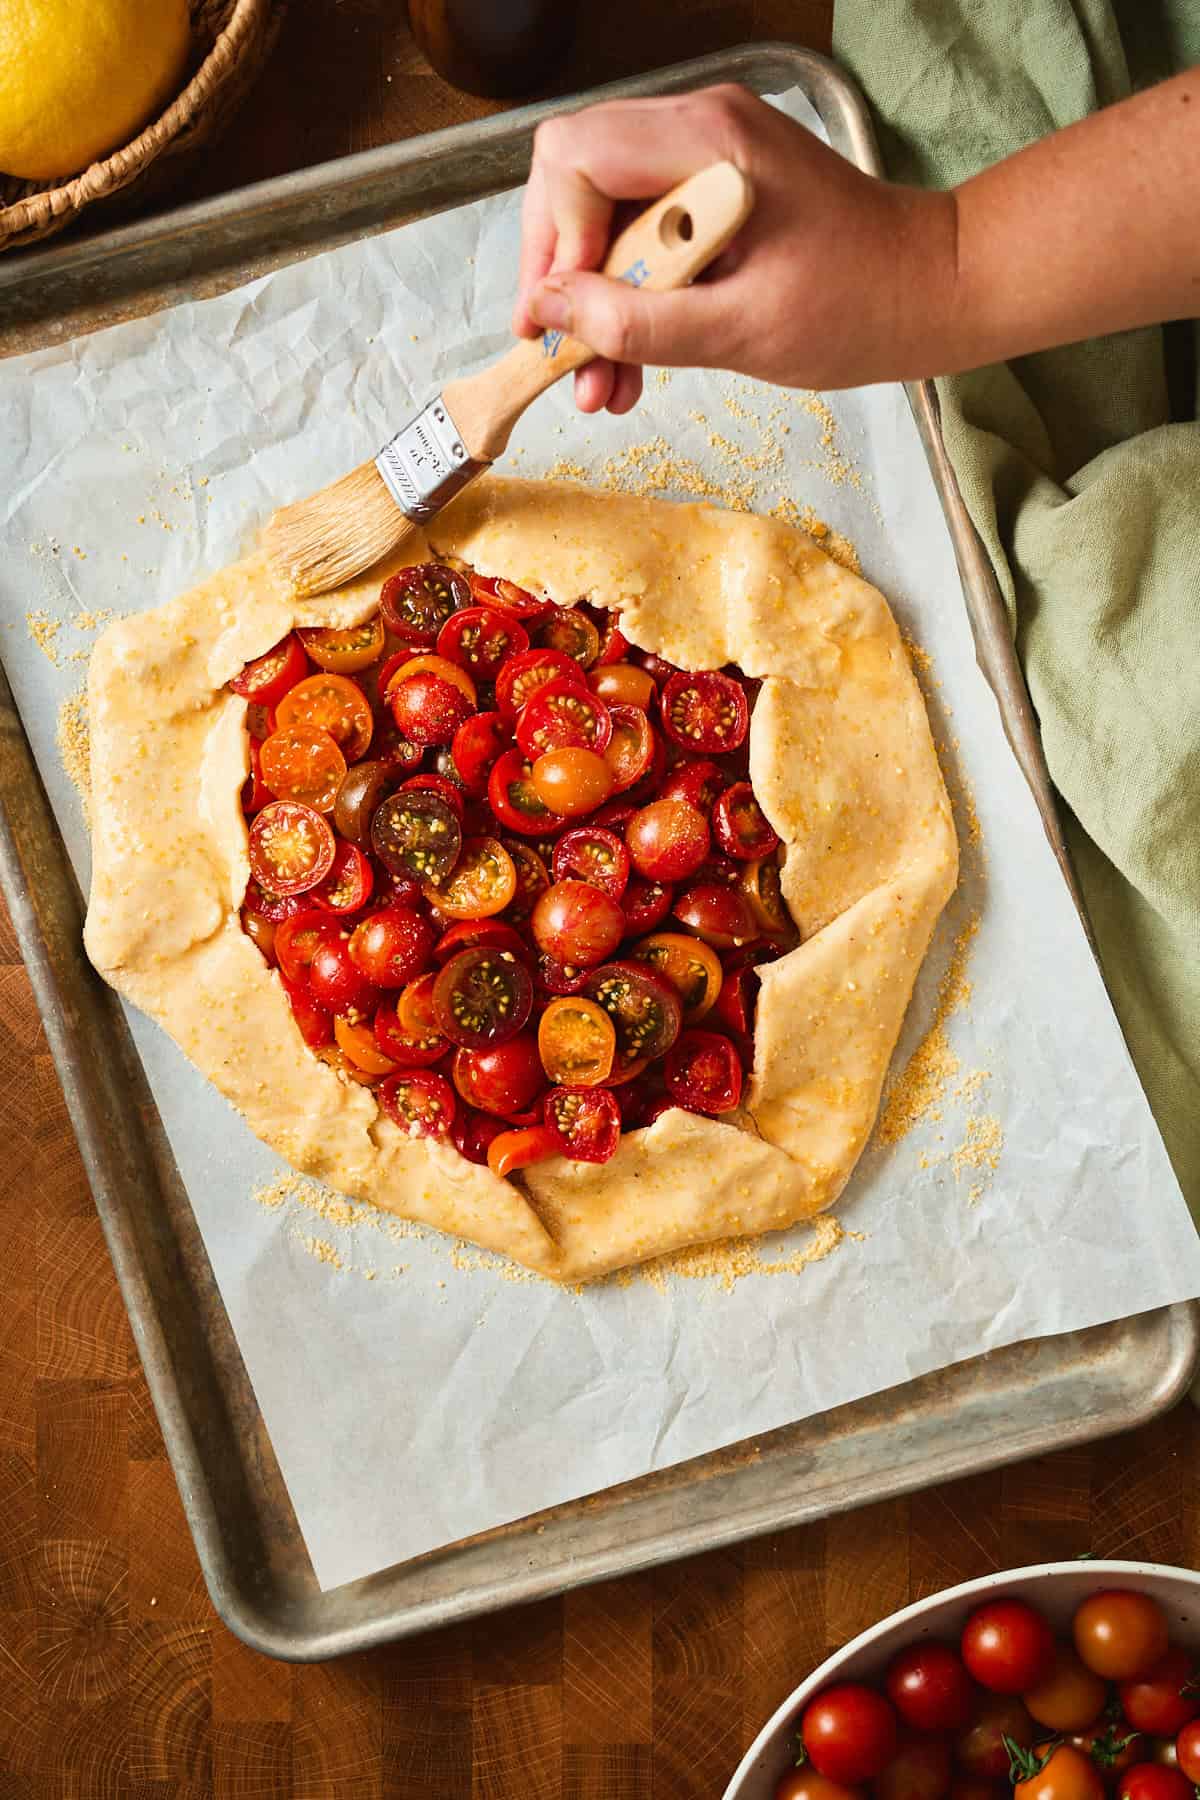
- Step 13: Brush the pastry with the egg wash, and season the tomatoes lightly with salt and pepper. Then chill the whole pan for 20 minutes. Heat the oven to 400°F with a rack in the lower third while it chills.
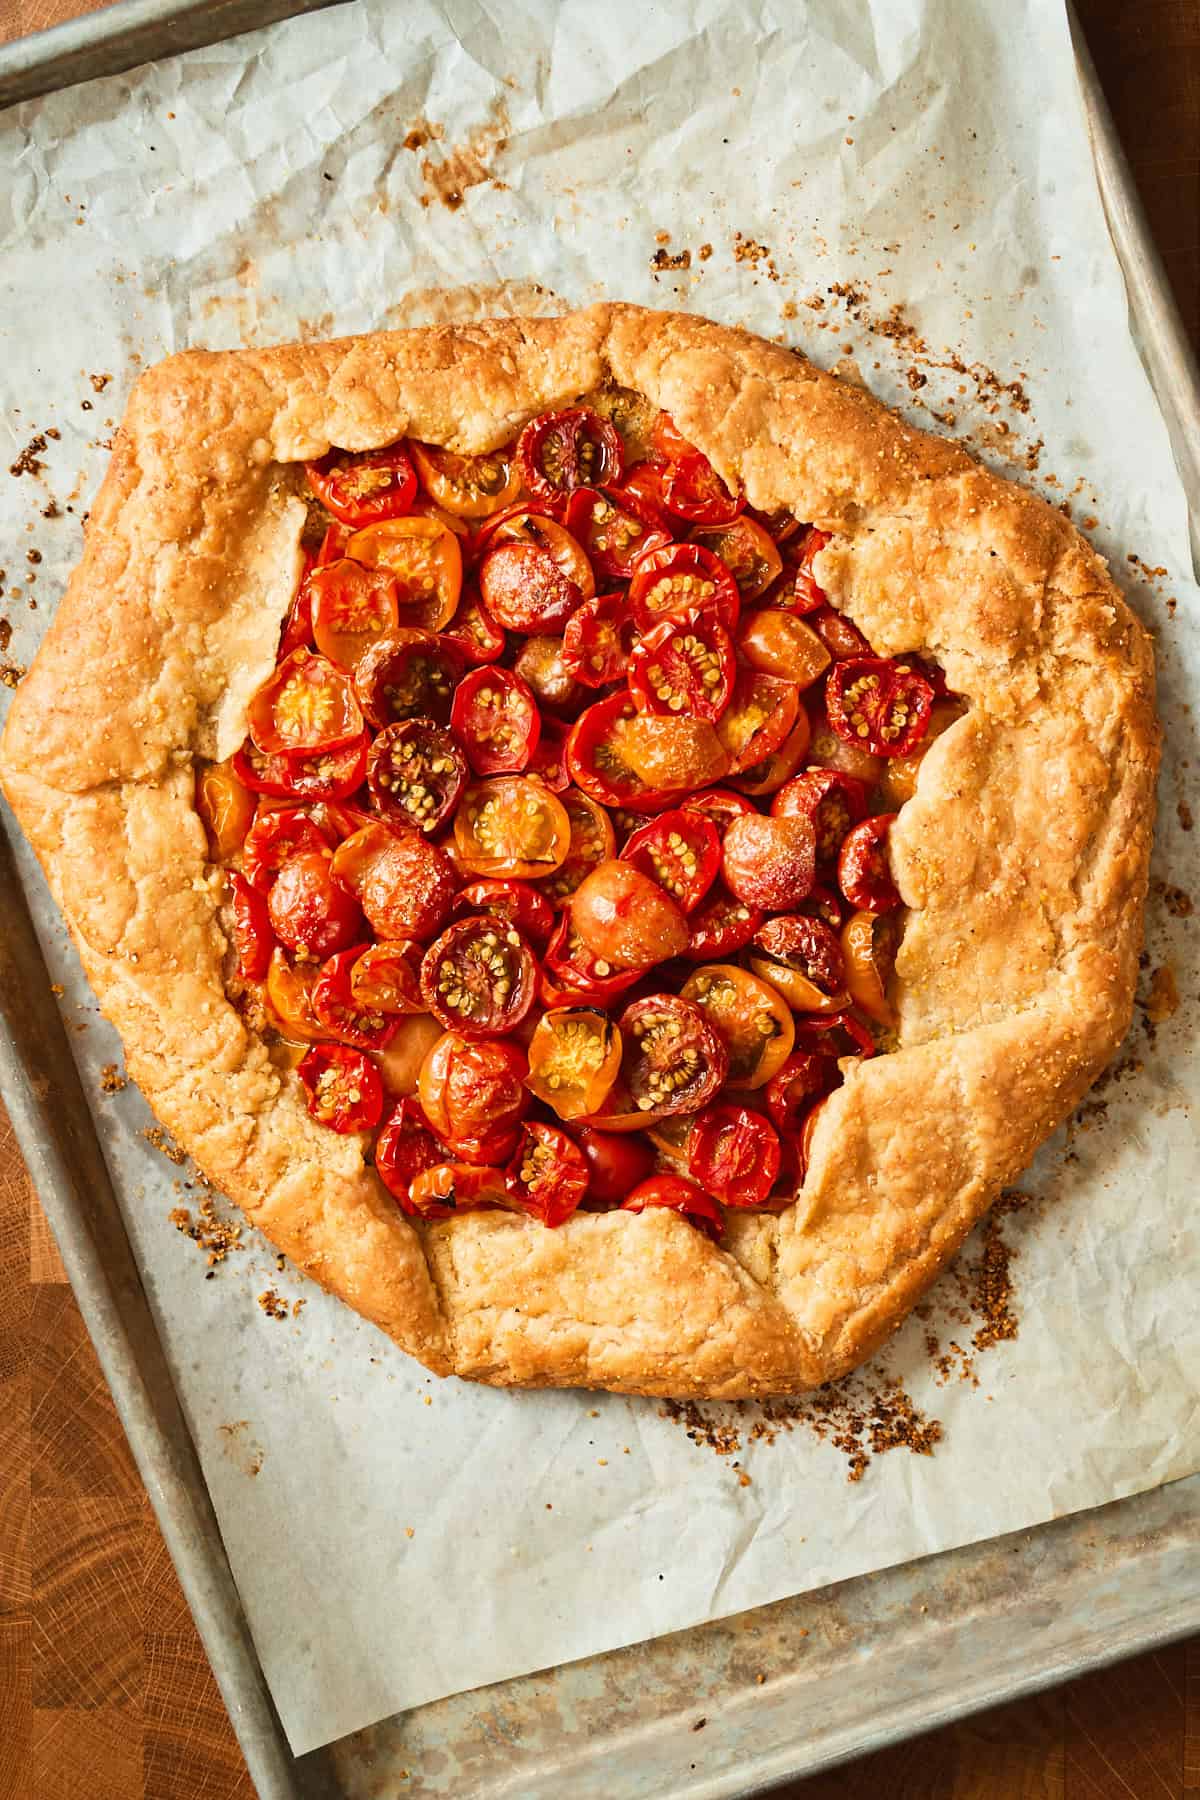
- Step 14: Bake on the lower rack for 45 to 55 minutes, rotating the pan at the 30-minute mark. Start checking at 45. You're looking for a deep golden crust, pleats that have set firm, and an underside that's golden brown but not dark. Lift an edge with a spatula to check the bottom, because that's the part you can't see.
🔥 Ovens vary more than recipes admit: Fifty-five minutes was right in one of our ovens and slightly too long in a hotter one. Go by the color and the set pleats rather than the clock. An oven thermometer is also a worthwhile (and cheap!) investment, so you have more certainty over your oven's actual temperature.
- Step 15: Brush the hot crust with melted butter the second it comes out of the oven, then slide the galette off the parchment onto a wire rack so the bottom doesn't steam itself soft. Rest for a minimum of 25 minutes to allow the tomatoes to firm back up for cleaner slices.
💡It's going to look wet when it comes out, and that's fine: Coming out of the oven, the whole thing looks like it's swimming, and you will be convinced you've made a soggy mess. Leave it alone. As it cools, all that liquid reabsorbs, and the crust goes right back to flaky. Ours does every time we make it.
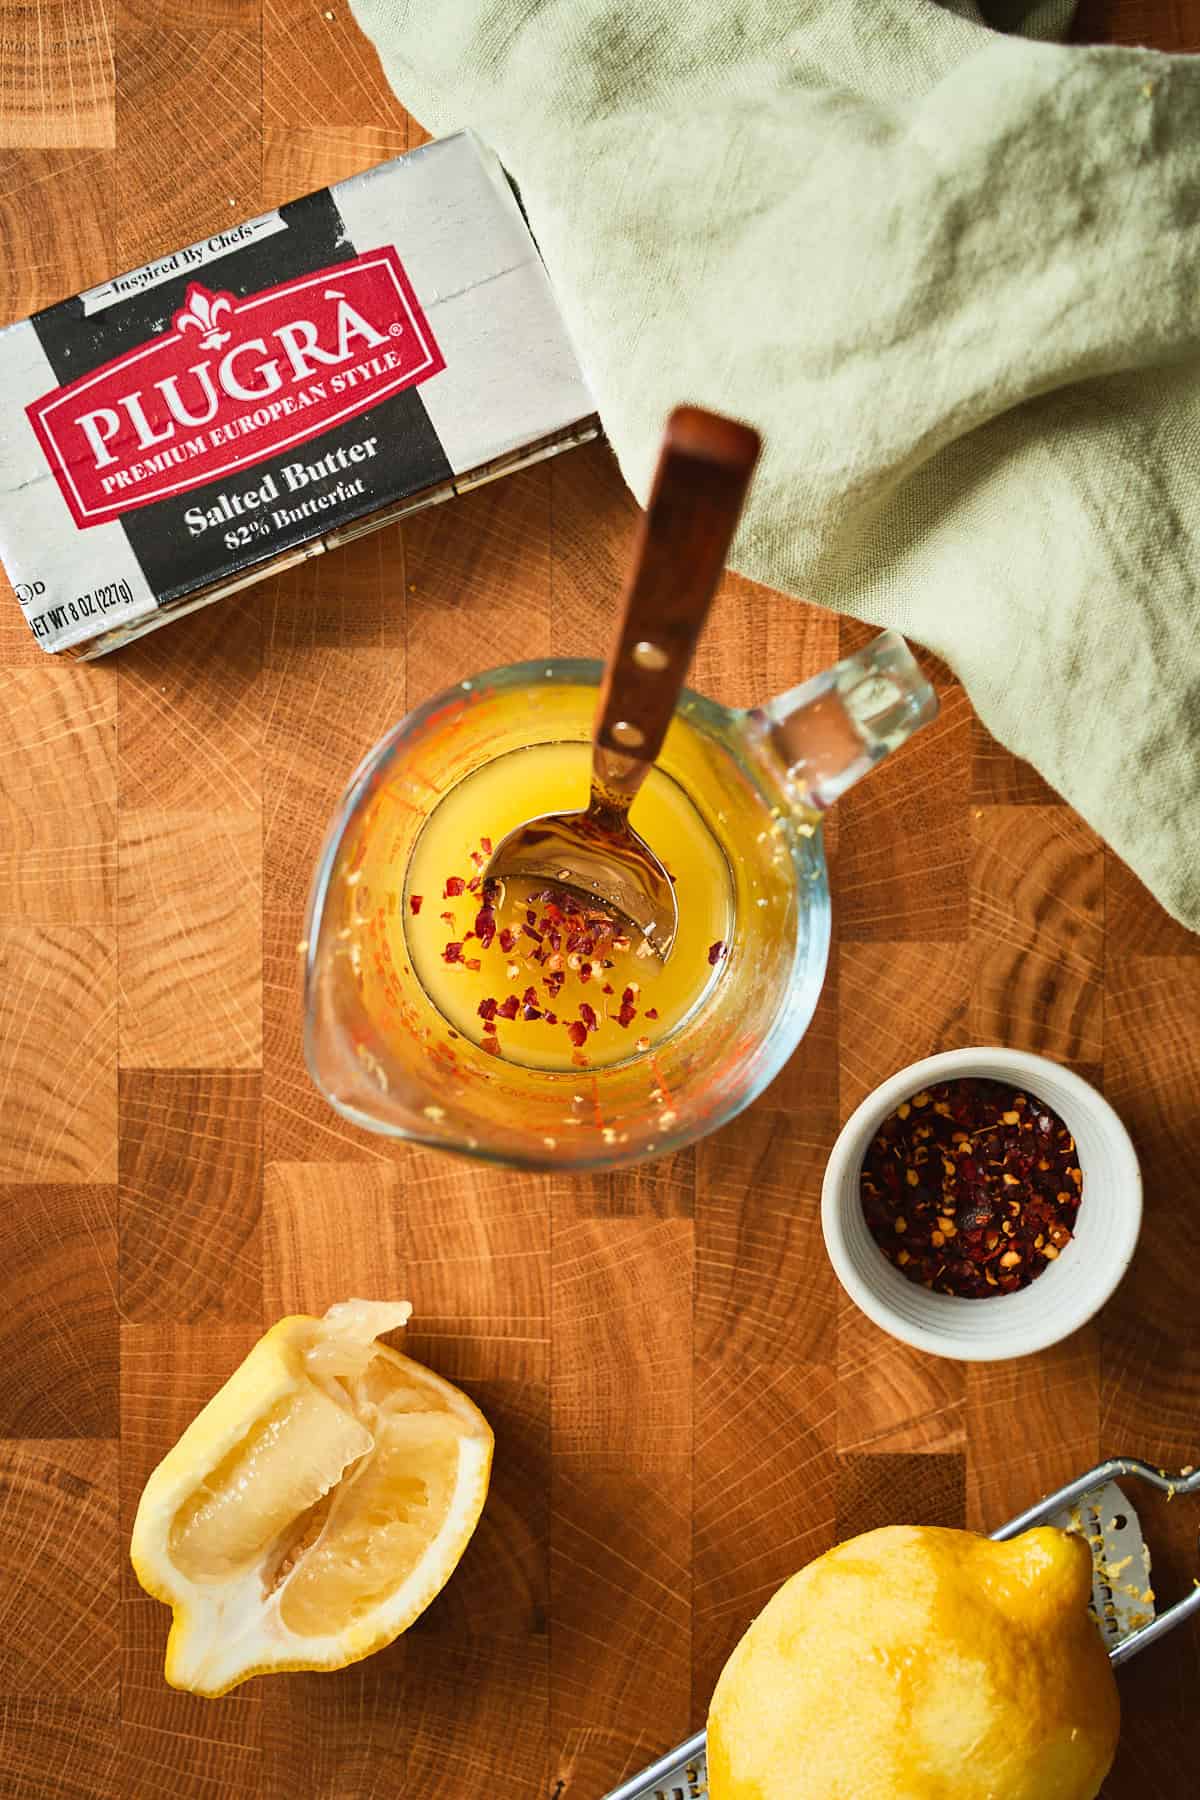
- Step 16: Meanwhile, stir together melted butter, lemon zest, lemon juice, and a pinch of red pepper flakes.
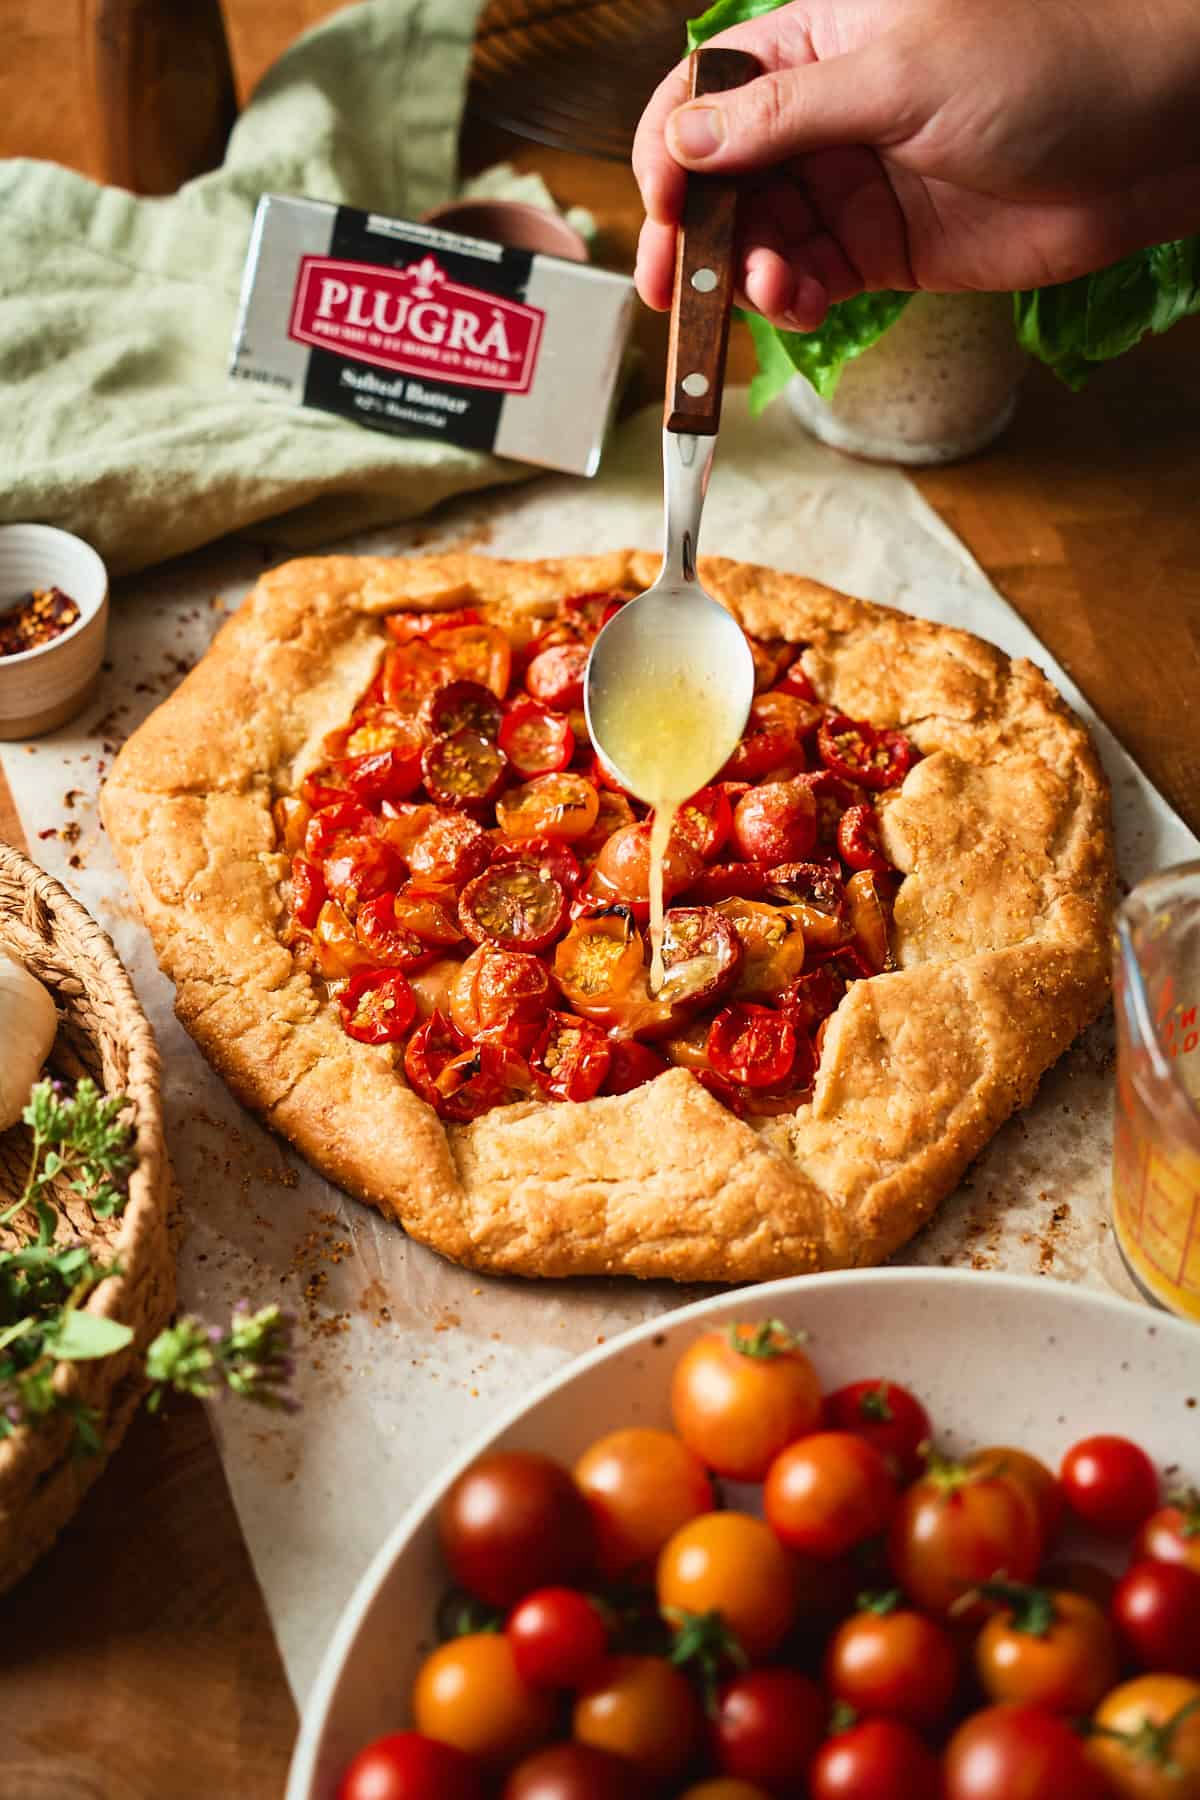
- Step 17: Spoon the lemon butter over the tomatoes just before serving.
🍋 Don't skip this! This galette is rich, and the lemon brightens it up a lot and balances the whole thing out. The extra heat is a great touch too. The first time we made this, the tomatoes tasted a little flat on their own, and the lemon butter fixed it right up.
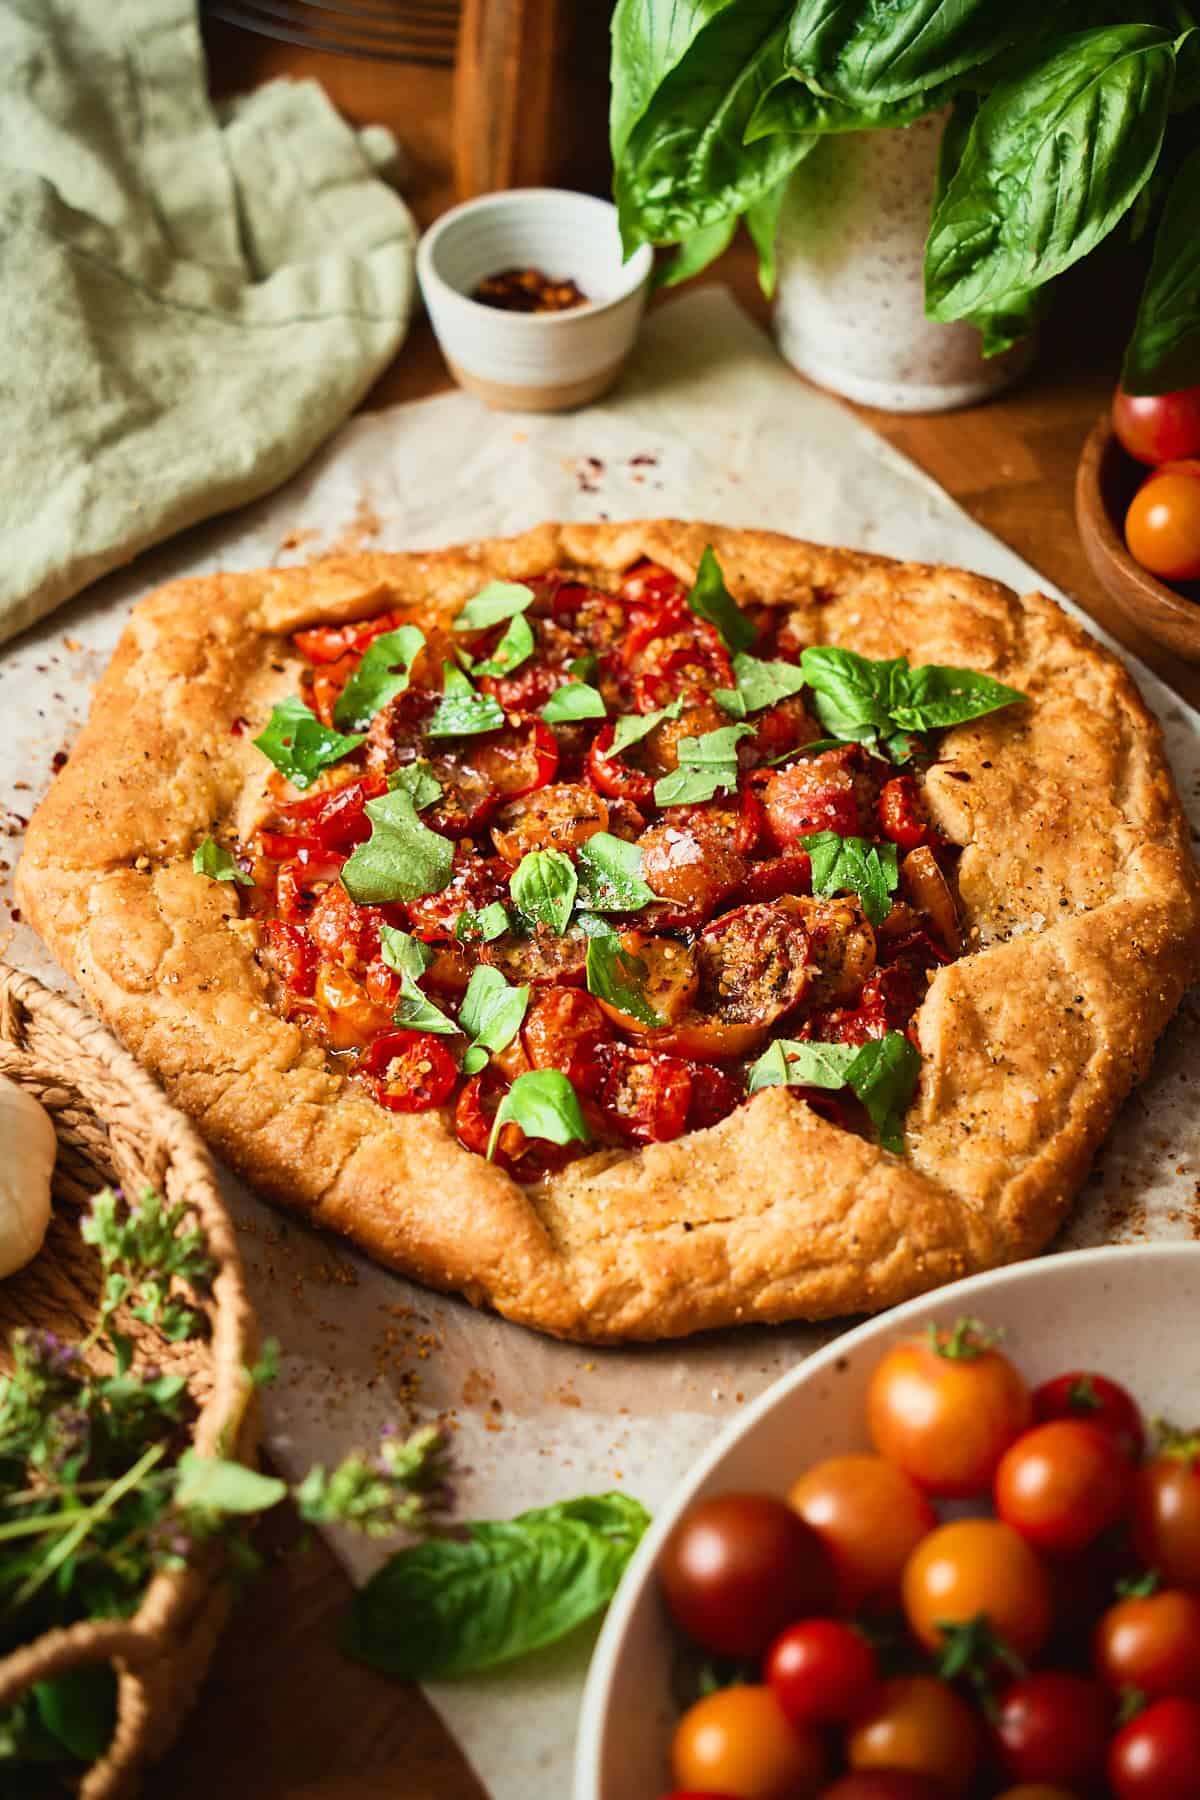
- Step 18: Scatter the torn basil over the top and finish with flaky salt and black pepper.

Cut it into wedges and eat it warm, with a green salad and a cold glass of something. It's just as good at room temperature an hour later, which makes it a solid thing to carry to a porch dinner. 🤤
🌟Leave a Review!
If you make this Savory Cherry Tomato Galette, we'd love to hear from you! Leave a comment below with your rating for the recipe. Share with us by tagging us on Instagram! We love seeing your creations! 📸
📖 Recipe

Cherry Tomato Galette (Buttery, Flaky Crust!)
Equipment
- microplane or zester
Ingredients
Crust
- 2½ cups all-purpose flour 300g
- 1 teaspoon kosher salt 3g (use ½ teaspoon if using Morton's or table salt, see notes)
- 1 teaspoon granulated sugar 4g
- 1 cup salted butter 2 sticks Plugrà butter, cold, cut into tablespoon-size cubes
- 6 to 8 tablespoons ice water as needed
- ½ tablespoon cornmeal 5g, for the parchment
- All-purpose flour and cornmeal for rolling to prevent sticking, as needed
- 1 large egg plus 1 tablespoon water beaten, for the egg wash
Garlic herb butter filling
- 4 tablespoons salted butter Plugrà butter, softened
- 3 cloves garlic grated
- 1 tablespoon fresh thyme minced
- 1 teaspoon fresh oregano minced
- 1½ teaspoons lemon zest zest of ½ lemon
- ¾ teaspoon red pepper flakes
Tomatoes
- 1½ pounds mixed cherry tomatoes halved
- 1 teaspoon kosher salt 3g, for draining
- kosher salt and freshly cracked black pepper to season after assembling
- 2 tablespoons cornmeal 20g, for the barrier layer
Lemon butter drizzle (to serve)
- 3 tablespoons salted butter Plugrà butter,melted
- 1½ teaspoons lemon zest zest of ½ a lemon
- 2 tablespoons lemon juice
- Pinch red pepper flakes optional and to taste
To finish
- ¼ cup fresh basil torn
- Flaky salt and freshly cracked black pepper to finish
- 1 tablespoon butter Plugrà butter, melted, for brushing the hot crust
Instructions
Make the dough
- Whisk the flour, salt, and sugar together in a large bowl.2½ cups all-purpose flour, 1 teaspoon kosher salt, 1 teaspoon granulated sugar
- Add the cold butter and toss to coat in the flour. Working quickly, smash each cube flat between your fingers until you have a mix of pea-size pieces and flat, sheety ones. Those big flat pieces are where the flake comes from, so don't work them down to crumbs.1 cup salted butter
- Add the ice water 1 tablespoon at a time, starting with 6 and tossing after each addition. Only add the final 2 tablespoons if the dough won't hold together when squeezed.6 to 8 tablespoons ice water
- Gather the dough, flatten it into a disk, wrap tightly, and chill for 30 minutes.
Make the garlic herb butter
- While the dough chills, stir the softened butter together with the grated garlic, thyme, oregano, lemon zest, and red pepper flakes until evenly combined. Leave it somewhere cool but not cold so it stays spreadable.4 tablespoons salted butter, 3 cloves garlic , 1 tablespoon fresh thyme, 1 teaspoon fresh oregano, 1½ teaspoons lemon zest, ¾ teaspoon red pepper flakes
Drain the tomatoes
- Toss the halved tomatoes with salt and let them drain in a fine mesh sieve set over a bowl for 15 minutes.1½ pounds mixed cherry tomatoes, 1 teaspoon kosher salt
- Blot the tomatoes dry, and be thorough about it. A damp paper towel run over the top isn't enough.
Assemble
- Line a rimmed sheet pan with parchment and scatter the ½ tablespoon of cornmeal over it. Set aside.½ tablespoon cornmeal
- Dust your work surface with a mix of flour and cornmeal and roll the chilled dough into a 13 to 14-inch round. To move it, roll the dough loosely up around your rolling pin, lift, and unroll it over the prepared parchment.All-purpose flour and cornmeal
- Spread the garlic herb butter over the center of the dough, leaving a clean 2-inch border all the way around.
- Scatter the 2 tablespoons cornmeal evenly over the butter.2 tablespoons cornmeal
- Pack the tomatoes on top cut side up, tighter than looks right, since they shrink a lot as they bake. Keep the mound low enough that you can still make out the shape of the tomatoes on top rather than a heap.
- Fold the border up and over the edge of the tomatoes, pleating as you go. Pleat tightly so nothing slumps over the edge of the pan in the oven.
- Brush the pastry with the egg wash and season the tomatoes lightly with salt and freshly cracked black pepper.1 large egg plus 1 tablespoon water, kosher salt and freshly cracked black pepper
- Chill the assembled galette on the sheet pan for 20 minutes. While it chills, preheat the oven to 400°F with a rack in the lower third.
Bake
- Bake on the lower rack for 45 to 55 minutes, rotating the pan at the 30-minute mark. Start checking at 45. It's done when the crust is deep golden, the pleats are set, and the underside is golden brown but not dark.
Finish and serve
- Brush the hot crust with the 1 tablespoon melted butter as soon as it comes out of the oven. Slide the galette off the parchment onto a wire rack so the bottom doesn't steam. It will look wet on top, which is exactly right. It reabsorbs completely as it cools.1 tablespoon butter
- Rest for at least 25 minutes, so the tomatoes firm back up and the slices cut cleanly.
- Stir together the melted butter, lemon zest, lemon juice, and red pepper flakes. Spoon it over the tomatoes just before serving.3 tablespoons salted butter, 1½ teaspoons lemon zest, 2 tablespoons lemon juice, Pinch red pepper flakes
- Scatter the torn basil on top and finish with flaky salt and freshly cracked black pepper.¼ cup fresh basil, Flaky salt and freshly cracked black pepper
Save This Recipe! 💌
Video
Notes
- Use a mix of tomato varieties: Different cherry tomatoes break down at different rates, so a mix gives you some halves that collapse into jam and others that hold their shape. We used Sungold, Cherry Falls, Chocolate Cherry, and Tropical Sunset from the garden. Skip large slicing tomatoes here. We tested them and they create tall spots where the tomatoes steam instead of roasting.
- Tight, not tall: Pack the tomatoes shoulder to shoulder, since they shrink a lot, but keep the mound low enough that you can still make out the shape of the tomatoes on top rather than a heap. Anything deeper steams instead of roasting and the ones underneath come out raw.
- It will look wet coming out of the oven. That's normal, and it's not a soggy crust. The liquid reabsorbs completely as the galette cools, and the pastry goes right back to flaky. Move it off the parchment onto a rack so the bottom doesn't steam, and give it the full 25 minutes.
- Don't dump the drained tomato juice. You'll have close to a cup in the bowl. It makes a bright vinaigrette with olive oil and vinegar; it's good in a Bloody Mary or a pan sauce, and it freezes well.
- Moving the rolled dough: A 14-inch round of butter-heavy dough is awkward to lift by hand and it stretches if you try. Roll it loosely up around your rolling pin like a scroll, hold the pin over the parchment, and unroll. If the dough feels soft or sticky when you get there, chill it for 10 minutes and try again once it's firm.
- Make it ahead: The dough can be made up to 3 days ahead and kept wrapped in the refrigerator, or frozen for up to 3 months. Thaw overnight in the fridge before rolling. The garlic herb butter can be made 3 days ahead as well. We don't recommend assembling the galette more than about an hour before baking, since the tomatoes will keep releasing liquid.
- Storage: Leftovers keep in an airtight container in the refrigerator for up to 3 days. Reheat slices on a sheet pan in a 350°F oven for 10 to 12 minutes to bring the crust back. The microwave will make it soft.
- Salted butter, on purpose: Butter turns up in four places in this recipe, and using salted throughout means you're not stopping to season at every one. The crust works the same either way, but if you're using unsalted, salt the garlic herb butter and the lemon butter to taste. That's where you'll notice it.
- Salt: All salt amounts are Diamond Crystal kosher salt. If you're using Morton's kosher or table salt, use half the listed volume.
- Fresh herbs, not dried: We tested this with dried thyme and the herbs disappeared completely under an hour of wet tomatoes. If dried is what you have, use 1 teaspoon dried thyme and a scant ½ teaspoon dried oregano, but know they'll be quieter than the fresh version. The basil at the end has to be fresh either way.
- Serve with: A simple green salad with a sharp vinaigrette, or alongside anything off the grill. It's just as good at room temperature as it is warm, which makes it easy to carry to a porch dinner.




Comments
No Comments