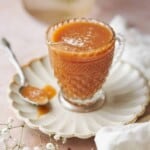
Easy Salted Caramel Recipe
Craft luxurious, Homemade Salted Caramel with this simple recipe. A perfect balance of salty sweet, it's the ultimate drizzle for desserts, turning any treat into a gourmet delight!
Servings: 16 servings
Calories: 149kcal
Equipment
- heavy bottom saucepan
- Whisk
Ingredients
- 1 & ¼ cups white sugar (250 grams)
- 3 tablespoons water
- 6 tablespoons salted butter, cut into cubes and room temperature (can use unsalted butter)
- 1 cup heavy whipping cream, room temperature
- 1 - 1.5 teaspoons kosher salt (to taste)
- 1 teaspoon vanilla extract
Instructions
- With this recipe, it is incredibly important to have everything ready to go prior to beginning. Add 1 and ¼ cups sugar and 3 tablespoons of water to a saucepan. Gently tap the water and sugar together with a whisk, but don’t mix it up, just sort of push the sugar to the middle of the pan towards the water a few times to help incorporate some of the water into the sugar.
- Put the mixture over medium heat and stop touching it! Use a thick walled pot, and a pastry brush with water to help wash the sugar down the sides as the mixture gets hot and crystallizes on the sides. If you notice one side of the caramel is bubbling and water is dissolving, and the other side isn’t, don’t mix or stir! Instead, pick the saucepan up and gently swirl to incorporate water and sugar.
- Allow the mixture to bubble and bubble for a few minutes. Continue to brush the sides with a wet pastry brush periodically to make sure no sugar crystals are forming. Cook until the sugar mixture becomes a golden amber color. Then, immediately remove from the heat and very vigorously, whisk in 1 cup of room temperature heavy cream. It will bubble up a lot, don’t worry, this is normal! Just be careful not to get burned by the steam, and continue whisking until the mixture comes together. It might take a few moments. Don't worry if some lumps are forming, keep whisking quickly.
- Add 6 tablespoons of butter to the mixture and whisk until completely combined. Then, add back to the stove over medium-low heat. Continue whisking and cooking for another 2 minutes or so. It will bubble and thicken a bit.
- Remove from the heat and add in 1 - 1.5 teaspoons of salt to taste, and the optional 1 teaspoon of vanilla extract, whisk to combine until smooth.
- Remove from the pan and pour into heat safe containers. We want to cool down the caramel at this point and prevent it from cooking anymore in the hot pan. If you pour some into a wide container, it will cool off faster if you're looking to use it right away! Top with a little flaky salt if desired, and enjoy with your favorite desserts!
- Store leftovers in an airtight container in the fridge for up to 2 weeks. Reheat gently in the microwave (at about 70% power) to make it pourable again. To freeze, store in an airtight freezer safe container in the freezer for up to 3 months.
Notes
-
- Use room temperature ingredients. Make sure your heavy cream and butter are truly at room temperature. Cold ingredients can cause the hot caramel to seize or clump up.
-
- Ensure consistent heat. The key to a successful caramel is consistent, medium heat. If the heat is too high, then you risk burning the sugar. If it's too low, the sugar may crystallize as it might not melt fast enough.
-
- Use a light-colored saucepan. Using a pot with a light-colored bottom helps you see the color of the caramel as it cooks more easily. This is crucial as the caramel can go from a perfect golden color to burnt in a matter of seconds.
-
- Don't walk away from the saucepan! If you're uncertain about the color, you can use a candy thermometer. For a pourable caramel, you want the temperature to be between 210°F - 240°F. But remember, color and texture are the most important indicators, and keep in mind that the caramel will thicken as it cools!
-
- Prevent crystallization. If you see crystals forming on the sides of the pan, use the pastry brush with some water to wash the sides of the pan gently. This will help wash down any sugar crystals on the side. You can also gently swirl the pan, if you notice butter melting unevenly on one side, but do not stir or whisk it until the cream and butter are added! This is actually crucial and will prevent it from crystallizing and forming sugar clumps. We know it's tempting, but you have to trust the process and avoid stirring while the sugar dissolves and boils.
-
- Be careful! Caramel gets extremely hot. Wear oven mitts when stirring in the cream and butter, and consider using a long-handled whisk to avoid splatters.
-
- Fix the texture after the fact. If your caramel sauce is too thick when it cools, you can gently reheat it and whisk in a tablespoon or two of room temperature heavy cream until you reach your desired consistency.
- Use a rubber spatula or whisk over a wooden spoon. This is more of a personal preference, but this helps us to ensure there are no leftover sugar clumps in the pan and that everything gets nice and incorporated.
-
Nutrition
Calories: 149kcal | Carbohydrates: 16g | Protein: 0.5g | Fat: 10g | Saturated Fat: 6g | Polyunsaturated Fat: 0.4g | Monounsaturated Fat: 2g | Trans Fat: 0.2g | Cholesterol: 28mg | Sodium: 183mg | Potassium: 16mg | Sugar: 16g | Vitamin A: 350IU | Vitamin C: 0.1mg | Calcium: 11mg | Iron: 0.03mg